Traditional computer operating systems have been around for a while, long enough that concerns around physical security have been well addressed. We understand the value and power that the information on our computers can provide to an attacker, so we have locked them down with features such as disk encryption, passphrase protected lock screens and techniques to prevent unwanted DMA attacks via high speed buses.
Yet despite the massive development of mobile devices technology in the past several years, a number of these features didn’t manage to make their way into the mobile operating systems as defaults. Whilst we take the time to setup disk encryption on our laptops and maybe desktops, we tend not to bother securing our mobile devices, possibly due to the perception of them being less risky to have exposed, or that they are less attractive targets.
Even a relatively paranoid IT geek like myself with an encrypted laptop, secure passphrases, and VPNs, still had a mobile phone that was protected with nothing more than it’s physical proximity to myself. Anyone gaining physical access to my phone could unlock it, whether it be by guessing a trivial unlock pattern, or by attaching it to another computer and reading the unencrypted filesystem.
And as these mobile devices have increased in functionality, so has the risk of an attacker getting hold of the device. When a mobile phone did nothing but phone calls and txts, having someone gain access would be more of a annoyance when they rack up a bill or prank call your contacts, than a serious risk.
But rather than leave it there, we started adding other productivity features – email, so we could keep in touch on the go. Instant messaging. Fully featured web browers that sync account details, bookmarks and history with your desktop. Banking applications. Access to shared storage solutions like Dropbox. Suddenly a mobile device is a much more attractive target.
And even if we decide that the mobile apps are too limited in scope, there’s the risk of an attacker using the information such as credentials stored on the device to gain full access to the desktop version of these services. Having an email application that limits the phone to the inbox can reduce risk by protecting your archives, but not if the attacker can obtain your full username/passphrase from the device and then use it to gain full access with some alternative software.
Remember that obtaining credentials from a device isn’t hard – the credentials have to be kept in some decrypted format somewhere on disk, so even if they’re hashed/obfuscated in some form, they’ll still have the key that enables them to be exposed somewhere on disk.
A quick grep through the /data/ volume on my phone revealed numerous applications that had my passphrases in plain text, extremely easy pickings for an attacker.
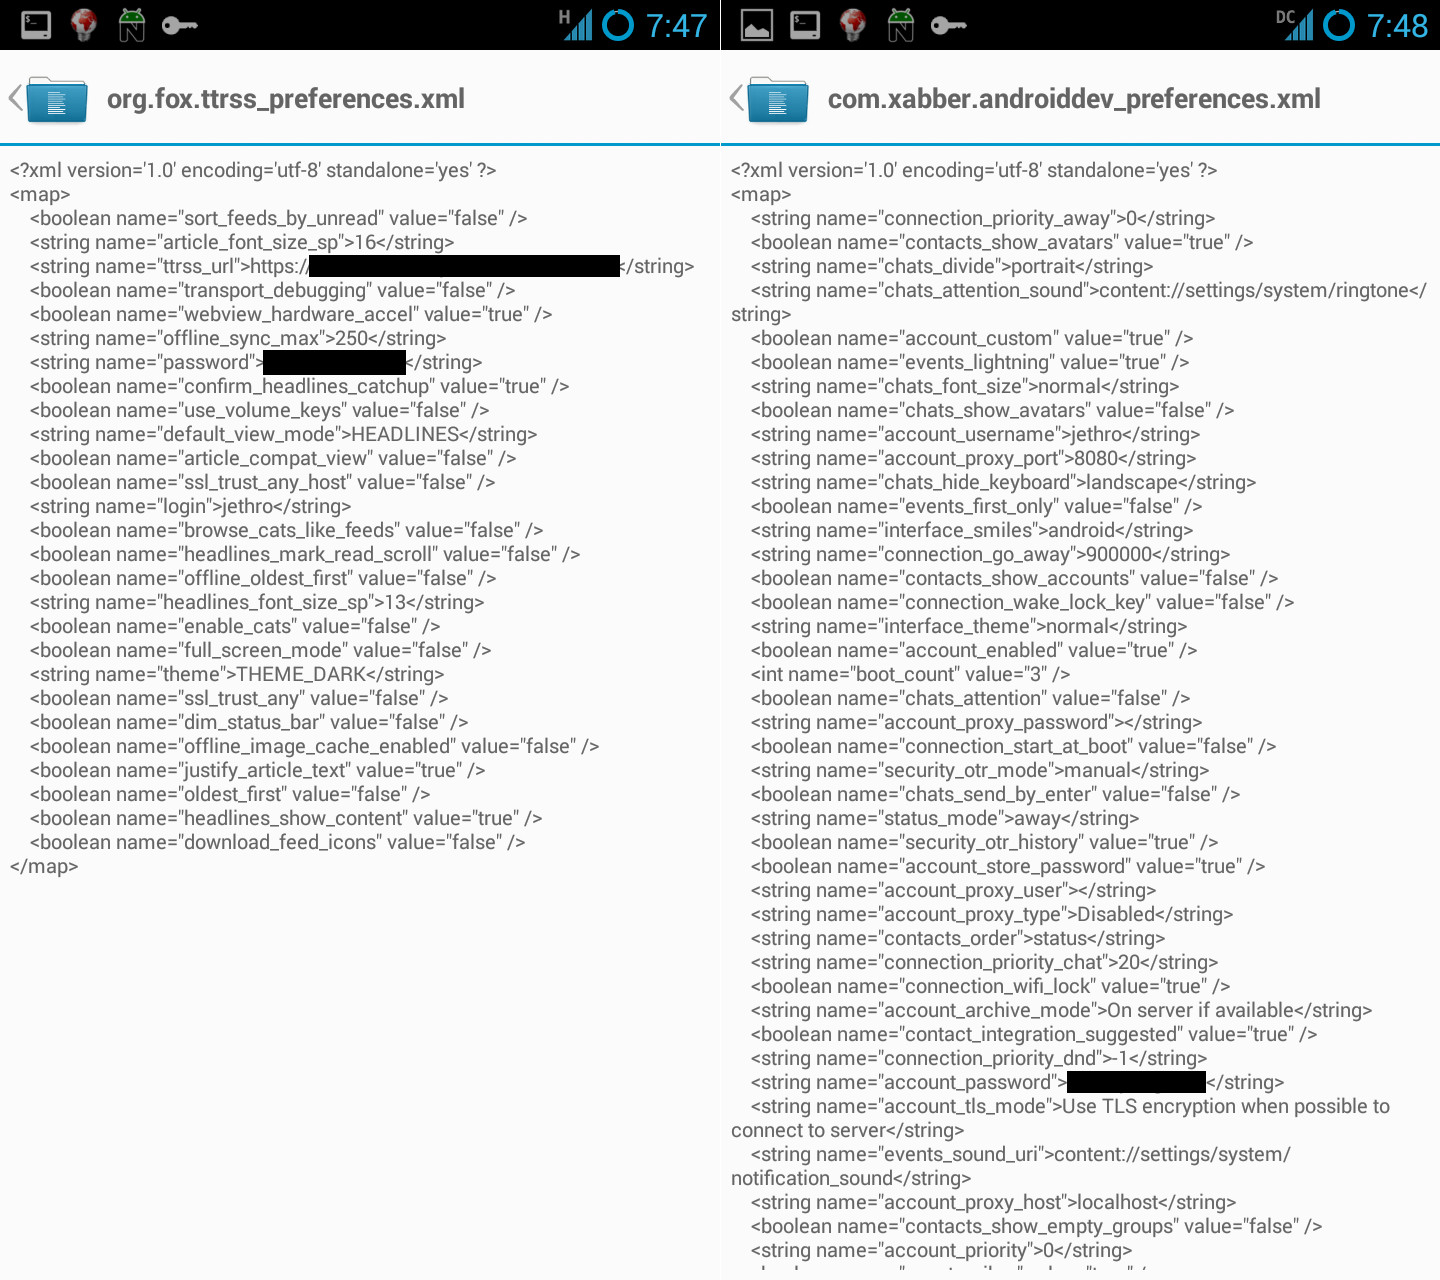
Mmmm plain text passwords. :-)
I was getting increasingly concerned with this hole in my security, so recently having replaced my Galaxy Nexus with a Samsung Galaxy Note II, I decided to set it up in a more secure fashion.
Android added disk encryption in Android 3, but it’s suffered two main issues that limits it’s usefulness:
- The disk encryption only covers the data volumes (/data, /sdcard) which is good in that it protects the data, but it still leaves the application volumes open to be exploited by anyone wanting to install malware such as key loggers.
- Turning on Android disk encryption then forces the user to use either a PIN or a passphrase to unlock their device as swipe or pattern unlock is disabled. For a frequent phone user this is too much of an usability issue, it makes frequent locks/unlocks much more difficult, so users may chose not to use encryption altogether, or choose a very easy/weak passphrase.
The first point I can’t do much about without digging into the low guts of Android, however the second is fixable. My personal acceptable trade-off is a weaker lock screen using a pattern, but being able to have a secure disk encryption passphrase. This ensures that if powered off, an attacker can’t exploit my data and the passphrase is long and secure, but if the phone is running, I take a compromise of security for convenience and ease of use.
There’s still the risk of an attacker installing malware on the non-encrypted OS portion of the mobile device, however if I lose physical access of my phone in an untrusted environment (eg border security confiscation) I can reload the OS from backup.
To setup disk encryption on Android 4 without losing pattern unlock, instead of adjusting via the settings interface, you need to enable it via the shell -easiest way is via the ADB shell in root mode.
Firstly you need to enable developer mode in Settings -> About Phone by tapping the build number multiple times, until it tells you that the developer mode has been unlocked. Then inside Settings -> Developer options, change the “Root Access” option to “Apps and ADB”.
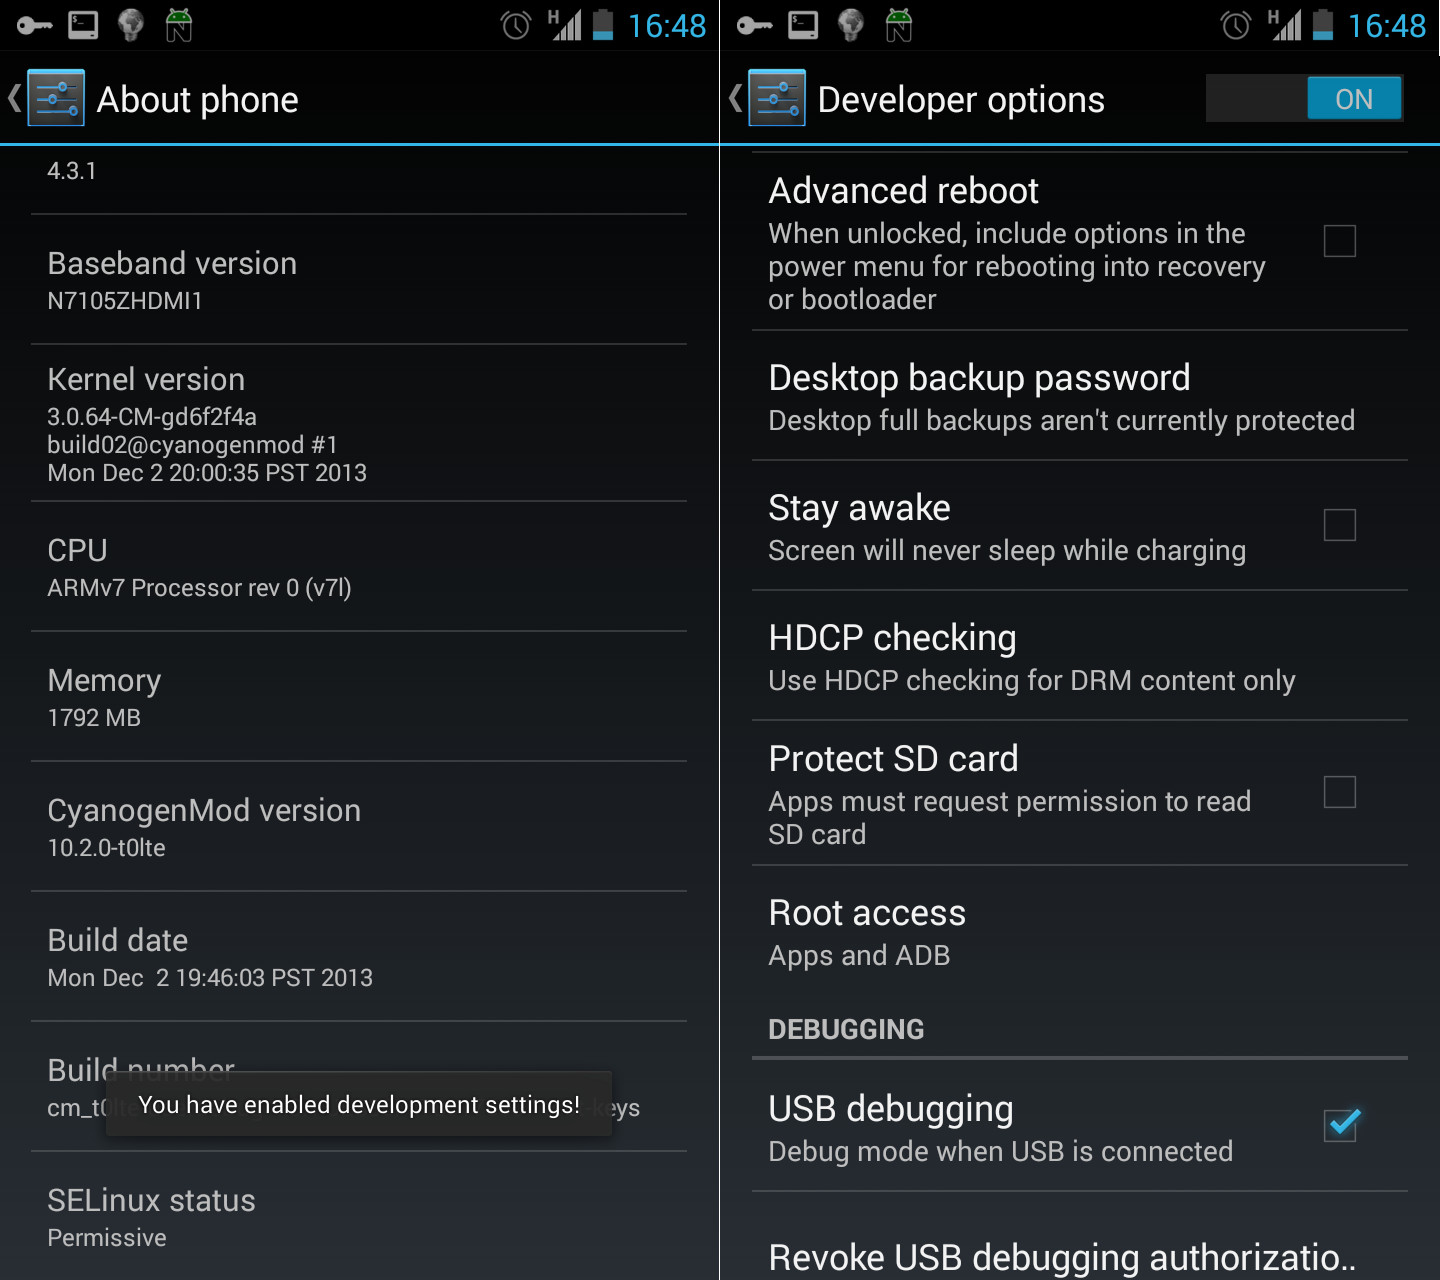
Enable ADB root for all the fun stuff!
Secondly, you need a workstation running the latest version of ADB (ships with the Android ADK under platform-tools) and to connect your phone via USB. Once done, you can enable disk encryption with the following commands (where PASSWORD is the desired encryption passphrase).
user@laptop # adb root
user@laptop # adb shell
root@phone:/ #
root@phone:/ # /system/bin/vdc cryptfs enablecrypto inplace PASSWORD
Your Android device will then restart and encrypt itself. This process takes time, factor up to an hour for it to complete it’s work.
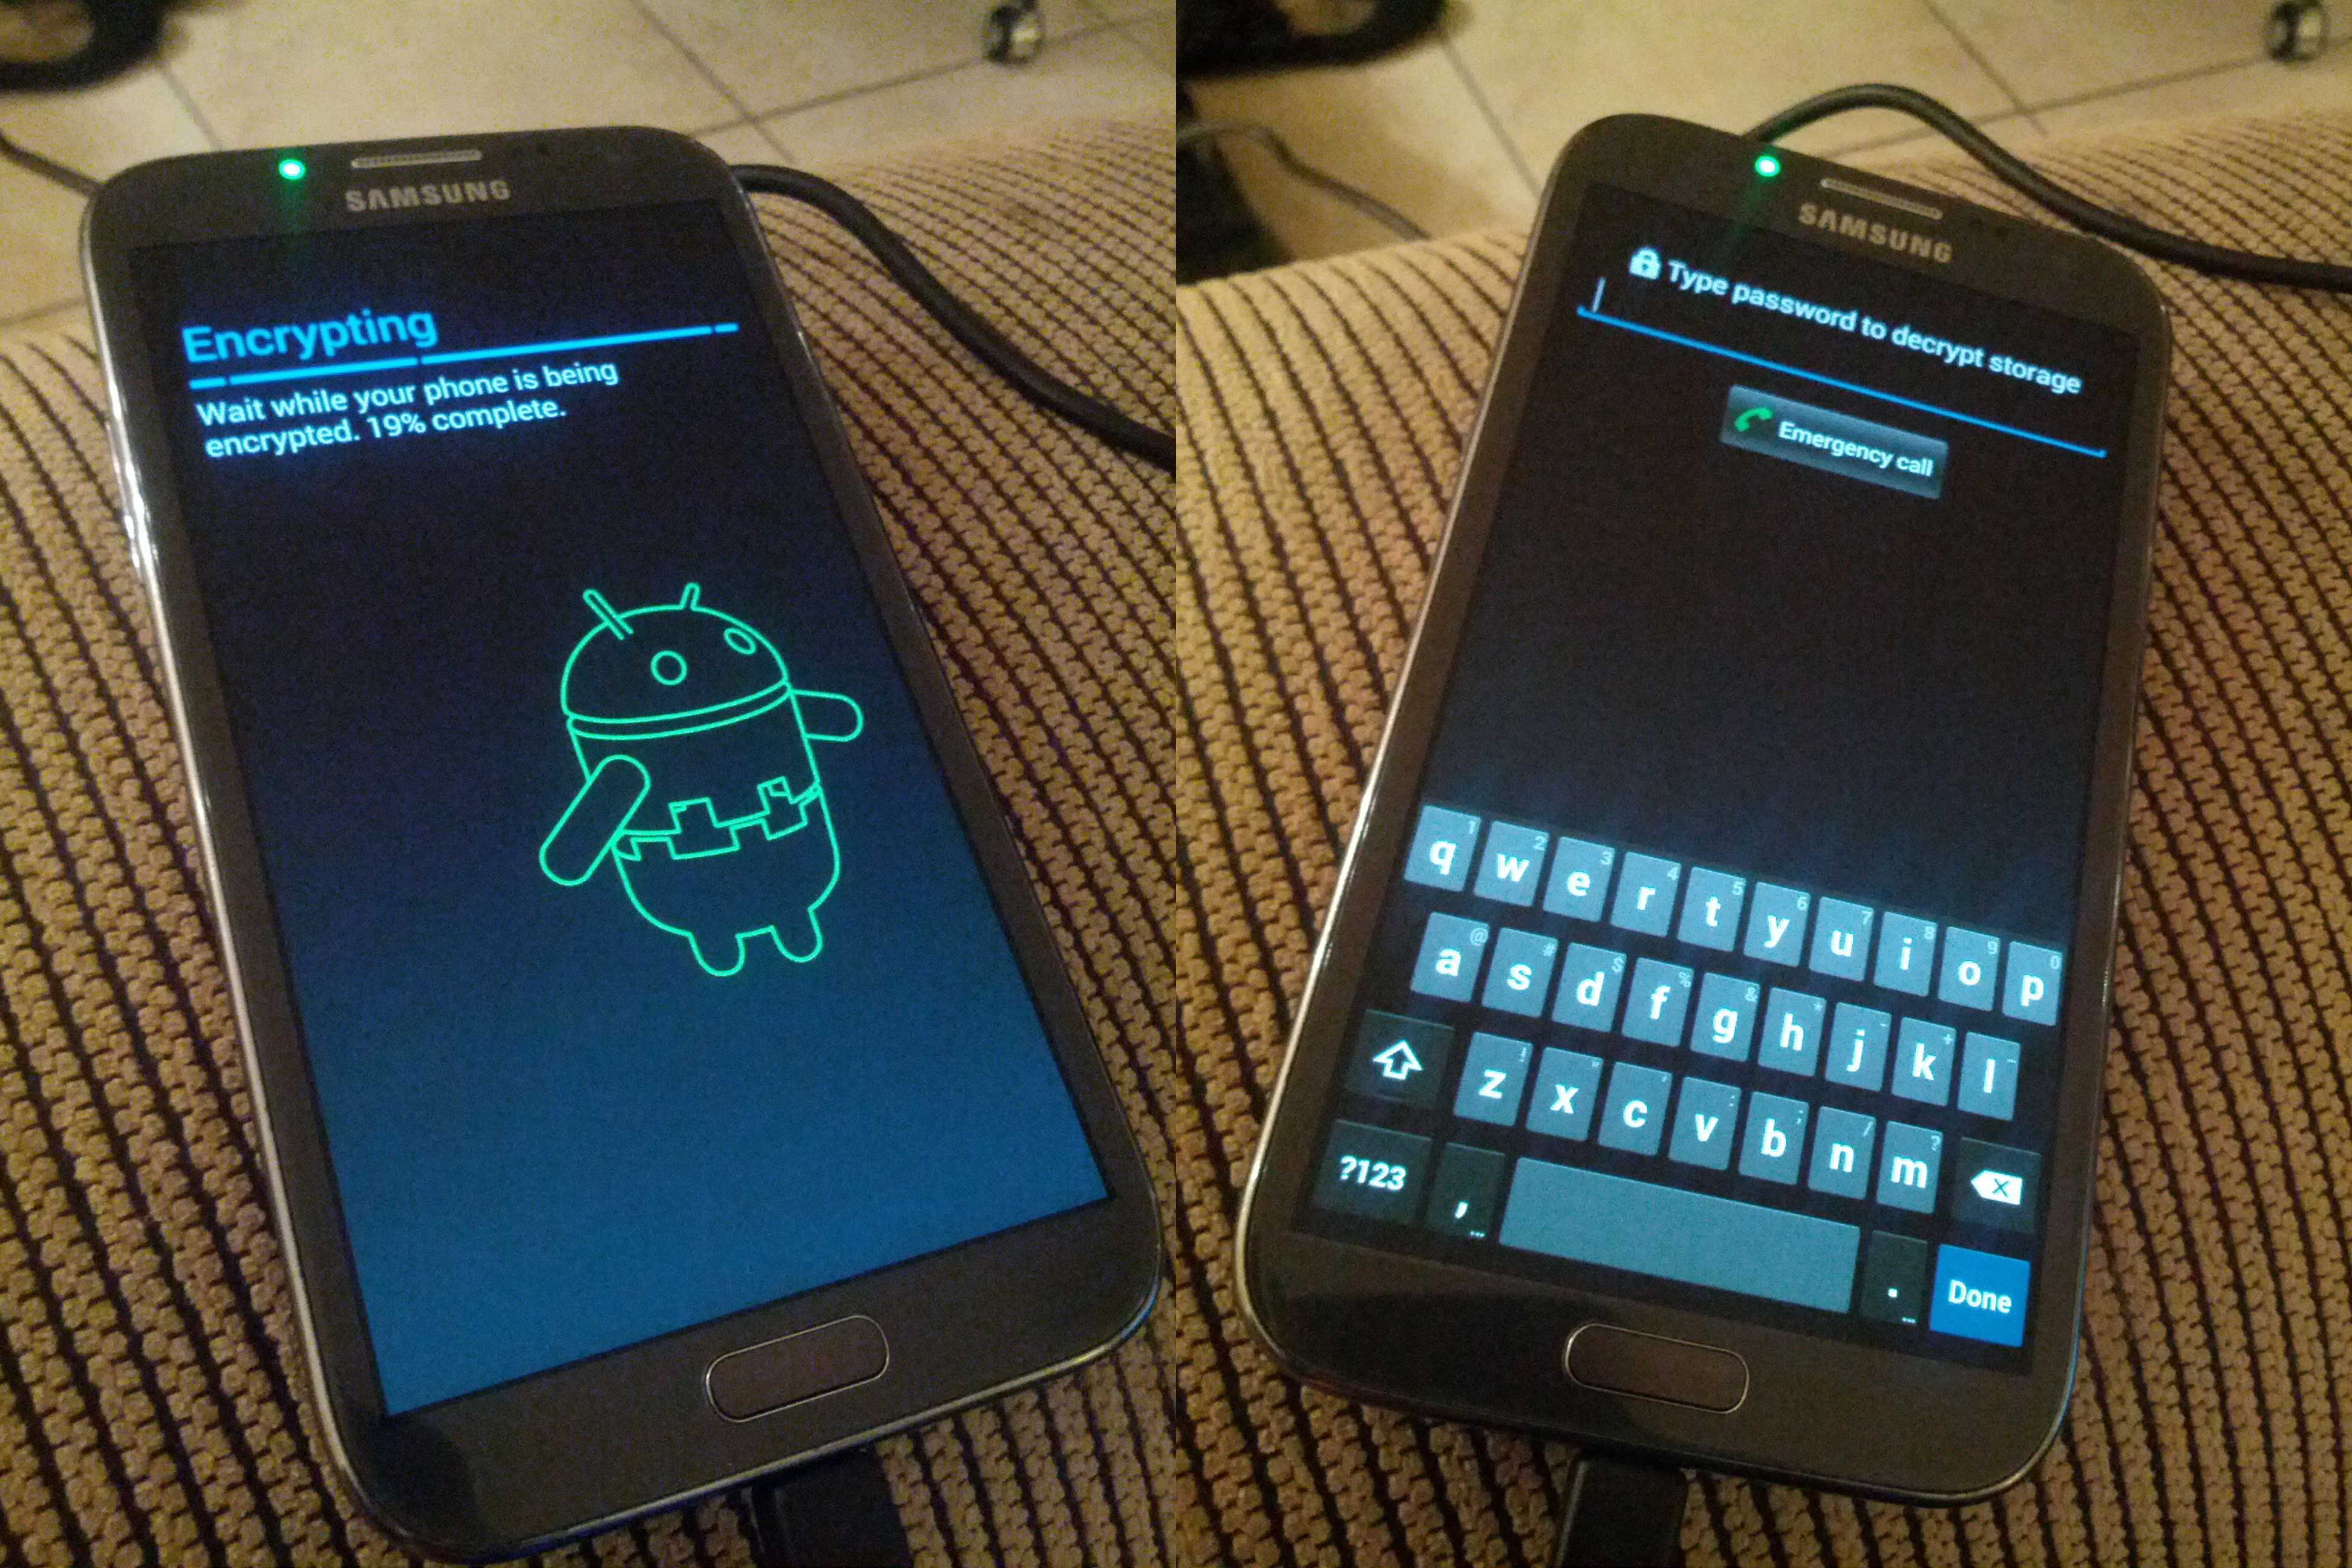
Android phone undergoing encryption; and subsequent boot with encryption enabled.
Once rebooted, your existing pattern based unlock continues to work fine and all your private data and credentials are now secured.