Tag Archives: new zealand

The Heating Project

Having gone through three Wellington winters in our home, Lisa and I really didn’t want to make it a fourth this year. Whilst our property is fortunate enough to get a lot of sun during the day, it still can’t sustain a comfortable temperature in the middle of winter when we have weeks with day highs of 10c and lows of 5c. In the worst case, it’s gotten right down to 2c outside.

We insulated as much as possible shortly after we moved in, both the roof and floor, but unfortunately with house being very low to the ground, there were sections of the floor that simply couldn’t be insulated, so we ended up with approximately 60% coverage. We aren’t sure about the walls either, some of the ones we’ve had to cut open to do work have revealed insulation but we don’t know for sure if it is fully present in all walls of the house or not.

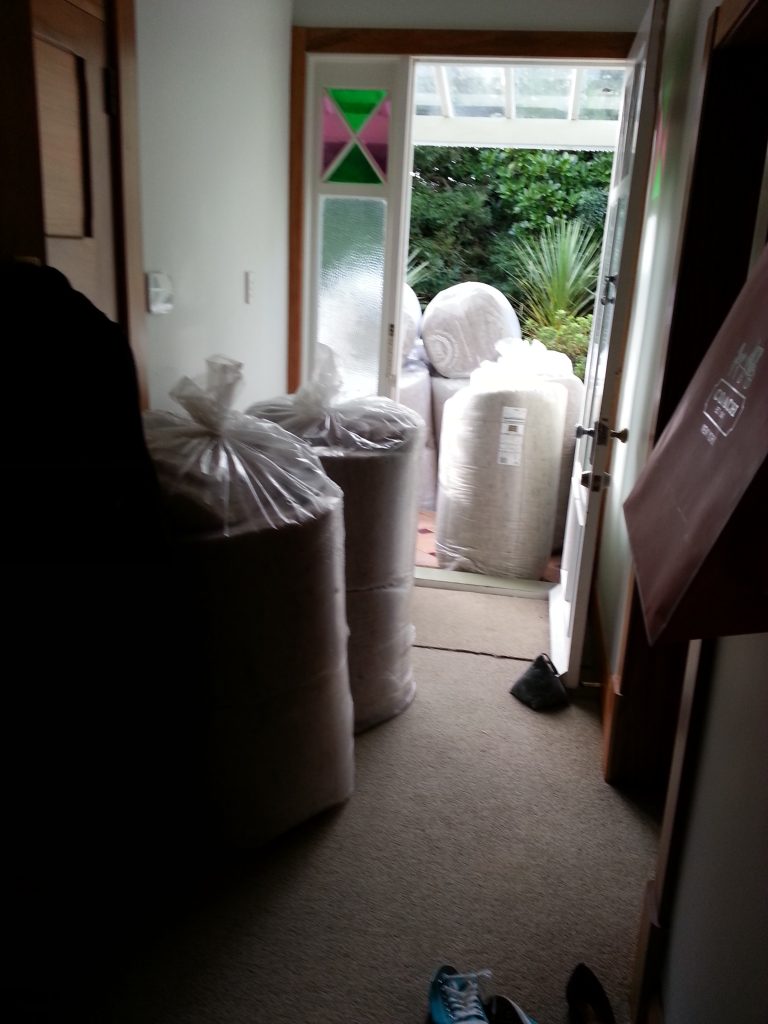
Insulation upgrade in progress

Most New Zealand homes are also only single glazed and ours is no exception, which means even with the roof (100%), floor (~ 60%) and walls (??%) insulated, we still have massive bay windows leaking heat like crazy. So regardless of the natural sun we get, a high capacity heat source is still critical to maintain a proper temperature at the property.

Which is also precisely what we lacked – when we moved in the house had a rusted wood fireplace in dubious condition and an unflued gas heater which are generally just a bad idea all-round. Neither of these were safe options, so we needed to replace them with something better.

We considered a few different options:

  1. A new wood fire would offer a nice ambience, but access to the property is a challenge and we’d go through most of the firewood we’ve ended up collecting from dropping overgrown trees. So long term, we’d be buying expensive firewood and having to shift it onto the property – plus we’d lose a good amount of space storing a winter’s worth of firewood.
  2. A gas fireplace was considered due to us already having existing piped gas. A modern flued gas fireplace is efficient and doesn’t exhaust into the living space, plus offers all the classic ambience of a fireplace. The only downside is that the heat would be focused in our lounge or dining rooms and wouldn’t propagate nicely through the rest of the house. There are some models that feature ducting that can exhaust some of the heat to other parts of the house (eg 2 or 3 other rooms) but our size of property wouldn’t be able to get full coverage meaning we’d need to looking at needing to install two fireplaces or additional heating to fully cover the property.
  3. We seriously considered a gas boiler and European style radiators emitting radiant heat in every room. This would result in us losing some wall space, although we would have been able to put them under the windows. Ultimately this option ended up not being possible, as our existing gas pipe is too small in diameter and the cost of running a new pipe from the street to the house is extremely uneconomical.

The gas pipe limitation also impacted our ability to drive other high consumption gas appliances, for example feeding large fireplaces could be tricky and we’d probably be unable to run more than a single instantaneous hot water system. Probably for the better anyway given that it’s a fossil fuel, but it’s so much more cost effective than electricity on a per kWh basis in NZ that it’s a compelling option if you have gas piped to your property.

Given the above issues, the only remaining option that made any sense was electric heat pumps. Heat pumps are generally 300-400% efficient, meaning although they use super expensive electricity, you get very good heat output compared to running traditional electric heaters.

What most NZders will think of when you say “heat pump”

These are becoming quite popular now in NZ as an affordable upgrade (a fully installed basic unit might cost as little as $2-3k NZD) for existing properties – the purchase of a mini-split system such as the above allows for easy retrofit installation and you’ll often see these added to lounges to ensure a reliable heat source in the main living space.

Their weakness is that you don’t get the heat spreading from the primary room out into other parts of the house, such as bedrooms. And they’re not cheap enough that you would install one in every room to get the coverage, but even if you did, you’d then have to deal with managing them all in a sensible fashion so they don’t end up fighting each other when maintaining temperatures.


To solve this problem, we went for a less common (in NZ residential homes) option of putting in a central ducted heat pump. These units use the same essential technology (using a refrigerant to shift heat from the outside unit through pipes to an inside unit), but rather than having an on-wall unit, we have a large unit in the attic, with ducting pushing air into every room of the house, to be recirculated back via a hallway intake.

Due to the amount of specialist skills and tools required for this project, plus a lot of time climbing around the attic which I just love doing, we instead contracted Wasabi Air to perform the complete installation for us. They did a really good job, so pretty happy with that.

Diagram from Mitsubishi’s website illustrating how a ducted heat pump setup looks.

We went with a Mitsubishi PEAD 140 unit based on Wasabi’s recommendation as an appropriately sized unit. This unit is capable of 16 kW heat output or 13 kW cooling output and can consume up to 4 kW of electricity to operate at peak.

The installation is pretty full on, it took 3 days for a team to get everything installed and set up. I took a selection of photos during the install since I’m a weirdo who finds installing things like this interesting.

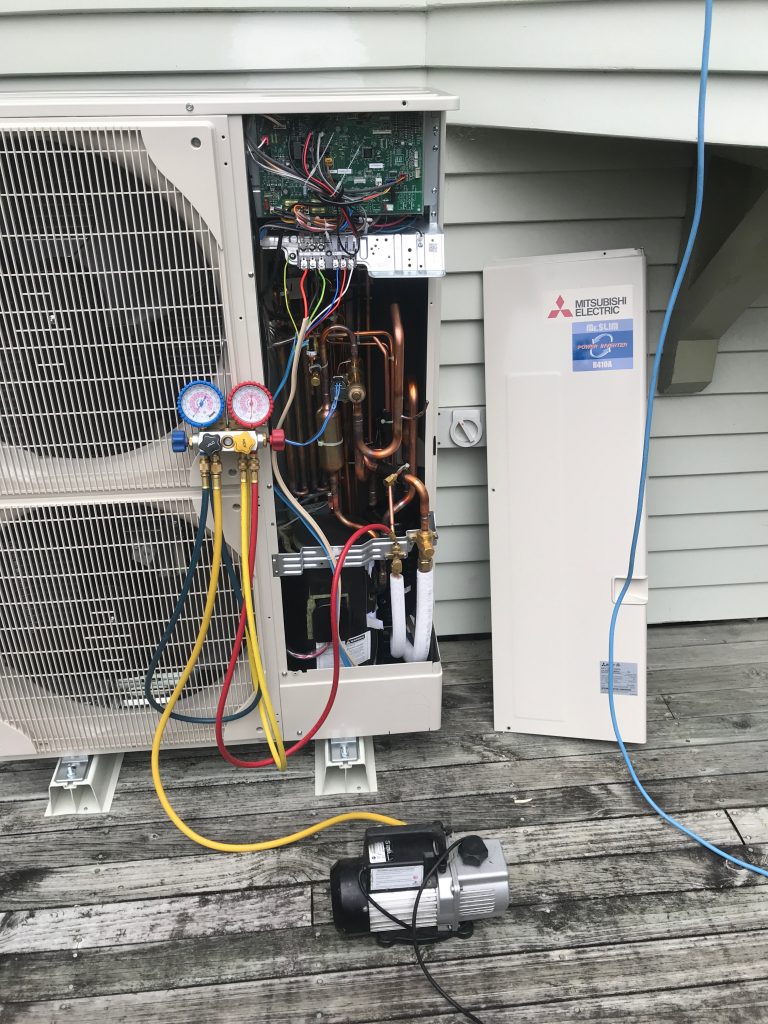
Firstly the exterior unit needed installation. Whilst modern heat pumps are “quiet” they’re still audible when working hard so you want them away from bedrooms – thankfully we had a convenient space between two bay windows where it could sit below the floor level of the house. The only slight downside of this location, is that I’ve noticed the deck has the tendency to slightly amplify the vibration of the unit at times, whereas if we had gotten it mounted on a concrete pad elsewhere it may have been less of an issue.
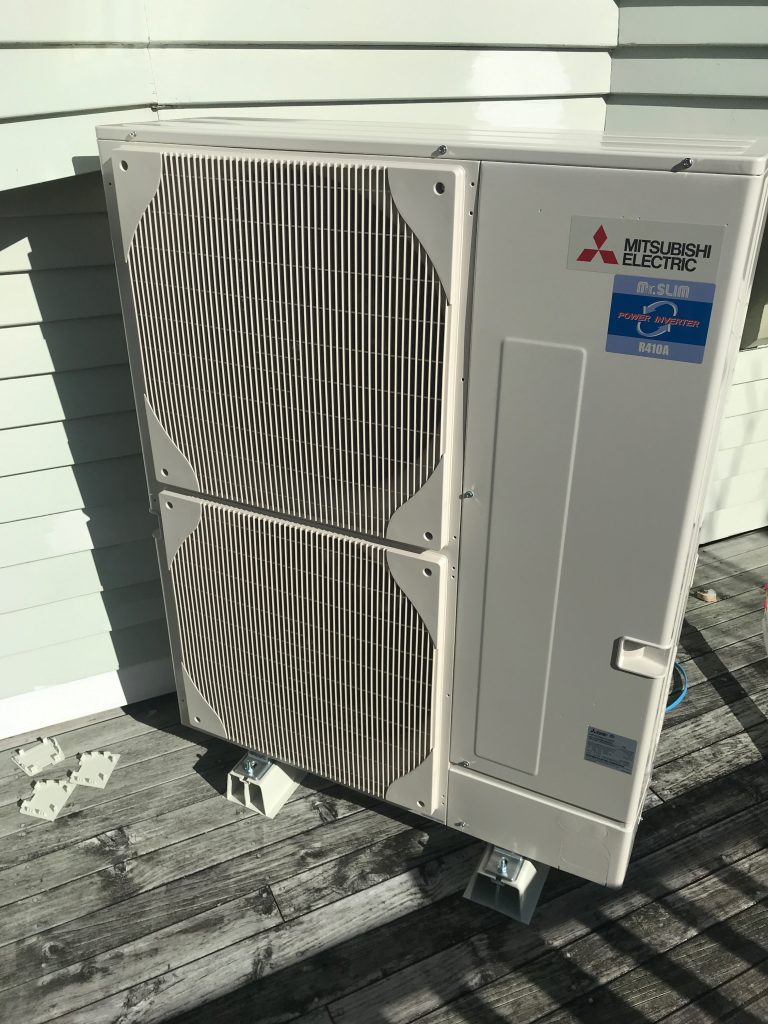
Exterior unit. This thing is *big* and shovels a significant amount of air through itself when operating.

Vacuum pumping the refrigerant lines ready for the gas to go in.

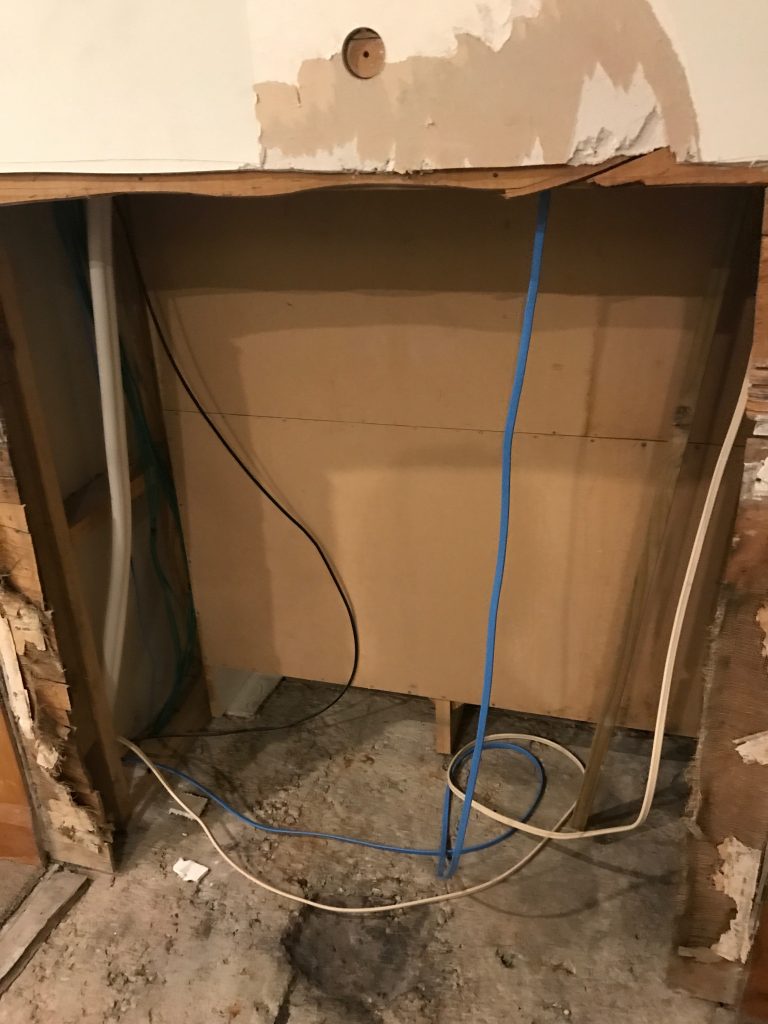
Because the exterior unit needs to run copper piping for the refrigerant, power and controls up into the roof of the house, we needed to go from under the floor to the attic at some point. Rather than an ugly boxed conduit on the outside of the house, we had it installed through the middle of the house.

As mentioned earlier, our fireplace was wrecked, so I knocked it out entirely a few months back (post coming once I finally finish the project) which has left a messy hole an accessible space from the floor to the attic that was perfect for linking the internal and external units.

Whilst the piping is copper, it has a surprising degree of flexibility so the team was able to feed it through and bend it varying degrees, whereas I had assumed it would all have to be right angles and welds. The piping is wrapped in a insulation tube which does a pretty good job at avoiding heat loss – even when running on full, the insulation is just mildly warm to the touch.

Piping and cabling going in.

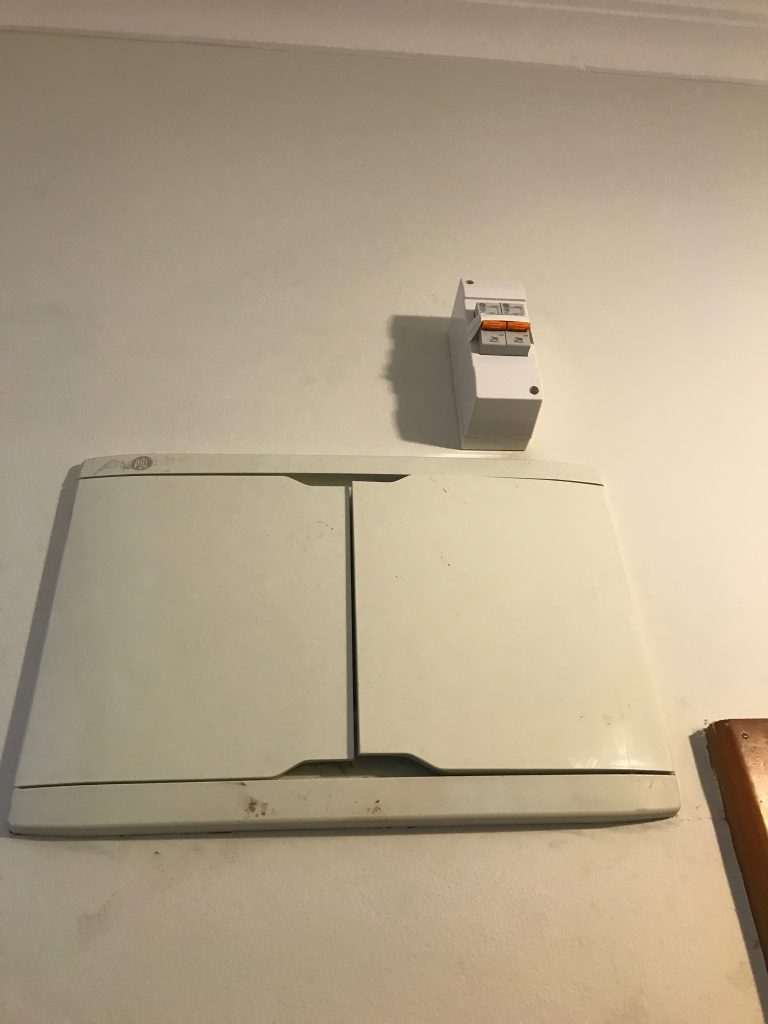
One of those big electrical cables had to go all the way back to the switch board to feed the unit with electricity. Unfortunately our switchboard is totally full, so the electrician ended up having to add a couple additional breakers off it to the side.

It’s not wonderful but it solved the problem – given future plans for the property (electrical hot water, induction cooking, car charging), I think we’ll end up doubling our switchboard and making it all tidy as a future project.

Not going to win any prettiness awards, but it’s safe and compliant.

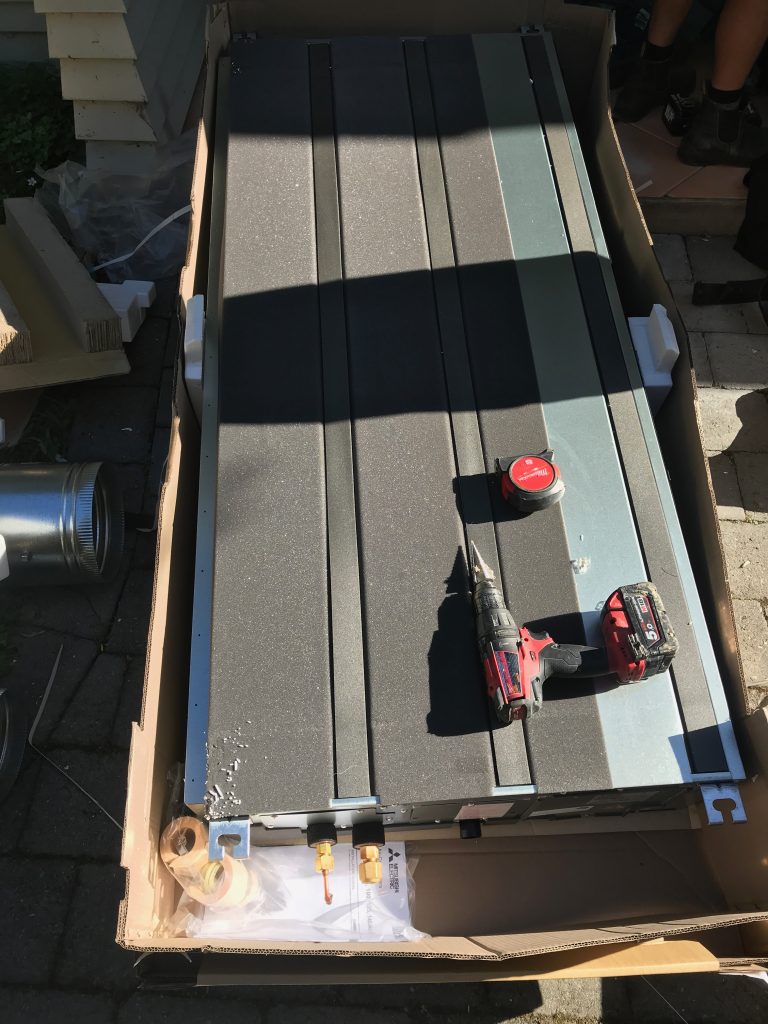
Of course the exterior unit is just half the fun – we also needed the interior unit installed and all the ducting connected. We had what is considered a slim unit, but it’s still a very sizeable item to try and lift up into a roof space!

Indoor unit before going into the roof and having ducting connected.

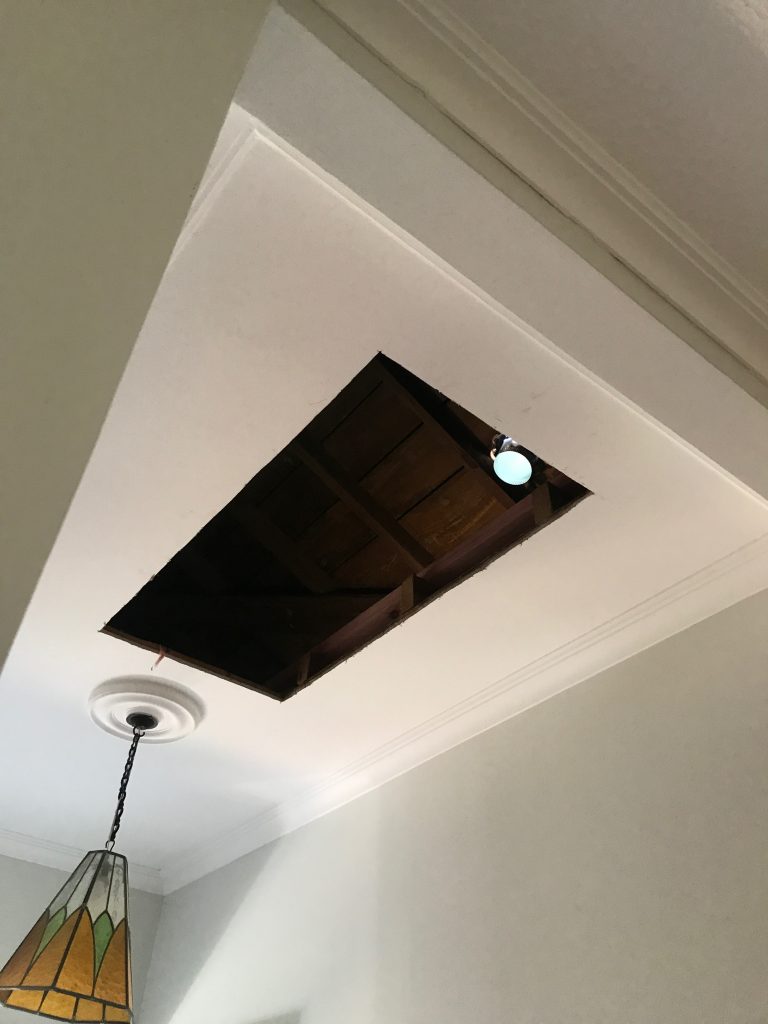
Impromptu skylight

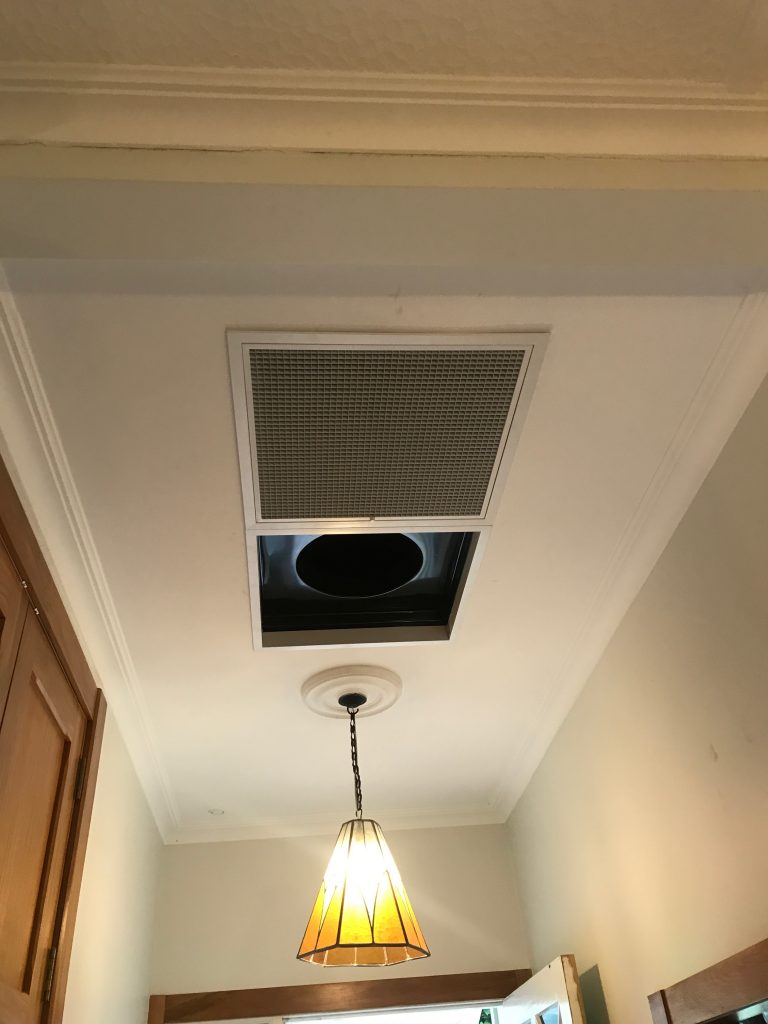
As there’s no way to get the unit into the roof via existing access ways, the team cut a massive hole in the hallway roof. They then swung the unit up into the roof with a team of guys who do a lot more physical activity than me and backfilled the space with the intake vents.

Intake vents going into the hallway to nicely fill the big hole that got made earlier.

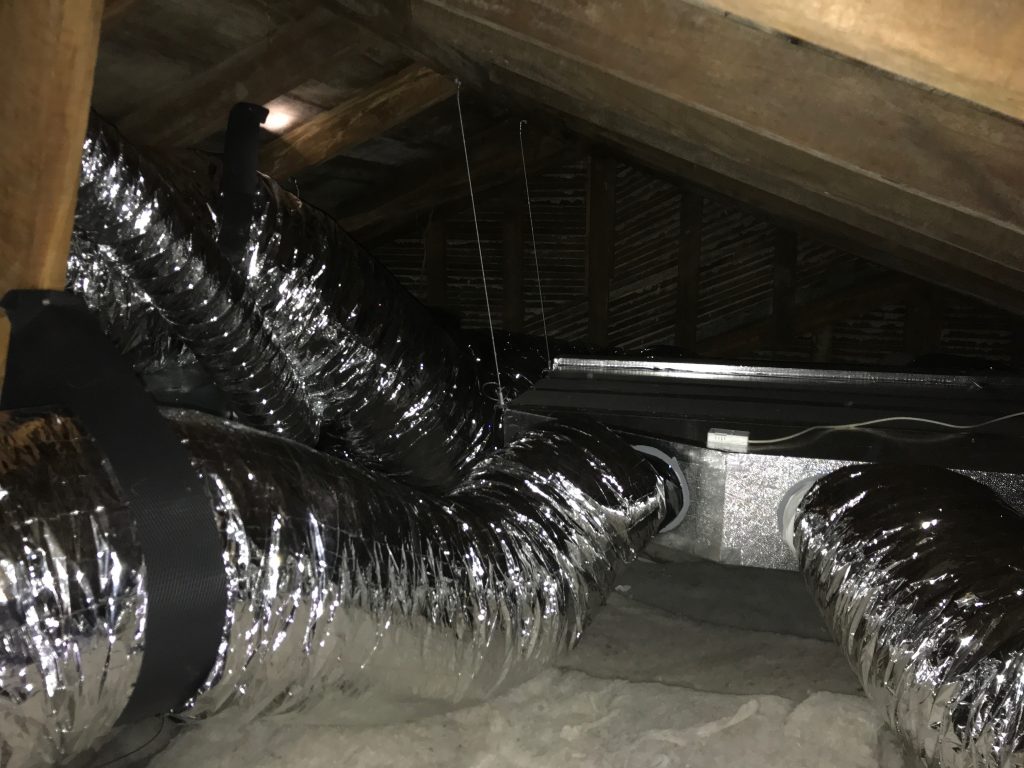
Once fitted in the roof, it takes up even more space for all the ducting to be connected. A large amount of our spacious attic is now consumed with this unit and associated ducting. I’m just glad we’d already done insulation and most of the cabling work we’ll want to do in there for the foreseeable future as it’s a lot more difficult to navigate now.

Fully installed in the attic space

Despite being above the bedroom, the unit is really quiet when operating and we can barely hear it. I took some video of the installation to give an idea of it’s low level of background noise even when inside the attic.

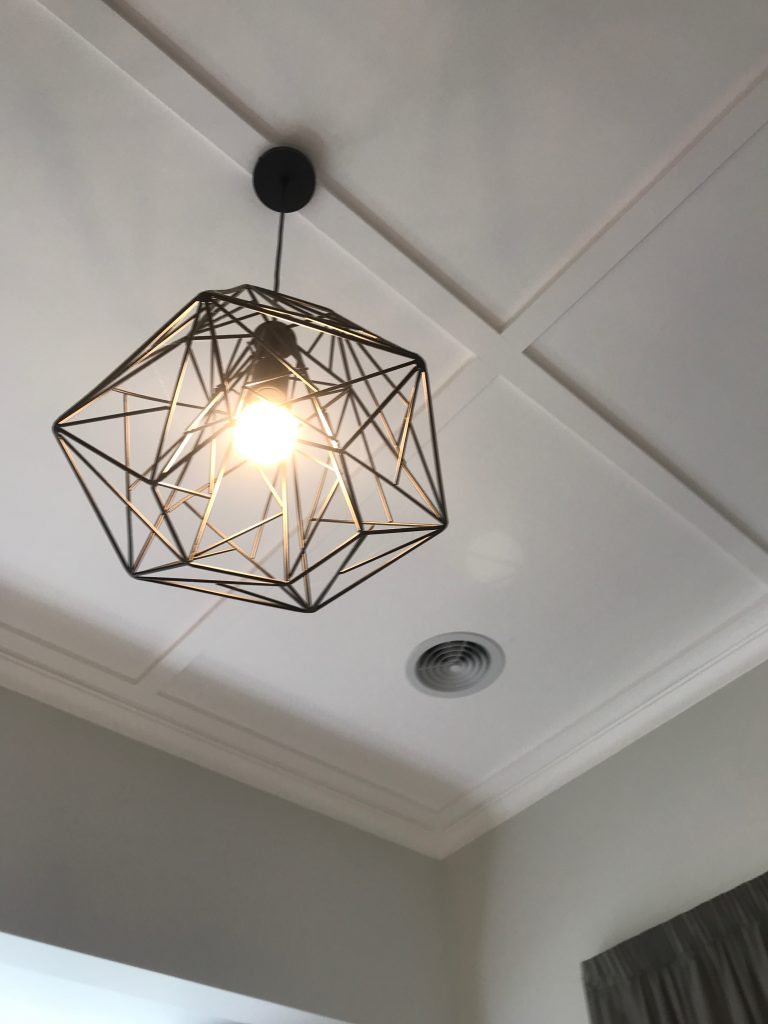
We decided to install outlets into every single bedroom (x4), one in the lounge and one in the dining room for a total of x6 outlets. The hallway features the intake vents for recirculating the air.

Note that there are two key downsides to the ducted heat pump option vs radiators here:

  1. The first is that you can’t directly heat damp areas like the bathrooms or kitchen, as pumping air into those areas will force moisture out into other parts of the house. Radiators have the upper hand here, since you can get appliances such as towel rail radiators to directly provide warmth. That being said, our bathroom gets enough residual heat from being in the middle of the house and when we renovate the second one I plan to look at putting in underfloor heating as it’s on a concrete pad, so it’s not a big issue for us.
  2. The second is that you don’t get per-room control. Whilst it’s technically possible to install dampeners (manual or electronic), when you close off one vent you can unbalance the system a bit and make other rooms too breezy or noisy. So it’s recommended to just heat the whole place and enjoy a fully warm house, rather than trying to create hot + cold rooms.

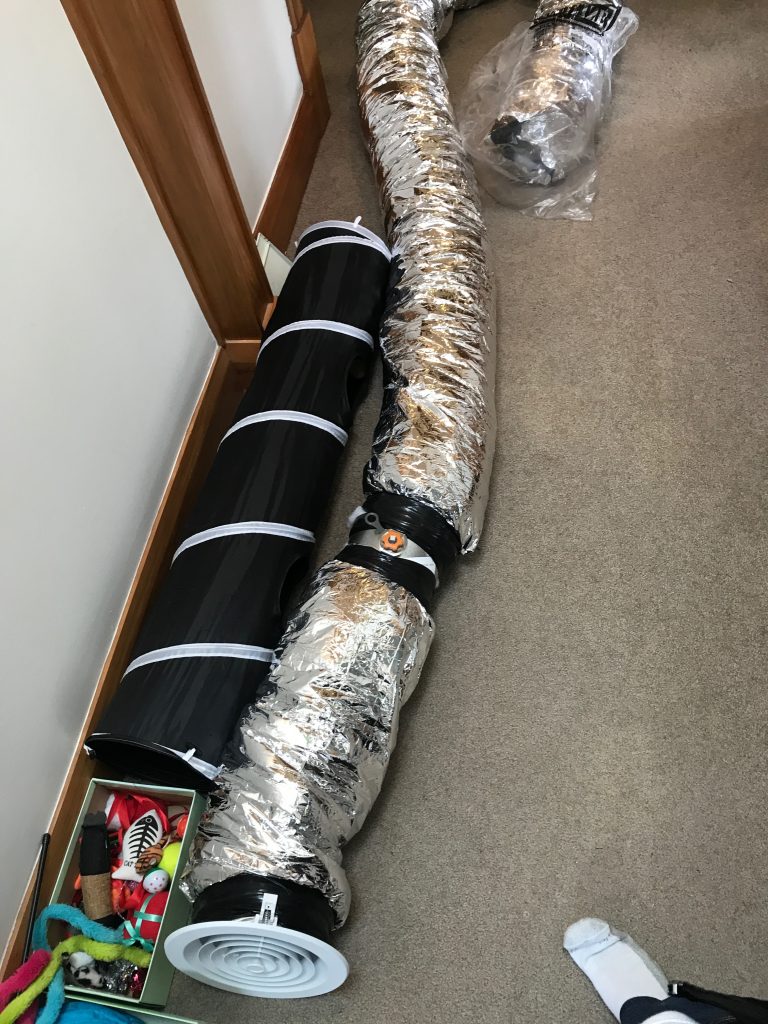
Ducting getting prepped pre-installation

The above photo showing the ducting being prepared shows the built-in dampeners used to balance the system when it’s installed. These are used to restrict/open the flow of air to each outlet to handle the fact that outlets have different length ducting runs and sizes. It also makes it possible to do things such as setting the heat output in the bedrooms to be a bit lower than that of the living spaces by keeping their volume of air output a little lower.

Once installed, the outlets are unobtrusive in the corner of each room.

I had some concerns around how the vents would handle our high ceilings and we do get some degree of heat blanketing when the system first starts heating the house (warm head, cold toes), but once it brings up the whole house to temperature the high ceilings aren’t a major issue.

That being said, it does mean there’s a lot more air to heat than a property with lower ceiling heights and certainly on the coldest days we’ve found the system takes too long to bring the house house up to a comfortable temperature if we’ve let the house get very cold. The solution is pretty simple, we just leave the house on a lower temperature when away from home to ensure it’s only a few degrees off our comfortable temperature when we come home (typically found 20c when awake and 18c when sleeping is our preferred climate).

It works well – for the first time we’ve actually had a comfortable time in winter, rather than huddling for warmth in only a couple rooms with the rest of the house closed off trying to conserve heat.


Whilst the heat pump ensures the house can now always be at a comfortable temperature, it won’t prevent moisture build up. It can reduce window condensation on account of the warmth and even be put into a drying mode, but it’s ultimately not a ventilation system and doesn’t cycle out moist stale air if you fail to manually ventilate your house.

Our house wasn’t too bad with moisture (not compared to many other NZ properties) on account of the kitchen and bathrooms all featuring extractor fans which ensured the bulk of moisture produced in the house is vented out, but the simple act of living in the house is enough to create moisture and having weeping windows in the morning was still not uncommon for us, especially during winter when opening windows isn’t very compelling.

Given the fact that we have long and cold winters, we decided to invest a bit more and had Mitsubishi’s ventilation product (Lossnay) installed as part of this project. This unit integrates with the ducted heat pump and regularly cycles out stale air and sucks in fresh air, recovering most of the energy in the process so you’re not constantly discarding the energy you just spent heating (or cooling) the house.
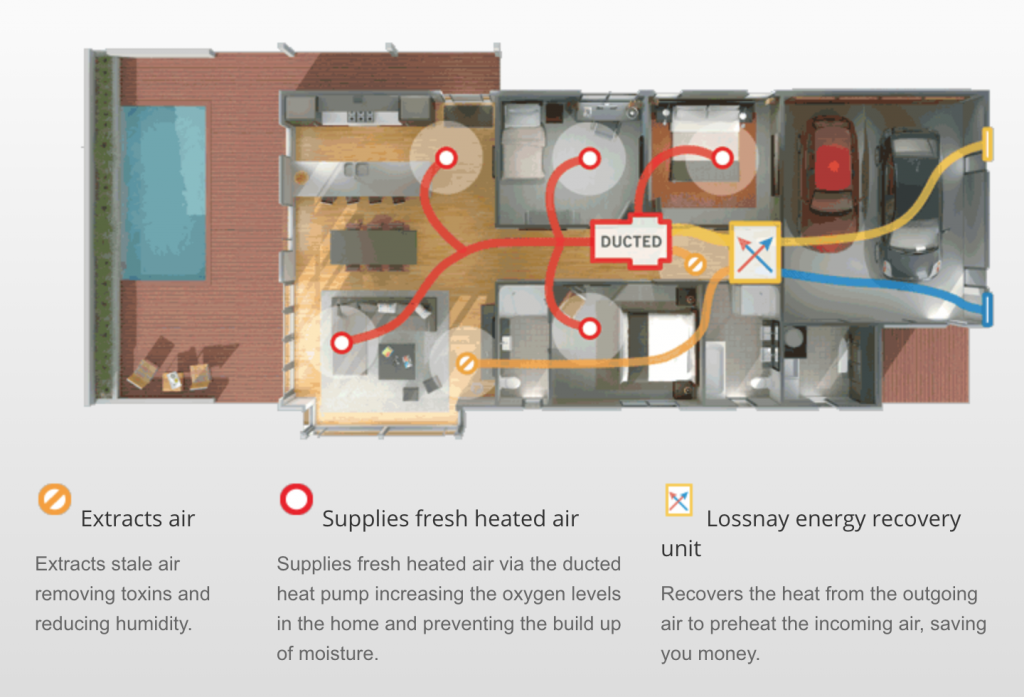
Diagram from Mitsubishi’s website illustrating how a Lossnay connects to the ducted heat pump system.

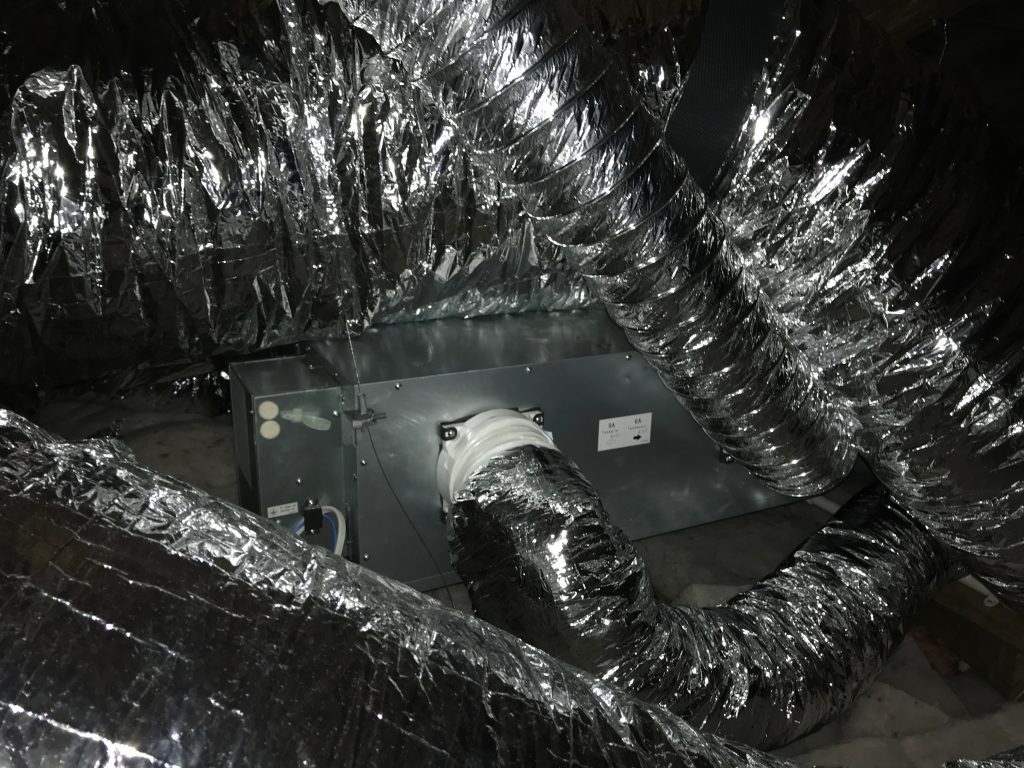
Lossnay unit operating away quietly in the maze of ducting.

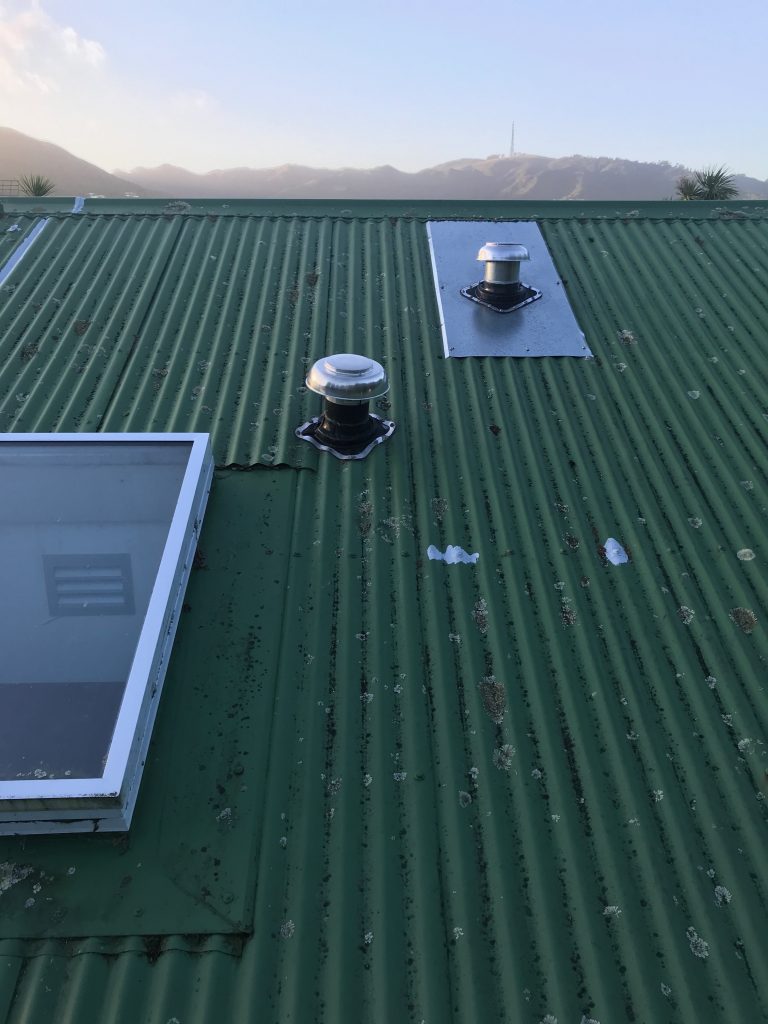
Because of the layout of the house, the two Lossnay vents ended up having to go through the roof – the egress near the existing bathroom fan vent and the intake a number of meters away on the other side to prevent just recirculating the same air, so we now have a few more mushrooms to add to the other unsightly appearance of our roof. Summer 2018-2019 has a painting project on my list to tidy it all up with a fresh coat of paint.

Lossnay vent (R) alongside existing bathroom vent (L)

The end result is that we have a completely moisture free property and I haven’t opened the windows once all June, since the system is constantly ensuring we have fresh, dry and warm air in the property. Even on the coldest days, the windows are now completely dry which is just fantastic.


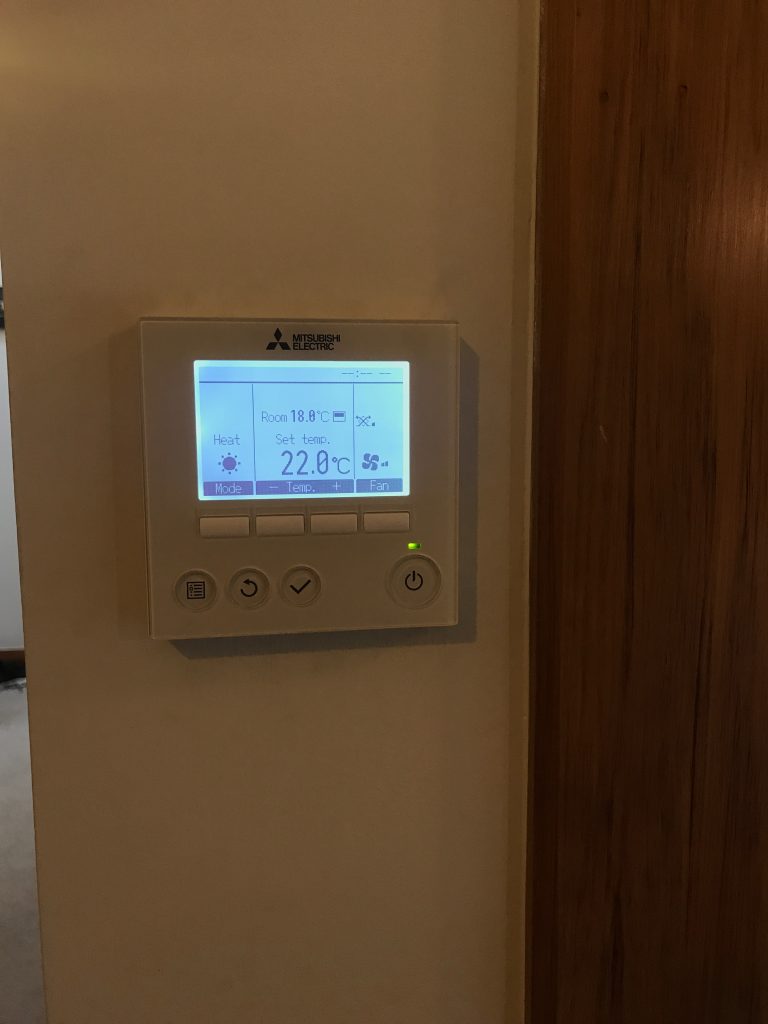
To control the combined system, there’s a central thermostat and control interface installed underneath the return intake. It’s pretty basic, capable of setting modes, fan speeds, temperatures and timers, but does the fundamentals nicely enough.

Nice modern look but it’s not all that intelligent.

Ultimately I wanted proper IP control of the system to allow a range of integrations rather than the manual drudgery of having to touch actual buttons with my actual hands.

Surprisingly for 2018 this isn’t standard for all heat pumps like this, some vendors seem to lack options entirely and whilst Mitsubishi have their “WiFi Control” product, it’s still sold as an extra ~$250 add-on, rather than being natively built into the control interface as standard feature.

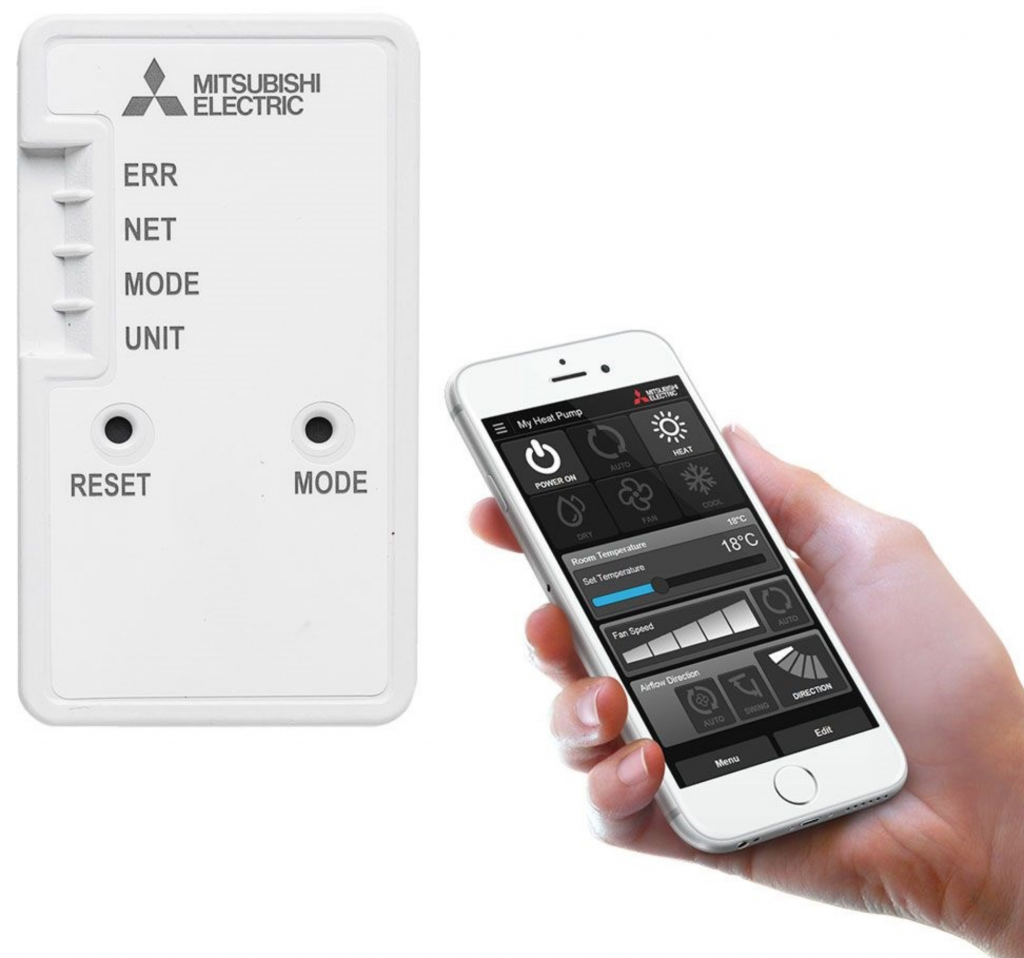
Essentially it works by connecting a small embedded computer to the heat pump via it’s onboard serial port  (You can see the little white box on one of the earlier photos of the attic install with the trailing cable going to the unit’s control circuit). It then bidirectionally syncs with Mitsubishi’s cloud services, which then allows you to control it from anywhere via your phone app. The experience is well polished and Mitsubishi is even doing HTTPS for their connections which was a (positive) surprise. Plus the WiFi module was designed/built by a local New Zealand company on behalf of Mitsubishi, so that’s kinda cool.

WiFi module + app

Note that I mentioned serial before – this isn’t too tricky to interface with and it is possible to build your own module – I’m not great with hardware and didn’t want the hassle and warranty risks, but if that’s your kind of thing, take a look at this blog post on Nicegear.

Overall it’s a pretty decent Internet of Things product, the only issue I had with it is that it relies entirely on their cloud service. And whilst Mitsubishi’s cloud app is *probably* going to stick around for a while, I wanted local control to allow me to link it to Home Assistant to make it part of a holistic smart house, not just an independent appliance. Getting it into Home Assistant also makes it possible to then control via Apple HomeKit, something not possible with the off-the-shelf product.

I had a bit of fun figuring out how I could interface with it locally (see my talk at the inargural Wellington Home Automation Hackers if interested) but ultimately I discovered that the latest version of the IP module (MAC-568IF-E) supported a Japanese standard called ECHONET Lite. This standard allows for completely local network control of various smart home appliances, including heat pumps, which allowed me to then write a bridge application between Home Assistant (using MQTT) and the heat pump (using ECHONET Lite).

The source code for this bridge application is available at https://github.com/jethrocarr/echonetlite-hvac-mqtt-service including a Docker image for easy installation.

The only limitation is that I have not found a way to control the Lossnay via ECHONET Lite – given that the official Mitsubishi app also lacks control, I suspect they simply haven’t developed functionality into the WiFI control module to expose the options for the Lossnay, it’s probably not a massively popular addon

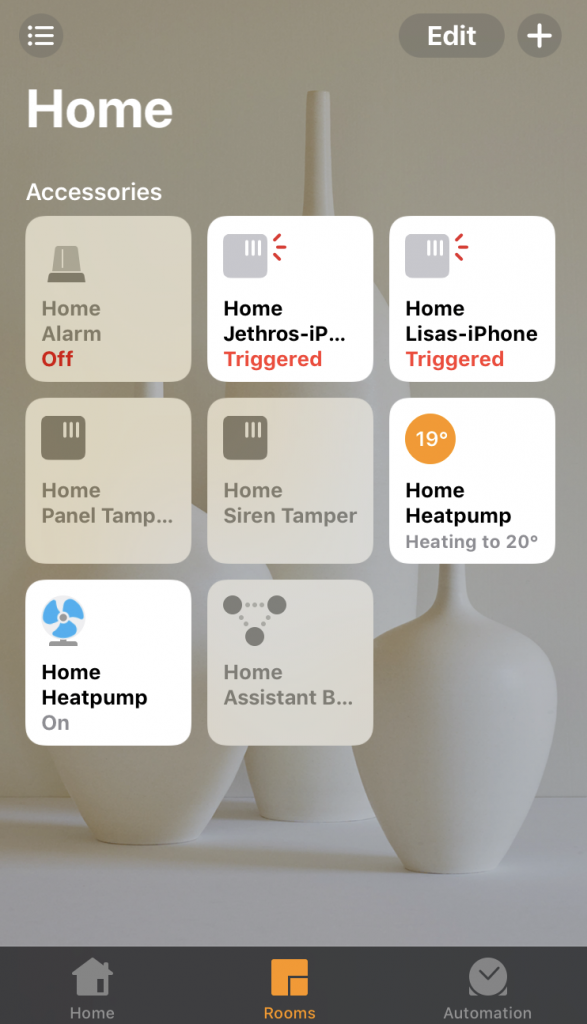
End result is that I now have the ability to control the mode and temperature via HomeKit from my iPhone/iPad – and since HomeKit links with the wider Apple Ecosystem and the fact we have an Apple TV, it’s possible for both Lisa and myself to control the heat pump (and all the other linked stuff) remotely from anywhere without a VPN needed. It also makes things super trivial to delegate and revoke access to guests when visiting.

Heating controls in HomeKit!

The other main drive to integrate locally is that I want to be able to setup smarter rules inside Home Assistant. Some of the stuff I’m planning is:

  1. Automatically set the temperature when we are away from home vs at home. We already have occupancy data from a range of metrics that we can use so this won’t be too tricky.
  2. Take exterior temperature into account, eg if the day is going to heat up there could be hours where we can shutdown the system entirely for power savings.
  3. Being able to read temperatures from sensors around the house rather than the averaged thermostat reading near the return intake and take into consideration when setting temperatures – eg “I always want the bedrooms at 18c, even if it means the hallway and lounge end up slightly warmer than they should otherwise”.
  4. Automatically shut down the system if someone leaves the front/back door open for more than a minute.
  5. A smarter night setback mode. The current behaviour of the system is to always run the fans whether actively heating or not, but this can sometimes be annoying at night when the breeze can be felt more noticeably. I’d like to program in logic to automatically shutdown the aircon when the temp is above 18, but if it drops below 18, heat back up to 20 then switch off again – thus only running the fans when actively heating but still ensuring the house stays warm. So no breezes other than when heating. The system has this with “night setback” but it just turns on if it gets below a threshold, it doesn’t then turn off again once it’s at a comfortable level.


So aside from the remaining automation work, project complete! We are super happy with this solution, it’s completely changed the liveability of the property during winter and it’s an upgrade I would absolutely make to any other property that I ever buy in future or recommend to anyone else living in our climate here in NZ.

It’s not a cheap solution – expect to spend $15-20k NZD for a 3-4 bedroom home, although it will vary considerably based on sizing and installer effort needed. Like most home upgrades, labour is a huge component of the ultimate bill. Our final bill came in around $22k, but this also included the Lossnay ventilation unit.

There’s also the electrical cost to operate. This one is super subjective since it depends on your usage patterns, house, etc. Our first winter month bill at ~$450 NZD seemed super high, but when we compared with previous years, it was only 30% more and instead of having two rooms barely liveable, we got an entire house that was comfortable. In fact it’s efficient enough that we’re likely to still come in just on or under the 8,000 kWh yearly low user consumption, given that our hot water is currently gas. Once we go full electric with our hot water, we will probably surpass that and need to go to the standard plan (cheaper per kWh rate, higher line charges).

I’m expecting to get 15 years lifespan on the system, maybe longer. At 15 years, it’s essentially $1,460 per year deprecation for the asset, which isn’t too bad for the level of comfort it provides. If we get longer, or can refurbish to extend beyond that period, even better. It’s also worth noting that even if the mechanical components need replacing at their end of life, we have all the ducting, piping, electrical etc already installed which would be reusable, making a replacement project at it’s EOL considerably cheaper than a new installation given how much of the cost is the labour doing ducting runs, cutting holes, etc.

Whilst there are many other reputable brands out there, we went with the Mitsubishi offering for two main reasons.

  1. It had an IP module (“WiFi control”) available. If you’re buying a unit, make sure to research this closely, not every vendor has one and you don’t want to get burnt with a system that’s extremely difficult to get integrated into your wider smart home.
  2. The integration with the ventilation product ensured that we could get a single vendor solution for the complete system, rather than trying to mix one vendor’s ventilation system with another vendor’s heat pump system and having to figure out which one was at fault if they didn’t cooperate nicely. This may depend on who your installer is as well, ours only did the one ventilation product, so kinda made the choice easy.

Having seen the effort and complexity that went into this installation, I’m glad I got the pros to do it. It would have taken ages to do by myself over weekends, etc and there’s a number of specialist steps (eg filling the refrigerant lines with gas) which are non-trivial plus just the experience of knowing how to size and setup the ducting runs appropriately for the property. So I’d recommend staying away from a DIY project on this one, despite the temptation given the costs involved. A good friend went through a project to do most of the work on his own install himself and it ultimately didn’t save as much as expected and created a number of headaches along the way.
Adventures in I/O Hell

Earlier this year I had a disk fail in my NZ-based file & VM server. This isn’t something unexpected, the server has 12x hard disks, which are over 2 years old, some failures are to be expected over time. I anticipated just needing to arrange the replacement of one disk and being able to move on with my life.

Of course computers are never as simple as this and it triggered a delightful adventure into how my RAID configuration is built, in which I encountered many lovely headaches and problems, both hardware and software.

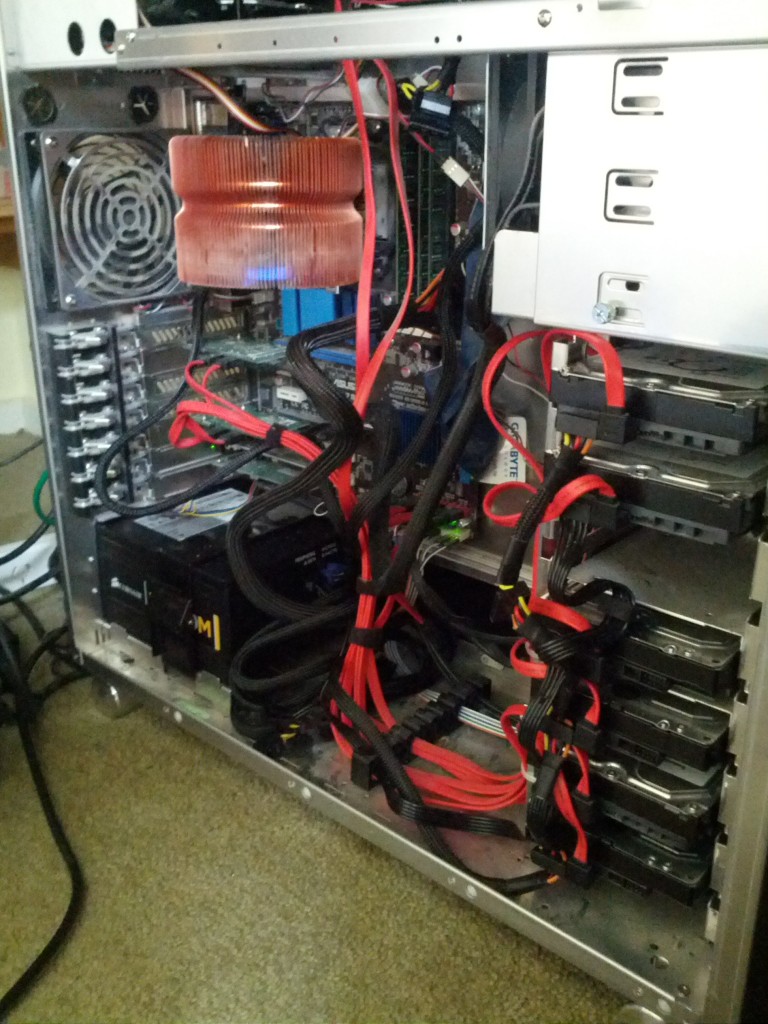
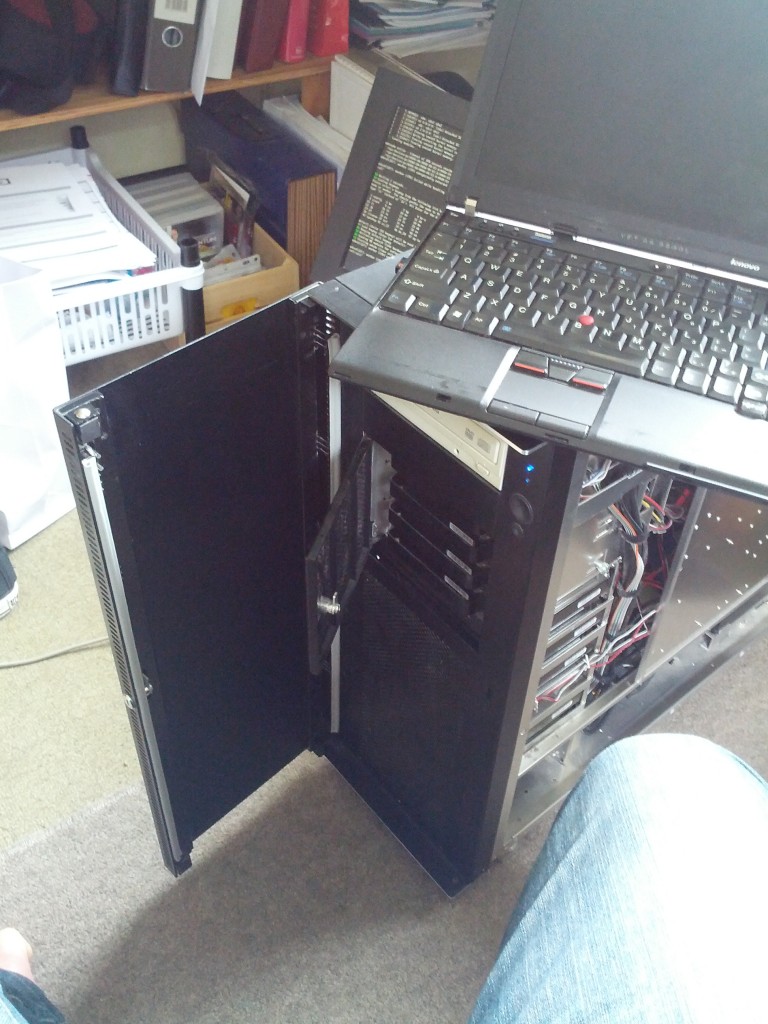
My beautiful baby

Servers are beautiful, but also such hard work sometimes.


The RAID

Of the 12x disks in my server, 2x are for the OS boot drives and the remaining 10x are pooled together into one whopping RAID 6 which is then split using LVM into volumes for all my virtual machines and also file server storage.

I could have taken the approach of splitting the data and virtual machine volumes apart, maybe giving the virtual machines a RAID 1 and the data a RAID 5, but I settled on this single RAID 6 approach for two reasons:

  1. The bulk of my data is infrequently accessed files but most of the activity is from the virtual machines – by mixing them both together on the same volume and spreading them across the entire RAID 6, I get to take advantage of the additional number of spindles. If I had separate disk pools, the VM drives would be very busy, the file server drives very idle, which is a bit of a waste of potential performance.
  2. The RAID 6 redundancy has a bit of overhead when writing, but it provides the handy ability to tolerate the failure and loss of any 2 disks in the array, offering a bit more protection than RAID 5 and much more usable space than RAID 10.

In my case I used Linux’s Software RAID – whilst many dislike software RAID, the fact is that unless I was to spend serious amounts of money on a good hardware RAID card with a large cache and go to the effort of getting all the vendor management software installed and monitored, I’m going to get little advantage over Linux Software RAID, which consumes relatively little CPU. Plus my use of disk encryption destroys any minor performance advantages obtained by different RAID approaches anyway, making the debate somewhat moot.

The Hardware

To connect all these drives, I have 3x SATA controllers installed in the server:

# lspci | grep -i sata
00:11.0 SATA controller: Advanced Micro Devices [AMD] nee ATI SB7x0/SB8x0/SB9x0 SATA Controller [AHCI mode]
02:00.0 SCSI storage controller: Marvell Technology Group Ltd. 88SX7042 PCI-e 4-port SATA-II (rev 02)
03:00.0 SCSI storage controller: Marvell Technology Group Ltd. 88SX7042 PCI-e 4-port SATA-II (rev 02)

The onboard AMD/ATI controller uses the standard “ahci” Linux kernel driver and the Marvell controllers use the standard “sata_mv” Linux kernel driver. In both cases, the controllers are configured purely in JBOD mode, which exposes each drive as-is to the OS, with no hardware RAID or abstraction taking place.

You can see how the disks are allocated to the different PCI controllers using the sysfs filesystem on the server:

# ls -l /sys/block/sd*
lrwxrwxrwx. 1 root root 0 Mar 14 04:50 sda -> ../devices/pci0000:00/0000:00:02.0/0000:02:00.0/host0/target0:0:0/0:0:0:0/block/sda
lrwxrwxrwx. 1 root root 0 Mar 14 04:50 sdb -> ../devices/pci0000:00/0000:00:02.0/0000:02:00.0/host1/target1:0:0/1:0:0:0/block/sdb
lrwxrwxrwx. 1 root root 0 Mar 14 04:55 sdc -> ../devices/pci0000:00/0000:00:02.0/0000:02:00.0/host2/target2:0:0/2:0:0:0/block/sdc
lrwxrwxrwx. 1 root root 0 Mar 14 04:50 sdd -> ../devices/pci0000:00/0000:00:02.0/0000:02:00.0/host3/target3:0:0/3:0:0:0/block/sdd
lrwxrwxrwx. 1 root root 0 Mar 14 04:55 sde -> ../devices/pci0000:00/0000:00:03.0/0000:03:00.0/host4/target4:0:0/4:0:0:0/block/sde
lrwxrwxrwx. 1 root root 0 Mar 14 04:55 sdf -> ../devices/pci0000:00/0000:00:03.0/0000:03:00.0/host5/target5:0:0/5:0:0:0/block/sdf
lrwxrwxrwx. 1 root root 0 Mar 14 04:55 sdg -> ../devices/pci0000:00/0000:00:03.0/0000:03:00.0/host6/target6:0:0/6:0:0:0/block/sdg
lrwxrwxrwx. 1 root root 0 Mar 14 04:55 sdh -> ../devices/pci0000:00/0000:00:03.0/0000:03:00.0/host7/target7:0:0/7:0:0:0/block/sdh
lrwxrwxrwx. 1 root root 0 Mar 14 04:55 sdi -> ../devices/pci0000:00/0000:00:11.0/host8/target8:0:0/8:0:0:0/block/sdi
lrwxrwxrwx. 1 root root 0 Mar 14 04:55 sdj -> ../devices/pci0000:00/0000:00:11.0/host9/target9:0:0/9:0:0:0/block/sdj
lrwxrwxrwx. 1 root root 0 Mar 14 04:55 sdk -> ../devices/pci0000:00/0000:00:11.0/host10/target10:0:0/10:0:0:0/block/sdk
lrwxrwxrwx. 1 root root 0 Mar 14 04:55 sdl -> ../devices/pci0000:00/0000:00:11.0/host11/target11:0:0/11:0:0:0/block/sdl

There is a single high-wattage PSU driving the host and all the disks, in a well designed Lian-Li case with proper space and cooling for all these disks.

The Failure

In March my first disk died. In this case, /dev/sde attached to the host AMD controller failed and I decided to hold off replacing it for a couple of months as it’s internal to the case and I would be visiting home in May in just a month or so. Meanwhile the fact that RAID 6 has 2x parity disks would ensure that I had at least a RAID-5 level of protection until then.

However a few weeks later, a second disk in the same array also failed. This become much more worrying, since two bad disks in the array removed any redundancy that the RAID array offered me and would mean that any further disk failures would cause fatal data corruption of the array.

Naturally due to Murphy’s Law, a third disk then promptly failed a few hours later triggering a fatal collapse of my array, leaving it in a state like the following:

md2 : active raid6 sdl1[9] sdj1[8] sda1[4] sdb1[5] sdd1[0] sdc1[2] sdh1[3](F) sdg1[1] sdf1[7](F) sde1[6](F)
      7814070272 blocks super 1.2 level 6, 512k chunk, algorithm 2 [10/7] [UUU_U__UUU]

Whilst 90% of my array is regularly backed up, there was some data that I hadn’t been backing up due to excessive size that wasn’t fatal, but nice to have. I tried to recover the array by clearing the faulty flag on the last-failed disk (which should still have been consistent/in-line with the other disks) in order to bring it up so I could pull the latest data from it.

mdadm --assemble /dev/md2 --force --run /dev/sdl1 /dev/sdj1 /dev/sda1 /dev/sdb1 /dev/sdd1 /dev/sdc1 /dev/sdh1 /dev/sdg1
mdadm: forcing event count in /dev/sdh1(3) from 6613460 upto 6613616
mdadm: clearing FAULTY flag for device 6 in /dev/md2 for /dev/sdh1
mdadm: Marking array /dev/md2 as 'clean'

mdadm: failed to add /dev/sdh1 to /dev/md2: Invalid argument
mdadm: failed to RUN_ARRAY /dev/md2: Input/output error

Sadly this failed in a weird fashion, where the array state was cleared to OK, but /dev/sdh was still failed and missing from the array, leading to corrupted data and all attempts to read the array successfully being hopeless. At this stage the RAID array was toast and I had no other option than to leave it broken for a few weeks till I could fix it on a scheduled trip home. :-(

Debugging in the murk of the I/O layer

Having lost 3x disks, it was unclear as to what the root cause of the failure in the array was at this time. Considering I was living in another country I decided to take the precaution of ordering a few different spare parts for my trip, on the basis that spending a couple hundred dollars on parts I didn’t need would be more useful than not having the part I did need when I got back home to fix it.

At this time, I had lost sde, sdf and sdh – all three disks belonging to a single RAID controller, as shown by /sys/block/sd, and all of them Seagate Barracuda disks.

lrwxrwxrwx. 1 root root 0 Mar 14 04:55 sde -> ../devices/pci0000:00/0000:00:03.0/0000:03:00.0/host4/target4:0:0/4:0:0:0/block/sde
lrwxrwxrwx. 1 root root 0 Mar 14 04:55 sdf -> ../devices/pci0000:00/0000:00:03.0/0000:03:00.0/host5/target5:0:0/5:0:0:0/block/sdf
lrwxrwxrwx. 1 root root 0 Mar 14 04:55 sdg -> ../devices/pci0000:00/0000:00:03.0/0000:03:00.0/host6/target6:0:0/6:0:0:0/block/sdg
lrwxrwxrwx. 1 root root 0 Mar 14 04:55 sdh -> ../devices/pci0000:00/0000:00:03.0/0000:03:00.0/host7/target7:0:0/7:0:0:0/block/sdh

Hence I decided to order 3x 1TB replacement Western Digital Black edition disks to replace the failed drives, deliberately choosing another vendor/generation of disk to ensure that if it was some weird/common fault with the Seagate drives it wouldn’t occur with the new disks.

I also placed an order of 2x new SATA controllers, since I had suspicions about the fact that numerous disks attached to one particular controller had failed. The two add in PCI-e controllers were somewhat simplistic ST-Labs cards, providing 4x SATA II ports in a PCI-e 4x format, using a Marvell 88SX7042 chipset. I had used their SiI-based PCI-e 1x controllers successfully before and found them good budget-friendly JBOD controllers, but being a budget no-name vendor card, I didn’t hold high hopes for them.

To replace them, I ordered 2x Highpoint RocketRaid 640L cards, one of the few 4x SATA port options I could get in NZ at the time. The only problem with these cards was that they were also based on the Marvell 88SX7042 SATA chipset, but I figured it was unlikely for a chipset itself to be the cause of the issue.

I considered getting a new power supply as well, but the fact that I had not experienced issues with any disks attached to the server’s onboard AMD SATA controller and that all my graphing of the power supply showed the voltages solid, I didn’t have reason to doubt the PSU.

When back in Wellington in May, I removed all three disks that had previously exhibited problems and installed the three new replacements. I also replaced the 2x PCI-e ST-Labs controllers with the new Highpoint RocketRaid 640L controllers. Depressingly almost as soon as the hardware was changed and I started my RAID rebuild, I started experiencing problems with the system.

May  4 16:39:30 phobos kernel: md/raid:md2: raid level 5 active with 7 out of 8 devices, algorithm 2
May  4 16:39:30 phobos kernel: created bitmap (8 pages) for device md2
May  4 16:39:30 phobos kernel: md2: bitmap initialized from disk: read 1 pages, set 14903 of 14903 bits
May  4 16:39:30 phobos kernel: md2: detected capacity change from 0 to 7000493129728
May  4 16:39:30 phobos kernel: md2:
May  4 16:39:30 phobos kernel: md: recovery of RAID array md2
May  4 16:39:30 phobos kernel: md: minimum _guaranteed_  speed: 1000 KB/sec/disk.
May  4 16:39:30 phobos kernel: md: using maximum available idle IO bandwidth (but not more than 200000 KB/sec) for recovery.
May  4 16:39:30 phobos kernel: md: using 128k window, over a total of 976631296k.
May  4 16:39:30 phobos kernel: unknown partition table
...
May  4 16:50:52 phobos kernel: ata7.00: exception Emask 0x0 SAct 0x0 SErr 0x0 action 0x6 frozen
May  4 16:50:52 phobos kernel: ata7.00: failed command: IDENTIFY DEVICE
May  4 16:50:52 phobos kernel: ata7.00: cmd ec/00:01:00:00:00/00:00:00:00:00/00 tag 0 pio 512 in
May  4 16:50:52 phobos kernel:         res 40/00:24:d8:1b:c6/00:00:02:00:00/40 Emask 0x4 (timeout)
May  4 16:50:52 phobos kernel: ata7.00: status: { DRDY }
May  4 16:50:52 phobos kernel: ata7: hard resetting link
May  4 16:50:52 phobos kernel: ata7: SATA link up 6.0 Gbps (SStatus 133 SControl 300)
May  4 16:50:52 phobos kernel: ata7.00: configured for UDMA/133
May  4 16:50:52 phobos kernel: ata7: EH complete
May  4 16:51:13 phobos kernel: ata16.00: exception Emask 0x0 SAct 0x0 SErr 0x0 action 0x6 frozen
May  4 16:51:13 phobos kernel: ata16.00: failed command: IDENTIFY DEVICE
May  4 16:51:13 phobos kernel: ata16.00: cmd ec/00:01:00:00:00/00:00:00:00:00/00 tag 0 pio 512 in
May  4 16:51:13 phobos kernel:         res 40/00:ff:00:00:00/00:00:00:00:00/00 Emask 0x4 (timeout)
May  4 16:51:13 phobos kernel: ata16.00: status: { DRDY }
May  4 16:51:13 phobos kernel: ata16: hard resetting link
May  4 16:51:18 phobos kernel: ata16: link is slow to respond, please be patient (ready=0)
May  4 16:51:23 phobos kernel: ata16: COMRESET failed (errno=-16)
May  4 16:51:23 phobos kernel: ata16: hard resetting link
May  4 16:51:28 phobos kernel: ata16: link is slow to respond, please be patient (ready=0)
May  4 16:51:33 phobos kernel: ata16: COMRESET failed (errno=-16)
May  4 16:51:33 phobos kernel: ata16: hard resetting link
May  4 16:51:39 phobos kernel: ata16: link is slow to respond, please be patient (ready=0)
May  4 16:52:08 phobos kernel: ata16: COMRESET failed (errno=-16)
May  4 16:52:08 phobos kernel: ata16: limiting SATA link speed to 3.0 Gbps
May  4 16:52:08 phobos kernel: ata16: hard resetting link
May  4 16:52:13 phobos kernel: ata16: COMRESET failed (errno=-16)
May  4 16:52:13 phobos kernel: ata16: reset failed, giving up
May  4 16:52:13 phobos kernel: ata16.00: disabled
May  4 16:52:13 phobos kernel: ata16: EH complete
May  4 16:52:13 phobos kernel: sd 15:0:0:0: [sdk] Unhandled error code
May  4 16:52:13 phobos kernel: sd 15:0:0:0: [sdk] Result: hostbyte=DID_BAD_TARGET driverbyte=DRIVER_OK
May  4 16:52:13 phobos kernel: sd 15:0:0:0: [sdk] CDB: Read(10): 28 00 05 07 c8 00 00 01 00 00
May  4 16:52:13 phobos kernel: md/raid:md2: Disk failure on sdk, disabling device.
May  4 16:52:13 phobos kernel: md/raid:md2: Operation continuing on 6 devices.
May  4 16:52:13 phobos kernel: md/raid:md2: read error not correctable (sector 84396112 on sdk).
...
May  4 16:52:13 phobos kernel: md/raid:md2: read error not correctable (sector 84396280 on sdk).
May  4 16:52:13 phobos kernel: sd 15:0:0:0: [sdk] Unhandled error code
May  4 16:52:13 phobos kernel: sd 15:0:0:0: [sdk] Result: hostbyte=DID_BAD_TARGET driverbyte=DRIVER_OK
May  4 16:52:13 phobos kernel: sd 15:0:0:0: [sdk] CDB: Read(10): 28 00 05 07 c9 00 00 04 00 00
May  4 16:52:13 phobos kernel: md/raid:md2: read error not correctable (sector 84396288 on sdk)
...
May  4 16:52:13 phobos kernel: md/raid:md2: read error not correctable (sector 84397304 on sdk).
May  4 16:52:13 phobos kernel: sd 15:0:0:0: [sdk] Unhandled error code
May  4 16:52:13 phobos kernel: sd 15:0:0:0: [sdk] Result: hostbyte=DID_BAD_TARGET driverbyte=DRIVER_OK
May  4 16:52:13 phobos kernel: sd 15:0:0:0: [sdk] CDB: Read(10): 28 00 05 07 cd 00 00 03 00 00
May  4 16:52:13 phobos kernel: md/raid:md2: read error not correctable (sector 84397312 on sdk).
...
May  4 16:52:13 phobos kernel: md/raid:md2: read error not correctable (sector 84398072 on sdk).
May  4 16:53:14 phobos kernel: ata18.00: exception Emask 0x0 SAct 0x0 SErr 0x0 action 0x6 frozen
May  4 16:53:14 phobos kernel: ata15.00: exception Emask 0x0 SAct 0x0 SErr 0x0 action 0x6 frozen
May  4 16:53:14 phobos kernel: ata18.00: failed command: FLUSH CACHE EXT
May  4 16:53:14 phobos kernel: ata18.00: cmd ea/00:00:00:00:00/00:00:00:00:00/a0 tag 0
May  4 16:53:14 phobos kernel:         res 40/00:00:00:00:00/00:00:00:00:00/a0 Emask 0x4 (timeout)
May  4 16:53:14 phobos kernel: ata18.00: status: { DRDY }
May  4 16:53:14 phobos kernel: ata18: hard resetting link
May  4 16:53:14 phobos kernel: ata17.00: exception Emask 0x0 SAct 0x0 SErr 0x0 action 0x6 frozen
May  4 16:53:14 phobos kernel: ata17.00: failed command: FLUSH CACHE EXT
May  4 16:53:14 phobos kernel: ata17.00: cmd ea/00:00:00:00:00/00:00:00:00:00/a0 tag 0
May  4 16:53:14 phobos kernel:         res 40/00:ff:00:00:00/00:00:00:00:00/40 Emask 0x4 (timeout)
May  4 16:53:14 phobos kernel: ata17.00: status: { DRDY }
May  4 16:53:14 phobos kernel: ata17: hard resetting link
May  4 16:53:14 phobos kernel: ata15.00: failed command: FLUSH CACHE EXT
May  4 16:53:14 phobos kernel: ata15.00: cmd ea/00:00:00:00:00/00:00:00:00:00/a0 tag 0
May  4 16:53:14 phobos kernel:         res 40/00:ff:00:00:00/00:00:00:00:00/40 Emask 0x4 (timeout)
May  4 16:53:14 phobos kernel: ata15.00: status: { DRDY }
May  4 16:53:14 phobos kernel: ata15: hard resetting link
May  4 16:53:15 phobos kernel: ata15: SATA link up 3.0 Gbps (SStatus 123 SControl 300)
May  4 16:53:15 phobos kernel: ata17: SATA link up 6.0 Gbps (SStatus 133 SControl 300)
May  4 16:53:15 phobos kernel: ata18: SATA link up 3.0 Gbps (SStatus 123 SControl 300)
May  4 16:53:20 phobos kernel: ata15.00: qc timeout (cmd 0xec)
May  4 16:53:20 phobos kernel: ata17.00: qc timeout (cmd 0xec)
May  4 16:53:20 phobos kernel: ata18.00: qc timeout (cmd 0xec)
May  4 16:53:20 phobos kernel: ata17.00: failed to IDENTIFY (I/O error, err_mask=0x4)
May  4 16:53:20 phobos kernel: ata17.00: revalidation failed (errno=-5)
May  4 16:53:20 phobos kernel: ata17: hard resetting link
May  4 16:53:20 phobos kernel: ata15.00: failed to IDENTIFY (I/O error, err_mask=0x4)
May  4 16:53:20 phobos kernel: ata15.00: revalidation failed (errno=-5)
May  4 16:53:20 phobos kernel: ata15: hard resetting link
May  4 16:53:20 phobos kernel: ata18.00: failed to IDENTIFY (I/O error, err_mask=0x4)
May  4 16:53:20 phobos kernel: ata18.00: revalidation failed (errno=-5)
May  4 16:53:20 phobos kernel: ata18: hard resetting link
May  4 16:53:21 phobos kernel: ata15: SATA link up 3.0 Gbps (SStatus 123 SControl 300)
May  4 16:53:21 phobos kernel: ata17: SATA link up 6.0 Gbps (SStatus 133 SControl 300)
May  4 16:53:21 phobos kernel: ata18: SATA link up 3.0 Gbps (SStatus 123 SControl 300)
May  4 16:53:31 phobos kernel: ata15.00: qc timeout (cmd 0xec)
May  4 16:53:31 phobos kernel: ata17.00: qc timeout (cmd 0xec)
May  4 16:53:31 phobos kernel: ata18.00: qc timeout (cmd 0xec)
May  4 16:53:32 phobos kernel: ata17.00: failed to IDENTIFY (I/O error, err_mask=0x4)
May  4 16:53:32 phobos kernel: ata15.00: failed to IDENTIFY (I/O error, err_mask=0x4)
May  4 16:53:32 phobos kernel: ata15.00: revalidation failed (errno=-5)
May  4 16:53:32 phobos kernel: ata15: limiting SATA link speed to 1.5 Gbps
May  4 16:53:32 phobos kernel: ata15: hard resetting link
May  4 16:53:32 phobos kernel: ata17.00: revalidation failed (errno=-5)
May  4 16:53:32 phobos kernel: ata17: limiting SATA link speed to 3.0 Gbps
May  4 16:53:32 phobos kernel: ata17: hard resetting link
May  4 16:53:32 phobos kernel: ata18.00: failed to IDENTIFY (I/O error, err_mask=0x4)
May  4 16:53:32 phobos kernel: ata18.00: revalidation failed (errno=-5)
May  4 16:53:32 phobos kernel: ata18: limiting SATA link speed to 1.5 Gbps
May  4 16:53:32 phobos kernel: ata18: hard resetting link
May  4 16:53:32 phobos kernel: ata17: SATA link up 6.0 Gbps (SStatus 133 SControl 320)
May  4 16:53:33 phobos kernel: ata15: SATA link up 3.0 Gbps (SStatus 123 SControl 310)
May  4 16:53:33 phobos kernel: ata18: SATA link up 3.0 Gbps (SStatus 123 SControl 310)
May  4 16:54:05 phobos kernel: ata15: EH complete
May  4 16:54:05 phobos kernel: ata17: EH complete
May  4 16:54:05 phobos kernel: sd 14:0:0:0: [sdj] Unhandled error code
May  4 16:54:05 phobos kernel: sd 14:0:0:0: [sdj] Result: hostbyte=DID_BAD_TARGET driverbyte=DRIVER_OK
May  4 16:54:05 phobos kernel: sd 14:0:0:0: [sdj] CDB: Write(10): 2a 00 00 00 00 10 00 00 05 00
May  4 16:54:05 phobos kernel: md: super_written gets error=-5, uptodate=0
May  4 16:54:05 phobos kernel: md/raid:md2: Disk failure on sdj, disabling device.
May  4 16:54:05 phobos kernel: md/raid:md2: Operation continuing on 5 devices.
May  4 16:54:05 phobos kernel: sd 16:0:0:0: [sdl] Unhandled error code
May  4 16:54:05 phobos kernel: sd 16:0:0:0: [sdl] Result: hostbyte=DID_BAD_TARGET driverbyte=DRIVER_OK
May  4 16:54:05 phobos kernel: sd 16:0:0:0: [sdl] CDB: Write(10): 2a 00 00 00 00 10 00 00 05 00
May  4 16:54:05 phobos kernel: md: super_written gets error=-5, uptodate=0
May  4 16:54:05 phobos kernel: md/raid:md2: Disk failure on sdl, disabling device.
May  4 16:54:05 phobos kernel: md/raid:md2: Operation continuing on 4 devices.
May  4 16:54:05 phobos kernel: ata18: EH complete
May  4 16:54:05 phobos kernel: sd 17:0:0:0: [sdm] Unhandled error code
May  4 16:54:05 phobos kernel: sd 17:0:0:0: [sdm] Result: hostbyte=DID_BAD_TARGET driverbyte=DRIVER_OK
May  4 16:54:05 phobos kernel: sd 17:0:0:0: [sdm] CDB: Write(10): 2a 00 00 00 00 10 00 00 05 00
May  4 16:54:05 phobos kernel: md: super_written gets error=-5, uptodate=0
May  4 16:54:05 phobos kernel: md/raid:md2: Disk failure on sdm, disabling device.
May  4 16:54:05 phobos kernel: md/raid:md2: Operation continuing on 4 devices.
May  4 16:54:05 phobos kernel: md: md2: recovery done.

The above logs demonstrate my problem perfectly. After rebuilding the array, a disk would fail and lead to a cascading failure where other disks would throw up “failed to IDENTIFY” errors until they eventually all failed one-by-one until all the disks attached to that controller had vanished from the server.

At this stage I knew the issue wasn’t caused by all the hard disk themselves, but there was the annoying fact that at the same time, I couldn’t trust all the disks – there were certainly at least a couple bad hard drives in my server triggering a fault, but many of the disks marked as bad by the server were perfectly fine when tested in a different system.

Untrustworthy Disks

Untrustworthy Disks

By watching the kernel logs and experimenting with disk combinations and rebuilds, I was able to determine that the first disk that always failed was usually faulty and did need replacing. However the subsequent disk failures were false alarms and seemed to be part of a cascading triggered failure on the controller that the bad disk was attached to.

Using this information, it would be possible for me to eliminate all the bad disks by removing the first one to fail each time till I had no more failing disks. But this would be a false fix, if I was to rebuild the RAID array in this fashion, everything would be great until the very next disk failure occurs and leads to the whole array dying again.

Therefore I had to find the root cause and make a permanent fix for the solution. Looking at what I knew about the issue, I could identify the following possible causes:

  1. A bug in the Linux kernel was triggering cascading failures of RAID rebuilds (bug in either software RAID or in AHCI driver for my Marvell controller).
  2. The power supply on the server was glitching under the load/strain of a RAID rebuild and causing brownouts to the drives.
  3. The RAID controller had some low level hardware issue and/or an issue exhibited when one failed disk sent a bad signal to the controller.

Frustratingly I didn’t have any further time to work on it whilst I was in NZ in May, so I rebuilt the minimum array possible using the onboard AMD controller to restore my critical VMs and had to revisit the issue again in October when back in the country for another visit.

Debugging hardware issues and cursing the lower levels of the OSI layers.

Debugging disks and cursing hardware.

When I got back in October, I decided to eliminate all the possible issues, no matter how unlikely…. I was getting pretty tired of having to squeeze all my stuff into only a few TB, so wanted a fix no matter what.

Kernel – My server was running the stock CentOS 6 2.6.32 kernel which was unlikely to have any major storage subsystem bugs, however as a precaution I upgraded to the latest upstream kernel at the time of 3.11.4.

This failed to make any impact, so I decided that it would be unlikely I’m the first person to discover a bug in the Linux kernel AHCI/Software-RAID layer and marked the kernel as an unlikely source of the problem. The fact that when I added a bad disk to the onboard AMD server controller I didn’t see the same cascading failure, also helped eliminate a kernel RAID bug as the cause, leaving only the possibility of a bug in the “sata_mv” kernel driver that was specific to the controllers.

Power Supply – I replaced the few year old power supply in the server with a newer higher spec good quality model. Sadly this failed to resolve anything, but it proved that the issue wasn’t power related.

SATA Enclosure – 4x of my disks were in a 5.25″ to 3.5″ hotswap enclosure. It seemed unlikely that a low level physical device could be the cause, but I wanted to eliminate all common infrastructure possibility, and all the bad disks tended to be in this enclosure. By juggling the bad disks around, I was able to confirm that the issue wasn’t specific to this one enclosure.

At this time the only hardware in common left over was the two PCI-e RAID controllers – and of course the motherboard they were connected via. I really didn’t want to replace the motherboard and half the system with it, so I decided to consider the possibility that the fact the old ST-Lab and new RocketRaid controllers both used the same Marvell 88SX7042 chipset meant that I hadn’t properly eliminated the controllers as being the cause of the issue.

After doing a fair bit of research around the Marvell 88SX7042 online, I did find a number of references to similar issues with other Marvell chipsets, such as issues with the 9123 chipset series, issues with the 6145 chipset and even reports of issues with Marvell chipsets on FreeBSD.

The Solution

Having traced something dodgy back to the Marvell controllers I decided the only course of action left was to source some new controller cards. Annoyingly I couldn’t get anything that was 4x SATA ports in NZ that wasn’t either Marvell chipset based or extremely expensive hardware RAID controllers offering many more features than I required.

I ended up ordering 2x Syba PCI Express SATA II 4-Port RAID Controller Card SY-PEX40008 which are SiI 3124 chipset based controllers that provide 4x SATA II ports on a single PCIe-1x card. It’s worth noting that these controllers are actually PCI-X cards with an onboard PCI-X to PCIe-1x converter chip which is more than fast enough for hard disks, but could be a limitation for SSDs.

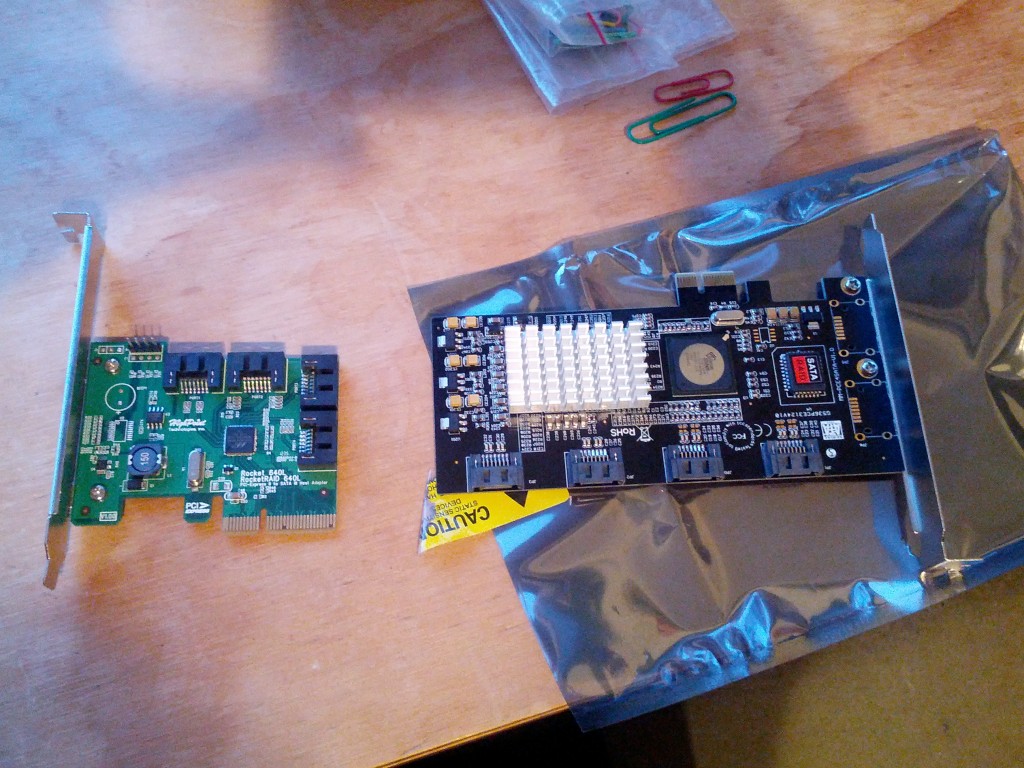
Marvell Chipset-based controller (left) and replacement SiI based controller (right).

Marvell Chipset-based controller (left) and replacement SiI based controller (right). The SiI controller is much larger thanks to the PCI-X to PCI-e converter chip on it’s PCB.

I selected these cards in particular, as they’re used by the team at Backblaze (a massive online back service provider) for their storage pods, which are built entirely around giant JBOD disk arrays. I figured with the experience and testing this team does, any kit they recommend is likely to be pretty solid (check out their design/decision blog post).

# lspci | grep ATA
00:11.0 SATA controller: Advanced Micro Devices [AMD] nee ATI SB7x0/SB8x0/SB9x0 SATA Controller [AHCI mode]
03:04.0 RAID bus controller: Silicon Image, Inc. SiI 3124 PCI-X Serial ATA Controller (rev 02)
05:04.0 RAID bus controller: Silicon Image, Inc. SiI 3124 PCI-X Serial ATA Controller (rev 02)

These controllers use the “sata_sil24” kernel driver and are configured as simple JBOD controllers in the exact same fashion as the Marvell cards.

To properly test them, I rebuilt an array with a known bad disk in it. As expected, at some point during the rebuild, I got a failure of this disk:

Nov 13 10:15:19 phobos kernel: ata14.00: exception Emask 0x0 SAct 0x3fe SErr 0x0 action 0x6
Nov 13 10:15:19 phobos kernel: ata14.00: irq_stat 0x00020002, device error via SDB FIS
Nov 13 10:15:19 phobos kernel: ata14.00: failed command: READ FPDMA QUEUED
Nov 13 10:15:19 phobos kernel: ata14.00: cmd 60/00:08:00:c5:c7/01:00:02:00:00/40 tag 1 ncq 131072 in
Nov 13 10:15:19 phobos kernel:         res 41/40:00:2d:c5:c7/00:01:02:00:00/00 Emask 0x409 (media error) <F>
Nov 13 10:15:19 phobos kernel: ata14.00: status: { DRDY ERR }
Nov 13 10:15:19 phobos kernel: ata14.00: error: { UNC }
Nov 13 10:15:19 phobos kernel: ata14.00: failed command: READ FPDMA QUEUED
Nov 13 10:15:19 phobos kernel: ata14.00: cmd 60/00:10:00:c6:c7/01:00:02:00:00/40 tag 2 ncq 131072 in
Nov 13 10:15:19 phobos kernel:         res 9c/13:04:04:00:00/00:00:00:20:9c/00 Emask 0x2 (HSM violation)
Nov 13 10:15:19 phobos kernel: ata14.00: status: { Busy }
Nov 13 10:15:19 phobos kernel: ata14.00: error: { IDNF }
Nov 13 10:15:19 phobos kernel: ata14.00: failed command: READ FPDMA QUEUED
Nov 13 10:15:19 phobos kernel: ata14.00: cmd 60/c0:18:00:c7:c7/00:00:02:00:00/40 tag 3 ncq 98304 in
Nov 13 10:15:19 phobos kernel:         res 9c/13:04:04:00:00/00:00:00:30:9c/00 Emask 0x2 (HSM violation)
...
Nov 13 10:15:41 phobos kernel: ata14.00: exception Emask 0x0 SAct 0x0 SErr 0x0 action 0x0
Nov 13 10:15:41 phobos kernel: ata14.00: irq_stat 0x00060002, device error via D2H FIS
Nov 13 10:15:41 phobos kernel: ata14.00: failed command: READ DMA
Nov 13 10:15:41 phobos kernel: ata14.00: cmd c8/00:00:00:c5:c7/00:00:00:00:00/e2 tag 0 dma 131072 in
Nov 13 10:15:41 phobos kernel:         res 51/40:00:2d:c5:c7/00:00:02:00:00/02 Emask 0x9 (media error)
Nov 13 10:15:41 phobos kernel: ata14.00: status: { DRDY ERR }
Nov 13 10:15:41 phobos kernel: ata14.00: error: { UNC }
Nov 13 10:15:41 phobos kernel: ata14.00: configured for UDMA/100
Nov 13 10:15:41 phobos kernel: sd 13:0:0:0: [sdk] Unhandled sense code
Nov 13 10:15:41 phobos kernel: sd 13:0:0:0: [sdk] Result: hostbyte=DID_OK driverbyte=DRIVER_SENSE
Nov 13 10:15:41 phobos kernel: sd 13:0:0:0: [sdk] Sense Key : Medium Error [current] [descriptor]
Nov 13 10:15:41 phobos kernel: Descriptor sense data with sense descriptors (in hex):
Nov 13 10:15:41 phobos kernel:        72 03 11 04 00 00 00 0c 00 0a 80 00 00 00 00 00 
Nov 13 10:15:41 phobos kernel:        02 c7 c5 2d 
Nov 13 10:15:41 phobos kernel: sd 13:0:0:0: [sdk] Add. Sense: Unrecovered read error - auto reallocate failed
Nov 13 10:15:41 phobos kernel: sd 13:0:0:0: [sdk] CDB: Read(10): 28 00 02 c7 c5 00 00 01 00 00
Nov 13 10:15:41 phobos kernel: ata14: EH complete
Nov 13 10:15:41 phobos kernel: md/raid:md5: read error corrected (8 sectors at 46646648 on sdk)

The known faulty disk failed as expected, but rather than suddenly vanishing from the SATA controller, the disk remained attached and proceeded to spew out seek errors for the next few hours, slowing down the rebuild process.

Most importantly, no other disks failed at any stage following the move from the Marvell to the SiI controller. Having assured myself with the stability and reliability of the controller, I was able to add in other disks I weren’t sure had or had not failed and quickly eliminate the truly faulty disks.

My RAID array rebuild completed successfully and I was then able to restore the LVM volume and all my data and restore full services on my system.

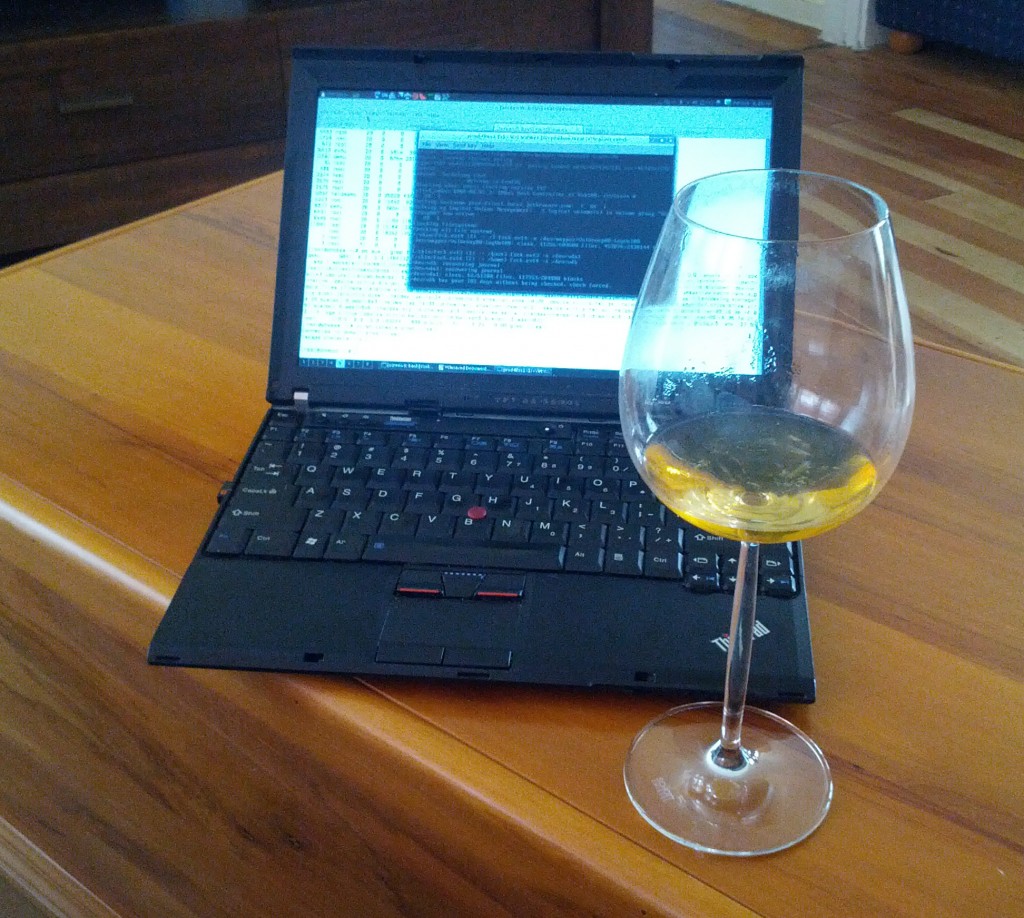
With the data restored, time for a delicious IPA.

With the data restored successfully at last, time for a delicious local IPA to celebrate victory at long last.

Having gone through the pain and effort to recover and rebuild this system, I had to ask myself a few questions about my design decisions and what I could do to avoid a fault like this again in future.

Are the Marvell controllers shit?

Yes. Next question?

In seriousness, the fact that two completely different PCI-e card vendors exhibited the exact same problem with this controller shows that it’s not going to be the fault of the manufacturer of the controller card and must be something with the controller itself or the kernel driver operating it.

It is *possible* that the Linux kernel has a bug in the sata_mv controller, but I don’t believe that’s the likely cause due to the way the fault manifests. Whenever a disk failed, the disks would slowly disappear from the kernel entirely, with the kernel showing surprise at suddenly having lost a disk connection. Without digging into the Marvell driver code, it looks very much like the hardware is failing in some fashion and dropping the disks. The kernel just gets what the hardware reports, so when the disks vanish, it just tries to cope the best that it can.

I also consider a kernel bug to be a vendor fault anyway. If you’re a major storage hardware vendor, you have an obligation to thoroughly test the behaviour of your hardware with the world’s leading server operating system and find/fix any bugs, even if the driver has been written by the open source community, rather than your own in house developers.

Finally posts on FreeBSD mailing lists also show users reporting strange issues with failing disks on Marvell controllers, so that adds a cross-platform dimension to the problem. Further testing with the RAID vendor drivers rather than sata_mv would have been useful, but they only had binaries for old kernel versions that didn’t match the CentOS 6 kernel I was using.

Are the Seagate disks shit?

Maybe – it’s hard to be sure, since my server has been driven up in my car from Wellington to Auckland (~ 900km) and back which would not have been great for the disks (especially with my driving) and has had a couple of times that it’s gotten warmer than I would have liked thanks to the wonders of running a server in a suburban home.

I am distrustful of my Seagate drives, but I’ve had bad experienced with Western Digital disks in the past as well, which brings me to the simple conclusion that all spinning rust platters are crap and the price drops of SSDs to a level that kills hard disks can’t come soon enough.

And even if I plug in the worst possible, spec-violating SATA drive to a controller, that controller should be able to handle it properly and keep the disk isolated, even if it means disconnecting one bad disk. The Marvell 88SX7042 controller is advertised as being a 4-channel controller, I therefore do not expect issues on one channel to impact the activities on the other channels. In the same way that software developers code assuming malicious input, hardware vendors need to design for the worst possible signals from other devices.

What about Enterprise vs Consumer disks

I’ve looked into the differences between Enterprise and Consumer grade disks before.

Enterprise disks would certainly help the failures occur in a cleaner fashion. Whether it would result in correct behaviour of the Marvell controllers, I am unsure… the cleaner death *may* result in the controller glitching less, but I still wouldn’t trust it after what I’ve seen.

I also found rebuilding my RAID array with one of my bad sector disks would take around 12 hours when the disk was failing. After kicking out the disk from the array, that rebuild time dropped to 5 hours, which is a pretty compelling argument for using enterprise disks to have them die quicker and cleaner.

Lessons & Recommendations

Whilst slow, painful and frustrating, this particular experience has not been a total waste of time, there are certainly some useful lessons I’ve learnt from the exercise and things I’d do different in future. In particular:

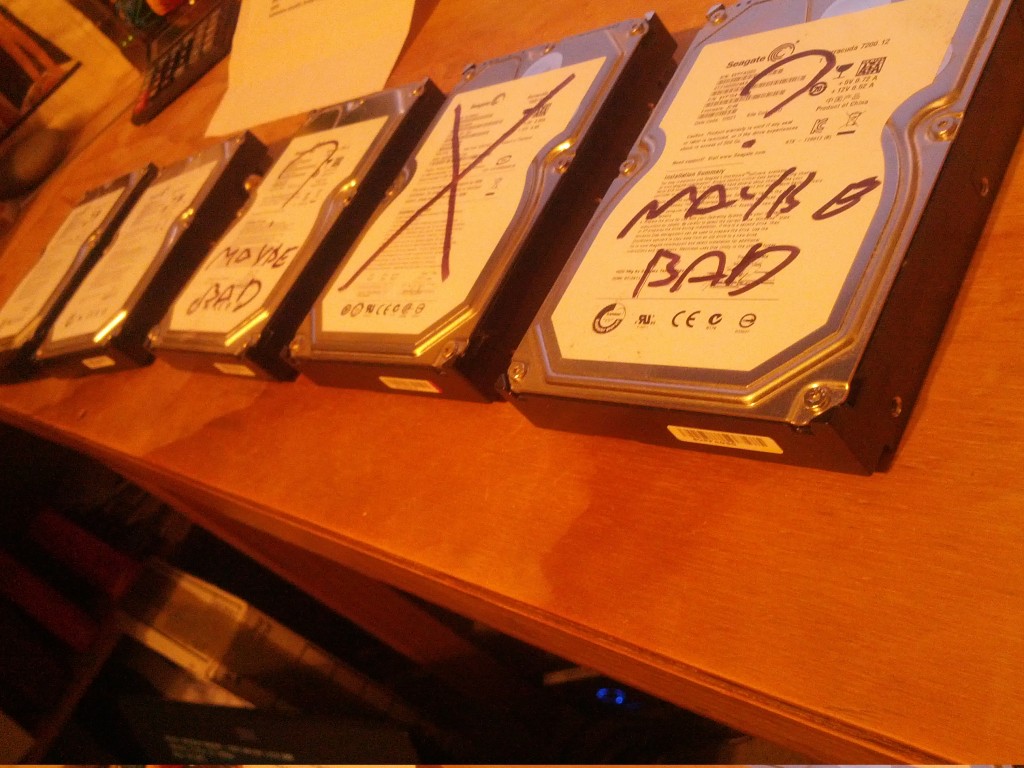
  1. Anyone involved in IT ends up with a few bad disks after a while. Keep some of these bad disks around rather than destroying them. When you build a new storage array, install a known bad disk and run disk benchmarks to trigger a fault to ensure that all your new infrastructure handles the failure of one disk correctly. Doing this would have allowed me to identify the Marvell controllers as crap before the server went into production, as I would have seen that a bad disks triggers a cascading fault across all the good disks.
  2. Record the serial number of all your disks once you build the server. I had annoyances where bad disks would disappear from the controller entirely and I wouldn’t know what the serial number of the disk was, so had to get the serial numbers from all the good disks and remove the one disk that wasn’t on the list in a slow/annoying process of elimination.
  3. RAID is not a replacement for backup. This is a common recommendation, but I still know numerous people who treat RAID as an infallible storage solution and don’t take adequate precautions for failure of the storage array. The same applies to RAID-like filesystem technologies such as ZFS. I had backups for almost all my data, but there were a few things I hadn’t properly covered, so it was a good reminder not to succumb to hubris in one’s data redundancy setup.
  4. Don’t touch anything with a Marvell chipset in it. I’m pretty bitter about their chipsets following this whole exercise and will be staying well away from their products for the foreseeable future.
  5. Hardware can be time consuming and expensive. As a company, I’d stick to using hosted/cloud providers for almost anything these days. Sure the hourly cost can seem expensive, but not needing to deal with hardware failures is of immense value in itself. Imagine if this RAID issue had been with a colocated server, rather than a personal machine that wasn’t mission critical, the cost/time to the company would have been a large unwanted investment.


Marriage Equality

New Zealand has passed legalisation for allowing same-sex marriage this evening! I’m so happy for my many LGBT friends and love the fact that no matter whom any of us love, we can get the same recognition and rights in not just law, but also have society recognise these choices.

I love the fact that my beautiful lady friend can settle down with another beautiful lady friend should she chose to. I love the fact my awesome male friend can find another awesome male to spend life with should he chose. And I love the fact that their relationship does not impact on the meaning of my own conventional relationship with Lisa in any way.

Unleash the Gayroller 2000!

Run conservatives! (credit to theoatmeal.com)

NZ has had civil unions for some time giving same-sex couples similar legal rights, but this removes the last barriers to equality and gives hetrosexual and homosexual relationships the same footing in society.

This may sound like a small thing, but it has huge ramifications – it removes the distinction of same-sex relationships as being different in some negative sense. In the eyes of the law, there is no difference in any marriage no matter what genders the participants are and this will reflect over time in society as well

It’s also solved the same-sex adoption issue, with the legalisation opening the door for the first gay adoptions to take place.

Generally New Zealand is very liberal – our government is almost entirely secular, generally mentioning and promoting religious views in government is the realm of fringe 1 or 2 MP parties, which has really helped with this legalisation as it hasn’t gotten so tangled up with religious arguments.

Whilst there were still a few conservative fucktards disturbed individuals who voted against the bill, the support has been strong across the entire house and across parties.

I’ve personally noted that the younger generations are the most open and comfortable around same-sex relationships, whereas the older generations tend to support their rights in general, but still raise their eyebrows when they see a same-sex couple, a hangover from decades of stigma where they still feel the need to point it out as something unusual.

There’s still some stigma and fights remaining – the law still won’t recognise polygamous marriage and government departments still tend to vary a lot on the gender question (although the new marriage laws allow you to be Partner/Partner rather than Husband/Husband, Wife/Wife or Husband/Wife; and NZ passports now have a X/Other gender option, so it’s getting better.).

There’s also some more understanding needed in society around the fluid nature of sexuality – if I sleep with guys and then settle down with a lady (or vice versa), it’s not a case of going through a phase before setting on straight or gay – there’s a whole range of gray areas in between which are very hard to define, yet I feel that society in general is very quick to label and categorise people into specific categories when the reality is that we’re just undefinable.

But despite a lot of remaining work, I’m extremely happy with this legalisation and happy that I voted for a party that supported it 100% as an undeniable human rights issue. Maybe even had a momentary twinge of patriotism for NZ. :-)

Look to the past to see the future

I came across  a great tweet the other day, pretty much sums up the whole marriage equality debate being had across the world:

All this has happened before. All this will happen again. ~ Scrolls of Pythia, Battlestar Galatica

Pretty happy that I come from a country that recognizes the rights and privileges for my LGBTWTF friends – it’s not 100% perfect yet, but it’s getting there.

Under NZ law, gay couples can get a civil union, but not marriage – the only technical difference is terminology, and due to a poorly structured bit of legalization, a gay couple can’t adopt, as it explicitly requires a “married” couple.

I’m hopeful that it won’t be too much longer before we can fix that final bit of legalization to make a civil union or marriage available to any couple and have exactly equal standing. :-)

Half a Terrabyte

With companies in Australia offering 1TB plans, us New Zealanders have been getting pretty jealous of only having 100GB plans for the same money.

Except that a couple days ago, my ISP Snap! upgraded everyone’s data allowance by at least 4x…. taking me from a 105GB plan to a 555GB monthly plan at no additional change.

Was a great surprise when I logged into my account, having only previously skimmed the announcement email which went into the mental TL;DR basket.

Good thing I got upgraded,used almost 50GB in 2 days :-/

I’m currently paying around $120-130 per month for half a terrabyte on a naked DSL line and to quote 4chan, it “feels good man”.

Of course it’s only DSL speed – although if I was planning to stick around long term at my apartment, I’d look into VDSL options which are available in some parts of NZ. And the first Ultra Fast Broadband fibre is starting to get laid in NZ so the future is bright.

For me personally, once I have 10mbit or so, the speed becomes less important, what is important is the latency and the amount of data allocated.

I suspect snap!’s move is in response to other mid sized providers providing new plans such as Slingshot’s $90 “unlimited” plan, or Orcon offering up to 1TB for $200 per month on their new Genius service.

TelstraClear is going to need to up their game, for the same price for my half terrabyte, I can only get 100GB of data – although supposedly at 100mbits/10mbits speeds (theoretically, since when they previously offered the 25mbit plan I couldn’t get anywhere near that speed to two different NZ data centers…)

Even with it’s faults, TelstraClear’s cable network still blows away DSL for latency and performance if you’re lucky enough to be in the right regions – they should press this advantage, bring the data caps up to match competition and push the speed advantage to secure customers.

Meanwhile Telecom NZ still offers internet plans with 2GB data caps and for more than I’m paying for 555GB, I’d get only 100GB. Not the great deal around guys… :-/ (yes I realize that includes a phone, that has no value to me as a mid-twenties landline-hating, cellphone-loving individual).

Why I hate DSL

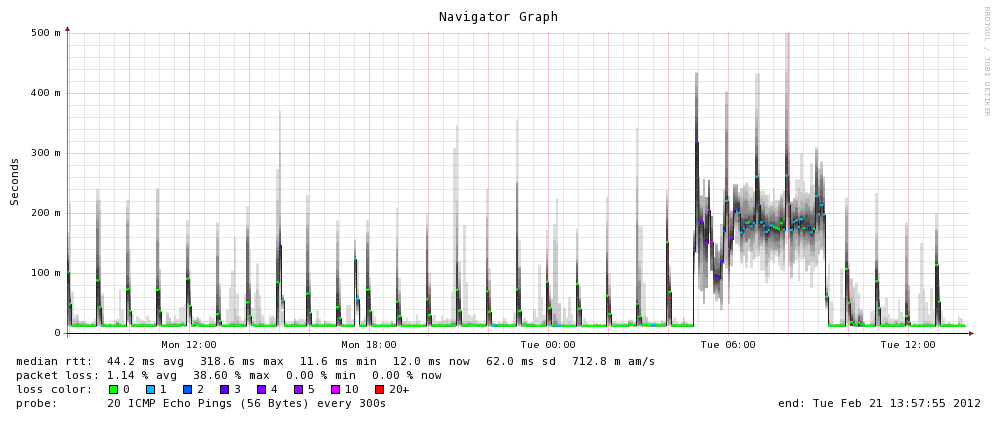
mmm latency, delicious delicious latency

I’m living around 8km from the center of Auckland, New Zealand’s largest city, with only 8 mbits down and 0.84 mbits upstream in a very modern building with (presumably) good wiring installed. :'(

The above is what happens to your domestic latency when your server’s cronjobs decide to push 1.8GB of new RPMs up to a public repo, causing the performance to any other hosts to slow to a grinding halt. :-/

On the plus side it did make me aware of a fault in my server setup – one of my VMs was incorrectly set to use my secondary LDAP server as it’s primary authentication source, meaning it called back across the VPN over this DSL connection, so when this performance hit occurred, the server started having weird “hangs” due to processes blocking whilst waiting for authentication attempts to complete.

The sooner we can shift off DSL the better – there’s the possibility that my area might be covered with VDSL, but since I don’t think we’ll be here for too long, I’m not going to go to the effort to look at other access methods.

But I will make sure I carefully consider where UFB is getting laid when I come to buy property….