Monthly Archives: June 2012

LDAP & RADIUS centralised authentication

I recently did a presentation at the June AuckLUG meeting on configuring LDAP and RADIUS centralised authentication solutions.

It’s a little rough (first time I’ve done a presentation on the topic), but hopefully is of use to anyone interested in setting up an LDAP server. In my case I’m using an OpenLDAP server with my self-developed open source LDAPAuthManager tool.

You can watch the presentation (about 2 hours) on YouTube, it includes a lot of verbal and visual demonstrations, so conveys a lot more detail than the slides alone.

You can download a copy of the slides here if wanted (pdf).

Soldering Adventures

As part of my efforts to learn more about electronics, I recently obtained a power supply kit that breaks the standard 5V USB output into 3.3V and 5V bread-board connectable outputs from Mindkits (who resell Sparkfun kits in NZ, amongst other stuff).

I went for a USB-powered model rather than a typical round-pin DC supply, since I have an abundance of USB power sources with me all the time (both laptop and wall adaptors) and it’s much better than having yet another damn power brick hanging around.

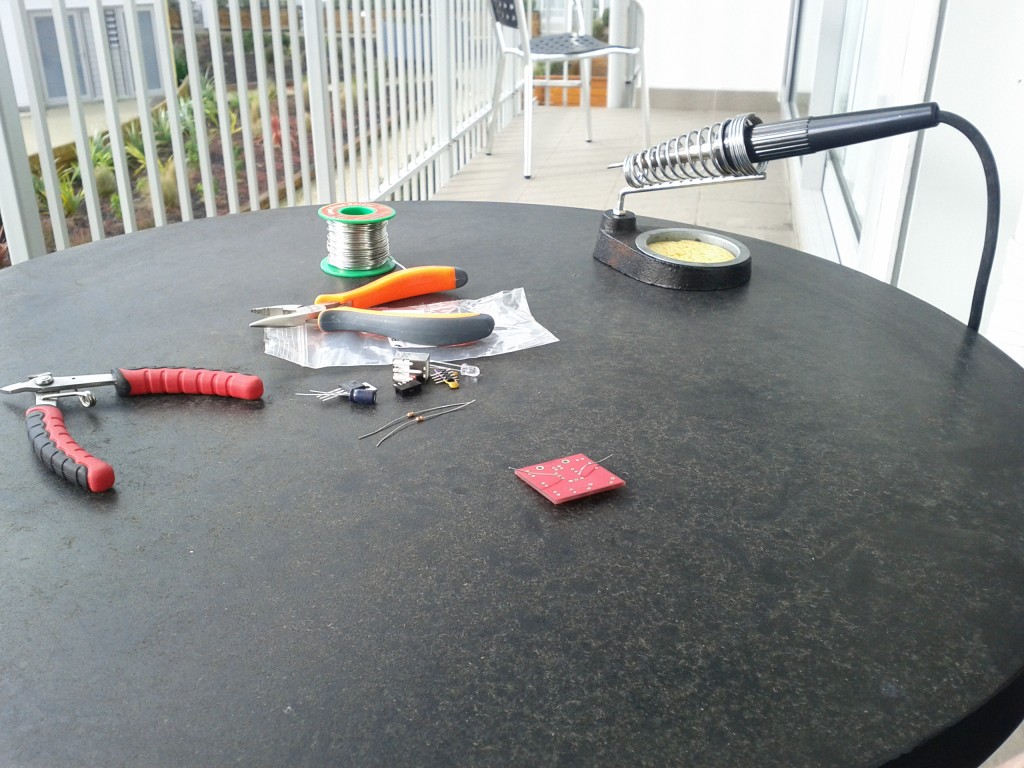
I finally managed to get around to making the time to try it out this weekend and dug out the soldering iron to tackle the challenge – past soldering exploits have never fared particularly well, but I figure sooner or later I’ll learn something and make a working device. ;-)

How hard could this possibly be? :-P

One of the biggest challenges I found was actually holding such a small PCB still, whilst trying to align solder and the iron – think one of my next purchases will be some sort of clamp to hold the board in place.

I’m not convinced that my soldering iron is particularly good either, need to do some research on the best type of soldering head (round vs chisel?). I’d probably go better with more gun shaped soldering iron than the round pencil design, I just tend to find it easier to align.

Ready, set, solder!

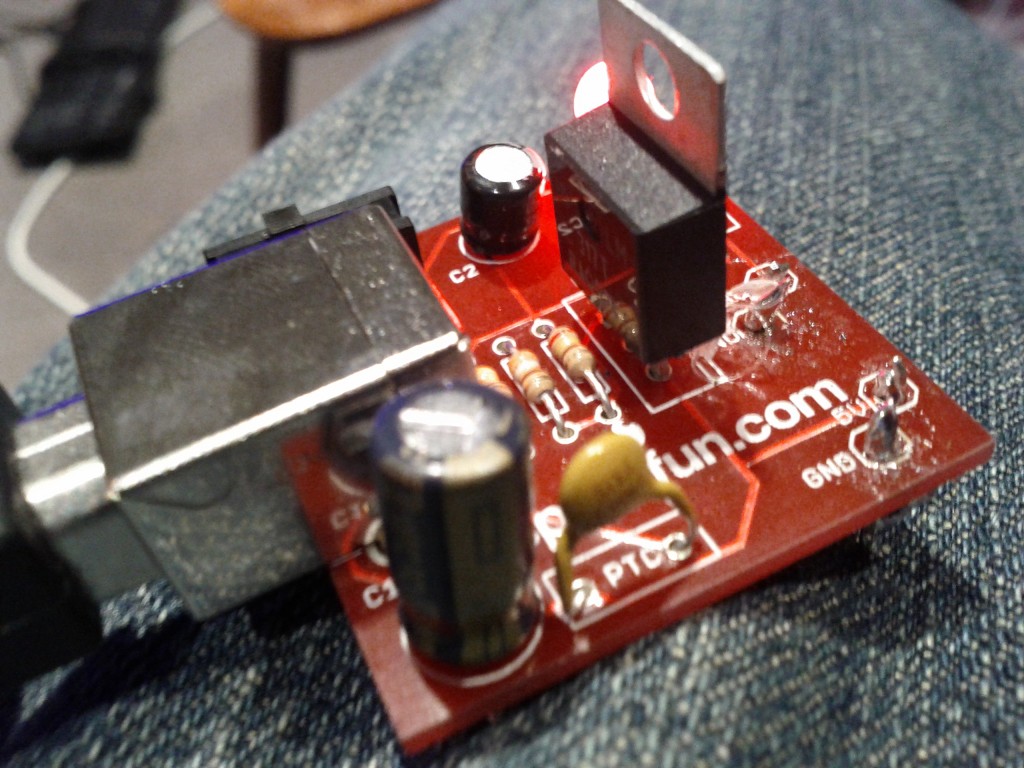
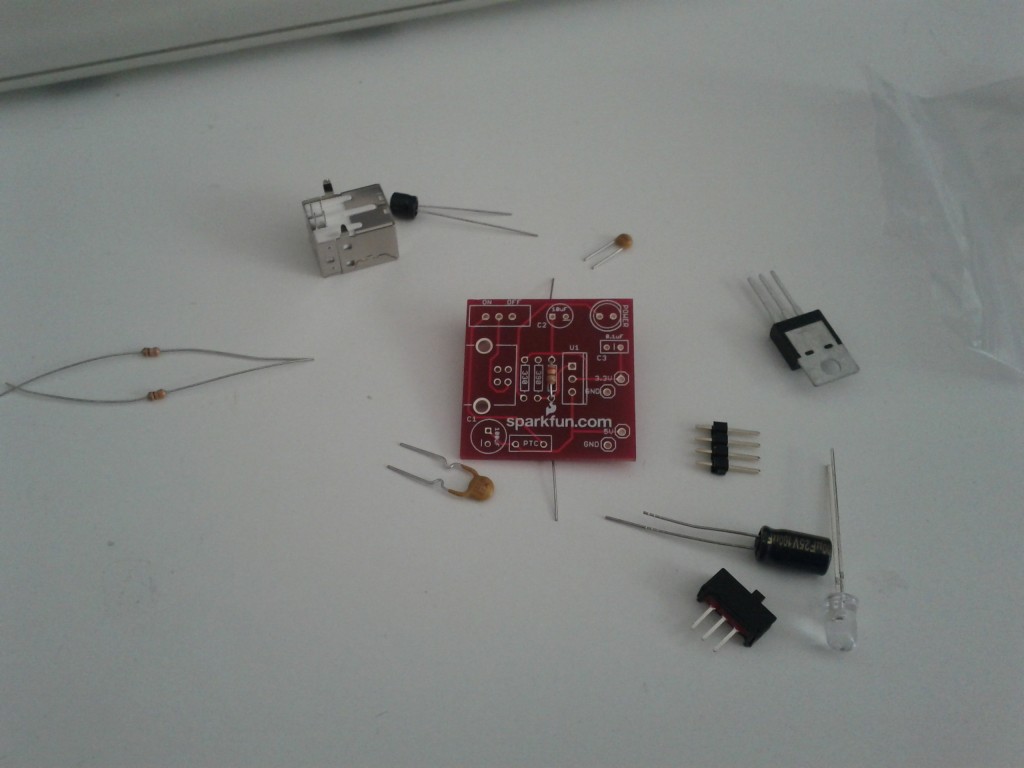
I started off doing the small components like resisters and small caps, before moving on to the voltage regular, switch, USB port and pin headers.

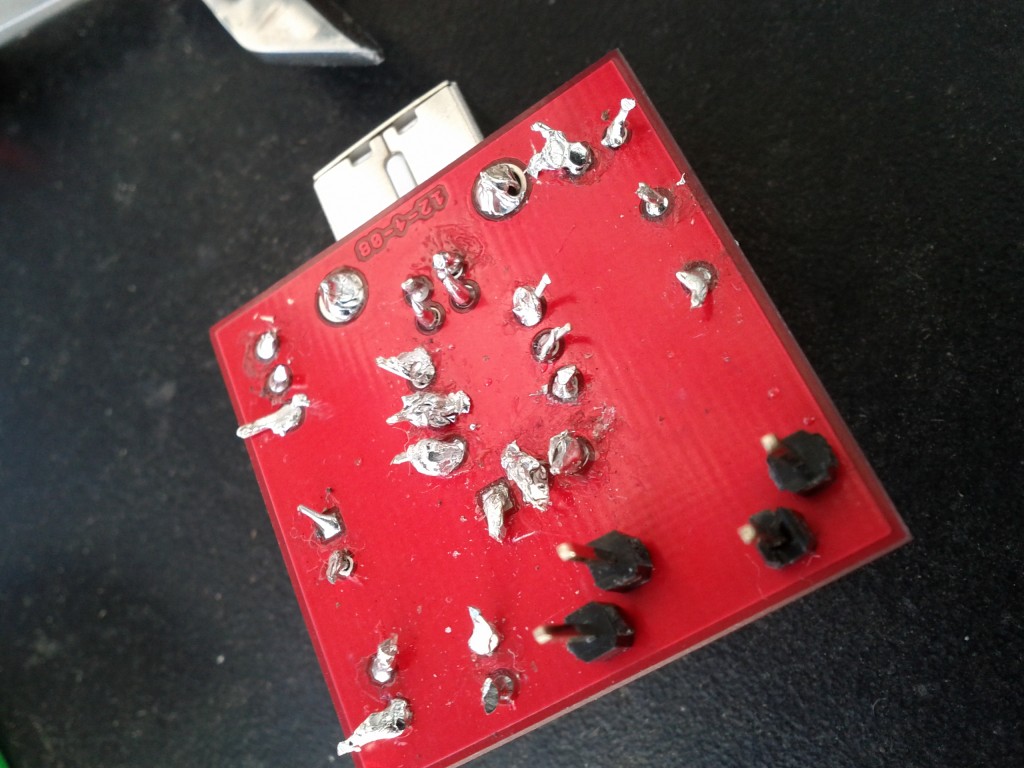
Apologies to any electrical engineers or skilled hobbyist reading this blog, but my soldering is pretty terrible, as you can see. Take note that this is the first thing I’ve soldered that actually works :-P

Oh god, oh god my eyes!

I started with the resisters in the middle, as you can see my soldering was pretty terrible there – used too much solder and ended up making large messy blobs.

Later I got better at briefly heating the legs and then applying the solder in a way that allowed it to run down and bond with the PCB, so my later joins got a lot better, eg the USB socket with it’s 4 close small pins.

I got an impromptu lesson to using a multimeter as the circuit wouldn’t work initially – I had managed to make a PSU that was always on (ignoring the switch status) and provided no 3.3V output.

Thanks to the simplicity of this kit, it was pretty easy to test each component to figure out where my bad joins were and I re-soldered a few of the bad earlier joins.

The only real headache was the voltage regulator – for some reason I had real difficulty getting the solder to bond with the middle pin and the PCB and had to redo it several times – it’s still not perfect TBH :-(

Assembled :-D

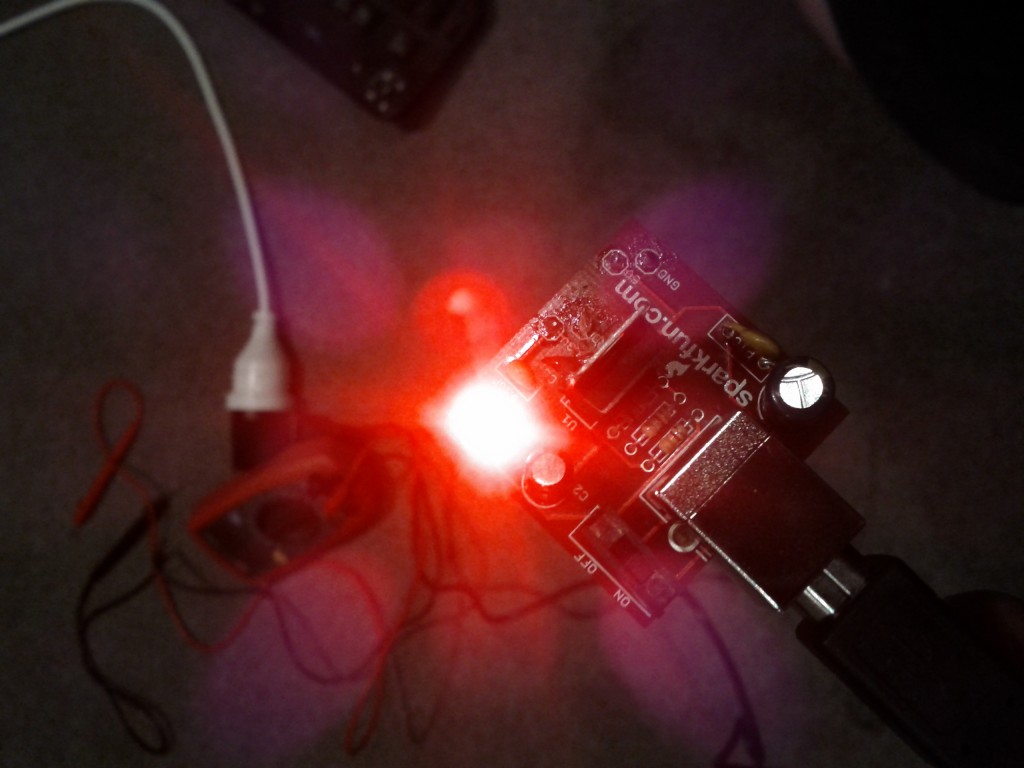
Shiny shiny! (OMG, an artsy picture without using Instagram!)

So far the kit seems pretty good, it was really easy to assemble with the clear silkscreen markings – most work I had to do was lookup the resister code/colors, which is trivial thanks to Electrodroid on my phone. :-)

The one design issue I do have with the kit, is that the positioning of the breadboard connectors requires you to break the header pins into single units, but doing this really weakens the design, since it’s just one tiny solder joint holding the pin to the PCB – I do fear the force of inserting and removing from breadboards will wear it down a bit over time.

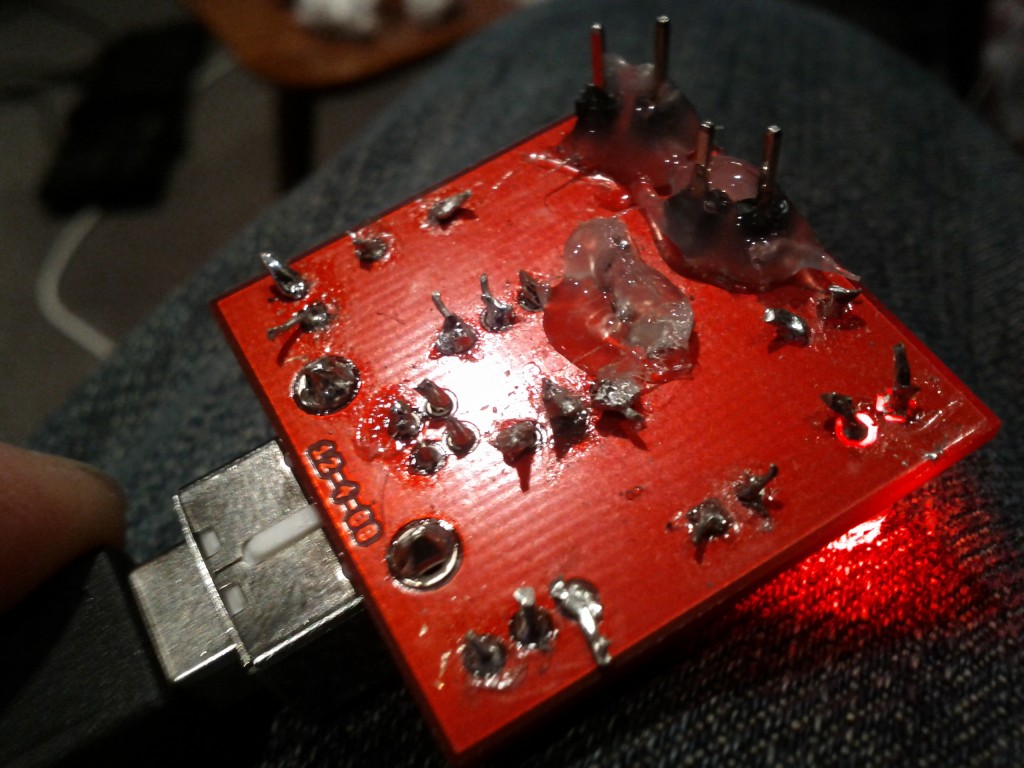
To counter this a bit, I’ve stuck a blob of hot glue around the headers, to give them a bit more integrity – although the 3.3V pin soldering joint is playing up and might need redoing anyway.

Hot glue solves all! (also stuck some around the voltage regulator as one of the solder joints isn't that great, but I can't fix it without risking ruining the PCB trace)

Looking at the round-DC connector version of the kit, the design instead has two pairs of 2x pin headers, which I suspect will make it a bit more sturdy.

Overall whilst it’s a painful learning curve trying to get the soldering right, I didn’t burn myself *too* badly and whilst not a shining example of art, the board works and powers up.

Next time, I’ll be tackling the RS232 shifter kit and then working to hook up an RS232 power to an Arduino’s digital pins using a software serial driver. And after that, I might have a go at making some temperature sensor 1-wire boards to install around my server case using the small square prototyping boards I brought.

Hopefully by then my soldering will be an acceptable level. :-)

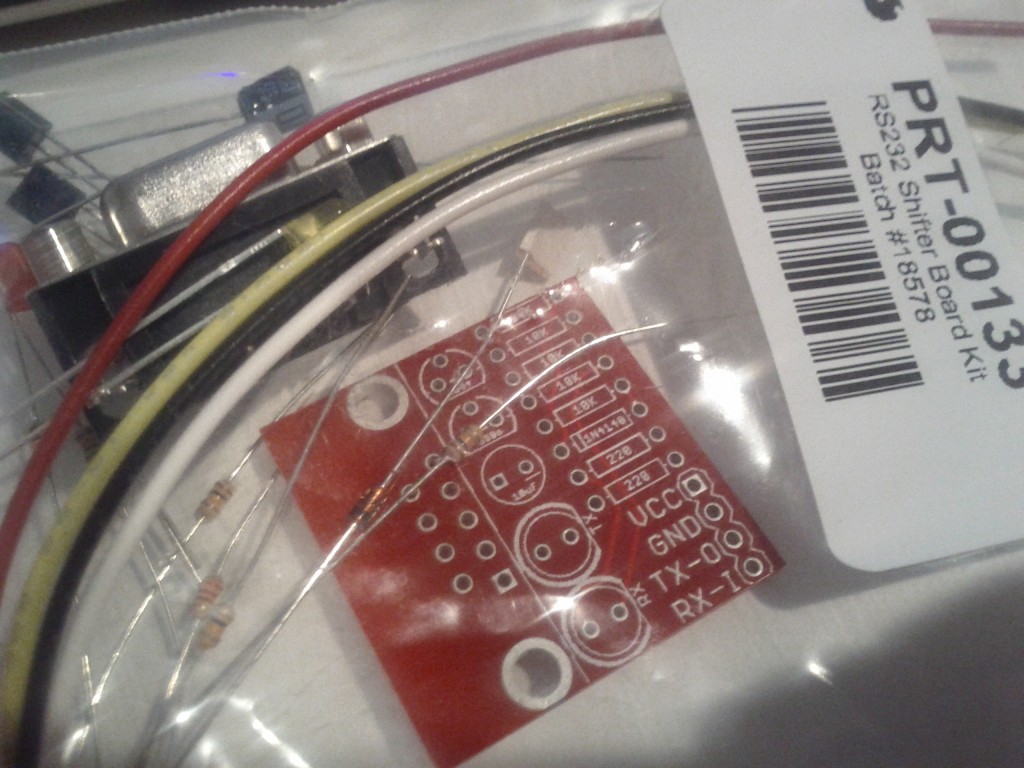
Next kit to make - the RS232 shifter, with lots of lovely close resisters to solder.

Lenovo & tp-fan fun

I quite like my Lenovo X201i laptop, I’ve been using it for a couple years now and it’s turned out to be the ideal combination of size and usability – the 12″ form factor means I can carry it around easily enough, it has plenty of performance (particularly since I upgraded it to an SSD and 8GB of RAM) and I can see myself using it for the foreseeable future.

Unfortunately it does have a few issues… the crappy “Thinkpad Wireless” default card that comes in it caused me no end of headaches and the BIOS has always been a

Thankfully most of the major BIOS flaws have been resolved in part due to subsequent updates, but also thanks to the efforts of the Linux kernel developers to work around weird bits of the BIOS’s behavior.

Sadly not all issues have been resolved, in particular, the thermal management is still flawed and fails to adequately handle the maximum heat output of the laptop. I recently discovered that when you’re unfortunate enough to run some very CPU intensive single-threaded processes, by keeping 1/4 cores at 100% for an extended period of time the Lenovo laptop will overheat and issue an emergency thermal shutdown to the OS.

During this time the fan increases in speed, but still has quite a low noise level and airflow volume, which is very hot to the touch, it appears the issue is due to the Lenovo BIOS not ramping the fan speed up high enough to meet the heat being produced.

Thanks to the excellent Thinkwiki site, there’s detailed information on how you can force specific fan speeds using the thinkpad_acpi kernel module, as well as details on various scripts and fan control solutions people have written.

What’s interesting is that when running the fan on level 7 (the maximum speed), the fan still doesn’t spin particularly fast or loudly, no more than when the overheating occurs. But reading the wiki shows that there is a “disengaged” mode, where the fan will run at the true maximum system speed.

It appears to me that the BIOS has the 100% speed setting for the fan set at too low a threshold, the smart fix would be to correct the BIOS so that 100% is actually the true maximum speed of the fan and to scale up slowly to keep the CPU at a reasonable temperature.

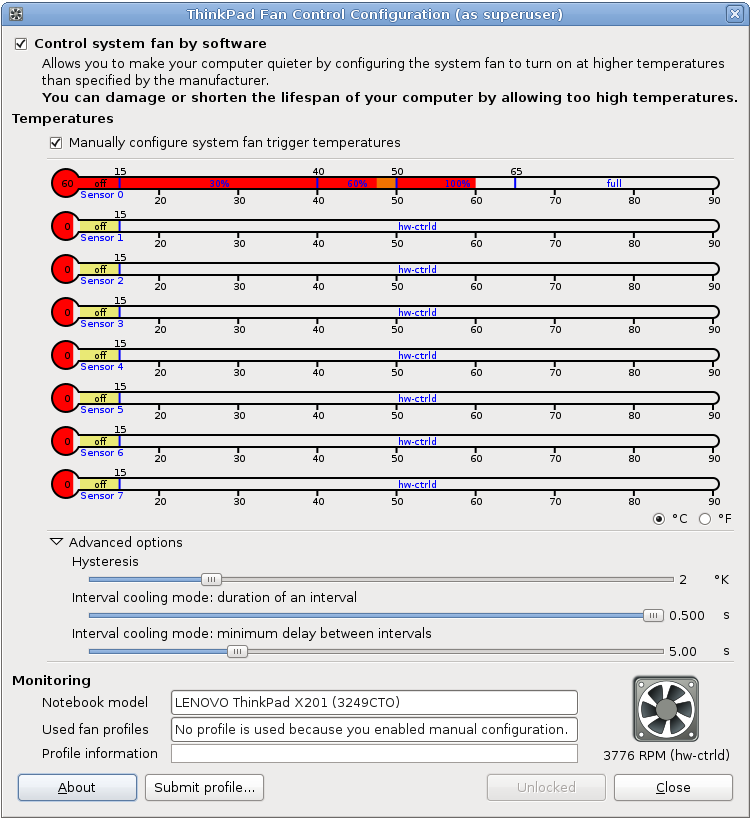
In order to fix it for myself, I obtained the tp-fan program, which runs a python daemon to monitor and adjust the fan speeds in the system based on the configured options. Sadly it’s not able to scale between “100%” and “disengaged” speeds, meaning I have the choice of quiet running or loud running but no middle ground.

Thanks to tpfan’s UI, I was able to tweak the speed positions until I obtained the right balance, the fans will now run at up to 100% for all normal tasks, often sitting just under 50 degrees at 60% fan speed.

When running a highly CPU intensive task, the fan will jump up to the max speed and run at that until the temperature drops sufficiently.  In practice it’s worked pretty well, I don’t get too much jumping up and down of the fan speed and my system hasn’t had any thermal shutdowns since I started using it.

Whilst it’s clearly a fault with the Lenovo BIOS not handling the fans properly, it raised a few other questions for me:

  • Why does the OS lack logic to move CPU intensive tasks between cores? Shuffling high intensive loads between idle cores would reduce the heat and require less active cooling by the system fans – even on a working system that won’t overheat, this would be a good way to reduce power consumption.
  • Why doesn’t the OS have a feature to throttle the CPU clock speed down as the CPU temperature rises? It would be better than having the all or nothing approach that it currently enforces, better to have a slower computer than a fried computer.

Clearly I need some more free time to start writing kernel patches for my laptop, although I fear what new dangerous geeky paths this might lead me into. :-/

MOTAT Visit

Whilst I’ve been in Auckland for about 8 months now and driven past it a number of times, I had yet to visit the Auckland Museum Of Transport And Technology (MOTAT). However this month (June) there’s free entry for all visitors, which gave me a pretty compelling reason to head over there and check it out. :-)

Being a free weekend, it was pretty nuts with huge crowds there, but the staff did a great job and once we got in, as long as we avoided the major kids-focused attractions, the crowds weren’t an issue.

And wow, I’m glad I went. It’s actually one of the best things I’ve found in Auckland –  huge range of trams, from Wellington, Auckland and Melbourne, a massive aviation display and a solid number of trains, cars and other displays including Antarctic machines, Kiwiana display, old printing systems and a Victorian village.

Definitely the place to take geeky out-of-towners wanting something to see other than just traffic jams and the sky tower whilst in Auckland. ;-)

Motorised Auckland Fire Truck

Seeing how exposed drivers were on early cars are trucks is amazing, it must have been like driving whilst sitting on a park bench…. and no such thing as a seatbelt, or even doors to stop yourself from falling out sometimes :-/

I didn’t get many pictures of the other cars they have, although there’s a big selection of icon cars from the 20th century – quite surprising seeing how big some of the early models were, compared to the compact size of modern vehicles – some of their engines must have been at least 4 times the physical size of my modern 1.3l engine.

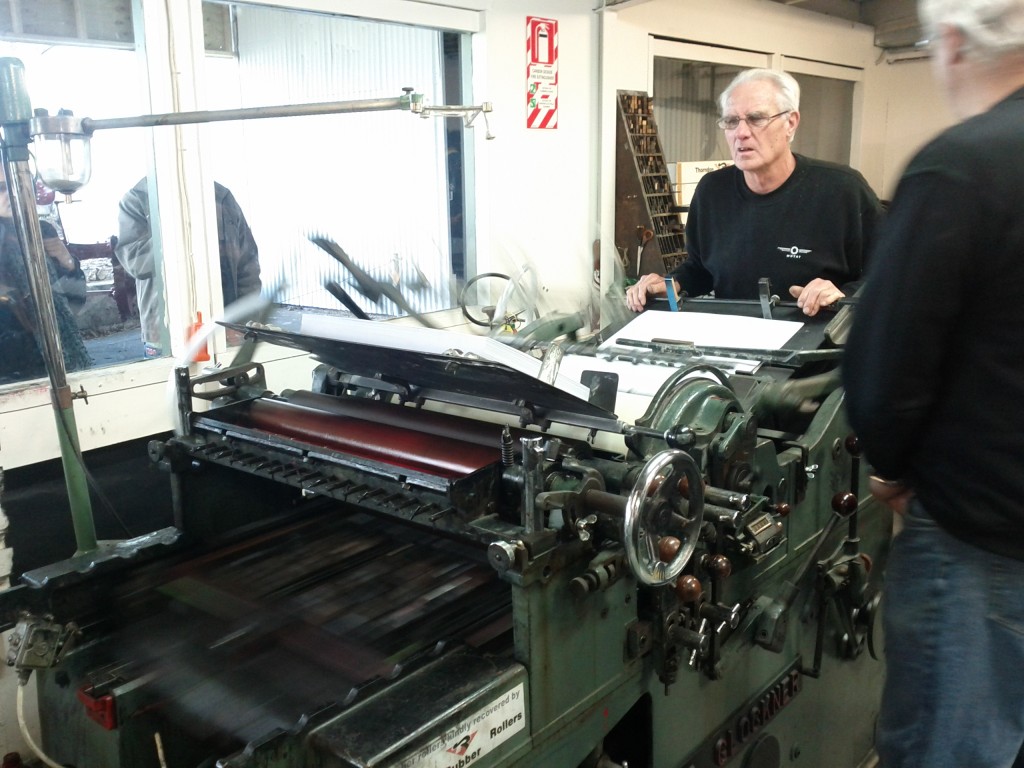
Mechanical printing press.

The mechanical printing press was pretty interesting to watch – the machine has an arm with various suction cups on it, which is used to pickup each sheet of paper and feed it into the print rollers.

The photo doesn’t really do it justice, so I’ve uploaded a youtube video of it in action here, you wouldn’t expect something that looks like such a crude mechanical machine to do such as accurate job of feeding and printing the pages.

Wonder how long until the news paper printing presses of the 2000s era end up in there as well, with the shift to digital it might not be that much longer…

Trams! And a Melbourne tram no less! :-D

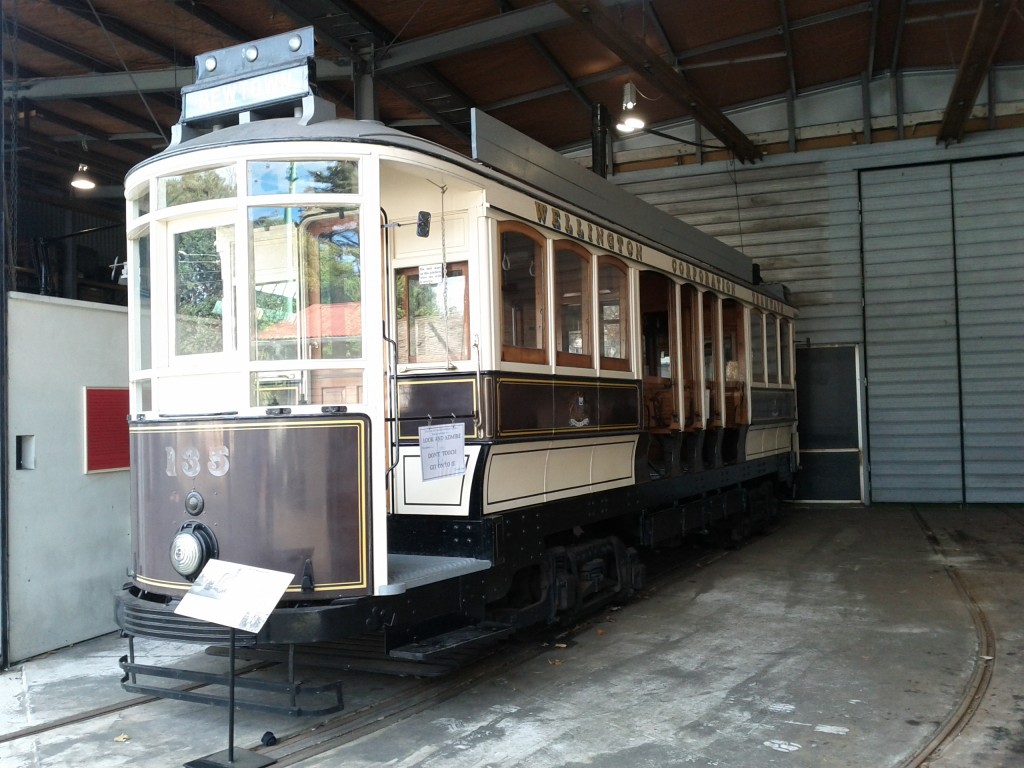
Wellington Tram! (double <3)

Steam powered tram - it's effectively an engine only, designed to pull/push tram trailers.

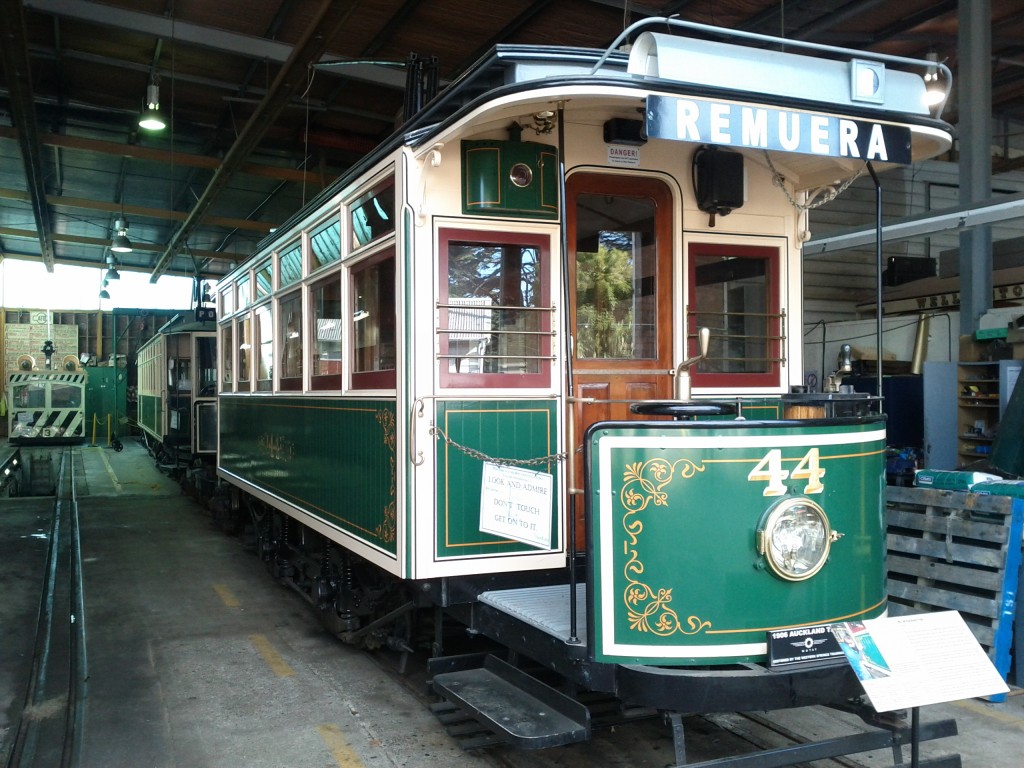
Auckland Tram!

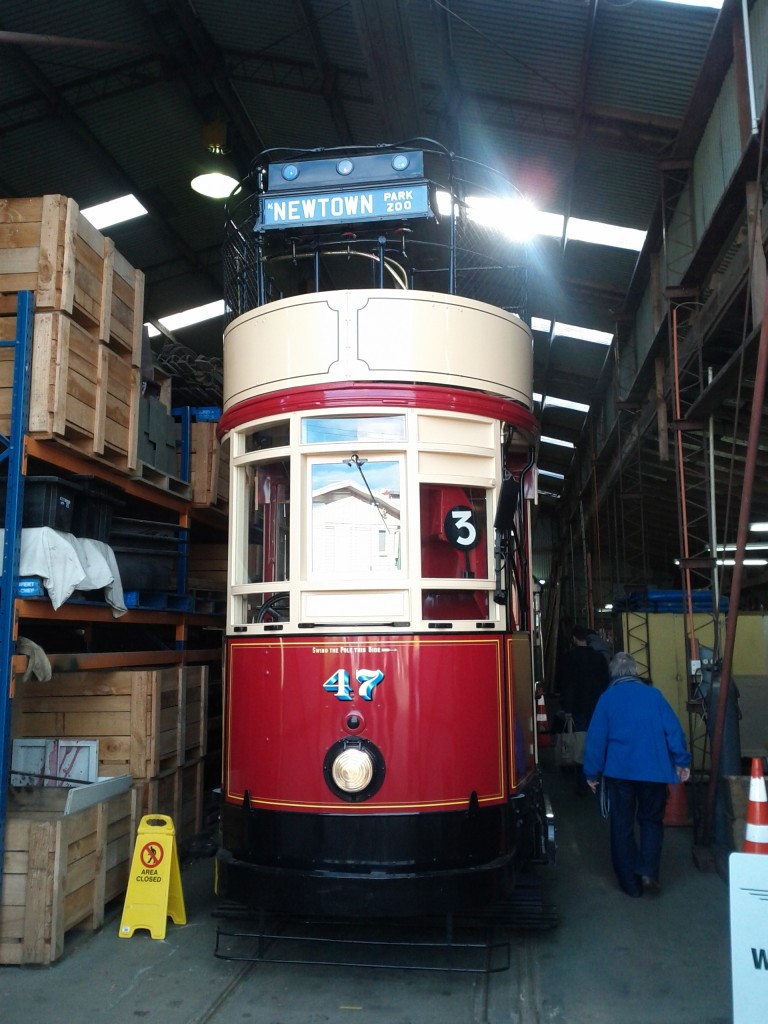
Double decker Wellington tram! I wonder how popular the upstairs was on a cold windy Wellington day. :-/

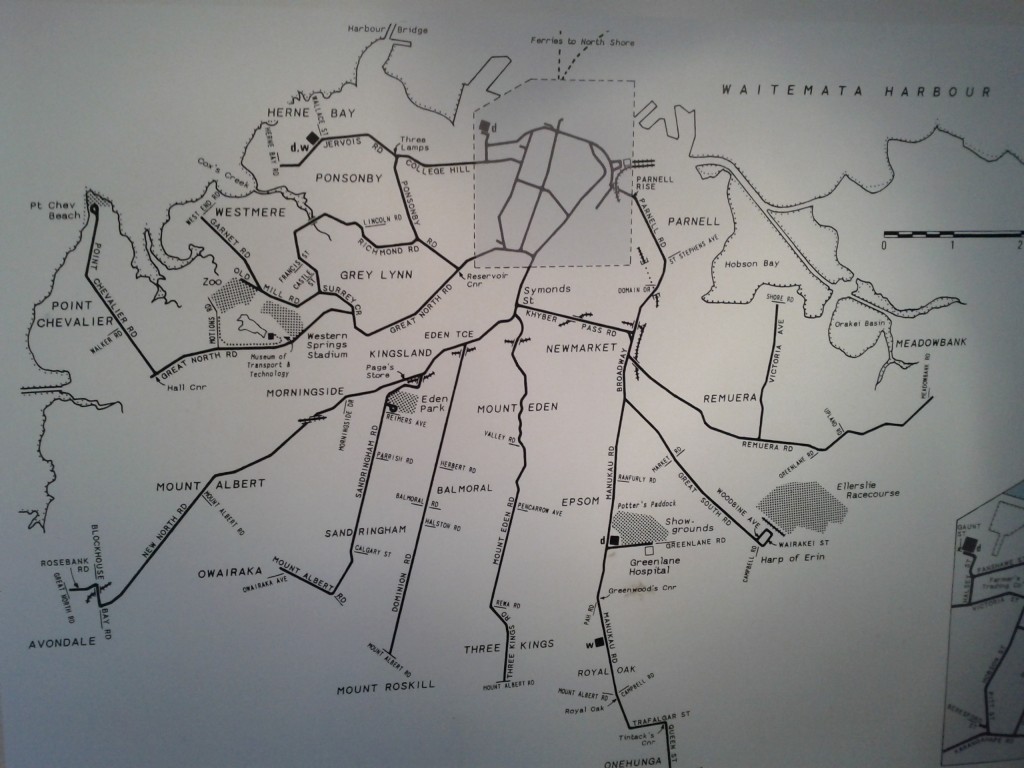
Map of Auckland's tram network - really wish they had kept it, Auckland needs all the public transport it can get. :-/

Trams on Queen Street.

It’s probably pretty clear that I love trams and MOTAT offers a great experience with a large number of them in excellent condition, as well as a number of ongoing restoration projects in the works, including an interesting sounding “freight tram”.

There’s at least a couple Melbourne trams and several trams from Wellington which are in good running condition, not sure about the Auckland ones, but they look pretty good so I presume they may also be in running condition,

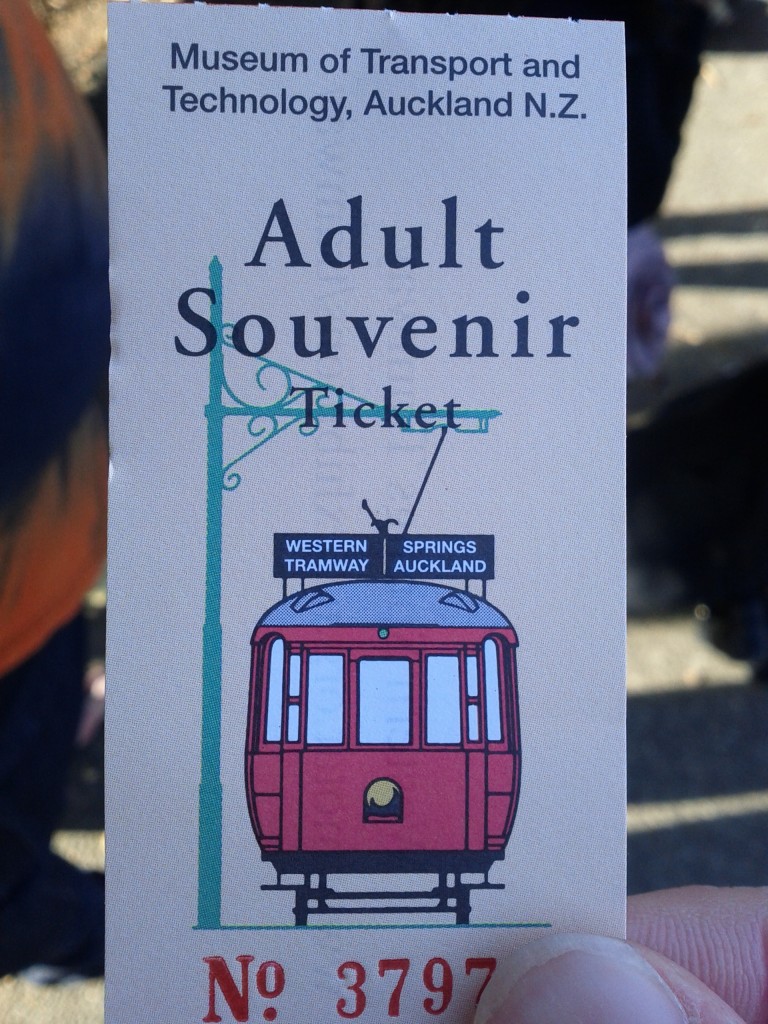
What’s really cool is that since MOTAT is split into two sites, they run several trams regularly which you can ride between the two sites, with an in-between station at Auckland Zoo – you get a free return ticket with your MOTAT entrance fee.

Tram ride ticket :-D

Historical sandwich maker :-P (just kidding dear! don't hurt me!)


The mini from Goodbye Pork Pie

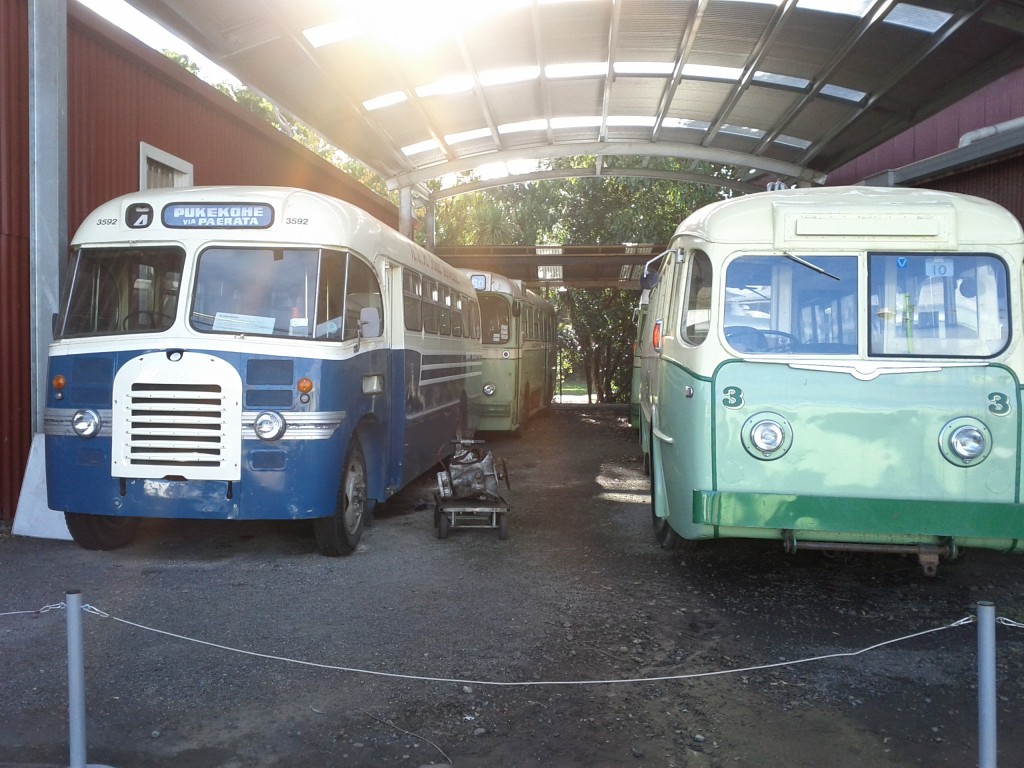
Retro buses!

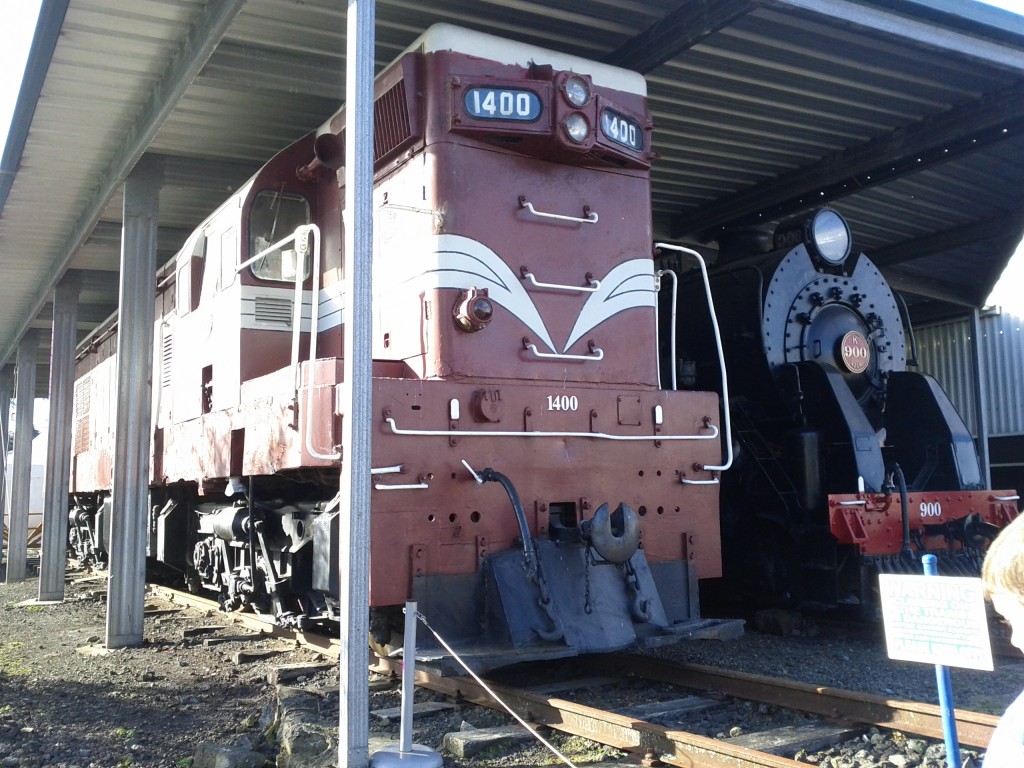
Massive locomotives - would love to see that steam train when it was running!

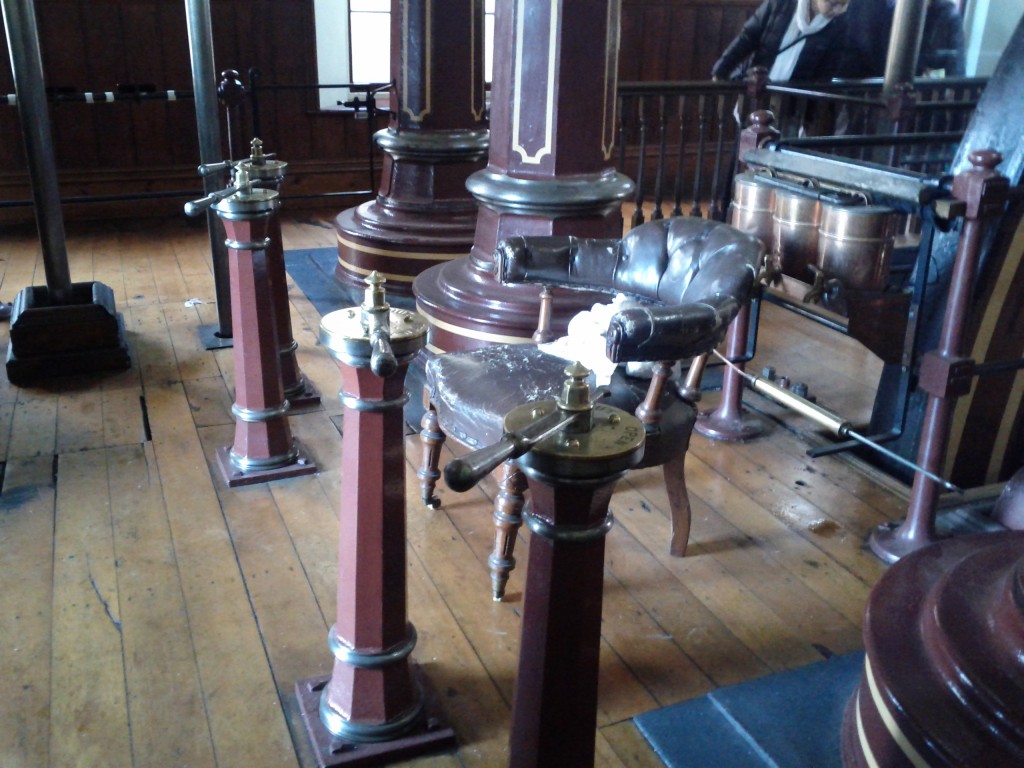
Steam punk throne! m/

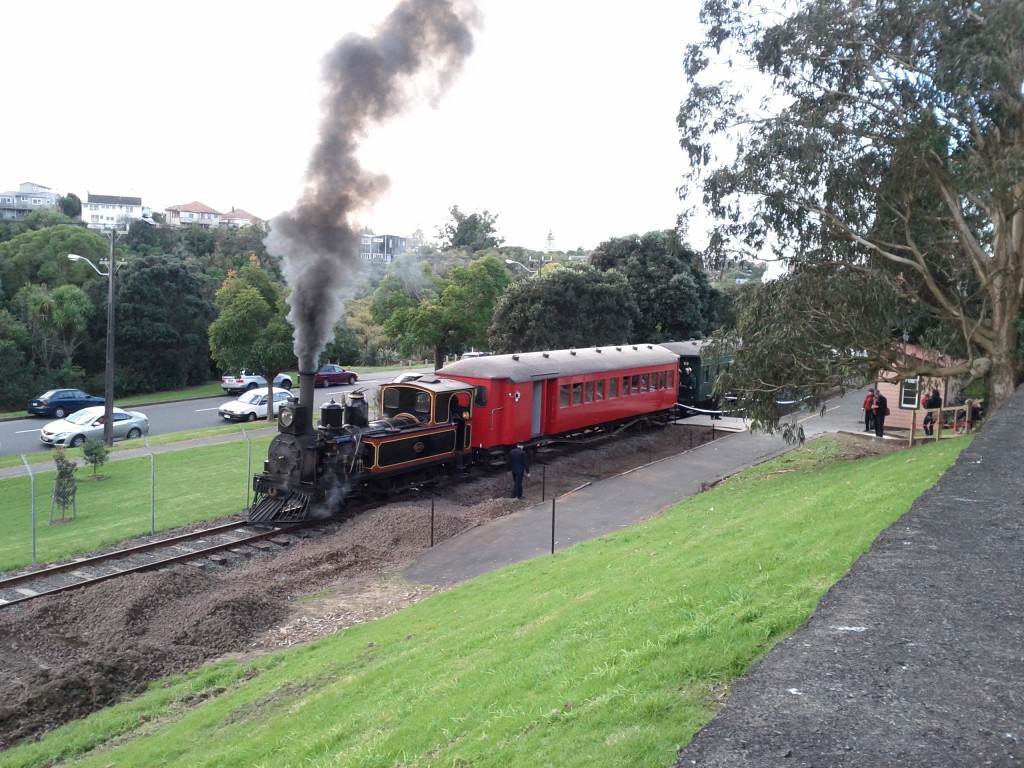
OMG OMG OMG steam train!!

I was fortunate in that I chose to come on the right weekend, as the steam train only runs on select Sundays. Whilst it’s not a long run of track, it’s always a treat to see steam locomotives when running – I took a video and uploaded to youtube of the train running. :-D

Standing on trams is great for holding cute females closely. Watch out Melbourne ladies! ;-)

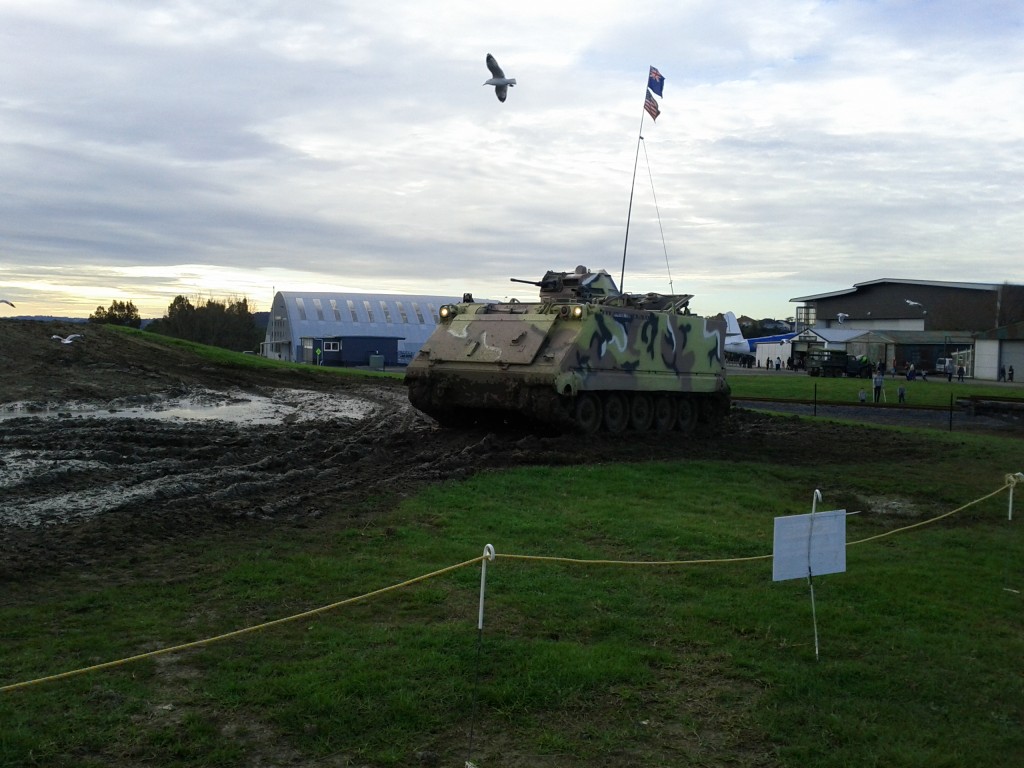
Tank rides! I didn't get a chance to go on it myself, but looks quite fun. They move surprisingly quickly over the muddy field too

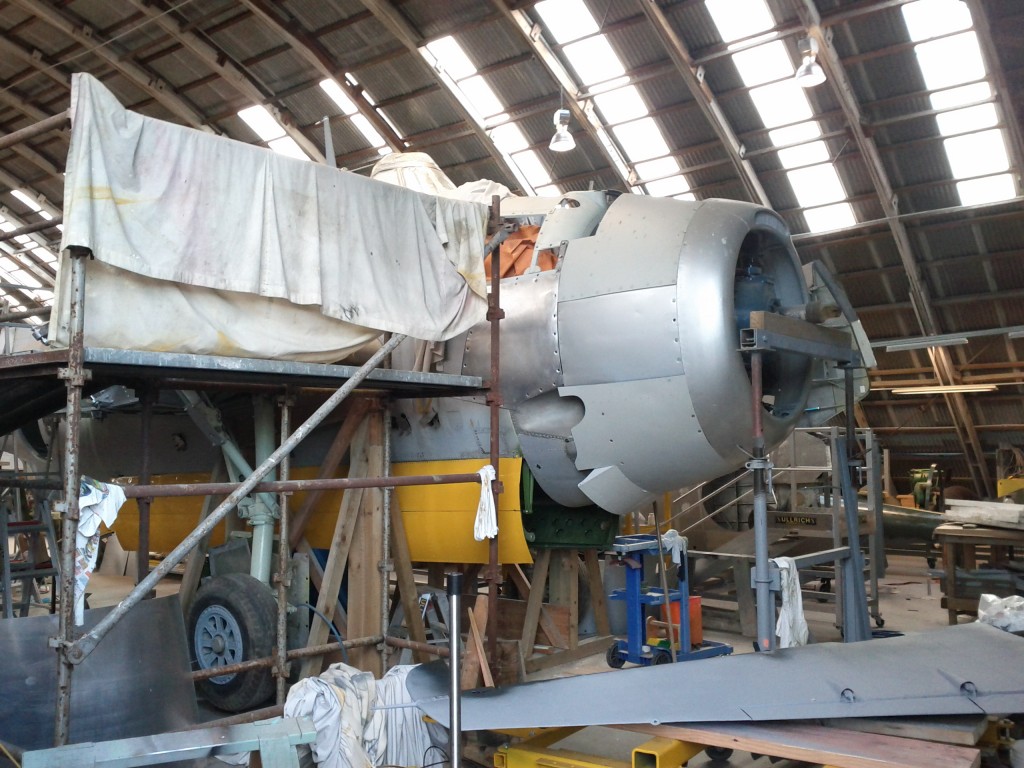
Quite neat seeing planes in various stages of assembly in the workshop.

Lots of planes outside in various conditions, many military options, some DC3s and some sea planes.

Massive sea plane - size becomes really noticeable when you see the people on the ground near it.... it amazes me that these things actually fly sometimes.

Avro Lancaster Bomber

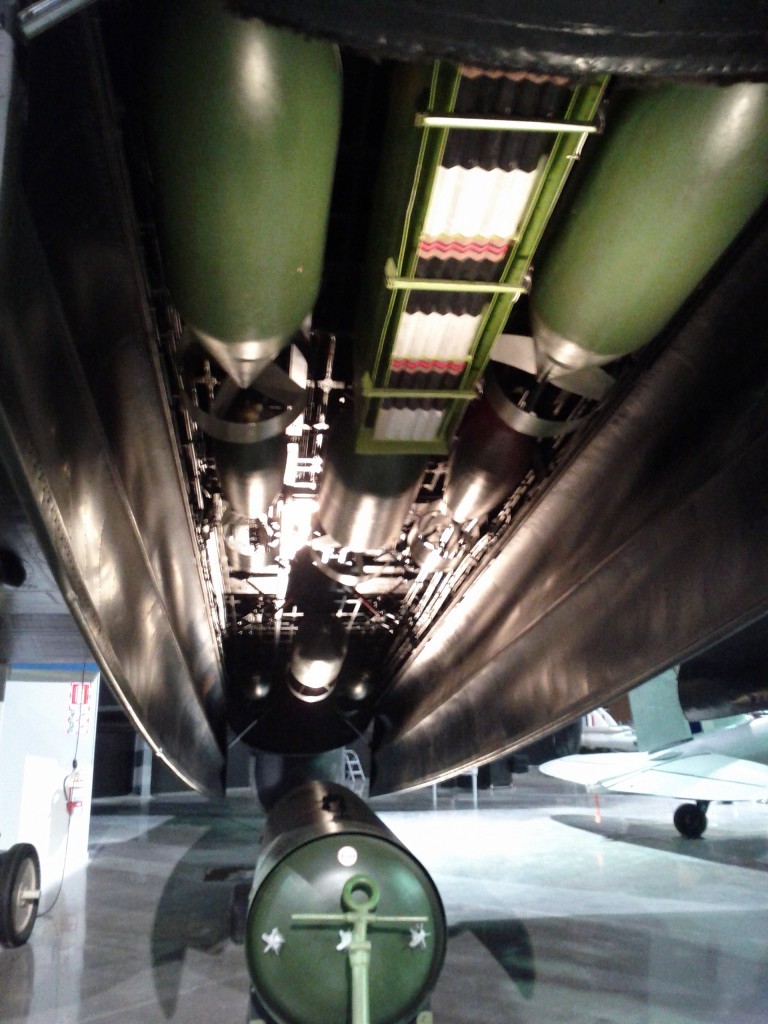
Bombing bay... I wouldn't want to be anywhere near bombs that size when they drop....

The Avro Lancaster is one of the best pieces in the aviation hall – it’s got to be one of the most famous and well known aircraft of the war, but for all the pictures and videos, you don’t really realize how massive the aircraft really is until you get up close to it IRL.

Especially the massive tires, rather than modern designs with groups of numerous smaller tires, the Lancaster has two massive tractor-sized tires that retract up into the wing.

Apparently one of my great grandfathers was on these during WW2, although I’m unsure of his exact position/role onboard.

Ah, the NZ skyhawks.... the most action they ever got was firing a warning shot over the bow of an illegal fishing ship, then got to sit in plastic wrap for years until the government decided nobody wanted to buy them, so scrapped them.

Aerial Mapping Plane

Large number of interesting bombers like this around the hall.

Old NZ Air Force VIP transport.

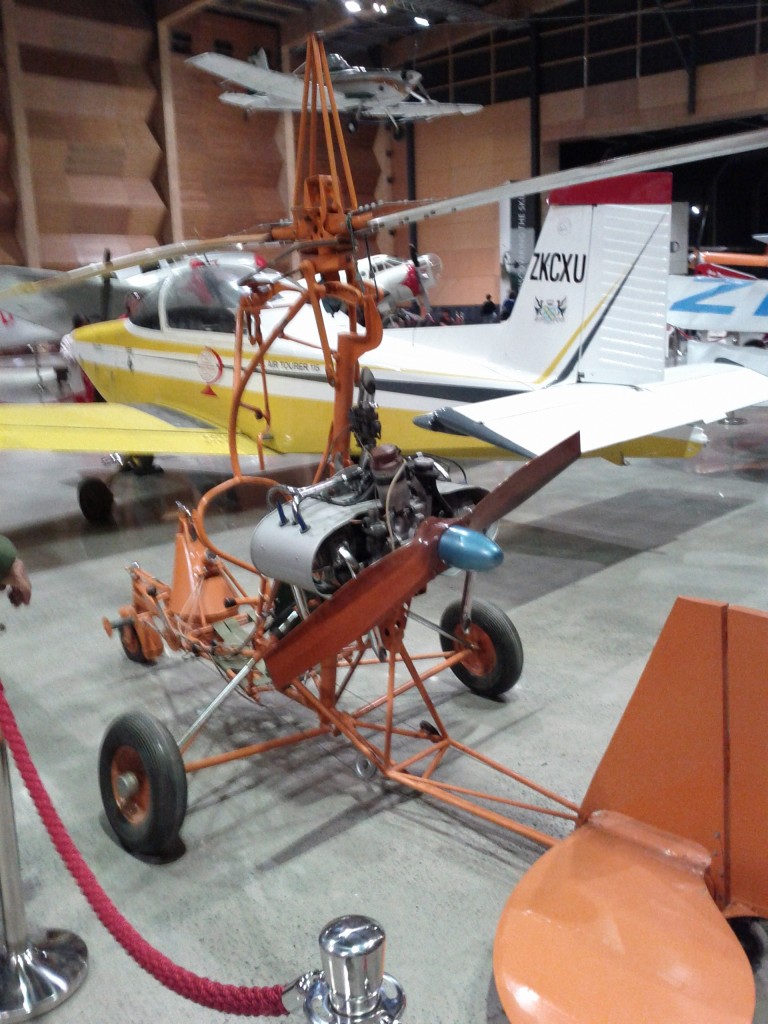
NZ-build Gyrocopter :-D

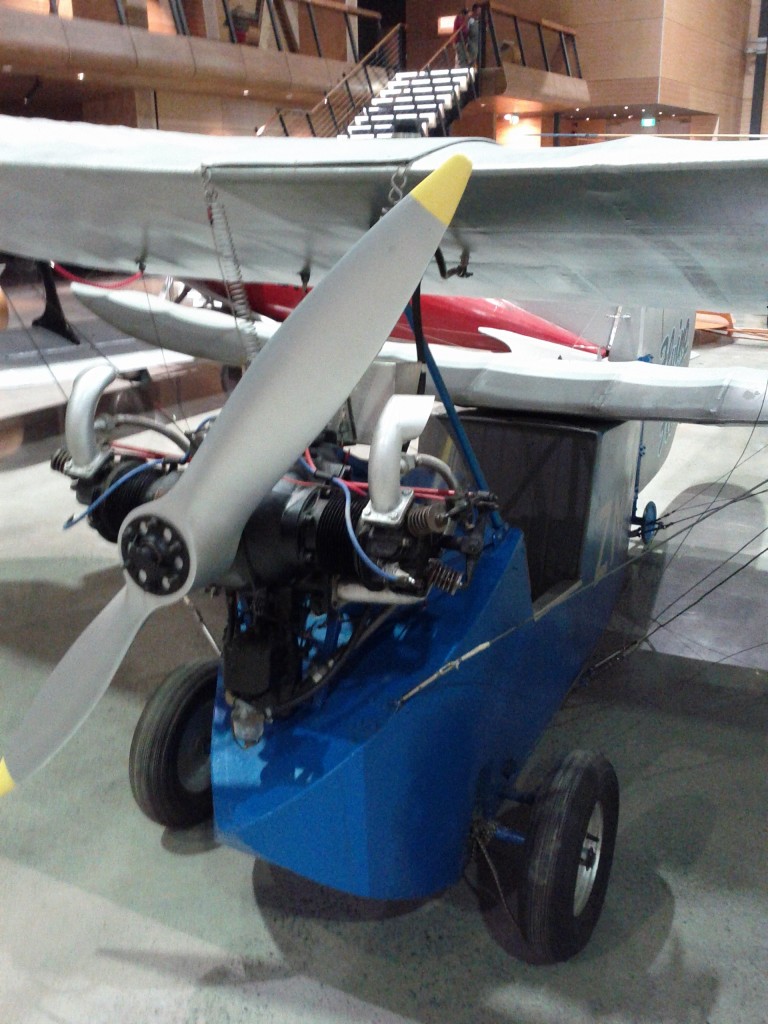
"Flying Flea" kitset aircraft

Overall it was a pretty excellent trip – we spent about 3 hours there, but I could have spent maybe 5 or 6 even, if you stopped to do everything and took the time to watch more of the scheduled activities and events.

It’s actually one of the few touristy things that I’d be happy to pay the entrance fee for, at $14 per adult, it’s pretty cheap – especially when compared to other Auckland attractions like Kelly Tartons ($34 per adult, maybe 2hrs activity at most).

It’s easy to get to with a car, there’s an abundance of parking, and there’s also a bus stop right outside if you’re going to brave the Auckland public transport system. :-)

Keeping Android Wifi Awake

I run a number of backgrounded applications on my Android phone, such as Nagios (server monitoring) CSipSimple (VoIP/SIP), OpenVPN (SSL-based VPN) and IMAP idle (push email).

Whilst this does impact battery life somewhat, I’ve got things reasonably well tuned so that the frequency of polling and keepalives is just long enough to prevent firewall timeouts, but long enough to avoid excessive waking of 3G & wifi hardware.

(For example, the default OpenVPN keepalive of 10 seconds is far more aggressive than what is actually needed, in reality, I was able to drop my phone back to one keepalive every 5 minutes – short enough to keep sessions active, but long enough that the transmitting hardware can sleep regularly whilst it isn’t needed).

However one problem I wasn’t able to fix, was the amount that the wifi disconnected – this would really screw up things, since services such as IMAP idle and SIP were trying to run over the VPN, but this would be broken by the VPN being dropped when wifi turned itself off.

I found the fix thanks to a friend who came around and told me about the hidden “Advanced” menu in the wifi network selection page:

When on the wifi network selection screen, you need to press the menu key (not sure what the option is for newer Android phones that don’t have the menu key any more?) and then a single “Advanced” menu item will appear.

Selecting this item will give you a couple extra options, including the important “Keep Wi-Fi on during sleep” option that stops the phone from dropping the wifi connection whenever you turn off the screen.

This resolved my issues with backgrounded services and I found it also made the phone generally perform better when doing any data-related services, since wifi didn’t have to renegotiate with the AP as frequently.

It’s not totally perfect, Android seems to sometimes have an argument with the AP and then drop the connection and waste a minute trying to reconnect, but it’s a lot better than it was. :-)

cifs, ipv6 and rhel 5

Unfortunately with my recent project enabling IPv6 across my entire personal server environment, I’ve bumped into a number of annoying issues – nothing that isn’t fixable, but things that are generally frustrating and which just shouldn’t be an issue.

Particular thanks goes to my many RHEL/CentOS 5 virtual machines, which lack some pretty key stuff such as:

  • IPv6 connection tracking preventing the ESTABLISHED,RELATED ip6tables rules from working.
  • Unexpected behavior of certain bootscript configuration options.
  • Lack of IPv6 support with CIFS (Samba/SMB) share mounting.
  • Some weirdness with Dovecot I still need to resolve.

(Personally, based on the number of headaches I’ve found with RHEL 5, my recommendation is accelerate any plans to upgrade to RHEL 6 – or some other distribution – before deploying IPv6 in production.)

At the moment, CIFS IPv6 support on RHEL 5 & 6 has been causing me the most pain. My internal file server is dual stacked and has both A and AAAA DNS records – it’s a stock-standard CentOS 6 box running distribution-shipped Samba packages and works perfectly from the server side and modern IPv6 hosts have no issue mounting the shares via IPv6.

Very typical dual stack configuration:

# host fileserver.example.com 
fileserver.example.com has address 192.168.0.10
fileserver.example.com has IPv6 address 2001:0DB8::10

However, when I run the following legitimate and syntactically correct command to mount the CIFS share provided by the Samba server on other RHEL 5 hosts, it breaks with a error message that is typical of incorrect syntax with the mount options:

# mount -t cifs //fileserver.example.com/tmp /mnt/tmpshare -o user=nobody
mount: wrong fs type, bad option, bad superblock on //fileserver.example.com/tmp,
       missing codepage or other error
       In some cases useful info is found in syslog - try
       dmesg | tail  or so

Taking a look a the kernel log, it shows a non-descriptive error explanation:

kernel:  CIFS VFS: cifs_mount failed w/return code = -22

This isn’t particularly helpful, made more infuriating by the fact that I know the command syntax is correct and should be working perfectly fine.

Seeing as a number of things broke after switching on IPv6 across the entire network, I’ve become even more of a cynical bastard and ran some tests using specifically stated IPv6 and IPv4 addresses in the mount command.

I found that by passing the IPv6 address instead of the DNS name, you can produce the additional error message which offers some additional insight:

kernel: CIFS: ip address too long

Huh. Looks like a text book IPv6 support bug to me. (Even I have made this mistake in some older generation web apps that didn’t foresee long 128-bit addresses).

In testing, I found that the following commands are all acceptable on a dual-stack network with a RHEL 5 host:

# mount -t cifs //192.168.0.10/tmp /mnt/tmpshare -o user=nobody
# mount -t cifs //fileserver.example.com/tmp /mnt/tmpshare -o user=nobody,ip=192.168.0.10

However all ways of specifying IPv6 will fail, as well as pure DNS resolution:

# mount -t cifs //2001:0DB8::10/tmp /mnt/tmpshare -o user=nobody
# mount -t cifs //fileserver.example.com/tmp /mnt/tmpshare -o user=nobody,ip=2001:0DB8::10
# mount -t cifs //fileserver.example.com/tmp /mnt/tmpshare -o user=nobody

No method of connecting via IPv6 would work, leaving stock RHEL 5 hosts only being able to work with CIFS shares via IPv4. :-(

Unfortunately this error is due to a known kernel bug in 2.6.18, which was fixed in 2.6.31, but sadly not backported to RHEL 5’s kernel (as of version 2.6.18-308.8.1.el5 anyway), leaving RHEL 5 users in a position where the stock OS is unable to mount CIFS shares on an IPv6 or dual-stacked network. :-(

The ideal solution would be to patch the kernel to resolve the issue – and in fact if you are running on a native IPv6-only (not dual stacked), it would be the only option to get a working solution.

However, typically if you’re using RHEL, custom kernels aren’t that popular due to the impact they make to supportability/guarantee of the platform by vendor and added headaches of security update tracking and application, so another approach is needed.

The following methods will all work for stock RHEL/Centos 5:

  • Use the ip=X mount option to overule DNS.
  • Add an entry to /etc/hosts.
  • Have a separate DNS entry that only has an A record for your file servers (ie //fileserverv4only.example.com/)
  • Disable IPv6 entirely (and suffer the scorn of your cooler IPv6 enabled friends).

These solutions all suck – having manually fixed IPs isn’t great for long term supportability, additional DNS records is an additional pain for management, and let’s not even begin to cover why disabling IPv6 entirely is wrong.

Of course RHEL 5 is a little outdated now, so I took a look at how RHEL 6 fared. On the plus side, it *can* mount IPv6 shares, all of the following mount commands are accepted without fault:

# mount -t cifs //192.168.0.10/tmp /mnt/tmpshare -o user=nobody
# mount -t cifs //2001:0DB8::10/tmp /mnt/tmpshare -o user=nobody
# mount -t cifs //fileserver.example.com/tmp /mnt/tmpshare -o user=nobody,ip=192.168.0.10
# mount -t cifs //fileserver.example.com/tmp /mnt/tmpshare -o user=nobody,ip=2001:0DB8::10

However, any mount of a IPv6 server using the DNS name will still fail, just like how they did with RHEL 5:

# mount -t cifs //fileserver.example.com/tmp /mnt/tmpshare -o user=nobody

The solution is that you need to install the “cifs-utils” package which provides the /sbin/mount.cifs binary offering smarter handling of shares – once installed, all mount command options will work OK on RHEL 6, including the standard DNS-based command we all know and love. :-D

I had always assumed that all Linux systems that could mount CIFS shares had the /sbin/mount.cifs binary installed, but it seems that’s not the case, rather the standard /bin/mount command can handle mounting CIFS using just the standard kernel mount() function

However when /bin/mount detects a /sbin/mount.FILESYSTEM binary, it will call that process instead of calling the kernel mount() directly, these binaries can offer additional logic and handling off the mount command before passing it through to the Linux kernel.

For example, the following strace from a RHEL 5 host shows that /sbin/mount checks for the existence of /sbin/mount.cifs, before then going on to call the Linux kernel mount() directly with the provided arguments:

stat64("/sbin/mount.cifs", 0xbfc9dd20)  = -1 ENOENT (No such file or directory)
...
mount("//fileserver.example.com/tmp", "/mnt", "cifs", MS_MGC_VAL, "user=nobody,password=nobody") = -1 EINVAL (Invalid argument)

But a RHEL 6 host with cifs-utils installed provides /sbin/mount.cifs, which appears to do it’s own name resolution, then establishes a connection to both the IPv4 and IPv6 sockets, before deciding which to use and instructs the kernel using the ip=X parameter.

stat64("/sbin/mount.cifs", {st_mode=S_IFREG|0755, st_size=29376, ...}) = 0
clone(Process 1666 attached
...
[pid  1666] mount("//fileserver.example.com/tmp/", ".", "cifs", 0, "ip=2001:0DB8::10",user=nobody,password=nobody) = 0

So I had an idea….. what if I could easily modify a version of cifs-utils to run on RHEL 5 dual-stack servers, yet only ever resolve DNS queries to IPv4 addresses to work around the kernel issue? :-D

Turns out you can – effectively I just made the nastiest hack ever by just tearing out the IPv6 name resolver. :-/
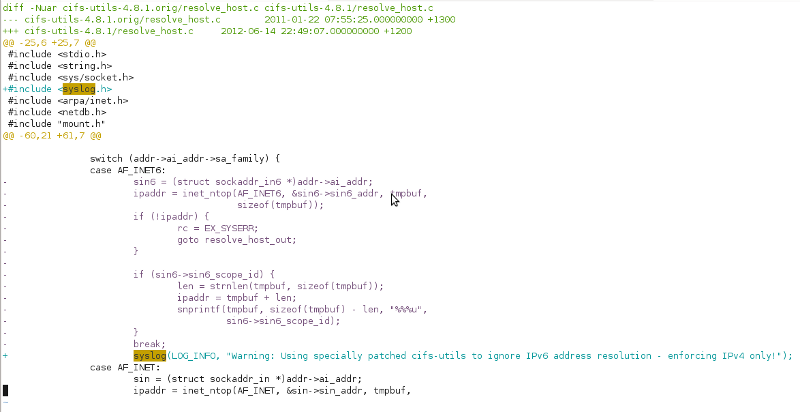
I’m going to hell for this, but damn, feels good man. ;-)

I wasn’t totally evil, I added an info level syslog notice about the IPv4 enforcement incase any poor admin is ever getting puzzled by someone’s customized RHEL 5 box refusing to connect to CIFS shares IPv6 – that would be a bit too cruel. ;-)

The hack is pretty crude, it actually just breaks the IPv6 socket connection attempt and so it then falls back to IPv4, so it throws up a couple errors in the logs, but doesn’t actually impact the mounting at all.

mount.cifs: Warning: Using specially patched cifs-utils to ignore IPv6 address resolution - enforcing IPv4 only!
kernel:  CIFS VFS: Error connecting to socket. Aborting operation
kernel:  CIFS VFS: cifs_mount failed w/return code = -111

But wait, there’s more! I have shiny cifs-util i386/x86_64/SRPM packages with this evil hack available for download from amberdms-os repository (or directly from the server here).

Naturally this is a bit of a kludge, don’t trust it for mission critical stuff, you ONLY need it for RHEL 5, not RHEL 6 and I can’t guarantee it won’t eat all your data and bring upon the end times, etc, etc.

I’ve tested it on my devel systems and it seems like the nicest fix – sure it won’t work for any hosts needing to run on native IPv6, but by the time I come to drop IPv4 addressing entirely I certainly will have moved on my last hosts from RHEL 5 to something a bit newer. :-)
Largefiles strike again!

With modern Linux systems – hell, even systems from 5+ years ago – there’s usually very little issue with handling large files (> 2GB), in fact files considered large a decade ago are now tiny in comparison.

However sometimes poor sysadmins like myself have to support much older machines, in my case, a legacy accounting platform which is tied to the RHEL 2.1 host it was installed on and you suddenly get to re-discover the headaches that plagued sysadmins before us.

In my case, the backup scripts for this application suddenly stopped working recently with the error of:

cpio: standard input is closed: Value too large for defined data type

Turns out that their data had finally crept over the 2GB limit, which left cpio able to write the backup, but unable to read it for verification or restore purposes.

Thankfully cpio does support largefiles, but it’s a case of adding -D_FILE_OFFSET_BITS=64 to the gcc options at build time, so I built which fixes the problem (or at least till we hit the 16GB filesystem limits) ;-)

The version of cpio on the server is ancient, dating back to 2001 (with RHEL 2.1 being first released in 2002), so it’s over a decade old now, and I found it quite difficult to obtain the source for the specific installed version of cpio on the server, Red Hat seemed to be missing the exact release (they have -23 and -28, but not -25) so I pulled the Red Hat 8 source which comes from around the same time period – one of the advantages of having RHN is being able to quickly pull old packages, both binary and source. :-)

If you have this exact issue with a legacy system using cpio, feel free to grab my binary or source package from my repos and save yourself some build time. :-)
Bit Flipping Cycle Lanes

On my recent walk to Devonport I was amazed at the design of the cycle lanes made by the North Shore City Council (now part of the amalgamated Auckland City Council).

Aside from the initial amazement that such a car-focused city knew what cycle lanes where, I was also extremely amused to see how exactly they chose to implement them….


Exhibit A: The flipped cycleway.

Having a standard such as “people to the left, bikes to the right” clearly wasn’t exciting enough, so let’s have bike and pedestrian lanes randomly swapping sides at each junction.

Quick everyone, change places!


Exhibit B: Multipathing!

Having just one bike lane isn’t enough, let’s add a second bike lane – one on the footpath and one on the road. And whilst we’re at it, let’s make it so it goes bike, pedestrian and then bike again. :-/

Pedestrians: Cyclist sandwich filling.

Not pictured are the other great cycle designs I came across on my wander including:

  • The suddenly ending and then re-starting bike lane.
  • The going-on-and-off-the-footpath bike lane
  • The bizarre invisible bike lane – I found it in one suburb, where a single bike symbol was painted on the side of the road in a side street, with no other markings around, not even  a cycle lane line marking.

Whilst it’s great to see a council working to lay some cycle lanes, the lack of thought around planning and standardization of the lanes is a source of great amusement, but also a potential risk to both cyclists and pedestrians if these lanes start getting used more heavily.

Look to the past to see the future

I came across  a great tweet the other day, pretty much sums up the whole marriage equality debate being had across the world:

All this has happened before. All this will happen again. ~ Scrolls of Pythia, Battlestar Galatica

Pretty happy that I come from a country that recognizes the rights and privileges for my LGBTWTF friends – it’s not 100% perfect yet, but it’s getting there.

Under NZ law, gay couples can get a civil union, but not marriage – the only technical difference is terminology, and due to a poorly structured bit of legalization, a gay couple can’t adopt, as it explicitly requires a “married” couple.

I’m hopeful that it won’t be too much longer before we can fix that final bit of legalization to make a civil union or marriage available to any couple and have exactly equal standing. :-)
Matangi Trains

I was in Wellington the other week to catch up with friends and family and had the opportunity to catch the new Matangi trains out to Johnsonville – you might remember my previous trip out there featured the pre-WW2 relics, so it was exciting to check out some 21st century transportation. :-)

In some ways, it’s sad to lose the old relics since they were great fun as a visitor, but I can imagine that the local are grateful for some of the more modern comforts and quietness.

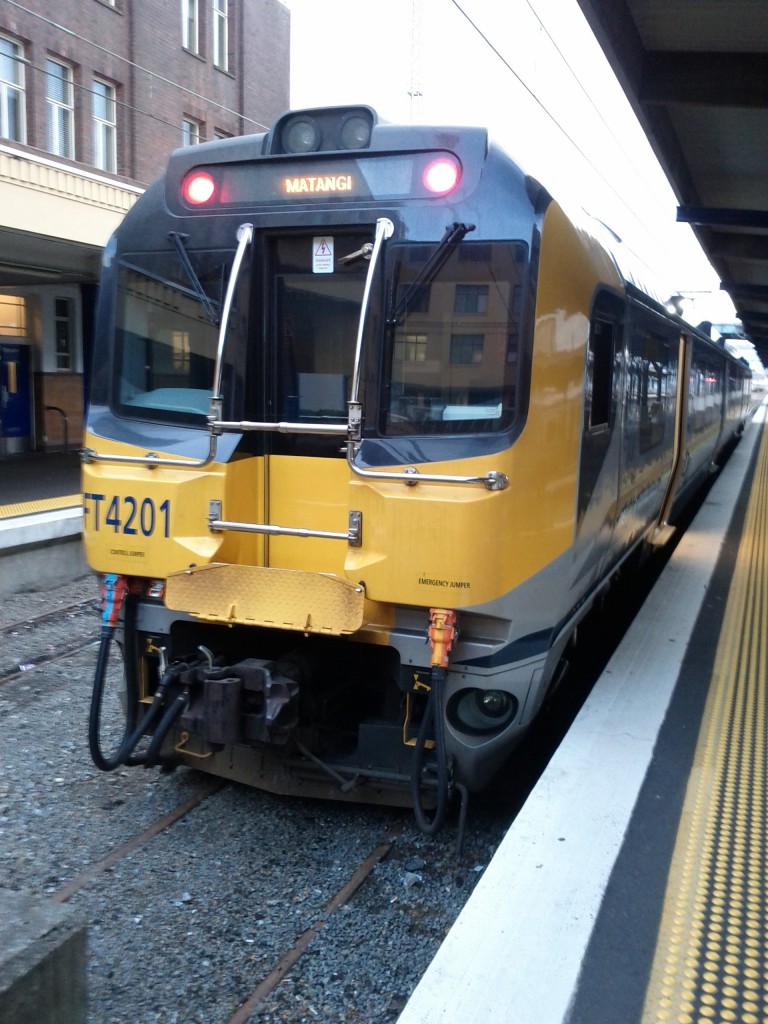
Speedy train is speedy! (or crappy phone camera is crappy)

I do think showing the train's model name rather than the actual destination is going to be pretty unhelpful for tourists, I'd be pretty worried if I was trying to catch the "Johnsonville" train if it had a sign saying "Matangi". :-/

Nice and new :-)

Of particular interest is that the Johnsonville units are specially marked, as they feature an additional feature of “wheel flange lube” –  apparently this is to help deal with reducing wear on the tight Johnsonville line rails by keeping the wheels lubricated.

Wheel flange lube? Sounds kinky!