Earlier this year I had a disk fail in my NZ-based file & VM server. This isn’t something unexpected, the server has 12x hard disks, which are over 2 years old, some failures are to be expected over time. I anticipated just needing to arrange the replacement of one disk and being able to move on with my life.
Of course computers are never as simple as this and it triggered a delightful adventure into how my RAID configuration is built, in which I encountered many lovely headaches and problems, both hardware and software.
Servers are beautiful, but also such hard work sometimes.
The RAID
Of the 12x disks in my server, 2x are for the OS boot drives and the remaining 10x are pooled together into one whopping RAID 6 which is then split using LVM into volumes for all my virtual machines and also file server storage.
I could have taken the approach of splitting the data and virtual machine volumes apart, maybe giving the virtual machines a RAID 1 and the data a RAID 5, but I settled on this single RAID 6 approach for two reasons:
- The bulk of my data is infrequently accessed files but most of the activity is from the virtual machines – by mixing them both together on the same volume and spreading them across the entire RAID 6, I get to take advantage of the additional number of spindles. If I had separate disk pools, the VM drives would be very busy, the file server drives very idle, which is a bit of a waste of potential performance.
- The RAID 6 redundancy has a bit of overhead when writing, but it provides the handy ability to tolerate the failure and loss of any 2 disks in the array, offering a bit more protection than RAID 5 and much more usable space than RAID 10.
In my case I used Linux’s Software RAID – whilst many dislike software RAID, the fact is that unless I was to spend serious amounts of money on a good hardware RAID card with a large cache and go to the effort of getting all the vendor management software installed and monitored, I’m going to get little advantage over Linux Software RAID, which consumes relatively little CPU. Plus my use of disk encryption destroys any minor performance advantages obtained by different RAID approaches anyway, making the debate somewhat moot.
The Hardware
To connect all these drives, I have 3x SATA controllers installed in the server:
# lspci | grep -i sata
00:11.0 SATA controller: Advanced Micro Devices [AMD] nee ATI SB7x0/SB8x0/SB9x0 SATA Controller [AHCI mode]
02:00.0 SCSI storage controller: Marvell Technology Group Ltd. 88SX7042 PCI-e 4-port SATA-II (rev 02)
03:00.0 SCSI storage controller: Marvell Technology Group Ltd. 88SX7042 PCI-e 4-port SATA-II (rev 02)
The onboard AMD/ATI controller uses the standard “ahci” Linux kernel driver and the Marvell controllers use the standard “sata_mv” Linux kernel driver. In both cases, the controllers are configured purely in JBOD mode, which exposes each drive as-is to the OS, with no hardware RAID or abstraction taking place.
You can see how the disks are allocated to the different PCI controllers using the sysfs filesystem on the server:
# ls -l /sys/block/sd*
lrwxrwxrwx. 1 root root 0 Mar 14 04:50 sda -> ../devices/pci0000:00/0000:00:02.0/0000:02:00.0/host0/target0:0:0/0:0:0:0/block/sda
lrwxrwxrwx. 1 root root 0 Mar 14 04:50 sdb -> ../devices/pci0000:00/0000:00:02.0/0000:02:00.0/host1/target1:0:0/1:0:0:0/block/sdb
lrwxrwxrwx. 1 root root 0 Mar 14 04:55 sdc -> ../devices/pci0000:00/0000:00:02.0/0000:02:00.0/host2/target2:0:0/2:0:0:0/block/sdc
lrwxrwxrwx. 1 root root 0 Mar 14 04:50 sdd -> ../devices/pci0000:00/0000:00:02.0/0000:02:00.0/host3/target3:0:0/3:0:0:0/block/sdd
lrwxrwxrwx. 1 root root 0 Mar 14 04:55 sde -> ../devices/pci0000:00/0000:00:03.0/0000:03:00.0/host4/target4:0:0/4:0:0:0/block/sde
lrwxrwxrwx. 1 root root 0 Mar 14 04:55 sdf -> ../devices/pci0000:00/0000:00:03.0/0000:03:00.0/host5/target5:0:0/5:0:0:0/block/sdf
lrwxrwxrwx. 1 root root 0 Mar 14 04:55 sdg -> ../devices/pci0000:00/0000:00:03.0/0000:03:00.0/host6/target6:0:0/6:0:0:0/block/sdg
lrwxrwxrwx. 1 root root 0 Mar 14 04:55 sdh -> ../devices/pci0000:00/0000:00:03.0/0000:03:00.0/host7/target7:0:0/7:0:0:0/block/sdh
lrwxrwxrwx. 1 root root 0 Mar 14 04:55 sdi -> ../devices/pci0000:00/0000:00:11.0/host8/target8:0:0/8:0:0:0/block/sdi
lrwxrwxrwx. 1 root root 0 Mar 14 04:55 sdj -> ../devices/pci0000:00/0000:00:11.0/host9/target9:0:0/9:0:0:0/block/sdj
lrwxrwxrwx. 1 root root 0 Mar 14 04:55 sdk -> ../devices/pci0000:00/0000:00:11.0/host10/target10:0:0/10:0:0:0/block/sdk
lrwxrwxrwx. 1 root root 0 Mar 14 04:55 sdl -> ../devices/pci0000:00/0000:00:11.0/host11/target11:0:0/11:0:0:0/block/sdl
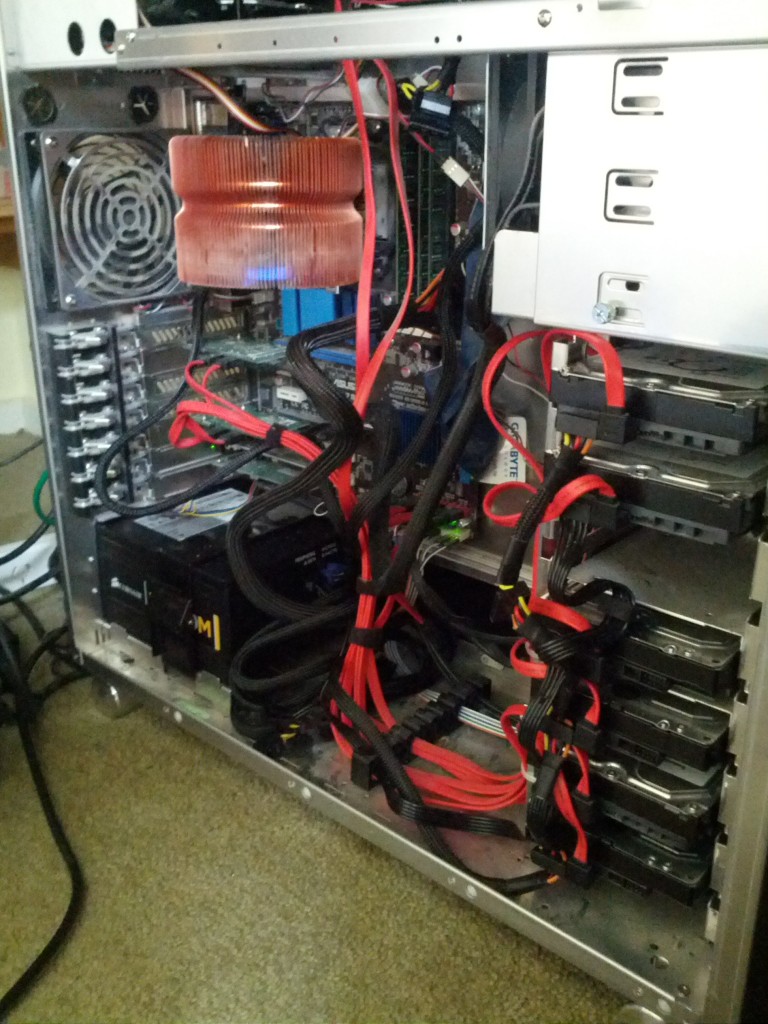
There is a single high-wattage PSU driving the host and all the disks, in a well designed Lian-Li case with proper space and cooling for all these disks.
The Failure
In March my first disk died. In this case, /dev/sde attached to the host AMD controller failed and I decided to hold off replacing it for a couple of months as it’s internal to the case and I would be visiting home in May in just a month or so. Meanwhile the fact that RAID 6 has 2x parity disks would ensure that I had at least a RAID-5 level of protection until then.
However a few weeks later, a second disk in the same array also failed. This become much more worrying, since two bad disks in the array removed any redundancy that the RAID array offered me and would mean that any further disk failures would cause fatal data corruption of the array.
Naturally due to Murphy’s Law, a third disk then promptly failed a few hours later triggering a fatal collapse of my array, leaving it in a state like the following:
md2 : active raid6 sdl1[9] sdj1[8] sda1[4] sdb1[5] sdd1[0] sdc1[2] sdh1[3](F) sdg1[1] sdf1[7](F) sde1[6](F)
      7814070272 blocks super 1.2 level 6, 512k chunk, algorithm 2 [10/7] [UUU_U__UUU]
Whilst 90% of my array is regularly backed up, there was some data that I hadn’t been backing up due to excessive size that wasn’t fatal, but nice to have. I tried to recover the array by clearing the faulty flag on the last-failed disk (which should still have been consistent/in-line with the other disks) in order to bring it up so I could pull the latest data from it.
mdadm --assemble /dev/md2 --force --run /dev/sdl1 /dev/sdj1 /dev/sda1 /dev/sdb1 /dev/sdd1 /dev/sdc1 /dev/sdh1 /dev/sdg1
mdadm: forcing event count in /dev/sdh1(3) from 6613460 upto 6613616
mdadm: clearing FAULTY flag for device 6 in /dev/md2 for /dev/sdh1
mdadm: Marking array /dev/md2 as 'clean'

mdadm: failed to add /dev/sdh1 to /dev/md2: Invalid argument
mdadm: failed to RUN_ARRAY /dev/md2: Input/output error
Sadly this failed in a weird fashion, where the array state was cleared to OK, but /dev/sdh was still failed and missing from the array, leading to corrupted data and all attempts to read the array successfully being hopeless. At this stage the RAID array was toast and I had no other option than to leave it broken for a few weeks till I could fix it on a scheduled trip home. :-(
Debugging in the murk of the I/O layer
Having lost 3x disks, it was unclear as to what the root cause of the failure in the array was at this time. Considering I was living in another country I decided to take the precaution of ordering a few different spare parts for my trip, on the basis that spending a couple hundred dollars on parts I didn’t need would be more useful than not having the part I did need when I got back home to fix it.
At this time, I had lost sde, sdf and sdh – all three disks belonging to a single RAID controller, as shown by /sys/block/sd, and all of them Seagate Barracuda disks.
lrwxrwxrwx. 1 root root 0 Mar 14 04:55 sde -> ../devices/pci0000:00/0000:00:03.0/0000:03:00.0/host4/target4:0:0/4:0:0:0/block/sde
lrwxrwxrwx. 1 root root 0 Mar 14 04:55 sdf -> ../devices/pci0000:00/0000:00:03.0/0000:03:00.0/host5/target5:0:0/5:0:0:0/block/sdf
lrwxrwxrwx. 1 root root 0 Mar 14 04:55 sdg -> ../devices/pci0000:00/0000:00:03.0/0000:03:00.0/host6/target6:0:0/6:0:0:0/block/sdg
lrwxrwxrwx. 1 root root 0 Mar 14 04:55 sdh -> ../devices/pci0000:00/0000:00:03.0/0000:03:00.0/host7/target7:0:0/7:0:0:0/block/sdh
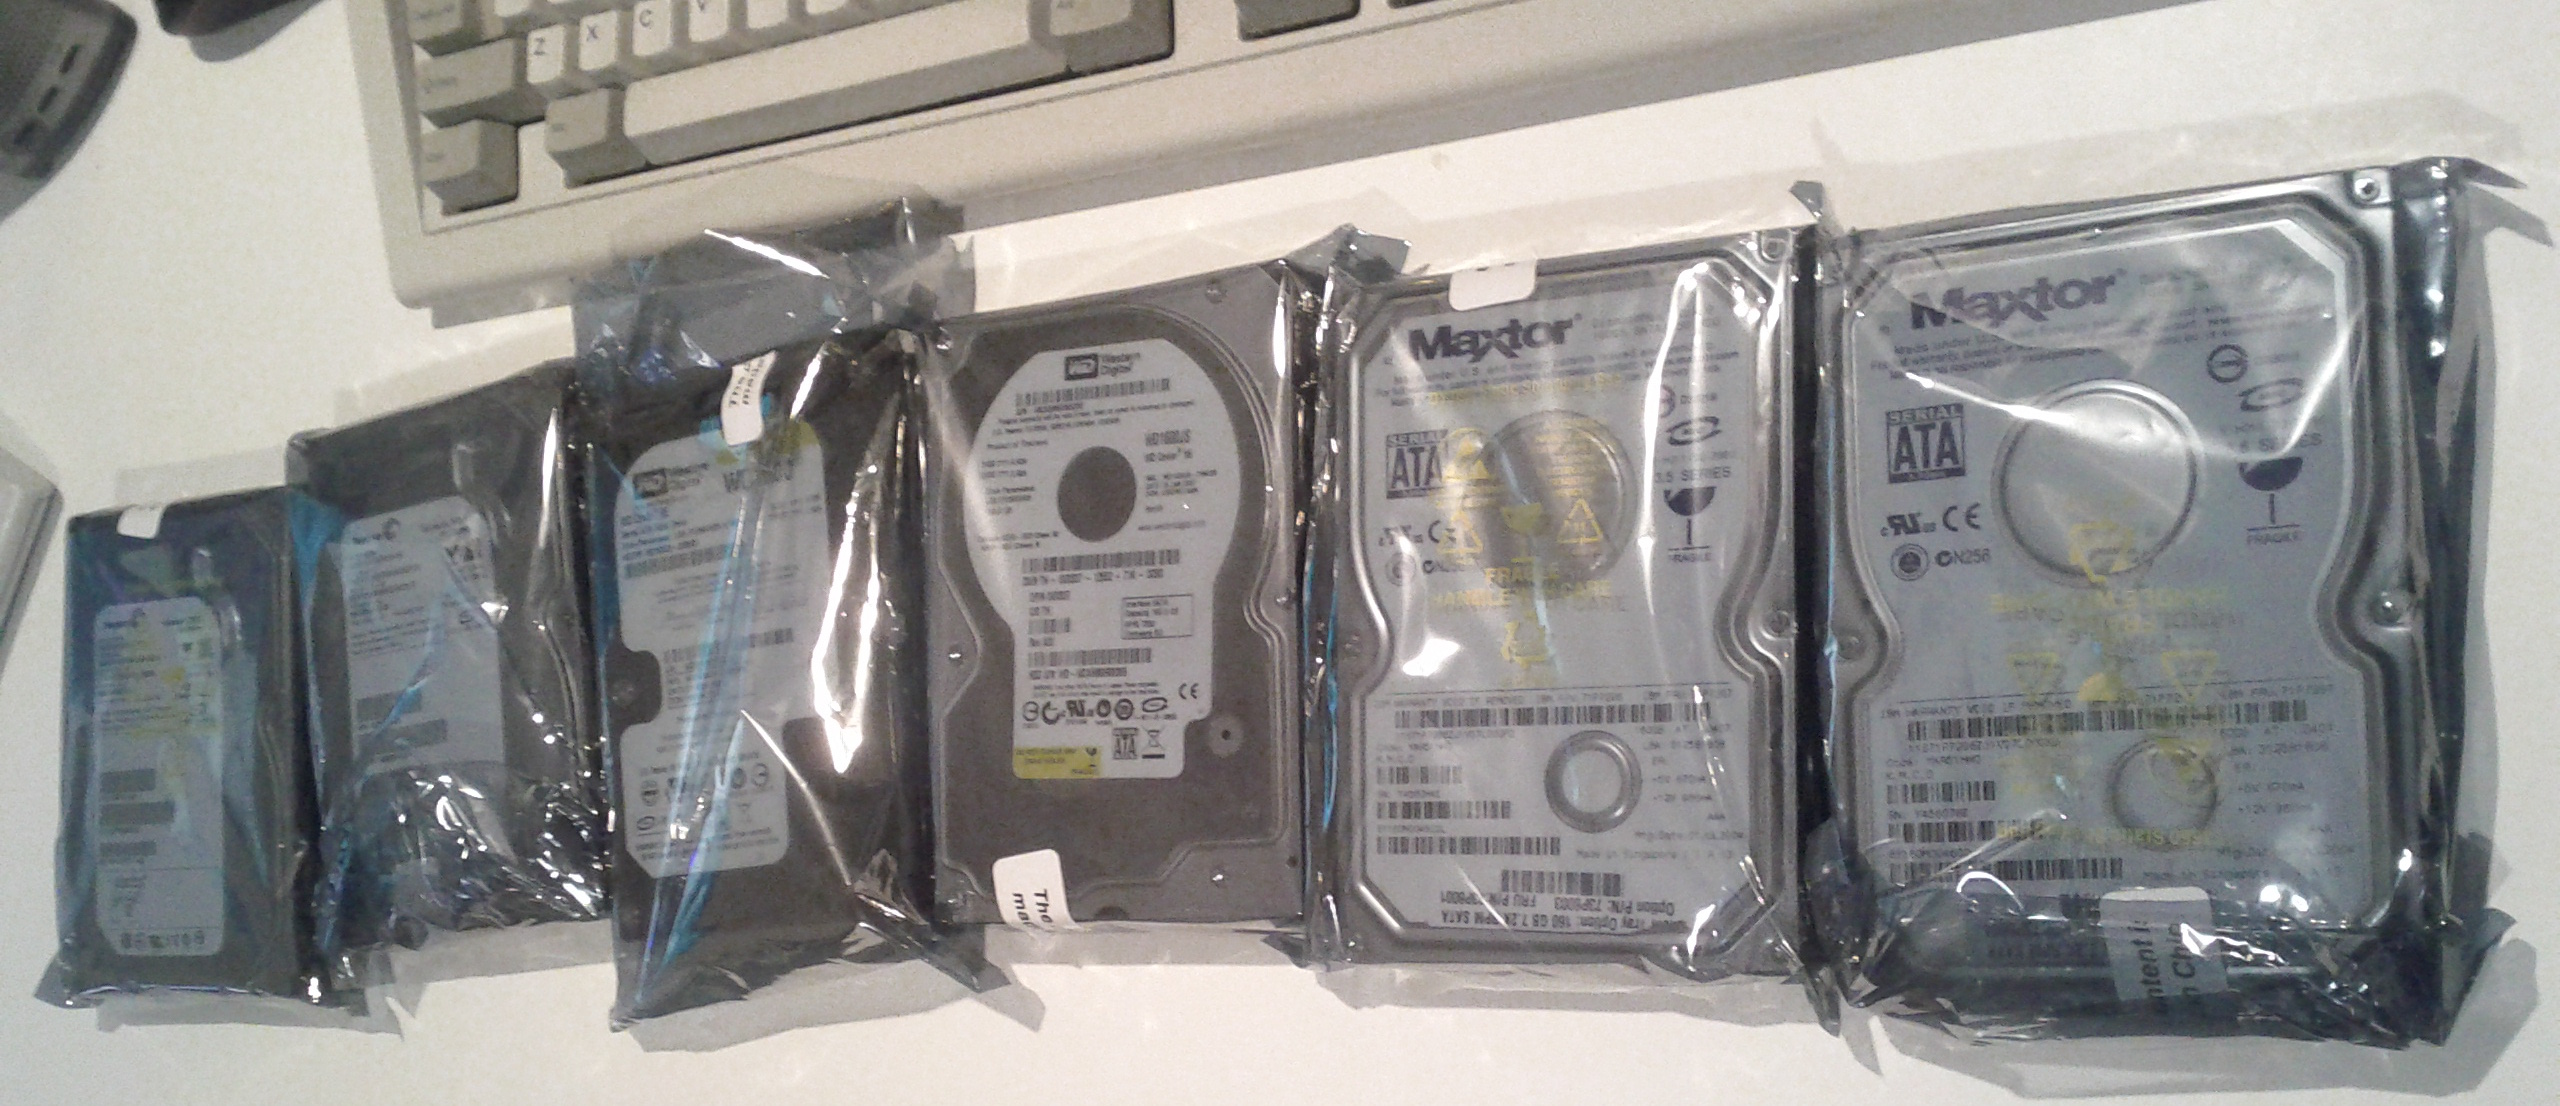
Hence I decided to order 3x 1TB replacement Western Digital Black edition disks to replace the failed drives, deliberately choosing another vendor/generation of disk to ensure that if it was some weird/common fault with the Seagate drives it wouldn’t occur with the new disks.
I also placed an order of 2x new SATA controllers, since I had suspicions about the fact that numerous disks attached to one particular controller had failed. The two add in PCI-e controllers were somewhat simplistic ST-Labs cards, providing 4x SATA II ports in a PCI-e 4x format, using a Marvell 88SX7042 chipset. I had used their SiI-based PCI-e 1x controllers successfully before and found them good budget-friendly JBOD controllers, but being a budget no-name vendor card, I didn’t hold high hopes for them.
To replace them, I ordered 2x Highpoint RocketRaid 640L cards, one of the few 4x SATA port options I could get in NZ at the time. The only problem with these cards was that they were also based on the Marvell 88SX7042 SATA chipset, but I figured it was unlikely for a chipset itself to be the cause of the issue.
I considered getting a new power supply as well, but the fact that I had not experienced issues with any disks attached to the server’s onboard AMD SATA controller and that all my graphing of the power supply showed the voltages solid, I didn’t have reason to doubt the PSU.
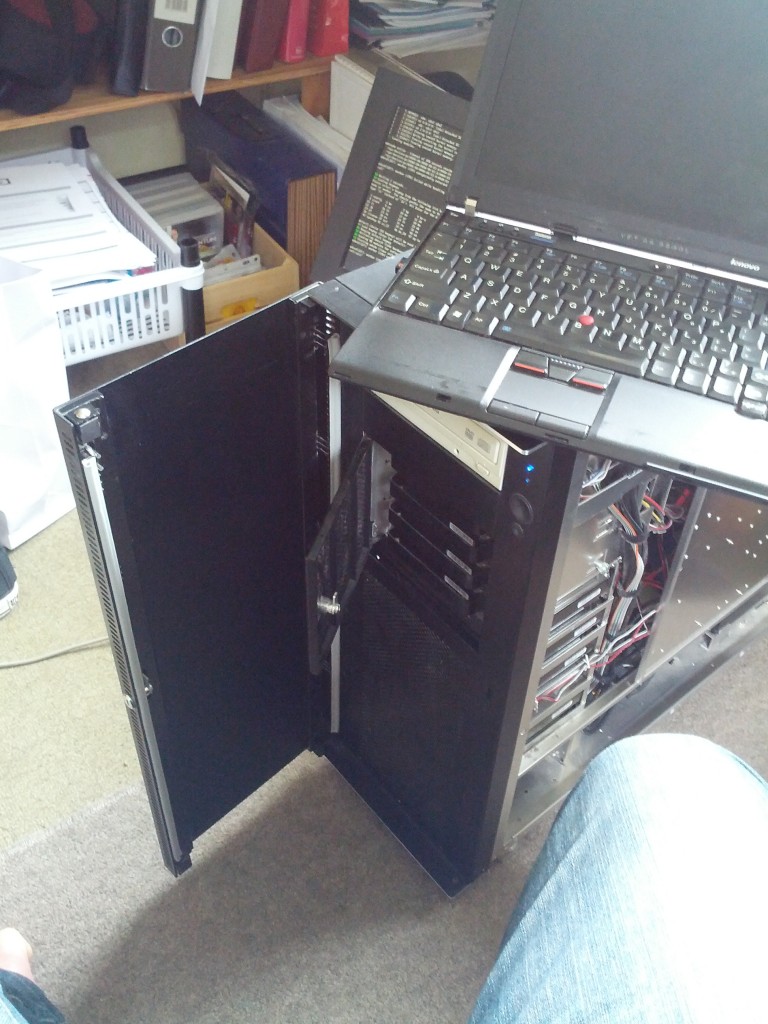
When back in Wellington in May, I removed all three disks that had previously exhibited problems and installed the three new replacements. I also replaced the 2x PCI-e ST-Labs controllers with the new Highpoint RocketRaid 640L controllers. Depressingly almost as soon as the hardware was changed and I started my RAID rebuild, I started experiencing problems with the system.
May  4 16:39:30 phobos kernel: md/raid:md2: raid level 5 active with 7 out of 8 devices, algorithm 2
May  4 16:39:30 phobos kernel: created bitmap (8 pages) for device md2
May  4 16:39:30 phobos kernel: md2: bitmap initialized from disk: read 1 pages, set 14903 of 14903 bits
May  4 16:39:30 phobos kernel: md2: detected capacity change from 0 to 7000493129728
May  4 16:39:30 phobos kernel: md2:
May  4 16:39:30 phobos kernel: md: recovery of RAID array md2
May  4 16:39:30 phobos kernel: md: minimum _guaranteed_  speed: 1000 KB/sec/disk.
May  4 16:39:30 phobos kernel: md: using maximum available idle IO bandwidth (but not more than 200000 KB/sec) for recovery.
May  4 16:39:30 phobos kernel: md: using 128k window, over a total of 976631296k.
May  4 16:39:30 phobos kernel: unknown partition table
...
May  4 16:50:52 phobos kernel: ata7.00: exception Emask 0x0 SAct 0x0 SErr 0x0 action 0x6 frozen
May  4 16:50:52 phobos kernel: ata7.00: failed command: IDENTIFY DEVICE
May  4 16:50:52 phobos kernel: ata7.00: cmd ec/00:01:00:00:00/00:00:00:00:00/00 tag 0 pio 512 in
May  4 16:50:52 phobos kernel:         res 40/00:24:d8:1b:c6/00:00:02:00:00/40 Emask 0x4 (timeout)
May  4 16:50:52 phobos kernel: ata7.00: status: { DRDY }
May  4 16:50:52 phobos kernel: ata7: hard resetting link
May  4 16:50:52 phobos kernel: ata7: SATA link up 6.0 Gbps (SStatus 133 SControl 300)
May  4 16:50:52 phobos kernel: ata7.00: configured for UDMA/133
May  4 16:50:52 phobos kernel: ata7: EH complete
May  4 16:51:13 phobos kernel: ata16.00: exception Emask 0x0 SAct 0x0 SErr 0x0 action 0x6 frozen
May  4 16:51:13 phobos kernel: ata16.00: failed command: IDENTIFY DEVICE
May  4 16:51:13 phobos kernel: ata16.00: cmd ec/00:01:00:00:00/00:00:00:00:00/00 tag 0 pio 512 in
May  4 16:51:13 phobos kernel:         res 40/00:ff:00:00:00/00:00:00:00:00/00 Emask 0x4 (timeout)
May  4 16:51:13 phobos kernel: ata16.00: status: { DRDY }
May  4 16:51:13 phobos kernel: ata16: hard resetting link
May  4 16:51:18 phobos kernel: ata16: link is slow to respond, please be patient (ready=0)
May  4 16:51:23 phobos kernel: ata16: COMRESET failed (errno=-16)
May  4 16:51:23 phobos kernel: ata16: hard resetting link
May  4 16:51:28 phobos kernel: ata16: link is slow to respond, please be patient (ready=0)
May  4 16:51:33 phobos kernel: ata16: COMRESET failed (errno=-16)
May  4 16:51:33 phobos kernel: ata16: hard resetting link
May  4 16:51:39 phobos kernel: ata16: link is slow to respond, please be patient (ready=0)
May  4 16:52:08 phobos kernel: ata16: COMRESET failed (errno=-16)
May  4 16:52:08 phobos kernel: ata16: limiting SATA link speed to 3.0 Gbps
May  4 16:52:08 phobos kernel: ata16: hard resetting link
May  4 16:52:13 phobos kernel: ata16: COMRESET failed (errno=-16)
May  4 16:52:13 phobos kernel: ata16: reset failed, giving up
May  4 16:52:13 phobos kernel: ata16.00: disabled
May  4 16:52:13 phobos kernel: ata16: EH complete
May  4 16:52:13 phobos kernel: sd 15:0:0:0: [sdk] Unhandled error code
May  4 16:52:13 phobos kernel: sd 15:0:0:0: [sdk] Result: hostbyte=DID_BAD_TARGET driverbyte=DRIVER_OK
May  4 16:52:13 phobos kernel: sd 15:0:0:0: [sdk] CDB: Read(10): 28 00 05 07 c8 00 00 01 00 00
May  4 16:52:13 phobos kernel: md/raid:md2: Disk failure on sdk, disabling device.
May  4 16:52:13 phobos kernel: md/raid:md2: Operation continuing on 6 devices.
May  4 16:52:13 phobos kernel: md/raid:md2: read error not correctable (sector 84396112 on sdk).
...
May  4 16:52:13 phobos kernel: md/raid:md2: read error not correctable (sector 84396280 on sdk).
May  4 16:52:13 phobos kernel: sd 15:0:0:0: [sdk] Unhandled error code
May  4 16:52:13 phobos kernel: sd 15:0:0:0: [sdk] Result: hostbyte=DID_BAD_TARGET driverbyte=DRIVER_OK
May  4 16:52:13 phobos kernel: sd 15:0:0:0: [sdk] CDB: Read(10): 28 00 05 07 c9 00 00 04 00 00
May  4 16:52:13 phobos kernel: md/raid:md2: read error not correctable (sector 84396288 on sdk)
...
May  4 16:52:13 phobos kernel: md/raid:md2: read error not correctable (sector 84397304 on sdk).
May  4 16:52:13 phobos kernel: sd 15:0:0:0: [sdk] Unhandled error code
May  4 16:52:13 phobos kernel: sd 15:0:0:0: [sdk] Result: hostbyte=DID_BAD_TARGET driverbyte=DRIVER_OK
May  4 16:52:13 phobos kernel: sd 15:0:0:0: [sdk] CDB: Read(10): 28 00 05 07 cd 00 00 03 00 00
May  4 16:52:13 phobos kernel: md/raid:md2: read error not correctable (sector 84397312 on sdk).
...
May  4 16:52:13 phobos kernel: md/raid:md2: read error not correctable (sector 84398072 on sdk).
May  4 16:53:14 phobos kernel: ata18.00: exception Emask 0x0 SAct 0x0 SErr 0x0 action 0x6 frozen
May  4 16:53:14 phobos kernel: ata15.00: exception Emask 0x0 SAct 0x0 SErr 0x0 action 0x6 frozen
May  4 16:53:14 phobos kernel: ata18.00: failed command: FLUSH CACHE EXT
May  4 16:53:14 phobos kernel: ata18.00: cmd ea/00:00:00:00:00/00:00:00:00:00/a0 tag 0
May  4 16:53:14 phobos kernel:         res 40/00:00:00:00:00/00:00:00:00:00/a0 Emask 0x4 (timeout)
May  4 16:53:14 phobos kernel: ata18.00: status: { DRDY }
May  4 16:53:14 phobos kernel: ata18: hard resetting link
May  4 16:53:14 phobos kernel: ata17.00: exception Emask 0x0 SAct 0x0 SErr 0x0 action 0x6 frozen
May  4 16:53:14 phobos kernel: ata17.00: failed command: FLUSH CACHE EXT
May  4 16:53:14 phobos kernel: ata17.00: cmd ea/00:00:00:00:00/00:00:00:00:00/a0 tag 0
May  4 16:53:14 phobos kernel:         res 40/00:ff:00:00:00/00:00:00:00:00/40 Emask 0x4 (timeout)
May  4 16:53:14 phobos kernel: ata17.00: status: { DRDY }
May  4 16:53:14 phobos kernel: ata17: hard resetting link
May  4 16:53:14 phobos kernel: ata15.00: failed command: FLUSH CACHE EXT
May  4 16:53:14 phobos kernel: ata15.00: cmd ea/00:00:00:00:00/00:00:00:00:00/a0 tag 0
May  4 16:53:14 phobos kernel:         res 40/00:ff:00:00:00/00:00:00:00:00/40 Emask 0x4 (timeout)
May  4 16:53:14 phobos kernel: ata15.00: status: { DRDY }
May  4 16:53:14 phobos kernel: ata15: hard resetting link
May  4 16:53:15 phobos kernel: ata15: SATA link up 3.0 Gbps (SStatus 123 SControl 300)
May  4 16:53:15 phobos kernel: ata17: SATA link up 6.0 Gbps (SStatus 133 SControl 300)
May  4 16:53:15 phobos kernel: ata18: SATA link up 3.0 Gbps (SStatus 123 SControl 300)
May  4 16:53:20 phobos kernel: ata15.00: qc timeout (cmd 0xec)
May  4 16:53:20 phobos kernel: ata17.00: qc timeout (cmd 0xec)
May  4 16:53:20 phobos kernel: ata18.00: qc timeout (cmd 0xec)
May  4 16:53:20 phobos kernel: ata17.00: failed to IDENTIFY (I/O error, err_mask=0x4)
May  4 16:53:20 phobos kernel: ata17.00: revalidation failed (errno=-5)
May  4 16:53:20 phobos kernel: ata17: hard resetting link
May  4 16:53:20 phobos kernel: ata15.00: failed to IDENTIFY (I/O error, err_mask=0x4)
May  4 16:53:20 phobos kernel: ata15.00: revalidation failed (errno=-5)
May  4 16:53:20 phobos kernel: ata15: hard resetting link
May  4 16:53:20 phobos kernel: ata18.00: failed to IDENTIFY (I/O error, err_mask=0x4)
May  4 16:53:20 phobos kernel: ata18.00: revalidation failed (errno=-5)
May  4 16:53:20 phobos kernel: ata18: hard resetting link
May  4 16:53:21 phobos kernel: ata15: SATA link up 3.0 Gbps (SStatus 123 SControl 300)
May  4 16:53:21 phobos kernel: ata17: SATA link up 6.0 Gbps (SStatus 133 SControl 300)
May  4 16:53:21 phobos kernel: ata18: SATA link up 3.0 Gbps (SStatus 123 SControl 300)
May  4 16:53:31 phobos kernel: ata15.00: qc timeout (cmd 0xec)
May  4 16:53:31 phobos kernel: ata17.00: qc timeout (cmd 0xec)
May  4 16:53:31 phobos kernel: ata18.00: qc timeout (cmd 0xec)
May  4 16:53:32 phobos kernel: ata17.00: failed to IDENTIFY (I/O error, err_mask=0x4)
May  4 16:53:32 phobos kernel: ata15.00: failed to IDENTIFY (I/O error, err_mask=0x4)
May  4 16:53:32 phobos kernel: ata15.00: revalidation failed (errno=-5)
May  4 16:53:32 phobos kernel: ata15: limiting SATA link speed to 1.5 Gbps
May  4 16:53:32 phobos kernel: ata15: hard resetting link
May  4 16:53:32 phobos kernel: ata17.00: revalidation failed (errno=-5)
May  4 16:53:32 phobos kernel: ata17: limiting SATA link speed to 3.0 Gbps
May  4 16:53:32 phobos kernel: ata17: hard resetting link
May  4 16:53:32 phobos kernel: ata18.00: failed to IDENTIFY (I/O error, err_mask=0x4)
May  4 16:53:32 phobos kernel: ata18.00: revalidation failed (errno=-5)
May  4 16:53:32 phobos kernel: ata18: limiting SATA link speed to 1.5 Gbps
May  4 16:53:32 phobos kernel: ata18: hard resetting link
May  4 16:53:32 phobos kernel: ata17: SATA link up 6.0 Gbps (SStatus 133 SControl 320)
May  4 16:53:33 phobos kernel: ata15: SATA link up 3.0 Gbps (SStatus 123 SControl 310)
May  4 16:53:33 phobos kernel: ata18: SATA link up 3.0 Gbps (SStatus 123 SControl 310)
May  4 16:54:05 phobos kernel: ata15: EH complete
May  4 16:54:05 phobos kernel: ata17: EH complete
May  4 16:54:05 phobos kernel: sd 14:0:0:0: [sdj] Unhandled error code
May  4 16:54:05 phobos kernel: sd 14:0:0:0: [sdj] Result: hostbyte=DID_BAD_TARGET driverbyte=DRIVER_OK
May  4 16:54:05 phobos kernel: sd 14:0:0:0: [sdj] CDB: Write(10): 2a 00 00 00 00 10 00 00 05 00
May  4 16:54:05 phobos kernel: md: super_written gets error=-5, uptodate=0
May  4 16:54:05 phobos kernel: md/raid:md2: Disk failure on sdj, disabling device.
May  4 16:54:05 phobos kernel: md/raid:md2: Operation continuing on 5 devices.
May  4 16:54:05 phobos kernel: sd 16:0:0:0: [sdl] Unhandled error code
May  4 16:54:05 phobos kernel: sd 16:0:0:0: [sdl] Result: hostbyte=DID_BAD_TARGET driverbyte=DRIVER_OK
May  4 16:54:05 phobos kernel: sd 16:0:0:0: [sdl] CDB: Write(10): 2a 00 00 00 00 10 00 00 05 00
May  4 16:54:05 phobos kernel: md: super_written gets error=-5, uptodate=0
May  4 16:54:05 phobos kernel: md/raid:md2: Disk failure on sdl, disabling device.
May  4 16:54:05 phobos kernel: md/raid:md2: Operation continuing on 4 devices.
May  4 16:54:05 phobos kernel: ata18: EH complete
May  4 16:54:05 phobos kernel: sd 17:0:0:0: [sdm] Unhandled error code
May  4 16:54:05 phobos kernel: sd 17:0:0:0: [sdm] Result: hostbyte=DID_BAD_TARGET driverbyte=DRIVER_OK
May  4 16:54:05 phobos kernel: sd 17:0:0:0: [sdm] CDB: Write(10): 2a 00 00 00 00 10 00 00 05 00
May  4 16:54:05 phobos kernel: md: super_written gets error=-5, uptodate=0
May  4 16:54:05 phobos kernel: md/raid:md2: Disk failure on sdm, disabling device.
May  4 16:54:05 phobos kernel: md/raid:md2: Operation continuing on 4 devices.
May  4 16:54:05 phobos kernel: md: md2: recovery done.
The above logs demonstrate my problem perfectly. After rebuilding the array, a disk would fail and lead to a cascading failure where other disks would throw up “failed to IDENTIFY” errors until they eventually all failed one-by-one until all the disks attached to that controller had vanished from the server.
At this stage I knew the issue wasn’t caused by all the hard disk themselves, but there was the annoying fact that at the same time, I couldn’t trust all the disks – there were certainly at least a couple bad hard drives in my server triggering a fault, but many of the disks marked as bad by the server were perfectly fine when tested in a different system.

Untrustworthy Disks
By watching the kernel logs and experimenting with disk combinations and rebuilds, I was able to determine that the first disk that always failed was usually faulty and did need replacing. However the subsequent disk failures were false alarms and seemed to be part of a cascading triggered failure on the controller that the bad disk was attached to.
Using this information, it would be possible for me to eliminate all the bad disks by removing the first one to fail each time till I had no more failing disks. But this would be a false fix, if I was to rebuild the RAID array in this fashion, everything would be great until the very next disk failure occurs and leads to the whole array dying again.
Therefore I had to find the root cause and make a permanent fix for the solution. Looking at what I knew about the issue, I could identify the following possible causes:
- A bug in the Linux kernel was triggering cascading failures of RAID rebuilds (bug in either software RAID or in AHCI driver for my Marvell controller).
- The power supply on the server was glitching under the load/strain of a RAID rebuild and causing brownouts to the drives.
- The RAID controller had some low level hardware issue and/or an issue exhibited when one failed disk sent a bad signal to the controller.
Frustratingly I didn’t have any further time to work on it whilst I was in NZ in May, so I rebuilt the minimum array possible using the onboard AMD controller to restore my critical VMs and had to revisit the issue again in October when back in the country for another visit.
Debugging disks and cursing hardware.
When I got back in October, I decided to eliminate all the possible issues, no matter how unlikely…. I was getting pretty tired of having to squeeze all my stuff into only a few TB, so wanted a fix no matter what.
Kernel – My server was running the stock CentOS 6 2.6.32 kernel which was unlikely to have any major storage subsystem bugs, however as a precaution I upgraded to the latest upstream kernel at the time of 3.11.4.
This failed to make any impact, so I decided that it would be unlikely I’m the first person to discover a bug in the Linux kernel AHCI/Software-RAID layer and marked the kernel as an unlikely source of the problem. The fact that when I added a bad disk to the onboard AMD server controller I didn’t see the same cascading failure, also helped eliminate a kernel RAID bug as the cause, leaving only the possibility of a bug in the “sata_mv” kernel driver that was specific to the controllers.
Power Supply – I replaced the few year old power supply in the server with a newer higher spec good quality model. Sadly this failed to resolve anything, but it proved that the issue wasn’t power related.
SATA Enclosure – 4x of my disks were in a 5.25″ to 3.5″ hotswap enclosure. It seemed unlikely that a low level physical device could be the cause, but I wanted to eliminate all common infrastructure possibility, and all the bad disks tended to be in this enclosure. By juggling the bad disks around, I was able to confirm that the issue wasn’t specific to this one enclosure.
At this time the only hardware in common left over was the two PCI-e RAID controllers – and of course the motherboard they were connected via. I really didn’t want to replace the motherboard and half the system with it, so I decided to consider the possibility that the fact the old ST-Lab and new RocketRaid controllers both used the same Marvell 88SX7042 chipset meant that I hadn’t properly eliminated the controllers as being the cause of the issue.
After doing a fair bit of research around the Marvell 88SX7042 online, I did find a number of references to similar issues with other Marvell chipsets, such as issues with the 9123 chipset series, issues with the 6145 chipset and even reports of issues with Marvell chipsets on FreeBSD.
The Solution
Having traced something dodgy back to the Marvell controllers I decided the only course of action left was to source some new controller cards. Annoyingly I couldn’t get anything that was 4x SATA ports in NZ that wasn’t either Marvell chipset based or extremely expensive hardware RAID controllers offering many more features than I required.
I ended up ordering 2x Syba PCI Express SATA II 4-Port RAID Controller Card SY-PEX40008 which are SiI 3124 chipset based controllers that provide 4x SATA II ports on a single PCIe-1x card. It’s worth noting that these controllers are actually PCI-X cards with an onboard PCI-X to PCIe-1x converter chip which is more than fast enough for hard disks, but could be a limitation for SSDs.
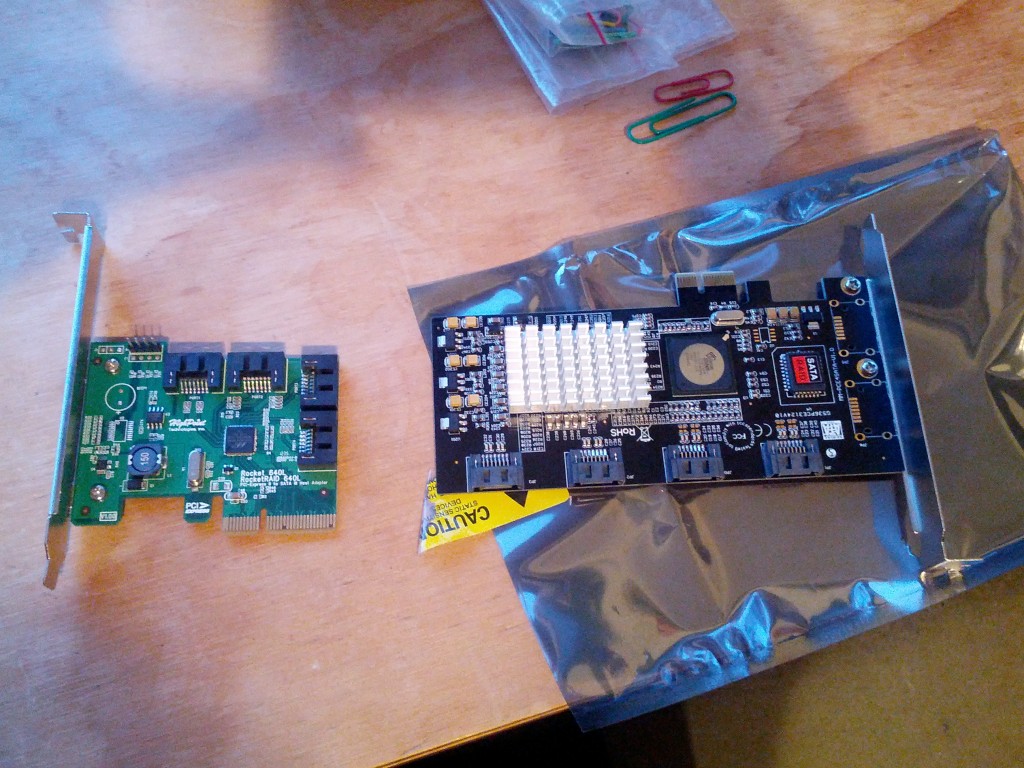
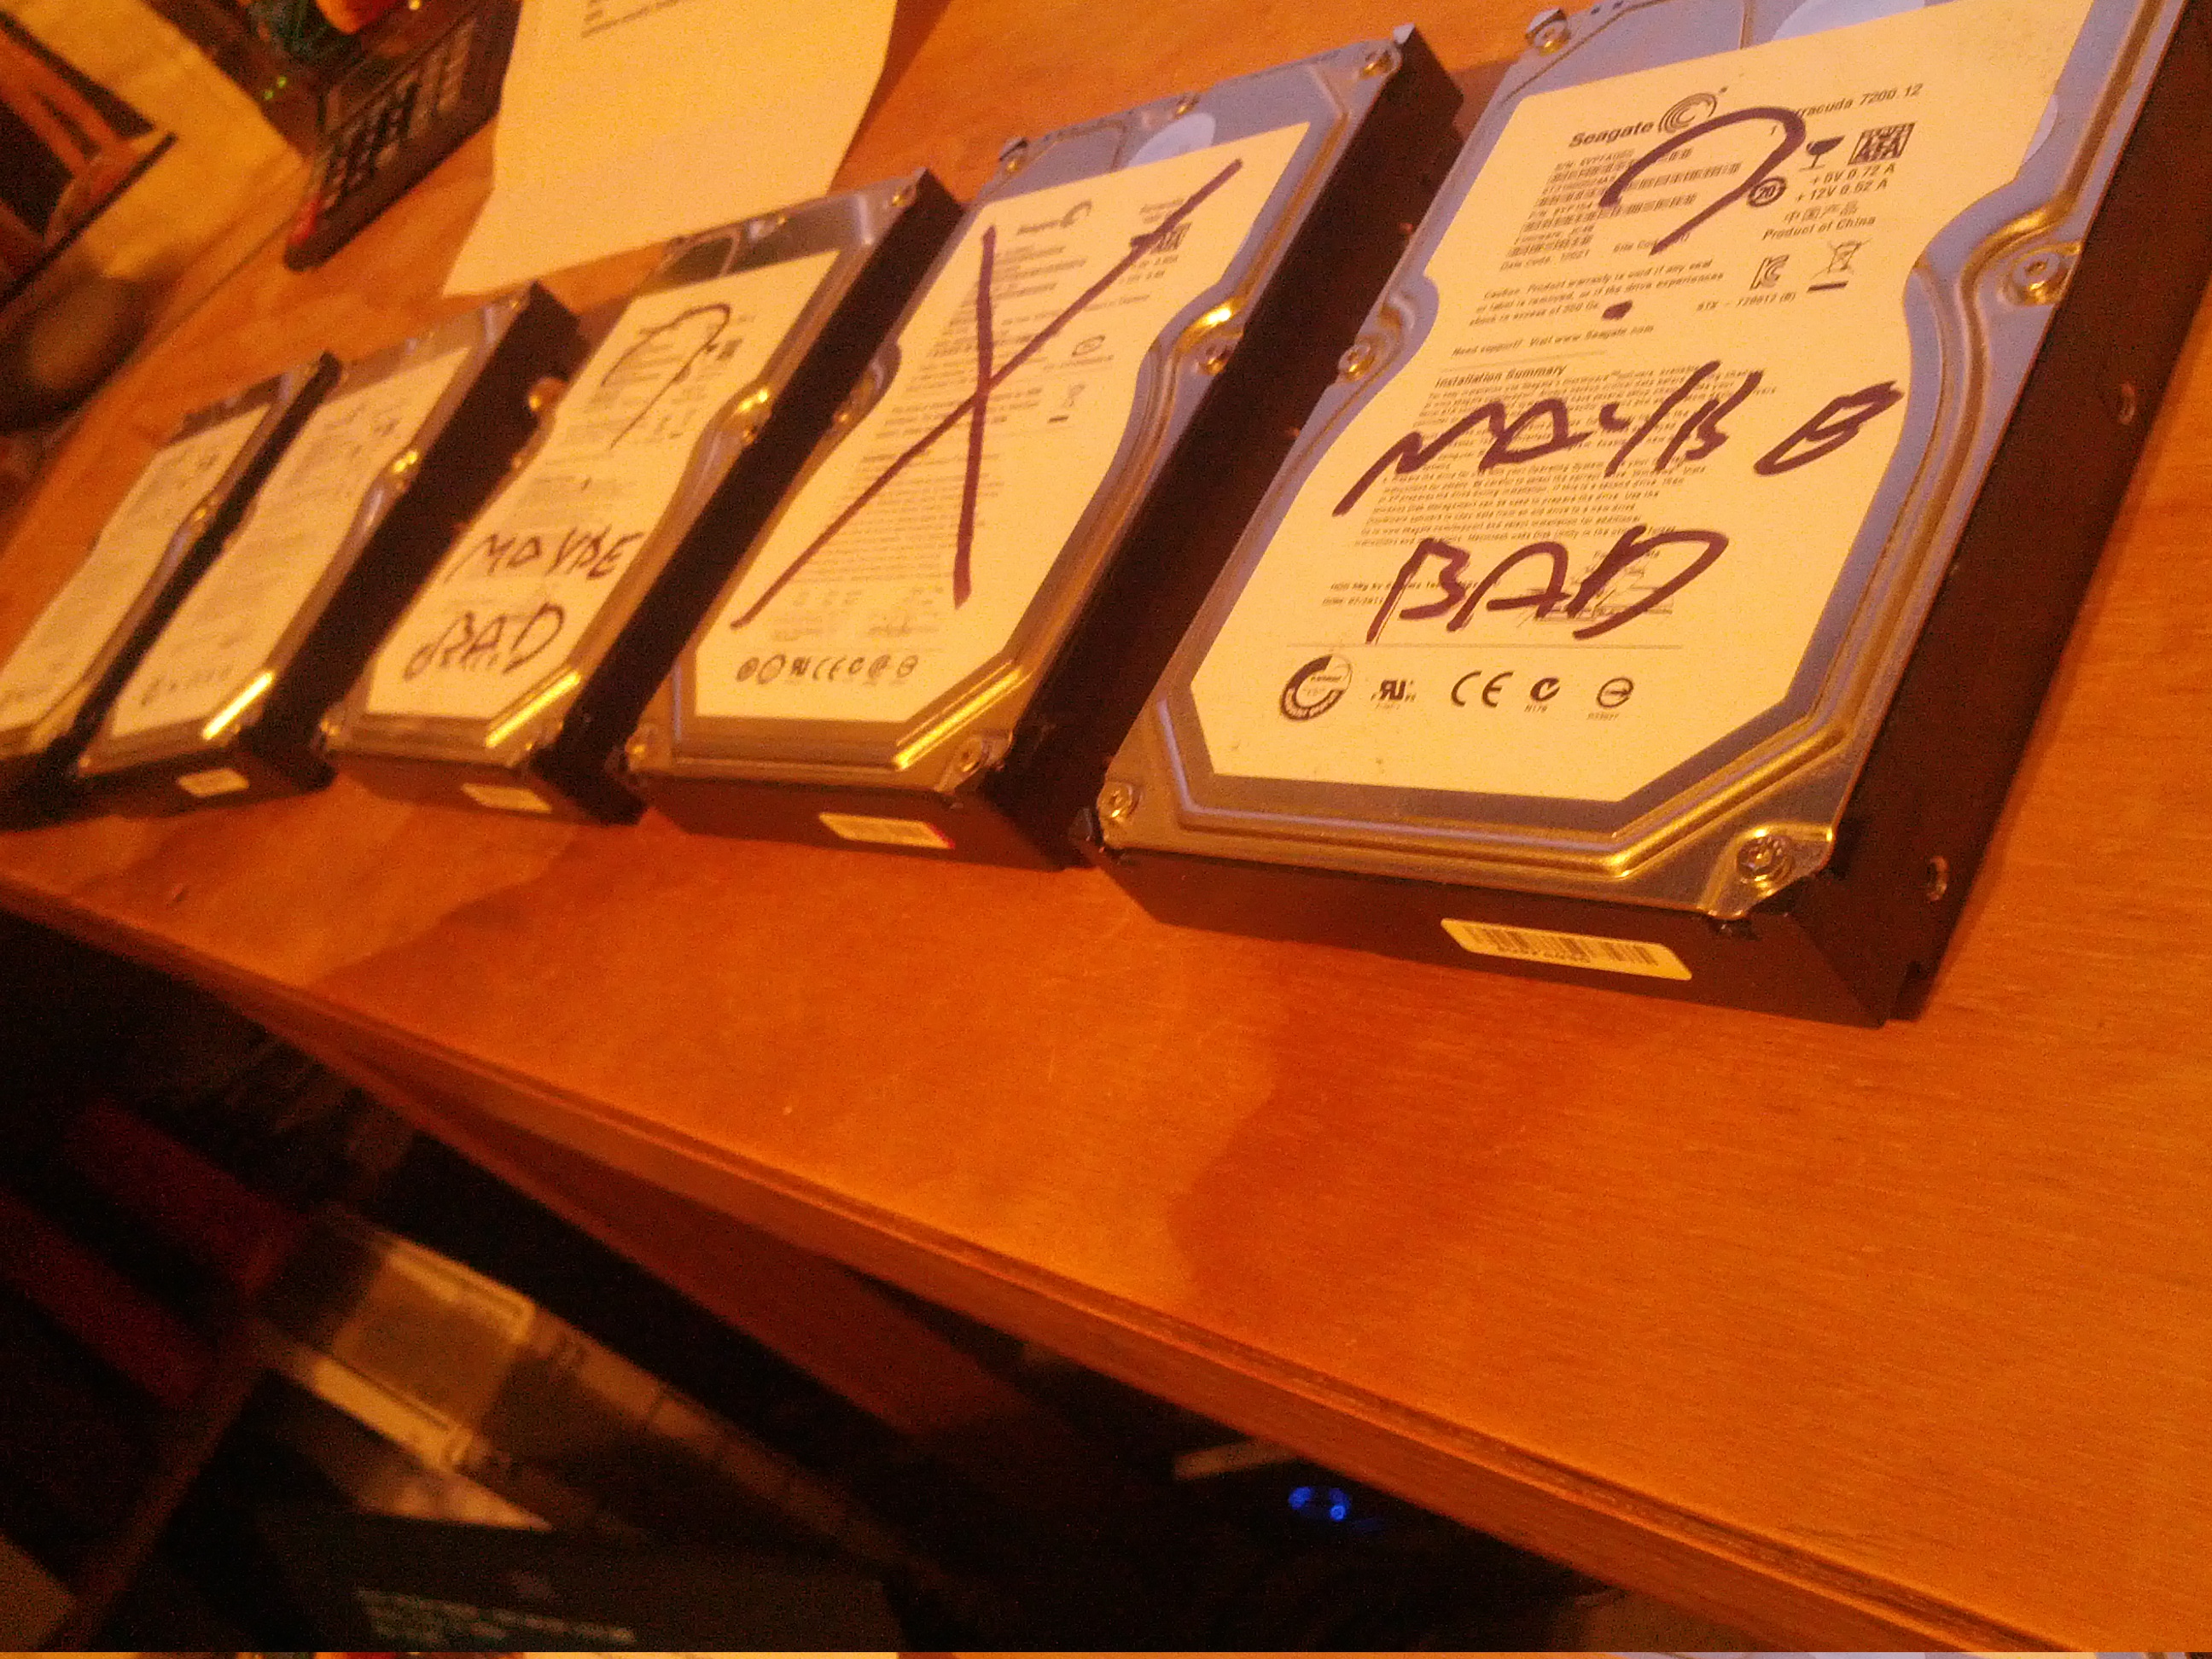
Marvell Chipset-based controller (left) and replacement SiI based controller (right). The SiI controller is much larger thanks to the PCI-X to PCI-e converter chip on it’s PCB.
I selected these cards in particular, as they’re used by the team at Backblaze (a massive online back service provider) for their storage pods, which are built entirely around giant JBOD disk arrays. I figured with the experience and testing this team does, any kit they recommend is likely to be pretty solid (check out their design/decision blog post).
# lspci | grep ATA
00:11.0 SATA controller: Advanced Micro Devices [AMD] nee ATI SB7x0/SB8x0/SB9x0 SATA Controller [AHCI mode]
03:04.0 RAID bus controller: Silicon Image, Inc. SiI 3124 PCI-X Serial ATA Controller (rev 02)
05:04.0 RAID bus controller: Silicon Image, Inc. SiI 3124 PCI-X Serial ATA Controller (rev 02)
These controllers use the “sata_sil24” kernel driver and are configured as simple JBOD controllers in the exact same fashion as the Marvell cards.
To properly test them, I rebuilt an array with a known bad disk in it. As expected, at some point during the rebuild, I got a failure of this disk:
Nov 13 10:15:19 phobos kernel: ata14.00: exception Emask 0x0 SAct 0x3fe SErr 0x0 action 0x6
Nov 13 10:15:19 phobos kernel: ata14.00: irq_stat 0x00020002, device error via SDB FIS
Nov 13 10:15:19 phobos kernel: ata14.00: failed command: READ FPDMA QUEUED
Nov 13 10:15:19 phobos kernel: ata14.00: cmd 60/00:08:00:c5:c7/01:00:02:00:00/40 tag 1 ncq 131072 in
Nov 13 10:15:19 phobos kernel:         res 41/40:00:2d:c5:c7/00:01:02:00:00/00 Emask 0x409 (media error) <F>
Nov 13 10:15:19 phobos kernel: ata14.00: status: { DRDY ERR }
Nov 13 10:15:19 phobos kernel: ata14.00: error: { UNC }
Nov 13 10:15:19 phobos kernel: ata14.00: failed command: READ FPDMA QUEUED
Nov 13 10:15:19 phobos kernel: ata14.00: cmd 60/00:10:00:c6:c7/01:00:02:00:00/40 tag 2 ncq 131072 in
Nov 13 10:15:19 phobos kernel:         res 9c/13:04:04:00:00/00:00:00:20:9c/00 Emask 0x2 (HSM violation)
Nov 13 10:15:19 phobos kernel: ata14.00: status: { Busy }
Nov 13 10:15:19 phobos kernel: ata14.00: error: { IDNF }
Nov 13 10:15:19 phobos kernel: ata14.00: failed command: READ FPDMA QUEUED
Nov 13 10:15:19 phobos kernel: ata14.00: cmd 60/c0:18:00:c7:c7/00:00:02:00:00/40 tag 3 ncq 98304 in
Nov 13 10:15:19 phobos kernel:         res 9c/13:04:04:00:00/00:00:00:30:9c/00 Emask 0x2 (HSM violation)
...
Nov 13 10:15:41 phobos kernel: ata14.00: exception Emask 0x0 SAct 0x0 SErr 0x0 action 0x0
Nov 13 10:15:41 phobos kernel: ata14.00: irq_stat 0x00060002, device error via D2H FIS
Nov 13 10:15:41 phobos kernel: ata14.00: failed command: READ DMA
Nov 13 10:15:41 phobos kernel: ata14.00: cmd c8/00:00:00:c5:c7/00:00:00:00:00/e2 tag 0 dma 131072 in
Nov 13 10:15:41 phobos kernel:         res 51/40:00:2d:c5:c7/00:00:02:00:00/02 Emask 0x9 (media error)
Nov 13 10:15:41 phobos kernel: ata14.00: status: { DRDY ERR }
Nov 13 10:15:41 phobos kernel: ata14.00: error: { UNC }
Nov 13 10:15:41 phobos kernel: ata14.00: configured for UDMA/100
Nov 13 10:15:41 phobos kernel: sd 13:0:0:0: [sdk] Unhandled sense code
Nov 13 10:15:41 phobos kernel: sd 13:0:0:0: [sdk] Result: hostbyte=DID_OK driverbyte=DRIVER_SENSE
Nov 13 10:15:41 phobos kernel: sd 13:0:0:0: [sdk] Sense Key : Medium Error [current] [descriptor]
Nov 13 10:15:41 phobos kernel: Descriptor sense data with sense descriptors (in hex):
Nov 13 10:15:41 phobos kernel:        72 03 11 04 00 00 00 0c 00 0a 80 00 00 00 00 00
Nov 13 10:15:41 phobos kernel:        02 c7 c5 2d
Nov 13 10:15:41 phobos kernel: sd 13:0:0:0: [sdk] Add. Sense: Unrecovered read error - auto reallocate failed
Nov 13 10:15:41 phobos kernel: sd 13:0:0:0: [sdk] CDB: Read(10): 28 00 02 c7 c5 00 00 01 00 00
Nov 13 10:15:41 phobos kernel: ata14: EH complete
Nov 13 10:15:41 phobos kernel: md/raid:md5: read error corrected (8 sectors at 46646648 on sdk)
The known faulty disk failed as expected, but rather than suddenly vanishing from the SATA controller, the disk remained attached and proceeded to spew out seek errors for the next few hours, slowing down the rebuild process.
Most importantly, no other disks failed at any stage following the move from the Marvell to the SiI controller. Having assured myself with the stability and reliability of the controller, I was able to add in other disks I weren’t sure had or had not failed and quickly eliminate the truly faulty disks.
My RAID array rebuild completed successfully and I was then able to restore the LVM volume and all my data and restore full services on my system.
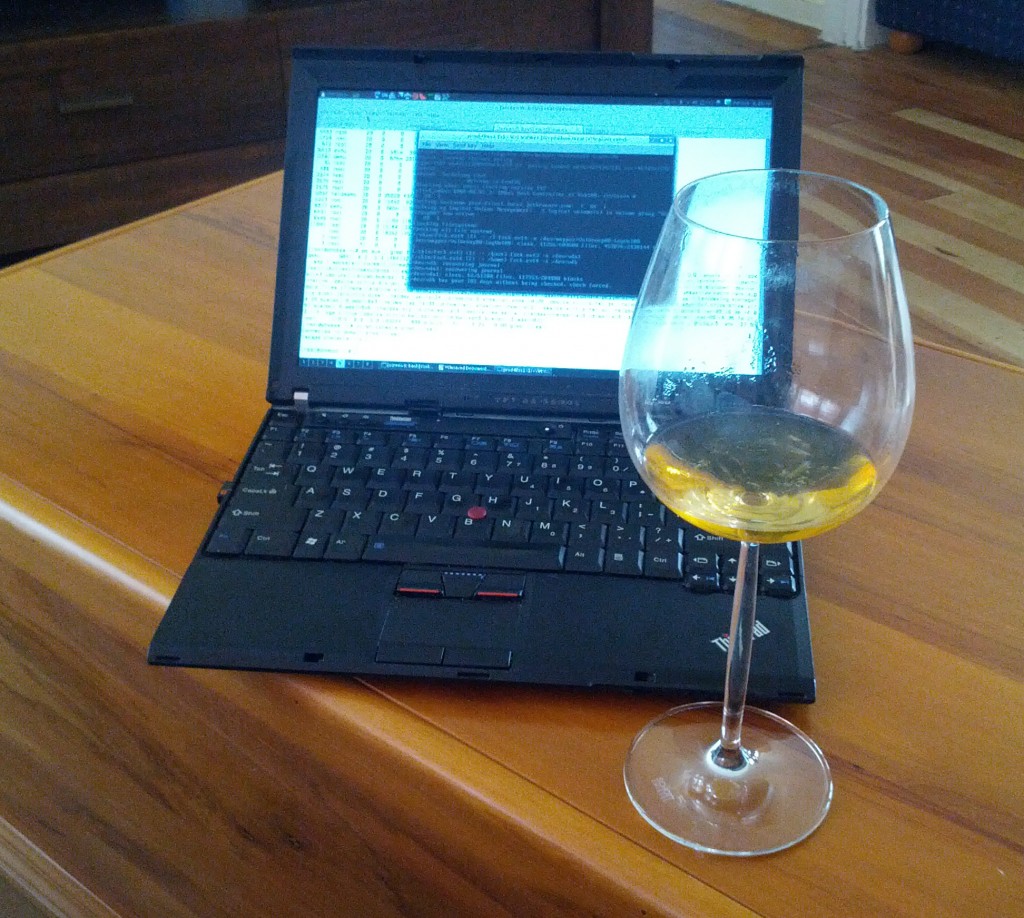
With the data restored successfully at last, time for a delicious local IPA to celebrate victory at long last.
Having gone through the pain and effort to recover and rebuild this system, I had to ask myself a few questions about my design decisions and what I could do to avoid a fault like this again in future.
Are the Marvell controllers shit?
Yes. Next question?
In seriousness, the fact that two completely different PCI-e card vendors exhibited the exact same problem with this controller shows that it’s not going to be the fault of the manufacturer of the controller card and must be something with the controller itself or the kernel driver operating it.
It is *possible* that the Linux kernel has a bug in the sata_mv controller, but I don’t believe that’s the likely cause due to the way the fault manifests. Whenever a disk failed, the disks would slowly disappear from the kernel entirely, with the kernel showing surprise at suddenly having lost a disk connection. Without digging into the Marvell driver code, it looks very much like the hardware is failing in some fashion and dropping the disks. The kernel just gets what the hardware reports, so when the disks vanish, it just tries to cope the best that it can.
I also consider a kernel bug to be a vendor fault anyway. If you’re a major storage hardware vendor, you have an obligation to thoroughly test the behaviour of your hardware with the world’s leading server operating system and find/fix any bugs, even if the driver has been written by the open source community, rather than your own in house developers.
Finally posts on FreeBSD mailing lists also show users reporting strange issues with failing disks on Marvell controllers, so that adds a cross-platform dimension to the problem. Further testing with the RAID vendor drivers rather than sata_mv would have been useful, but they only had binaries for old kernel versions that didn’t match the CentOS 6 kernel I was using.
Are the Seagate disks shit?
Maybe – it’s hard to be sure, since my server has been driven up in my car from Wellington to Auckland (~ 900km) and back which would not have been great for the disks (especially with my driving) and has had a couple of times that it’s gotten warmer than I would have liked thanks to the wonders of running a server in a suburban home.
I am distrustful of my Seagate drives, but I’ve had bad experienced with Western Digital disks in the past as well, which brings me to the simple conclusion that all spinning rust platters are crap and the price drops of SSDs to a level that kills hard disks can’t come soon enough.
And even if I plug in the worst possible, spec-violating SATA drive to a controller, that controller should be able to handle it properly and keep the disk isolated, even if it means disconnecting one bad disk. The Marvell 88SX7042 controller is advertised as being a 4-channel controller, I therefore do not expect issues on one channel to impact the activities on the other channels. In the same way that software developers code assuming malicious input, hardware vendors need to design for the worst possible signals from other devices.
What about Enterprise vs Consumer disks
I’ve looked into the differences between Enterprise and Consumer grade disks before.
Enterprise disks would certainly help the failures occur in a cleaner fashion. Whether it would result in correct behaviour of the Marvell controllers, I am unsure… the cleaner death *may* result in the controller glitching less, but I still wouldn’t trust it after what I’ve seen.
I also found rebuilding my RAID array with one of my bad sector disks would take around 12 hours when the disk was failing. After kicking out the disk from the array, that rebuild time dropped to 5 hours, which is a pretty compelling argument for using enterprise disks to have them die quicker and cleaner.
Lessons & Recommendations
Whilst slow, painful and frustrating, this particular experience has not been a total waste of time, there are certainly some useful lessons I’ve learnt from the exercise and things I’d do different in future. In particular:
- Anyone involved in IT ends up with a few bad disks after a while. Keep some of these bad disks around rather than destroying them. When you build a new storage array, install a known bad disk and run disk benchmarks to trigger a fault to ensure that all your new infrastructure handles the failure of one disk correctly. Doing this would have allowed me to identify the Marvell controllers as crap before the server went into production, as I would have seen that a bad disks triggers a cascading fault across all the good disks.
- Record the serial number of all your disks once you build the server. I had annoyances where bad disks would disappear from the controller entirely and I wouldn’t know what the serial number of the disk was, so had to get the serial numbers from all the good disks and remove the one disk that wasn’t on the list in a slow/annoying process of elimination.
- RAID is not a replacement for backup. This is a common recommendation, but I still know numerous people who treat RAID as an infallible storage solution and don’t take adequate precautions for failure of the storage array. The same applies to RAID-like filesystem technologies such as ZFS. I had backups for almost all my data, but there were a few things I hadn’t properly covered, so it was a good reminder not to succumb to hubris in one’s data redundancy setup.
- Don’t touch anything with a Marvell chipset in it. I’m pretty bitter about their chipsets following this whole exercise and will be staying well away from their products for the foreseeable future.
- Hardware can be time consuming and expensive. As a company, I’d stick to using hosted/cloud providers for almost anything these days. Sure the hourly cost can seem expensive, but not needing to deal with hardware failures is of immense value in itself. Imagine if this RAID issue had been with a colocated server, rather than a personal machine that wasn’t mission critical, the cost/time to the company would have been a large unwanted investment.


