Tag Archives: alarm

Firebase FCM upstream with Swift on iOS

I’ve been learning a bit of Swift lately in order to write an iOS app for my alarm system. I’m not very good at it yet, but figured I’d write some notes to help anyone else playing with the murky world of Firebase Cloud Messaging/FCM and iOS.

One of the key parts of the design is that I wanted the alarm app and the alarm server to communicate directly with each other without needing public facing endpoints, rather than the conventional design when the app interacts via an HTTP API.

The intention of this design is that it means I can dump all the alarm software onto a small embedded computer and as long as that computer has outbound internet access, it just works™️. No headaches about discovering the endpoint of the service and much more simplified security as there’s no public-facing web server.

Given I need to deliver push notifications to the app, I implemented Google Firebase Cloud Messaging (FCM) – formerly GCM – for push delivery to both iOS and Android apps.

Whilst FCM is commonly used for pushing to devices, it also supports pushing messages back upstream to the server from the device. In order to do this, the server must be implemented as an XMPP server and the FCM SDK be embedded into the app.

The server was reasonably straight forwards, I’ve written a small Java daemon that uses a reference XMPP client implementation and wraps some additional logic to work with HowAlarming.

The client side was a bit more tricky. Google has some docs covering how to implement upstream messaging in the iOS app, but I had a few issues to solve that weren’t clearly detailed there.


Handling failure of FCM upstream message delivery

Firstly, it’s important to have some logic in place to handle/report back if a message can not be sent upstream – otherwise you have no way to tell if it’s worked. To do this in swift, I added a notification observer for .MessagingSendError which is thrown by the FCM SDK if it’s unable to send upstream.

class AppDelegate: UIResponder, UIApplicationDelegate, MessagingDelegate {

 func application(_ application: UIApplication, didFinishLaunchingWithOptions launchOptions: [UIApplicationLaunchOptionsKey: Any]?) -> Bool {
   ...
   // Trigger if we fail to send a message upstream for any reason.
   NotificationCenter.default.addObserver(self, selector: #selector(onMessagingUpstreamFailure(_:)), name: .MessagingSendError, object: nil)
   ...
 }

 @objc
 func onMessagingUpstreamFailure(_ notification: Notification) {
   // FCM tends not to give us any kind of useful message here, but
   // at least we now know it failed for when we start debugging it.
   print("A failure occurred when attempting to send a message upstream via FCM")
 }
}

Unfortunately I’m yet to see a useful error code back from FCM in response to any failures to send message upstream – seem to just get back a 501 error to anything that has gone wrong which isn’t overly helpful… especially since in web programming land, any 5xx series error implies it’s the remote server’s fault rather than the client’s.


Getting the GCM Sender ID

In order to send messages upstream, you need the GCM Sender ID. This is available in the GoogleService-Info.plist file that is included in the app build, but I couldn’t figure out a way to extract this easily from the FCM SDK. There probably is a better/nice way of doing this, but the following hack works:

// Here we are extracting out the GCM SENDER ID from the Google
// plist file. There used to be an easy way to get this with GCM, but
// it's non-obvious with FCM so here's a hacky approach instead.
if let path = Bundle.main.path(forResource: "GoogleService-Info", ofType: "plist") {
  let dictRoot = NSDictionary(contentsOfFile: path)
  if let dict = dictRoot {
    if let gcmSenderId = dict["GCM_SENDER_ID"] as? String {
       self.gcmSenderId = gcmSenderId // make available on AppDelegate to whole app
    }
  }
}

And yes, although we’re all about FCM now, this part hasn’t been rebranded from the old GCM product, so enjoy having yet another acronym in your app.


Ensuring the FCM direct channel is established

Finally the biggest cause I had for upstream message delivery failing, is that I was often trying to send an upstream message before FCM had finished establishing the direct channel.

This happens for you automatically by the SDK whenever the app is loaded into foreground, provided that you have shouldEstablishDirectChannel set to true. This can take up to several seconds after application launch for it to actually complete – which means if you try to send upstream too early, the connection isn’t ready, and your send fails with an obscure 501 error.

The best solution I found was to use an observer to listen to .MessagingConnectionStateChanged which is triggered whenever the FCM direct channel connects or disconnects. By listening to this notification, you know when FCM is ready and capable of delivering upstream messages.

An additional bonus of this observer, is that when it indicates the FCM direct channel is established, by that time the FCM token for the device is available to your app to use if needed.

So my approach is to:

  1. Setup FCM with shouldEstablishDirectChannel set to true (otherwise you won’t be going upstream at all!).
  2. Setup an observer on .MessagingConnectionStateChanged
  3. When triggered, use Messaging.messaging().isDirectChannelEstablished to see if we have a connection ready for us to use.
  4. If so, pull the FCM token (device token) and the GCM Sender ID and retain in AppDelegate for other parts of the app to use at any point.
  5. Dispatch the message to upstream with whatever you want in messageData.

My implementation looks a bit like this:

class AppDelegate: UIResponder, UIApplicationDelegate, MessagingDelegate {

 func application(_ application: UIApplication, didFinishLaunchingWithOptions launchOptions: [UIApplicationLaunchOptionsKey: Any]?) -> Bool {
  ...
  // Configure FCM and other Firebase APIs with a single call.
  FirebaseApp.configure()

  // Setup FCM messaging
  Messaging.messaging().delegate = self
  Messaging.messaging().shouldEstablishDirectChannel = true

  // Trigger when FCM establishes it's direct connection. We want to know this to avoid race conditions where we
  // try to post upstream messages before the direct connection is ready... which kind of sucks.
  NotificationCenter.default.addObserver(self, selector: #selector(onMessagingDirectChannelStateChanged(_:)), name: .MessagingConnectionStateChanged, object: nil)
  ...
 }

 @objc
 func onMessagingDirectChannelStateChanged(_ notification: Notification) {
  // This is our own function listen for the direct connection to be established.
  print("Is FCM Direct Channel Established: \(Messaging.messaging().isDirectChannelEstablished)")

  if (Messaging.messaging().isDirectChannelEstablished) {
   // Set the FCM token. Given that a direct channel has been established, it kind of implies that this
   // must be available to us..
   if self.registrationToken == nil {
    if let fcmToken = Messaging.messaging().fcmToken {
     self.registrationToken = fcmToken
     print("Firebase registration token: \(fcmToken)")
    }
   }

   // Here we are extracting out the GCM SENDER ID from the Google PList file. There used to be an easy way
   // to get this with GCM, but it's non-obvious with FCM so we're just going to read the plist file.
   if let path = Bundle.main.path(forResource: "GoogleService-Info", ofType: "plist") {
    let dictRoot = NSDictionary(contentsOfFile: path)
     if let dict = dictRoot {
      if let gcmSenderId = dict["GCM_SENDER_ID"] as? String {
       self.gcmSenderID = gcmSenderId
     }
    }
   }

  // Send an upstream message
  let messageId = ProcessInfo().globallyUniqueString
  let messageData: [String: String] = [
   "registration_token": self.registrationToken!, // In my use case, I want to know which device sent us the message
   "marco": "polo"
  ]
  let messageTo: String = self.gcmSenderID! + "@gcm.googleapis.com"
  let ttl: Int64 = 0 // Seconds. 0 means "do immediately or throw away"

  print("Sending message to FCM server: \(messageTo)")

  Messaging.messaging().sendMessage(messageData, to: messageTo, withMessageID: messageId, timeToLive: ttl)
  }
 }

 ...
}

For a full FCM downstream and upstream implementation example, you can take a look at the HowAlarming iOS app source code on Github and if you need a server reference, take a look at the HowAlarming GCM server in Java.


Learnings

It’s been an interesting exercise – I wouldn’t particularly recommend this architecture for anyone building real world apps, the main headaches I ran into were:

  1. FCM SDK just seems a bit buggy. I had a lot of trouble with the GCM SDK and the move to FCM did improve stuff a bit, but there’s still a number of issues that occur from time to time. For example: occasionally a FCM Direct Channel isn’t established for no clear reason until the app is terminated and restarted.
  2. Needing to do things like making sure FCM Direct Channel is ready before sending upstream messages should probably be handled transparently by the SDK rather than by the app developer.
  3. I have still yet to get background code execution on notifications working properly. I get the push notification without a problem, but seem to be unable to trigger my app to execute code even with content-available == 1 . Maybe a bug in my code, or FCM might be complicating the mix in some way, vs using pure APNS. Probably my code.
  4. It’s tricky using FCM messages alone to populate the app data, occasionally have issues such as messages arriving out of order, not arriving at all, or occasionally ending up with duplicates. This requires the app code to process, sort and re-populate the table view controller which isn’t a lot of fun. I suspect it would be a lot easier to simply re-populate the view controller on load from an HTTP endpoint and simply use FCM messages to trigger refreshes of the data if the user taps on a notification.

So my view for other projects in future would be to use FCM purely for server->app message delivery (ie: “tell the user there’s a reason to open the app”) and then rely entirely on a classic app client and HTTP API model for all further interactions back to the server.
HowAlarming

The previous owners of our house had left us with a reasonably comprehensive alarm system wired throughout the house, however like many alarm systems currently in homes, it required an analogue phone line to be able to call back to any kind of monitoring service.

To upgrade the alarm to an IP module via the monitoring company would be at least $500 in parts and seemed to consist of hooking the phone line to essentially a VoIP ATA adaptor which can phone home to their service.

As a home owner I want it internet connected so I can do self-monitoring, give me the ability to control remotely and to integrate it with IP-based camera systems. Most of the conventional alarm companies seem to offer none of things, or only very expensive sub-standard solutions.

To make things worse, their monitoring services are also pretty poor. Most of the companies I spoke to would receive an alarm, then call me to tell me about it/check with me and only then send someone out to investigate. The existing alarm company the previous owner was using didn’t even offer a callout security service!

Spark (NZ incumbent telco) recently brought out a consumer product called Morepork (as seen on stuff!) which looks attractive for your average non-techie consumer, but I’m not particularly keen to tie myself to Spark’s platform and it is very expensive, especially when considering I have to discard an existing functional system and start from scratch. There’s also some design weaknesses like the cameras being mains dependent, which I don’t consider acceptable given how easy it is to cut power to a house.

So I decided that I’d like to get my existing alarm IP connected, but importantly, I wanted to retain complete control over the process of generating an alert and delivering it to my phone so that it’s as fast as possible and also, as reliable as possible.

Not only did I want to avoid the human factor, but I’m also wary of the proprietary technologies used by most of the alarm companies off-the-shelf solutions. I have some strong doubts about the security of a number of offers, not to mention life span (oh sorry that alarm is EOL, no new mobile app for you) and the level of customisation/integration offered (oh you want to link your alarm with your camera motion detection? Sorry, we don’t support that).


I did some research on my alarm system and found it’s one of the DSC PowerSeries range which is a large Canadian company operating globally. The good thing about them being a large global player is that there’s a heap of reference material about their products online.

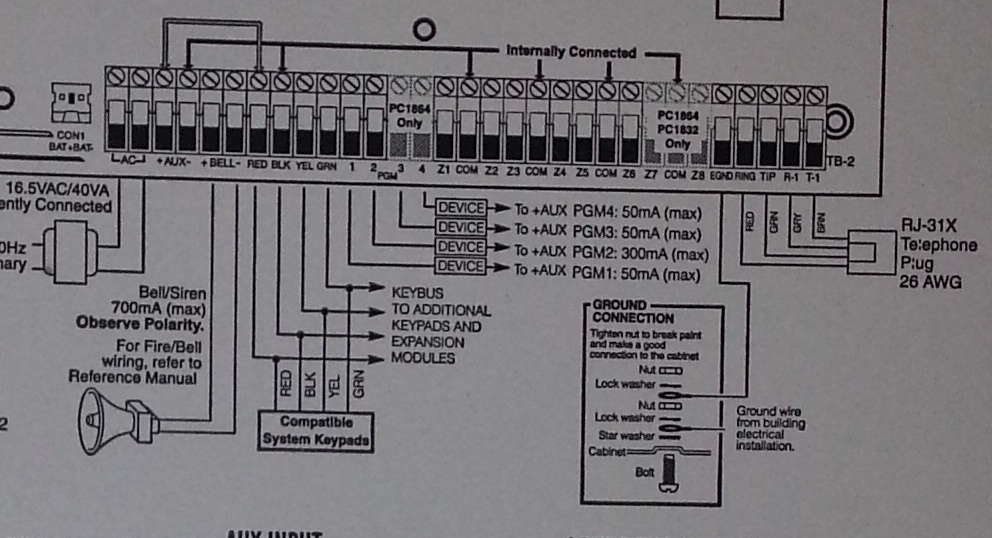
With a quick search I was able to find user guides, installer guides, programming guides and more. They also include a full wiring diagram inside the alarm control centre which is exceptionally useful, since it essentially explains how you can connect any kind of sensors yourself which can save a whole heap of money compared to paying for an alarm company to do the installation.

Spagettie

I wish all my electronic devices came with documentation this detailed.

The other great thing about this alarm is that since DSC is so massive, there’s an ecosystem of third party vendors offering components for it. Searching for third party IP modules, I ran into this article where the author purchased an IP module from a company known as Envisalink and used it’s third party API to write custom code to get alarm events and issue commands.

A third party API sounded perfect, so I purchased the EnvisaLink EVL-4 for $239 NZD delivered and did the installation myself. In theory the installation is easy, just a case of powering down the alarm (not touching any 240V hard wired mains in the process) and connecting it via the 4 wire keypad bus.

In my case it ended up being a bit more complex since the previous owner had helpfully never given me any of the master/installer alarm codes, so I ended up doing a factory reset of the unit and re-programming it from scratch (which means all the sensors, etc) which takes about a day to figure out and do the first time. The plus side is that this gave me complete control over the unit and I was able to do things like deprogram the old alarm company’s phone number to stop repeat failed callout attempts.

Once connected, the EnvisaLink unit was remarkably hassle free to setup – it grabbed a DHCP lease, connected to the internet and phoned home to the vendor’s free monitoring service.

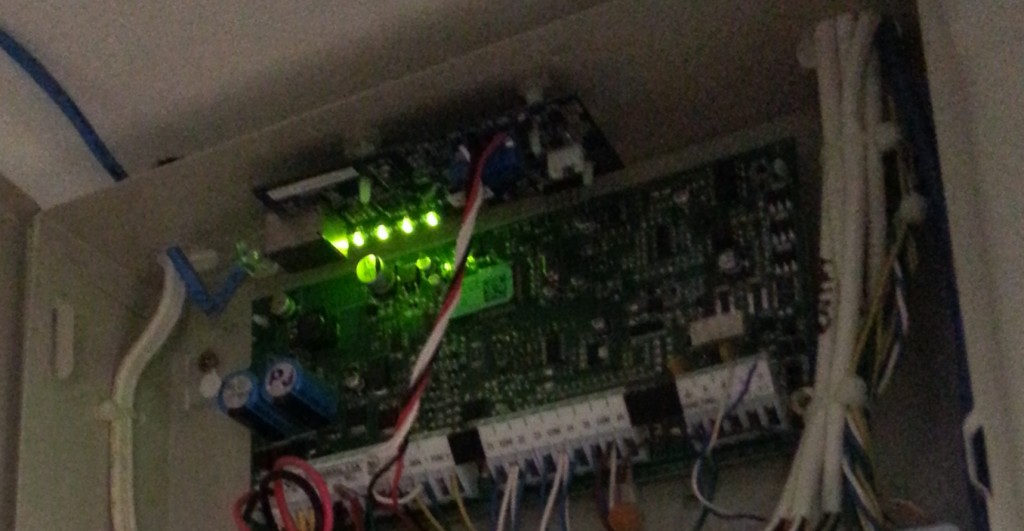
Installed with pretty LEDs!

EnvisaLink unit installed at the top above the alarm control circuit. A++ for LED ricing guys!


The EnvisaLink hardware is a great little unit and the third party programmer’s interface is reasonably well documented and works without too much grief. Unfortunately the rest of the experience of the company selling it isn’t particularly good. Specifically:

  • Their website places the order by emailing their accounts mailbox. How do I know? Because they printed the email including my credit card number in full and sent it as the packing slip on it’s journey across the world. Great PCI compliance guys!
  • They show the product as working with Android, iPhone and Blackberry. They carefully avoid saying it has native apps, they actually mean it has a “smart phone” optimized version, which is as terrible as it sounds.
  • I can’t enable alerts on their service since their signup process keeps sending my email a blank validation code. So I had an alarm that couldn’t alarm me via their service.
  • No 2FA on logging into the alarm website, so you could brute force login and then disable the alarm remotely… or set it off if you just want to annoy the occupants.

I haven’t dug into the communications between the unit and it’s vendor, I sure hope it’s SSL/TLS secured and doesn’t have the ability to remotely exploit it and upgrade it, but I’m not going to chance it. Even if they’ve properly encrypted and secured comms between the unit and their servers, the security is limited to the best practices of the company and software which already look disturbingly weak.

Thankfully my requirements for the module is purely it’s third party API so I can integrate with my own systems, so I can ignore all these issues and put it on it’s own little isolated VLAN where it can’t cause any trouble and talk to anything but my server.


So having sorted out the hardware and gotten the alarm onto the network, I now needed some software that would at least meet the basic alerting requirements I have.

There’s an existing comprehensive Java/Android-based product (plainly labeled as “DSC Security Server”) which looks very configurable, but I specifically wanted something open source to make sure the alarm integration remained maintainable long term and to use Google Push Notifications  for instant alerting on both Android (which supports long running background processes) and iOS (which does not – hence you must use push notifications via APNS).

I ended up taking advantage of some existing public code for handling the various commands and error responses from the Envisalink/DSC alarm combination but reworked it a bit so I now have a module system that consists of “alarm integrators” exchanging information/events with the alarm system and “alarm consumers” which decide what to do with the events generated. These all communicate via a simple beanstalk queue.

This design gives ultimate simplicity – each program is not much more than a small script and there’s a standard documented format for anyone whom wants to add support for other alarm integrators or alarm consumers in future. I wanted it kept simple, making it the sort of thing you could dump onto a Raspberry Pi and have anyone with basic scripting skills be able to debug and adjust it.

I’ve assembled these programs into an open source package I’m calling “HowAlarming”“, hopefully it might be useful for anyone in future with the same alarm system or wanting a foundation for building their own software for other alarms (or even their own alarms).


The simplest solution to get alerts from the system would be by sending SMS using one of the many different web-based SMS services, but I wanted something I can extend to support receiving images from the surveillance system in future and maybe also sending commands back.

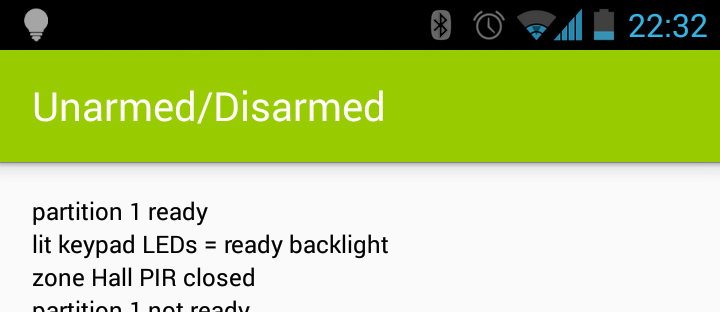
Hence I’ve written a companion Android app which receives messages from HowAlarming via push notifications and maintains an event log and the current state of the alarm.

UX doens't get much better than this.

UX doens’t get much better than this.

It’s pretty basic, but it offers the MVP that I require. Took about a day to hack together not having done any Android or Java before, thankfully Android Studio makes the process pretty easy with lots of hand holding and easy integration with the simulators and native devices.

TBD if I can hack something together in a day not having done any native app development before that’s better than many of the offerings from the alarm companies currently around, they need to be asking themselves some hard questions. At the very least, they should get someone to write some apps that can pull their customer’s alarm state from their current phone-home infrastructure – there’s probably good money to be made giving existing customers on non-IP era alarms upgrades given the number of installations out there.


So far my solution is working well for me. It’s not without it’s potential problems, for example alarm communications are now at the mercy of a power/internet outage whereas previously as long as the phone line was intact, it could call out. However this is easily fixed with my UPS and 3G failover modem – the 3G actually makes it better than previously.


The other potential issue is that I don’t know what insurance would classify this nature of self-monitoring as. I have mine declared as “un-monitored” to avoid any complications, but if your insurance conditions require monitoring I’m unsure if a home-grown solution would meet those requirements (even if it is better than 90% of the alarm companies). So do your research and check your contracts & terms.

Pimping my ride with high pitch painful sounds

I got my car back from the repair shop on Friday following it’s run in with the less pleasant residents of Auckland, with all the ignition and dash repaired.

Unfortunately the whole incident costs me at least $500 in excess payments, not to mention future impacts to my insurance premiums, so I’m not exactly a happy camper, even though I had full insurance.

Because I really don’t want to have to pay another $500 excess when the next muppet tries to break into it, I decided to spend the money to get an alarm installed, to deter anyone trying to break in again – going to all the effort to silence an alarm for a 1997 Toyota Starlet really won’t be worth the effort, sending them on to another easier target.

(I did consider some of those fake stickers and a blinky LED, but a real alarm does mean that if you hit the car, you’ll quickly get a chirp confirming there is an alarm present. Plus I get one of those chirpy remote controls to unlook the doors! :-D)

I do really hate car alarms, but it’s worth it to have something that will send anyone messing with my car running before it wakes up half the apartment complex.

I wanted to get a decent alarm installed properly and ended up getting referred to Mike & Lance at www.carstereoinstall.co.nz who do onsite visits to install which was really handy, and totally worth it after seeing all the effort needed to do the installation.

Car electronics spaghetti! Considering this is a pretty basic 1997 car, I'd hate to think what the newer ones are like...

There’s a bit of metal drilling, cable running, soldering, un-assembling parts of the car’s interior and trying to figure out which cables control which features of the car, all up it took two guys about 2 hours to complete.

Cost about $325 for the alarm and labor, plus an extra $40 as they had to run wires and install switches for the boot, which is pretty good when you consider it’s a 4 man hour job, would have taken all day if I’d done it at noob pace.

Would recommend these guys if you’re in Auckland. As an extra bonus, Mike turned out to be an ex-IT telco guy so we had some interesting chats – NZ is such a small world at times :-/