Tag Archives: DIY

HowAlarming

The previous owners of our house had left us with a reasonably comprehensive alarm system wired throughout the house, however like many alarm systems currently in homes, it required an analogue phone line to be able to call back to any kind of monitoring service.

To upgrade the alarm to an IP module via the monitoring company would be at least $500 in parts and seemed to consist of hooking the phone line to essentially a VoIP ATA adaptor which can phone home to their service.

As a home owner I want it internet connected so I can do self-monitoring, give me the ability to control remotely and to integrate it with IP-based camera systems. Most of the conventional alarm companies seem to offer none of things, or only very expensive sub-standard solutions.

To make things worse, their monitoring services are also pretty poor. Most of the companies I spoke to would receive an alarm, then call me to tell me about it/check with me and only then send someone out to investigate. The existing alarm company the previous owner was using didn’t even offer a callout security service!

Spark (NZ incumbent telco) recently brought out a consumer product called Morepork (as seen on stuff!) which looks attractive for your average non-techie consumer, but I’m not particularly keen to tie myself to Spark’s platform and it is very expensive, especially when considering I have to discard an existing functional system and start from scratch. There’s also some design weaknesses like the cameras being mains dependent, which I don’t consider acceptable given how easy it is to cut power to a house.

So I decided that I’d like to get my existing alarm IP connected, but importantly, I wanted to retain complete control over the process of generating an alert and delivering it to my phone so that it’s as fast as possible and also, as reliable as possible.

Not only did I want to avoid the human factor, but I’m also wary of the proprietary technologies used by most of the alarm companies off-the-shelf solutions. I have some strong doubts about the security of a number of offers, not to mention life span (oh sorry that alarm is EOL, no new mobile app for you) and the level of customisation/integration offered (oh you want to link your alarm with your camera motion detection? Sorry, we don’t support that).


I did some research on my alarm system and found it’s one of the DSC PowerSeries range which is a large Canadian company operating globally. The good thing about them being a large global player is that there’s a heap of reference material about their products online.

With a quick search I was able to find user guides, installer guides, programming guides and more. They also include a full wiring diagram inside the alarm control centre which is exceptionally useful, since it essentially explains how you can connect any kind of sensors yourself which can save a whole heap of money compared to paying for an alarm company to do the installation.

Spagettie

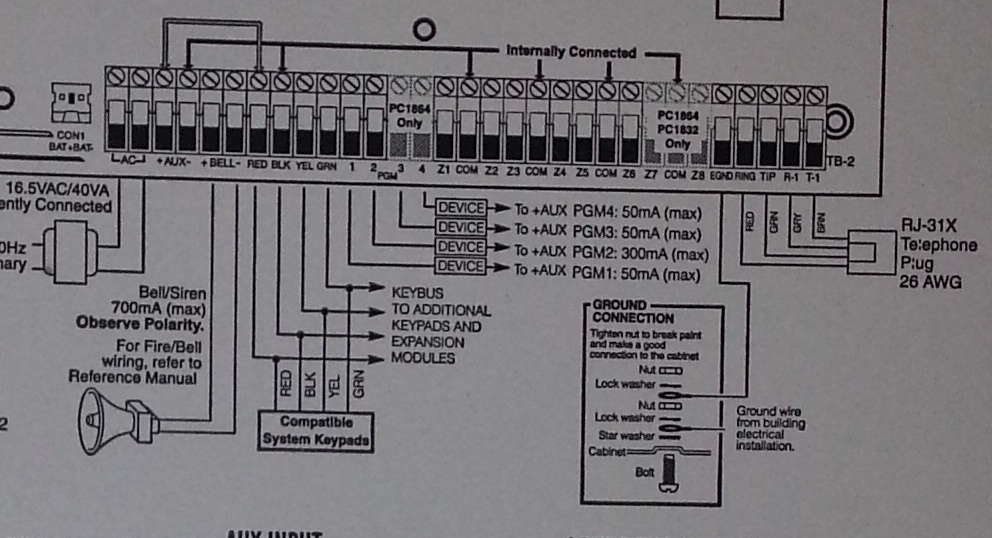
I wish all my electronic devices came with documentation this detailed.

The other great thing about this alarm is that since DSC is so massive, there’s an ecosystem of third party vendors offering components for it. Searching for third party IP modules, I ran into this article where the author purchased an IP module from a company known as Envisalink and used it’s third party API to write custom code to get alarm events and issue commands.

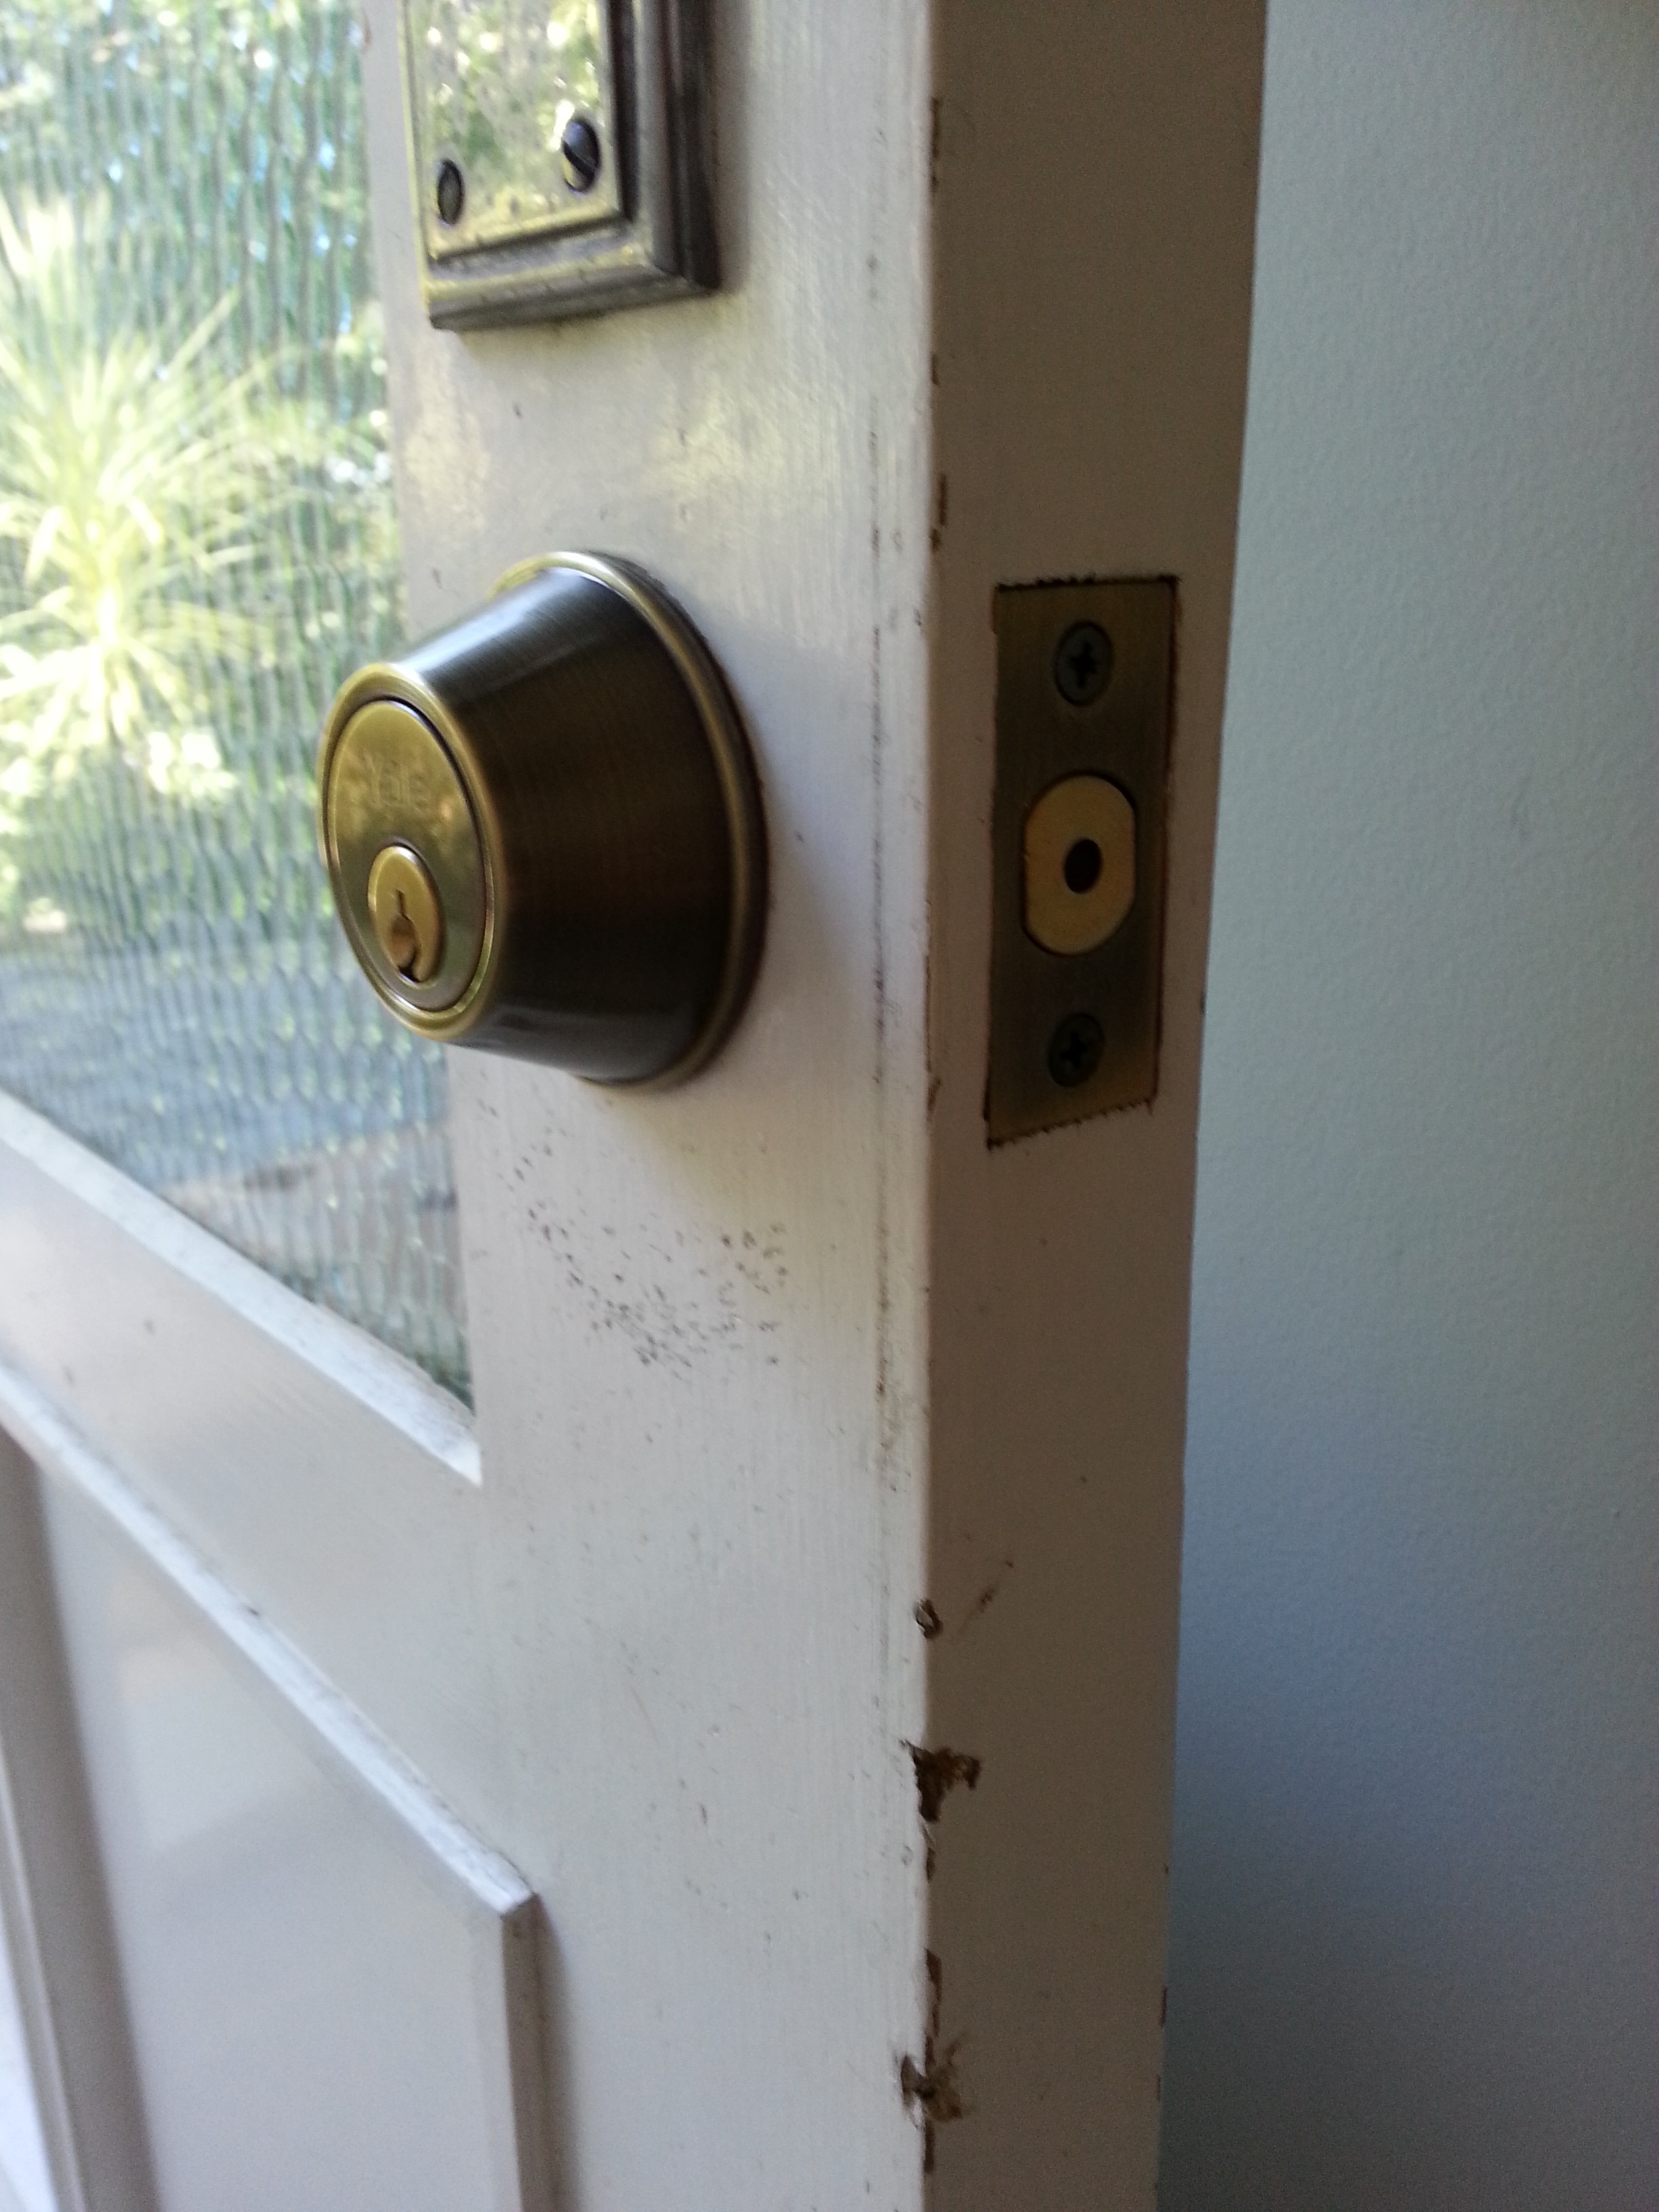
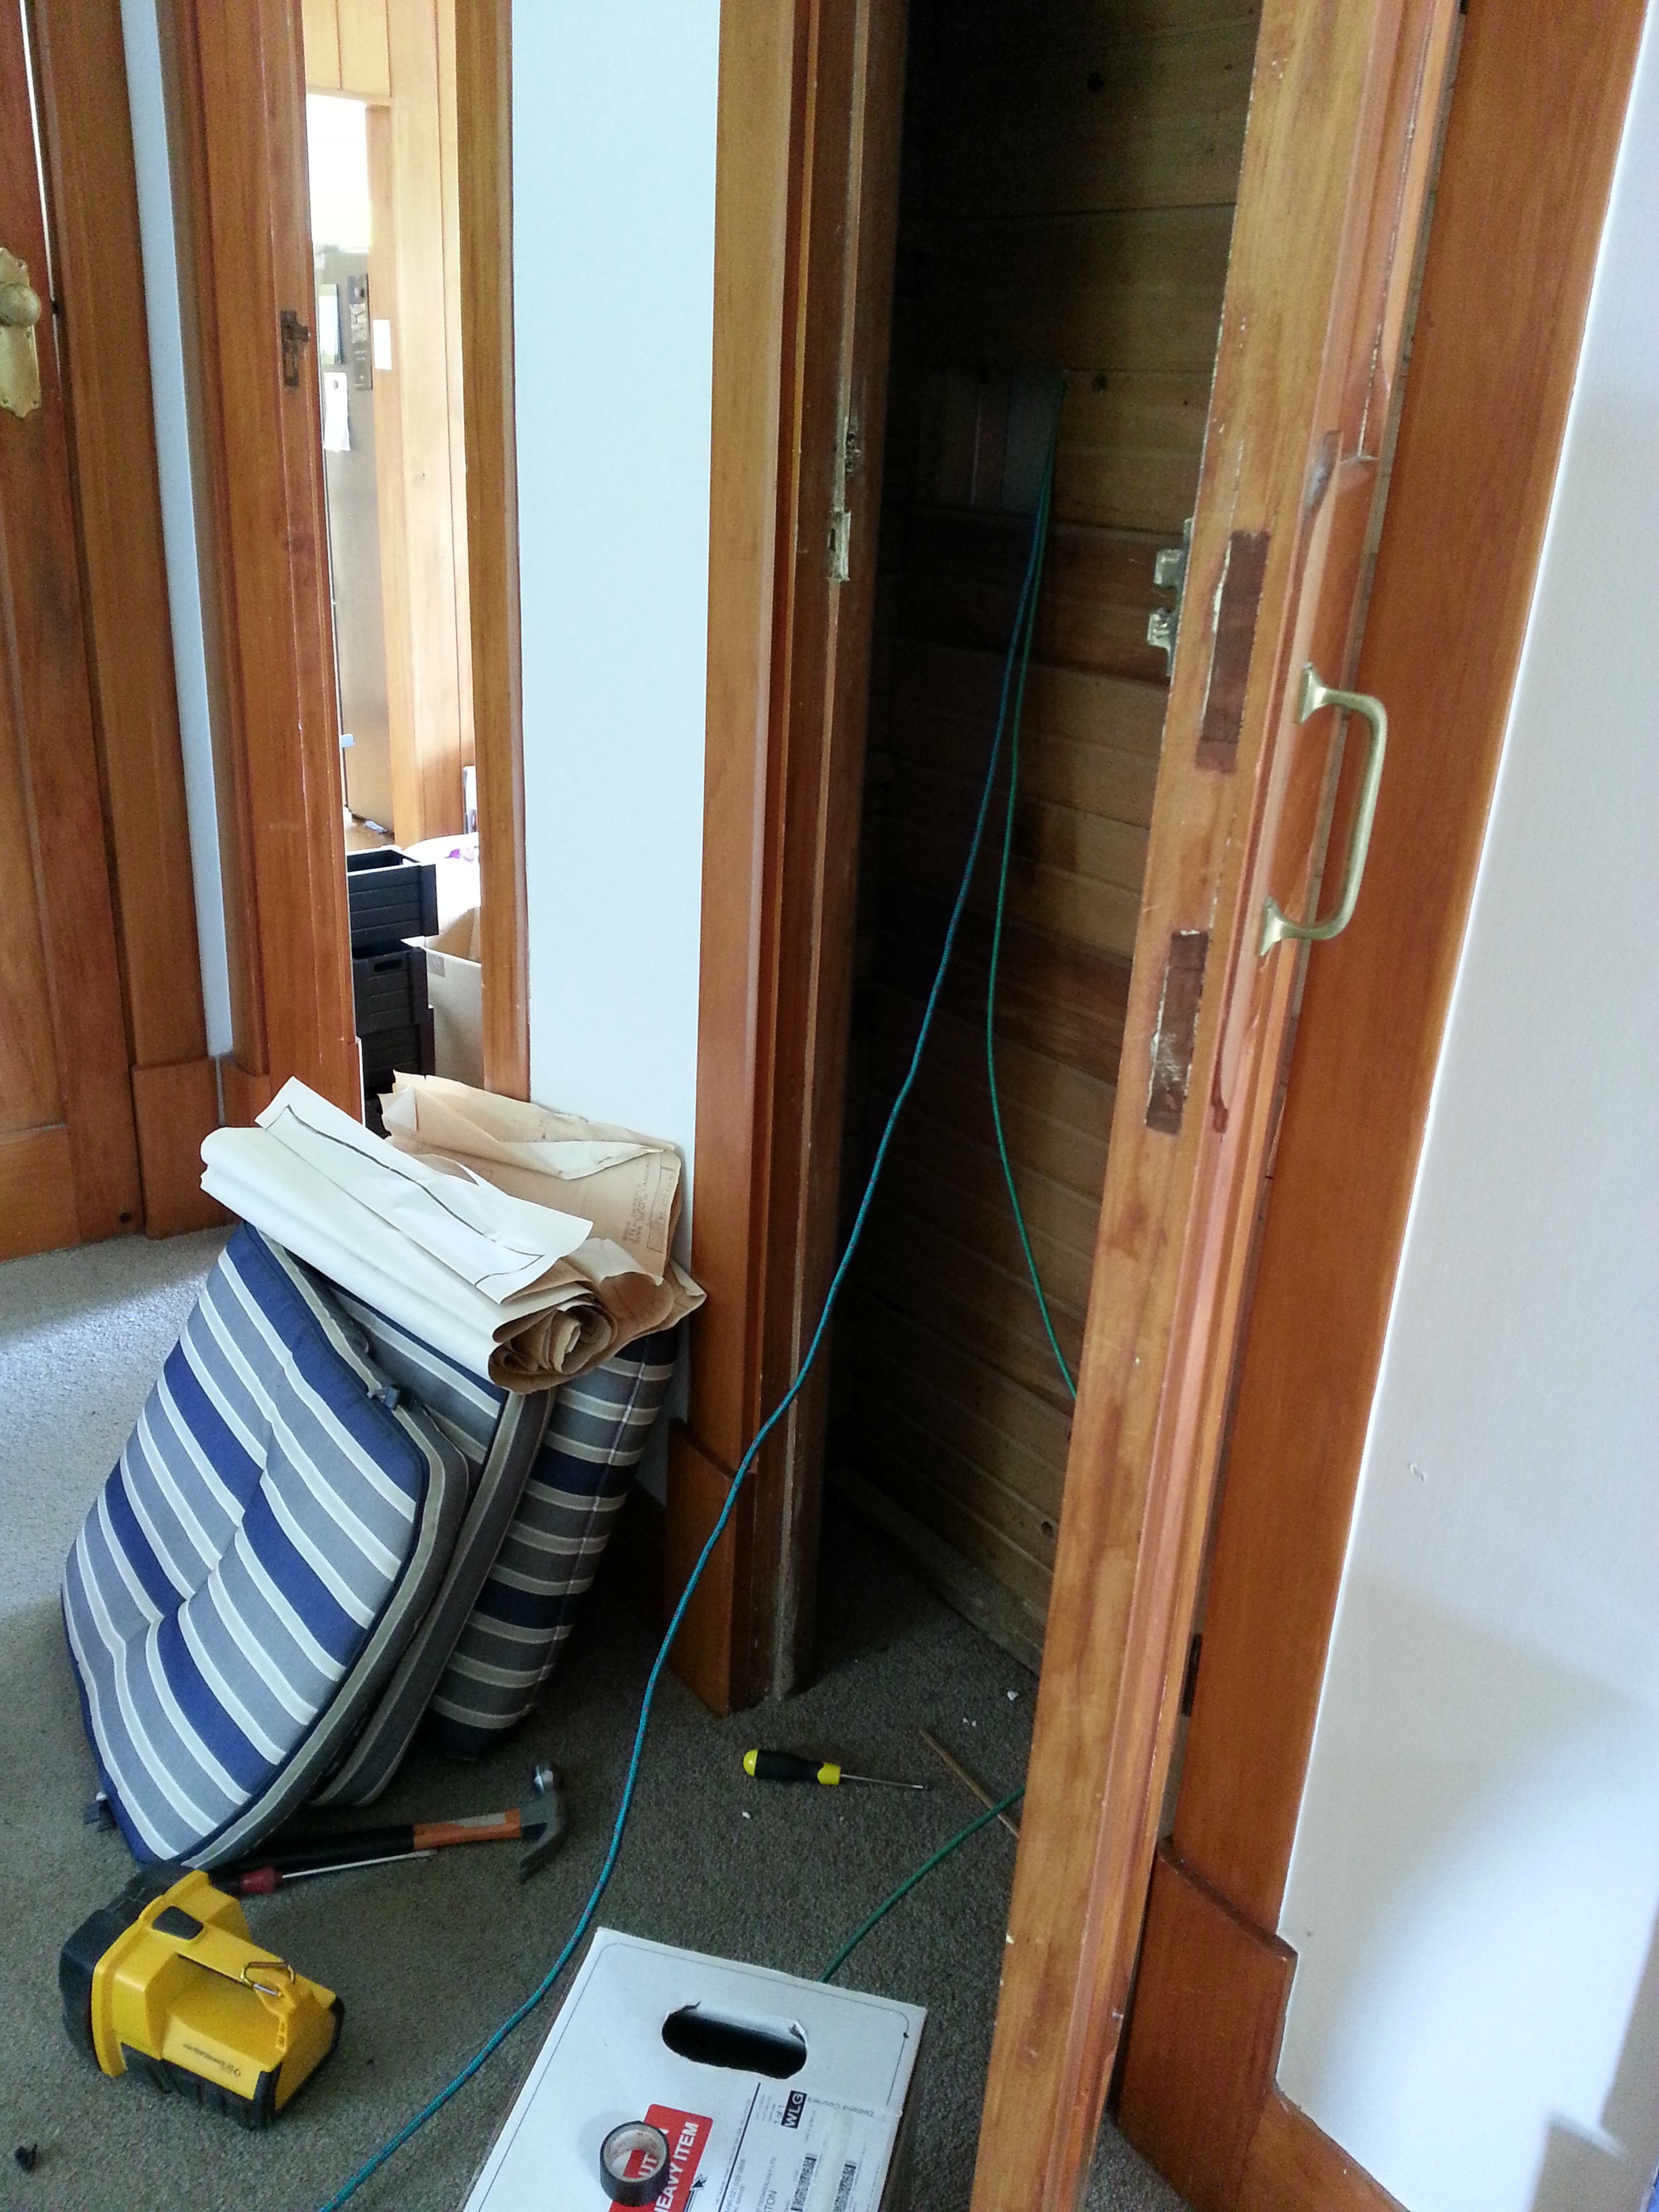
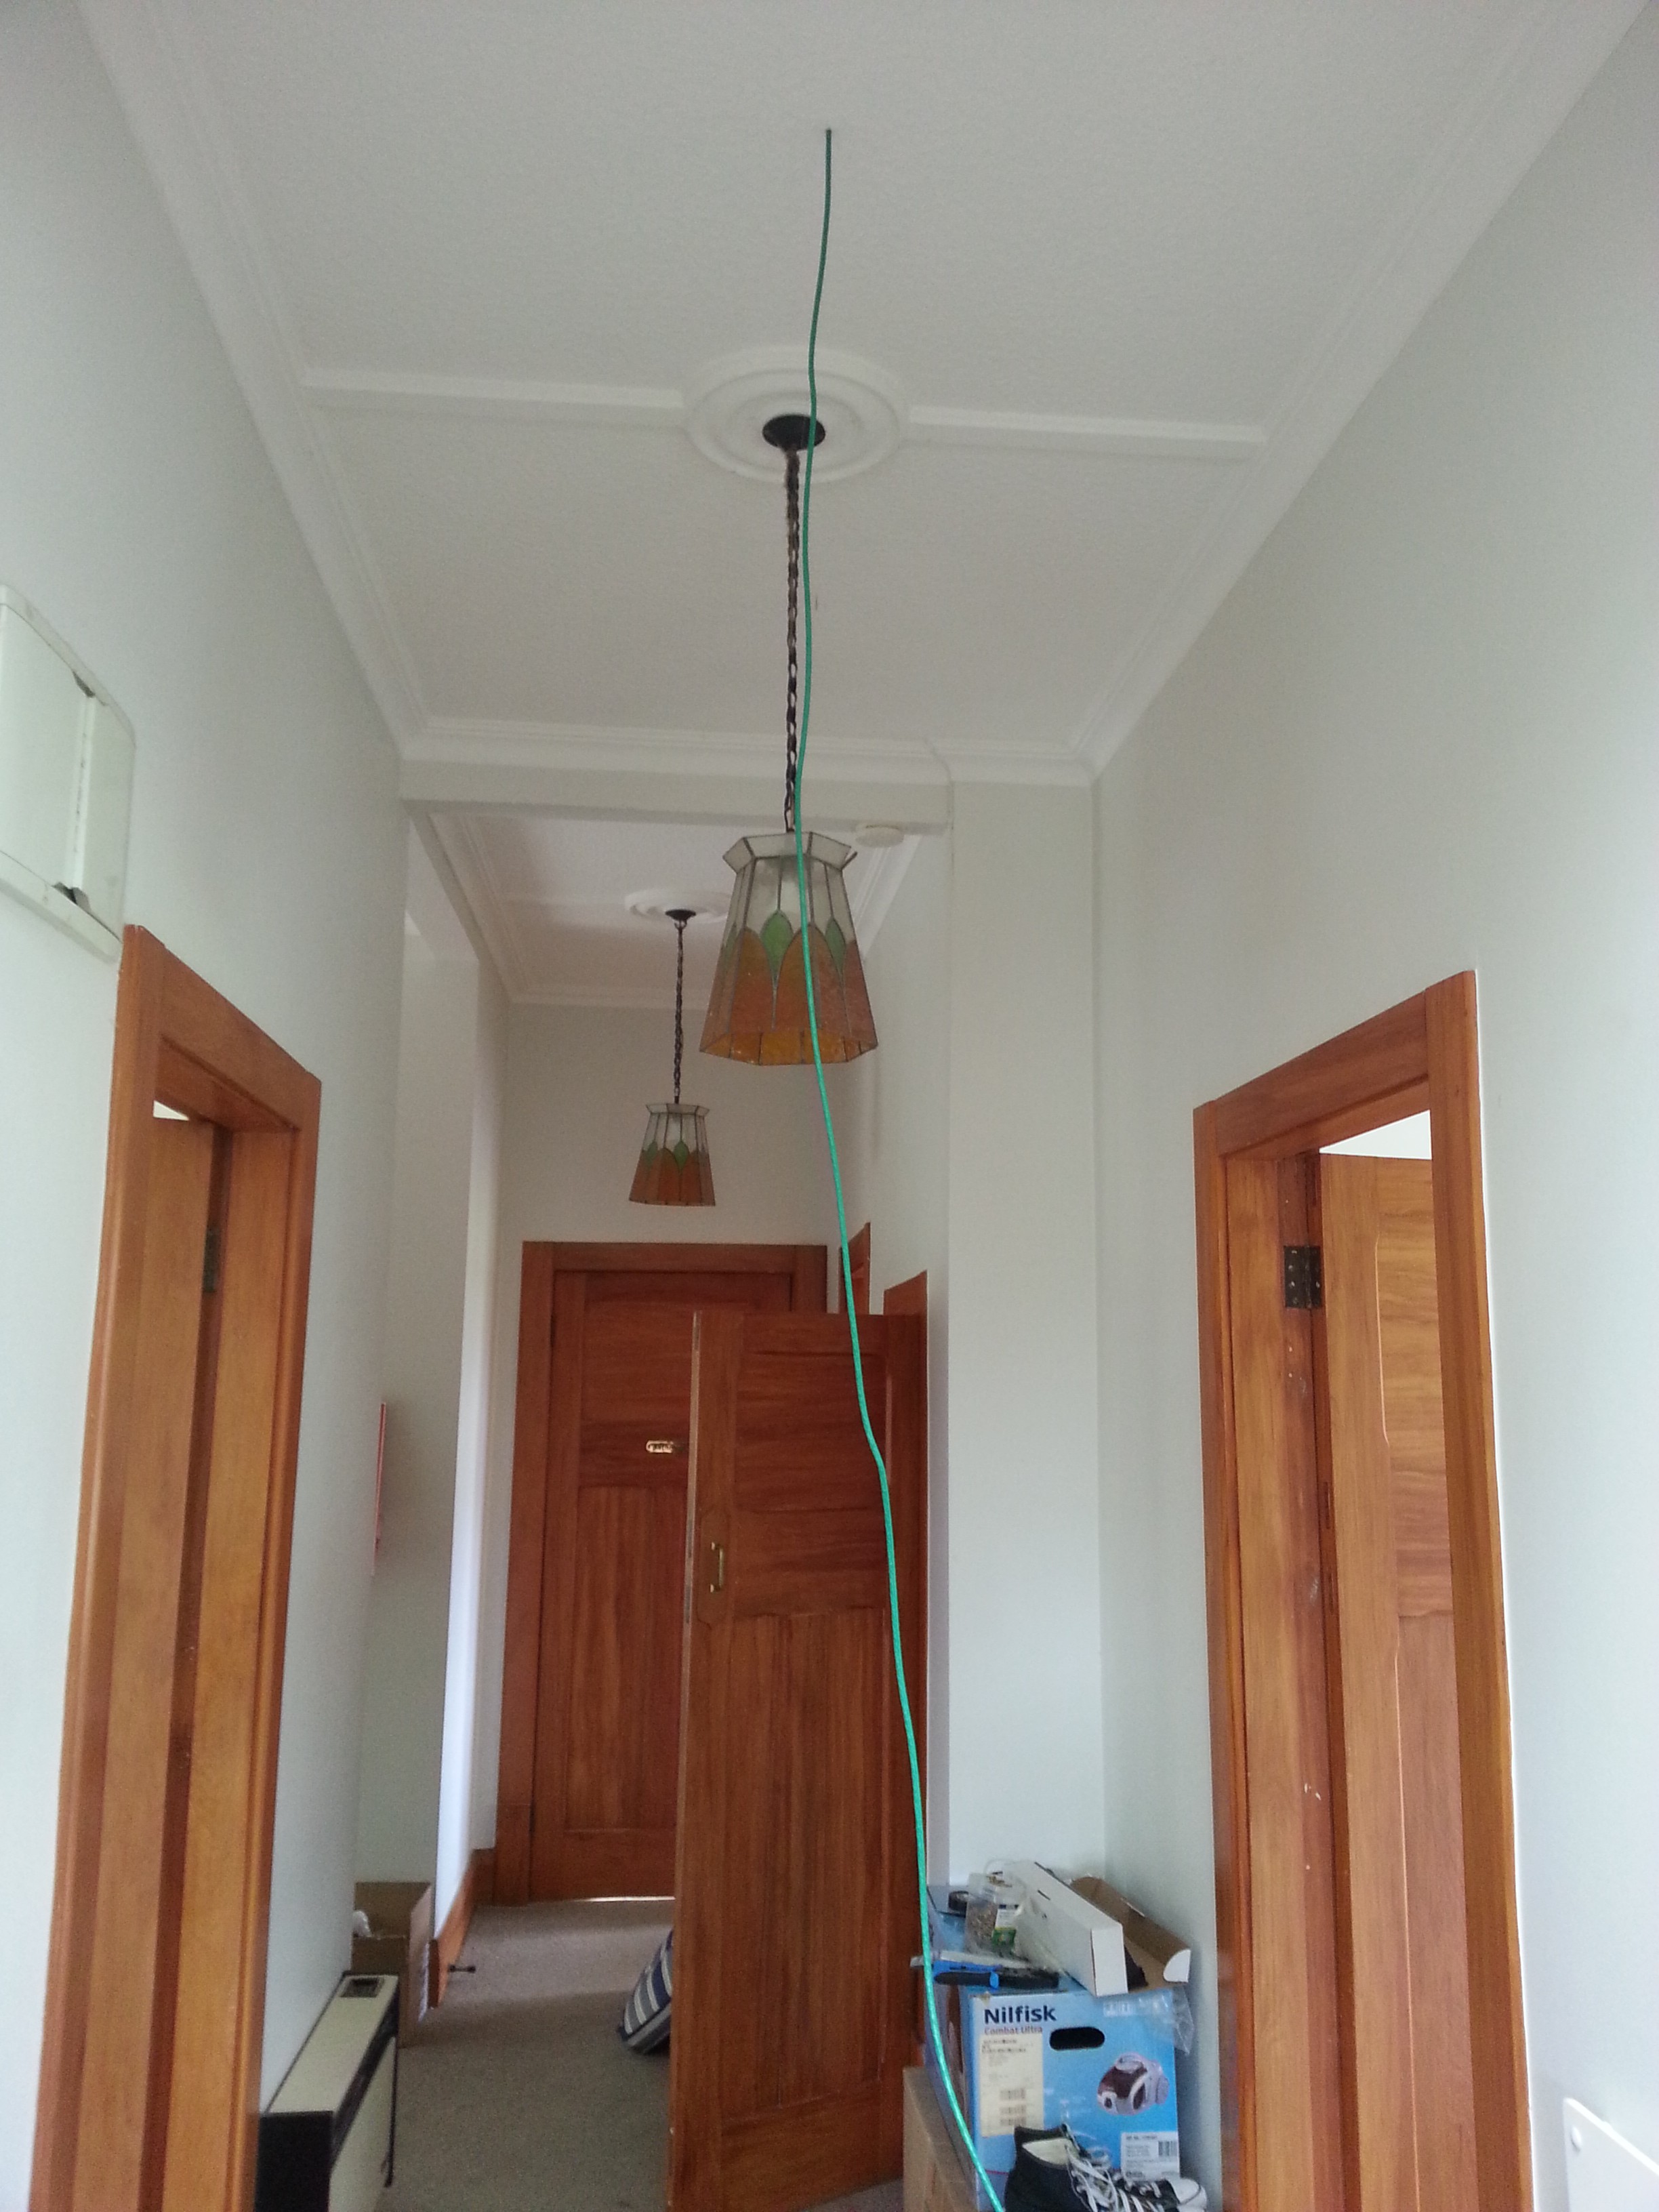
A third party API sounded perfect, so I purchased the EnvisaLink EVL-4 for $239 NZD delivered and did the installation myself. In theory the installation is easy, just a case of powering down the alarm (not touching any 240V hard wired mains in the process) and connecting it via the 4 wire keypad bus.

In my case it ended up being a bit more complex since the previous owner had helpfully never given me any of the master/installer alarm codes, so I ended up doing a factory reset of the unit and re-programming it from scratch (which means all the sensors, etc) which takes about a day to figure out and do the first time. The plus side is that this gave me complete control over the unit and I was able to do things like deprogram the old alarm company’s phone number to stop repeat failed callout attempts.

Once connected, the EnvisaLink unit was remarkably hassle free to setup – it grabbed a DHCP lease, connected to the internet and phoned home to the vendor’s free monitoring service.

Installed with pretty LEDs!

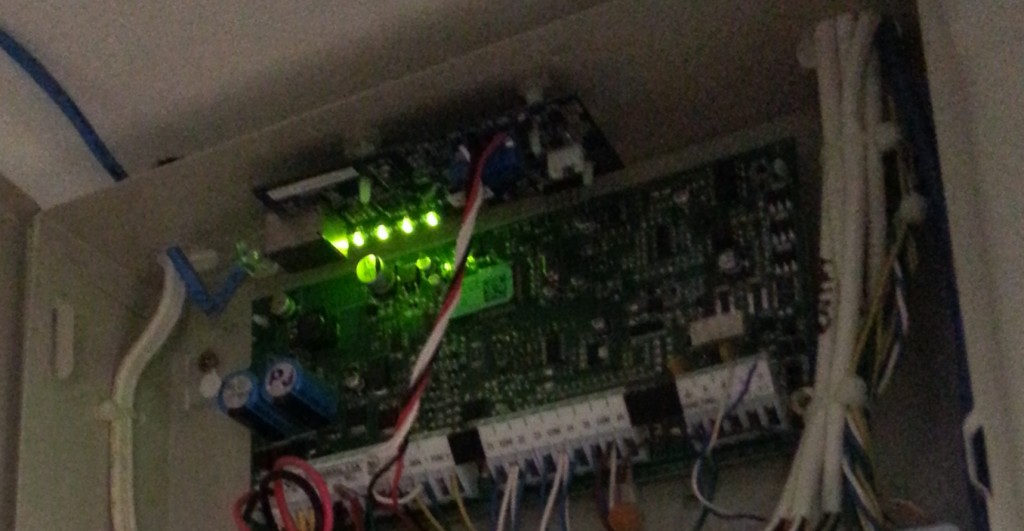
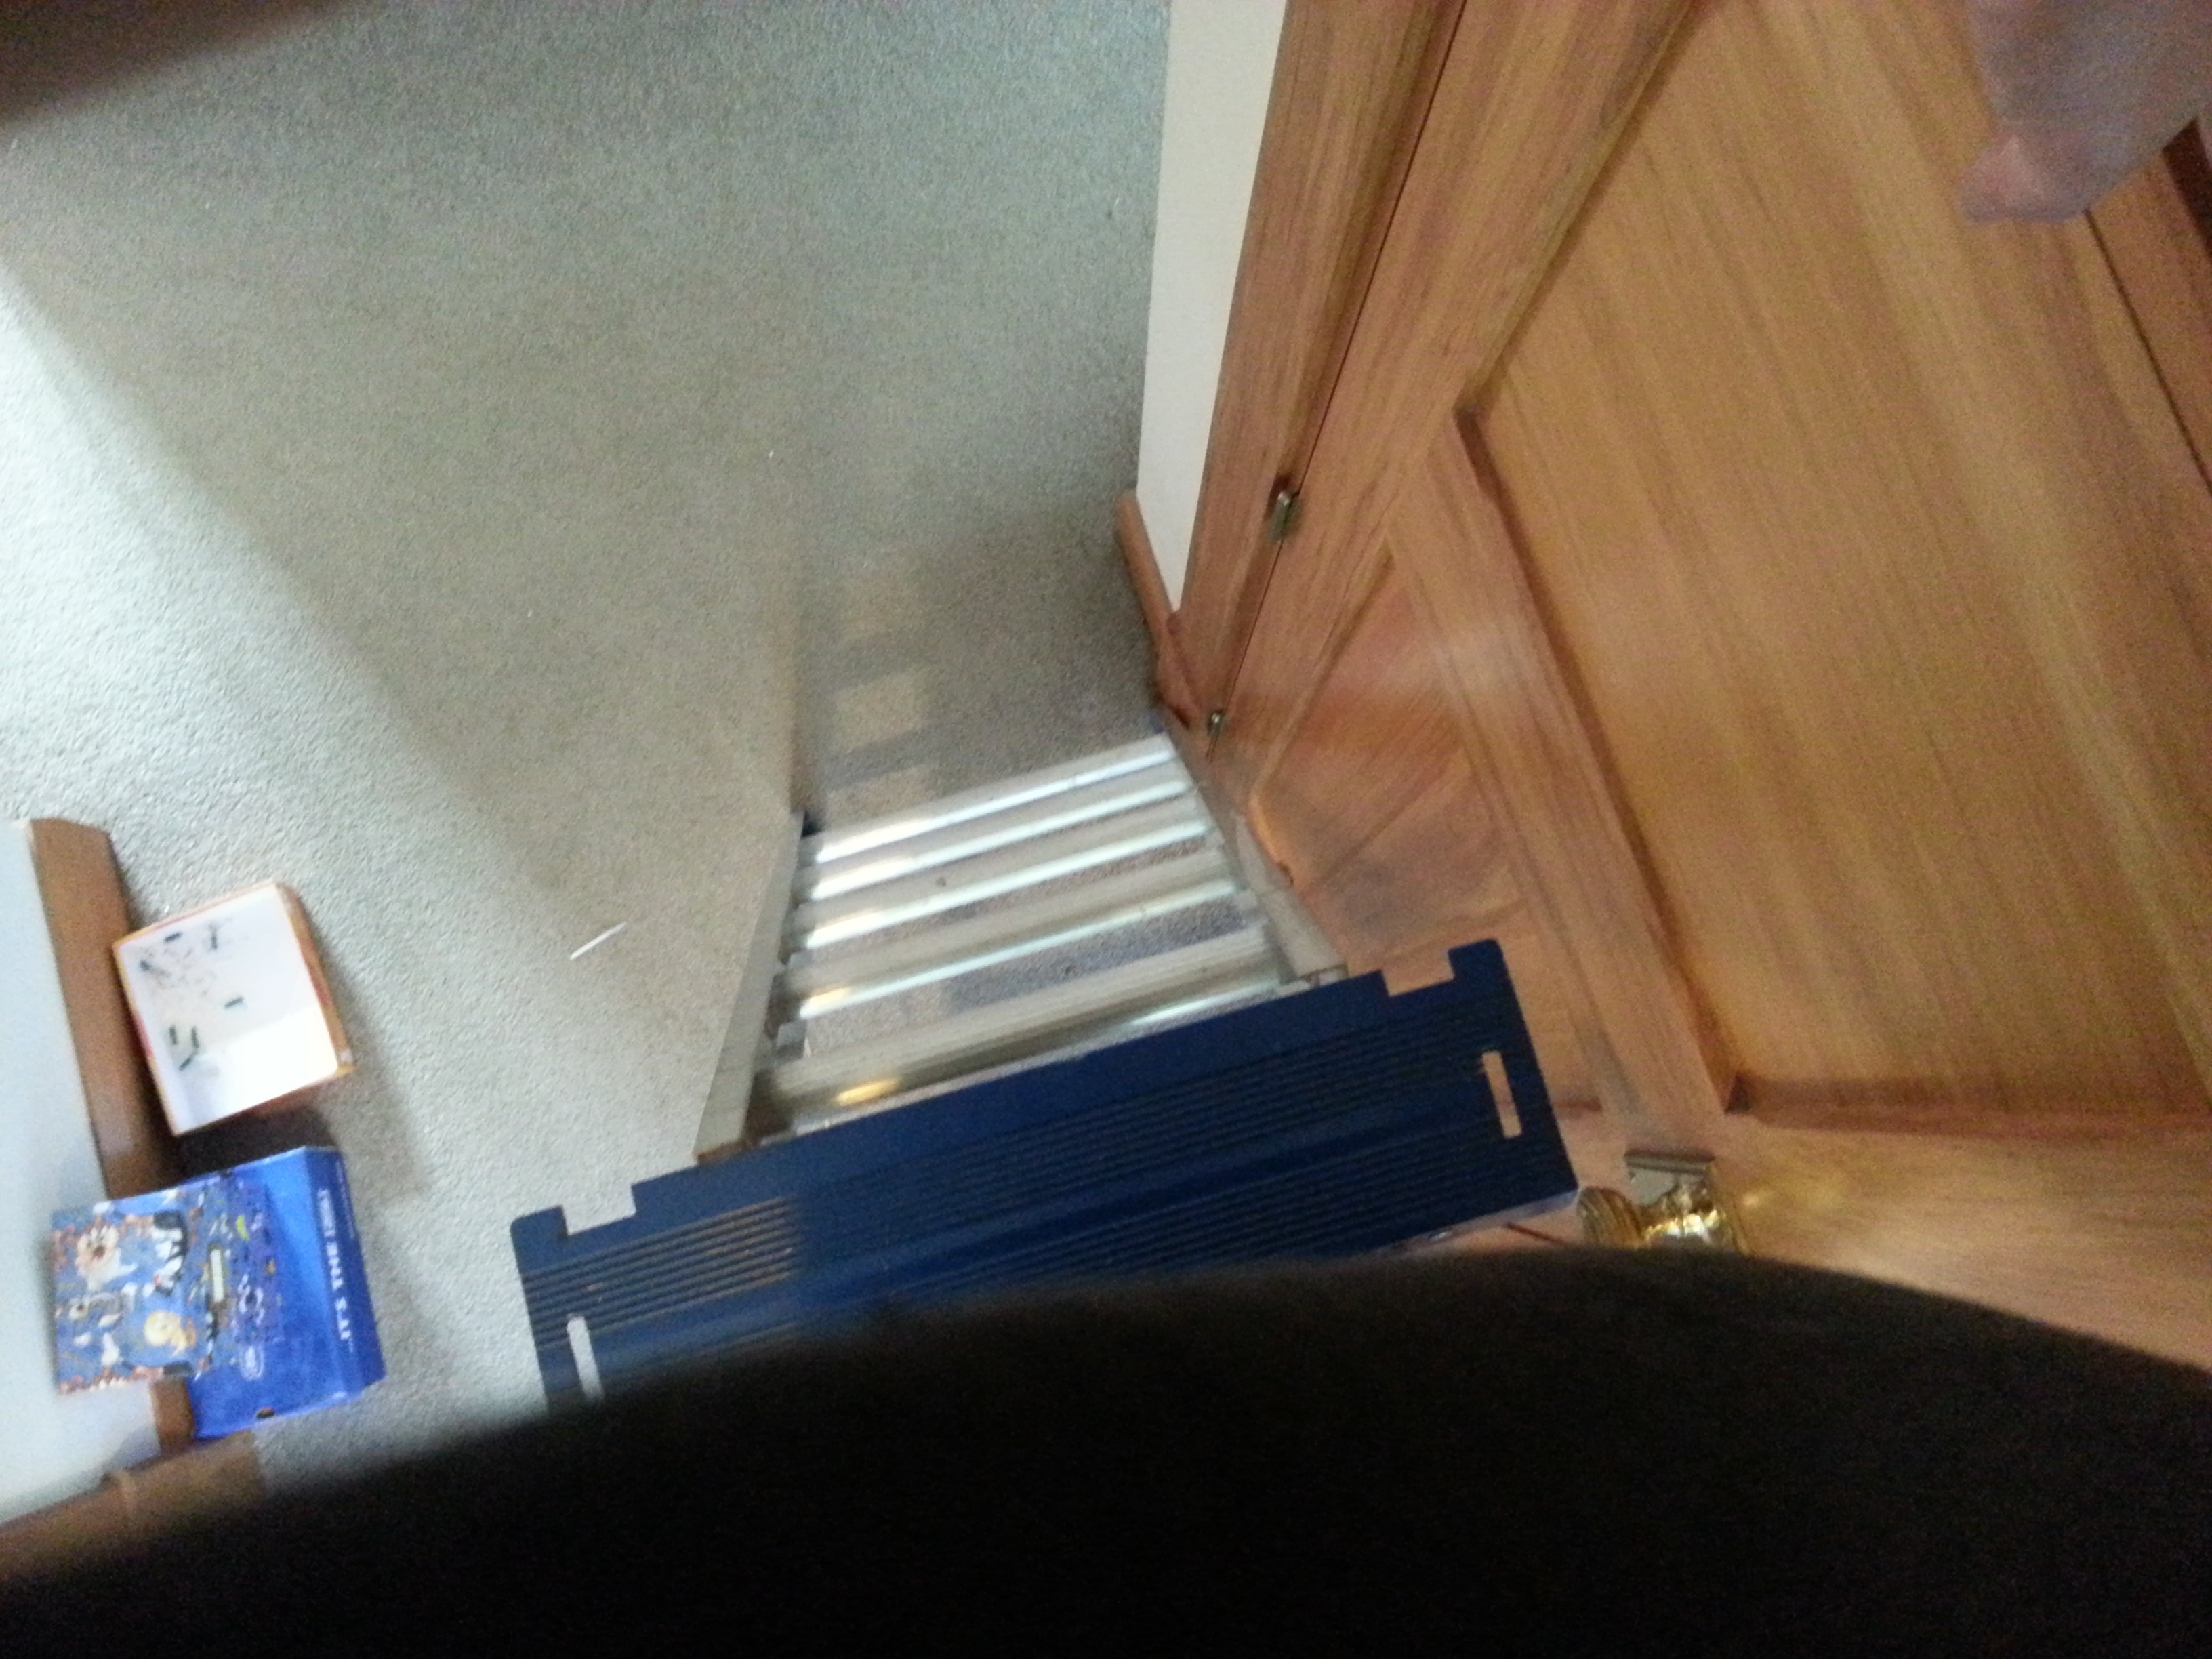
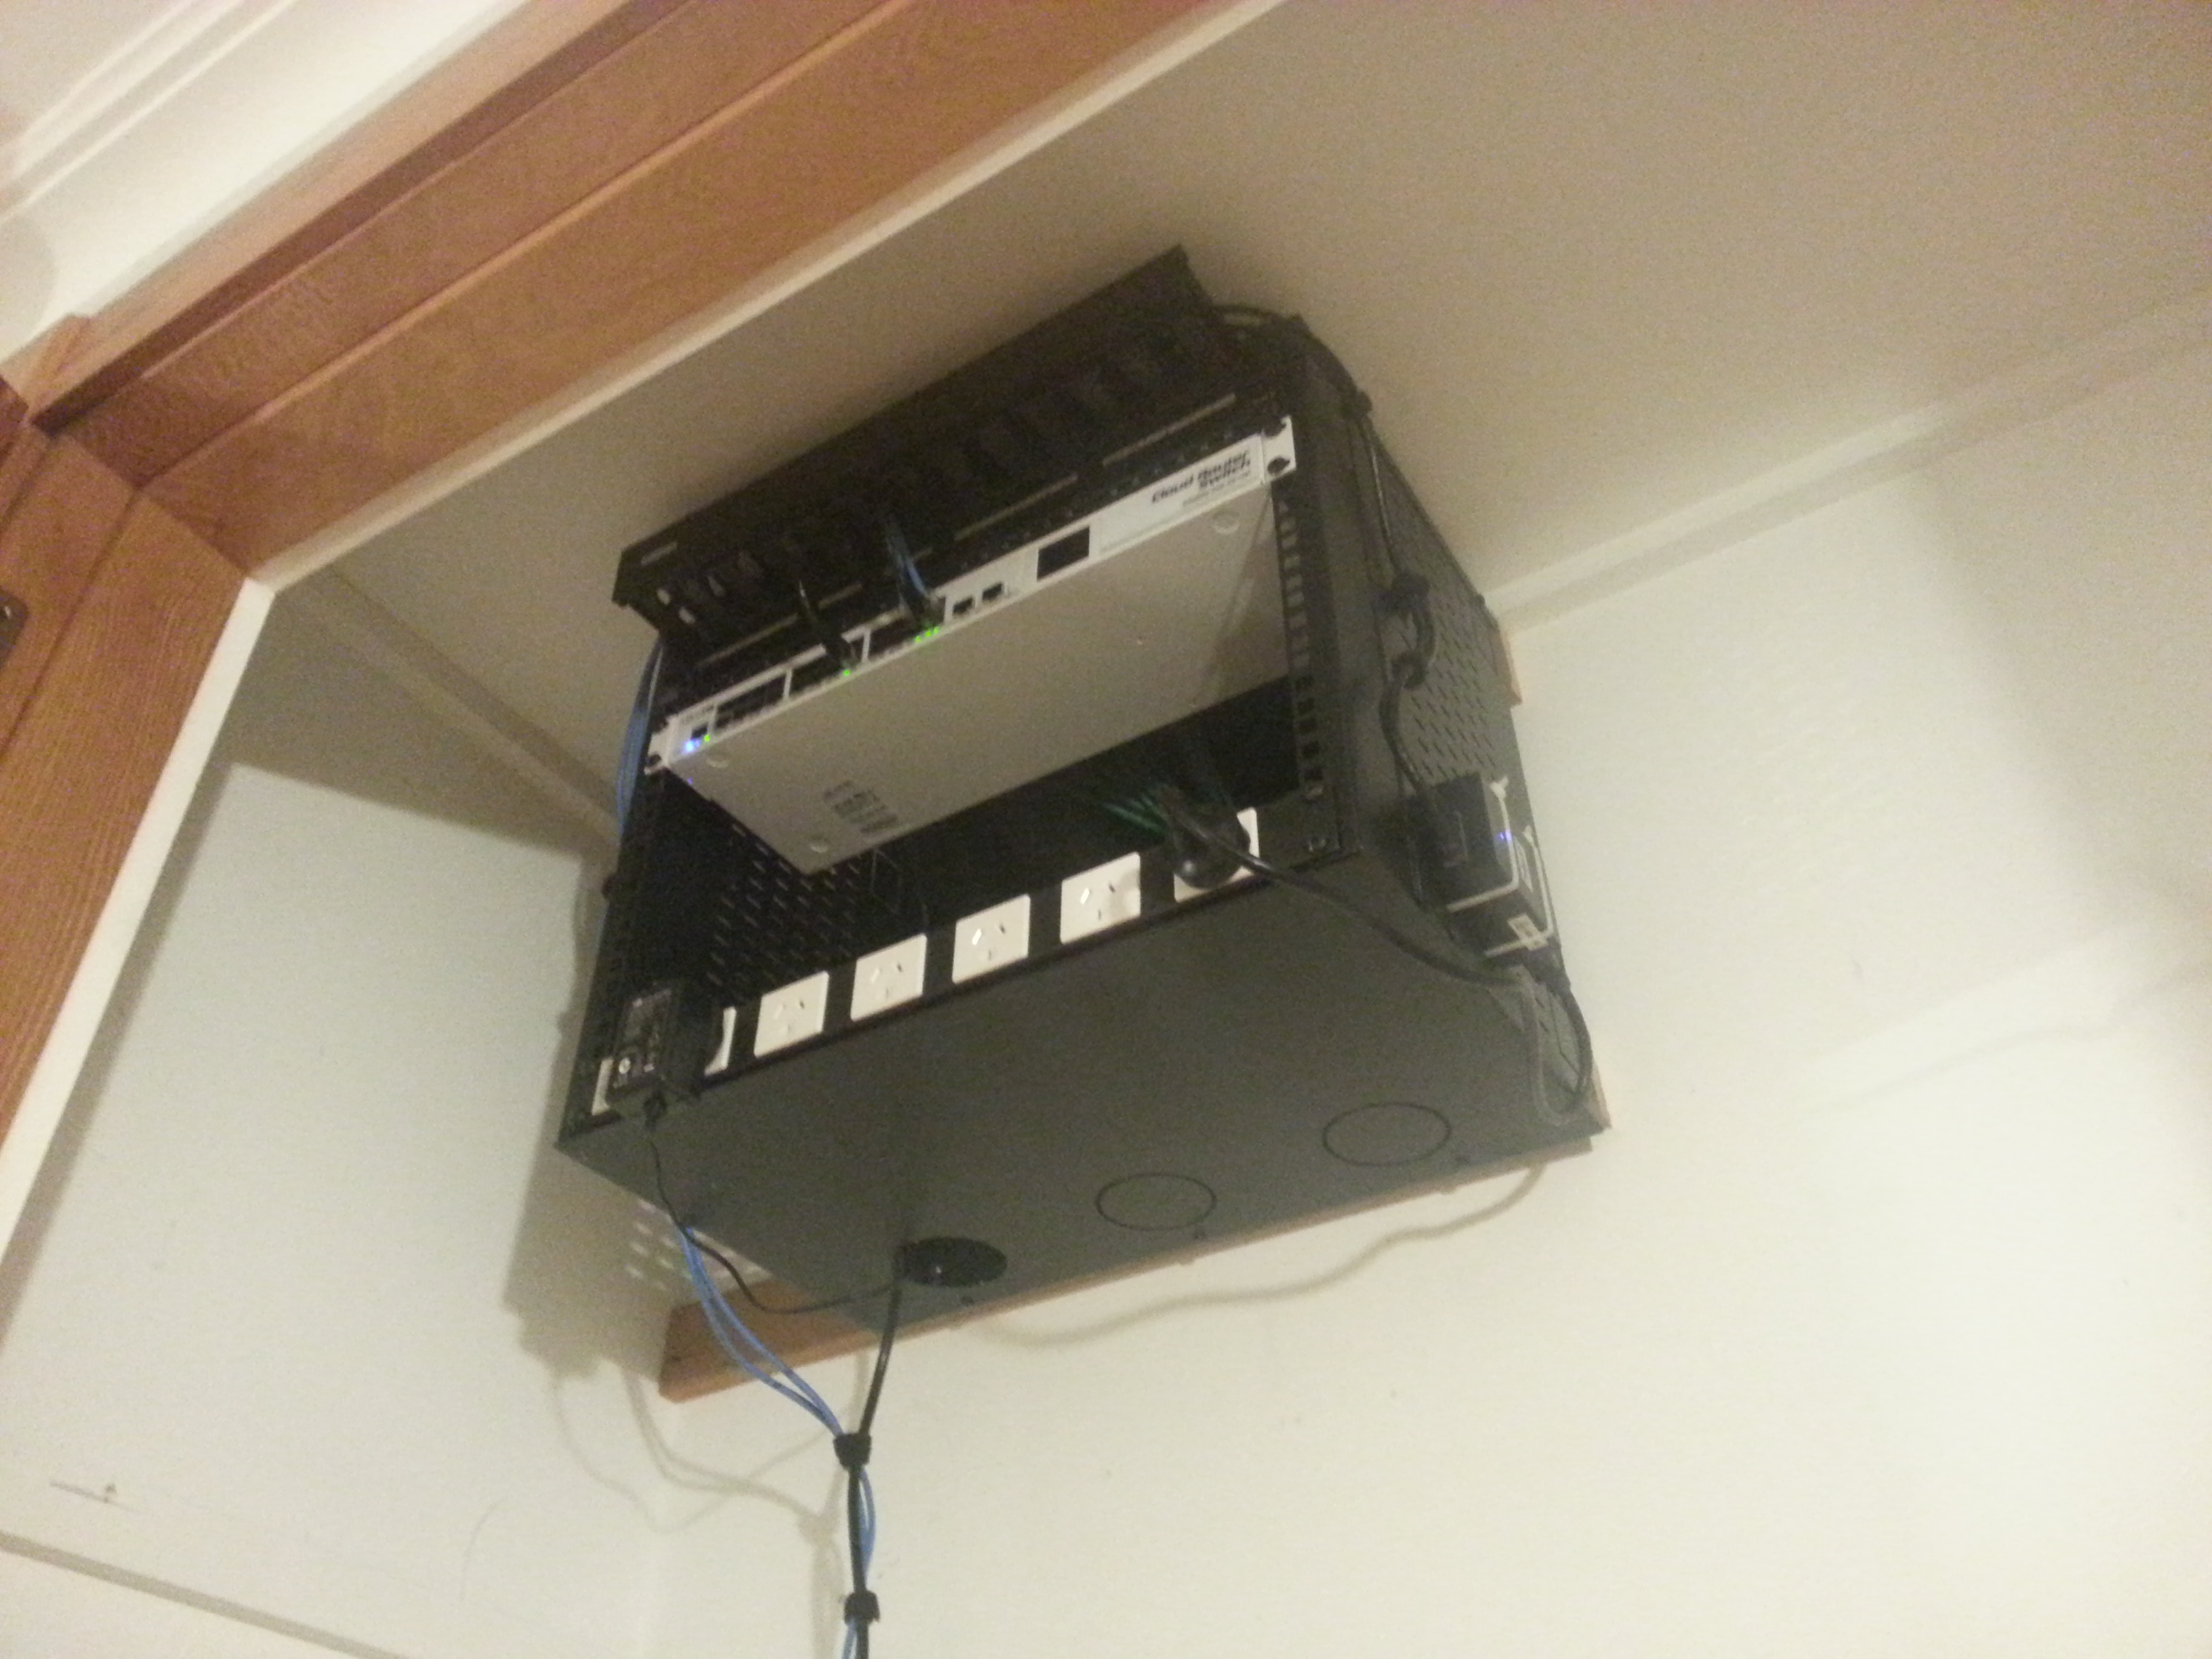
EnvisaLink unit installed at the top above the alarm control circuit. A++ for LED ricing guys!


The EnvisaLink hardware is a great little unit and the third party programmer’s interface is reasonably well documented and works without too much grief. Unfortunately the rest of the experience of the company selling it isn’t particularly good. Specifically:

  • Their website places the order by emailing their accounts mailbox. How do I know? Because they printed the email including my credit card number in full and sent it as the packing slip on it’s journey across the world. Great PCI compliance guys!
  • They show the product as working with Android, iPhone and Blackberry. They carefully avoid saying it has native apps, they actually mean it has a “smart phone” optimized version, which is as terrible as it sounds.
  • I can’t enable alerts on their service since their signup process keeps sending my email a blank validation code. So I had an alarm that couldn’t alarm me via their service.
  • No 2FA on logging into the alarm website, so you could brute force login and then disable the alarm remotely… or set it off if you just want to annoy the occupants.

I haven’t dug into the communications between the unit and it’s vendor, I sure hope it’s SSL/TLS secured and doesn’t have the ability to remotely exploit it and upgrade it, but I’m not going to chance it. Even if they’ve properly encrypted and secured comms between the unit and their servers, the security is limited to the best practices of the company and software which already look disturbingly weak.

Thankfully my requirements for the module is purely it’s third party API so I can integrate with my own systems, so I can ignore all these issues and put it on it’s own little isolated VLAN where it can’t cause any trouble and talk to anything but my server.


So having sorted out the hardware and gotten the alarm onto the network, I now needed some software that would at least meet the basic alerting requirements I have.

There’s an existing comprehensive Java/Android-based product (plainly labeled as “DSC Security Server”) which looks very configurable, but I specifically wanted something open source to make sure the alarm integration remained maintainable long term and to use Google Push Notifications  for instant alerting on both Android (which supports long running background processes) and iOS (which does not – hence you must use push notifications via APNS).

I ended up taking advantage of some existing public code for handling the various commands and error responses from the Envisalink/DSC alarm combination but reworked it a bit so I now have a module system that consists of “alarm integrators” exchanging information/events with the alarm system and “alarm consumers” which decide what to do with the events generated. These all communicate via a simple beanstalk queue.

This design gives ultimate simplicity – each program is not much more than a small script and there’s a standard documented format for anyone whom wants to add support for other alarm integrators or alarm consumers in future. I wanted it kept simple, making it the sort of thing you could dump onto a Raspberry Pi and have anyone with basic scripting skills be able to debug and adjust it.

I’ve assembled these programs into an open source package I’m calling “HowAlarming”“, hopefully it might be useful for anyone in future with the same alarm system or wanting a foundation for building their own software for other alarms (or even their own alarms).


The simplest solution to get alerts from the system would be by sending SMS using one of the many different web-based SMS services, but I wanted something I can extend to support receiving images from the surveillance system in future and maybe also sending commands back.

Hence I’ve written a companion Android app which receives messages from HowAlarming via push notifications and maintains an event log and the current state of the alarm.

UX doens't get much better than this.

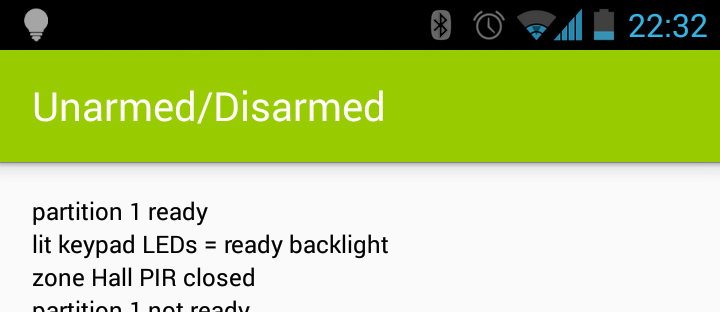
UX doens’t get much better than this.

It’s pretty basic, but it offers the MVP that I require. Took about a day to hack together not having done any Android or Java before, thankfully Android Studio makes the process pretty easy with lots of hand holding and easy integration with the simulators and native devices.

TBD if I can hack something together in a day not having done any native app development before that’s better than many of the offerings from the alarm companies currently around, they need to be asking themselves some hard questions. At the very least, they should get someone to write some apps that can pull their customer’s alarm state from their current phone-home infrastructure – there’s probably good money to be made giving existing customers on non-IP era alarms upgrades given the number of installations out there.


So far my solution is working well for me. It’s not without it’s potential problems, for example alarm communications are now at the mercy of a power/internet outage whereas previously as long as the phone line was intact, it could call out. However this is easily fixed with my UPS and 3G failover modem – the 3G actually makes it better than previously.


The other potential issue is that I don’t know what insurance would classify this nature of self-monitoring as. I have mine declared as “un-monitored” to avoid any complications, but if your insurance conditions require monitoring I’m unsure if a home-grown solution would meet those requirements (even if it is better than 90% of the alarm companies). So do your research and check your contracts & terms.

Pipegate

The joys of home ownership never stop giving and I’ve been having some fun with my old nemesis of plumbing

A few weeks back we got a rather curt letter from Wellington Water/Wellington City Council (WCC) advising us that they had detected a leak on our property at location  unknown and that they would fine us large amounts if not rectified in 14 days. The letter proceeded to give no other useful information on how this was detected or how a home owner should find said leak.


After following up via phone, it turns out they’ve been doing acoustic listening to the pipes and based on the audio taken at several different times they’re pretty certain there was a leak *somewhere*.

After doing some tests with our plumber, we were able to rule out the house being at fault, however that left a 60m water pipe up to the street, an even bigger headache to replace than the under-house plumbing given it’s probably buried under concrete and trees.

The most likely cause of any leak for us is Duxquest plumbing, a known defective product from the 70s/80s. Thankfully all the Duxquest inside the house has been removed by previous owners, but we were very concerned that our main water pipe could also be Duxquest (turns out they used it for the main feeds as well).

We decided to dig a new trench ourselves to save money by not having to have the expensive time of a plumber spent digging trenches and (strategically) started at the house end where there are the most joins in the pipe.

It's going to be a long day...

It’s going to be a long day…

Or maybe not - is that water squirting out of the ground??!?

Or maybe not – is that water squirting out of the ground??!?

So we got lucky very early in. We started digging right by the toby at the house given it was more likely any split would be towards the house and also it’s easiest to dig up here than the other end that’s buried in concrete.

The ground on the surface wasn’t damp or wet so we had no idea the leak was right below where we would start digging. It looks like a lot of the ground around the front of the house is sand/gravel infill that has been used, which resulted in the water draining away underground rather than coming to the surface. That being said, with the size of the leak I’m pretty amazed that it wasn’t a mud-bath at the surface.

Fffffff duxquest!!

Fffffff duxquest!!

The leak itself is in the Duxquest black joiner/branch pipe which comes off the main feed before the toby. It seems someone decided that it would be a great idea to feed the garden pipes of the house from a fork *before* the main toby so that it can’t be turned off easily, which is also exactly where it split meaning we couldn’t tell if the leak was this extension or the main pipe.

The thick grey pipe is the main water feed that goes to the toby (below the white cap to the right) and thankfully this dig confirms that it’s not Duxquest but more modern PVC which shouldn’t have any structural issues long term.

Finding the leak so quickly was good, but this still left me with a hole in the ground that would rapidly fill with water whenever the mains was turned back on. And being a weekend, I didn’t particularly want to have to call out an emergency plumber to seal the leak…

The good news is that the joiner used has the same screw fitting as a garden tap, which made it very easy to “cap” it by attaching a garden hose for the weekend!

Unscrewed

Hmm that looks oddly like a garden tap screw…

When number 8 wire doesn't suit, use pipe!

Huzzah!


Subsequently I’ve had the plumber come and replace all the remaining Duxquest under the house with modern PVC piping and copper joiners to eliminate the repeat of this headache. And I also had the toby moved so that it’s now positioned before the split so that it’s possible to isolate the 60m water main to the house which will make it a lot easier if we ever have a break in future.

You too, could have this stylish muddy hole for only $800!

You too, could have this stylish muddy hole for only $800!


I’m happy we got the leak fixed, but WCC made this way harder than it should have been. To date all my interactions with WCC have been quite positive (local government being helpful, it’s crazy!), but their state-owned-entity of Wellington Water leaves a lot to be desired with their communication standards.

Despite being in communication with the company that detected the leak and giving updates on our repairs we continued to get threatening form letters detailing all the fines in-store for us and then when we finally completed the repairs had zero further communications or even acknowledgment from them.

At least it’s just fixed now and I shouldn’t have any plumbing issues to worry about for a while… in theory.

10 months in

It’s been almost 10 months since Lisa and I brought our current house and moved in. Things are going well, having our own place and not paying a landlord is a fantastic and freeing feeling, but home ownership certainly isn’t a free ride and the amount of work it generates is quite incredible.

So what’s been happening around Carr Manor since we moved in?

Home sweet home

Can’t beat Wellington on a good day!

Generally the house is in good shape, most of my time has been spent in the grounds of the estate clearing paths, overgrown vegetation and various other missions. However we have had a couple smaller issues with the house itself.


The most serious one is that part of the iron roof in the house was leaking due to what looks like a number of different patch jobs combined with a nice unhealthy dose of rust.

Hmm cracks in the roof that let water in == bad right?

Hmm cracks in the roof that let water in == bad right?

The outside doesn't look a whole lot better.

The outside doesn’t look a whole lot better.

The “proper” fix is that this section of roof needs replacing at some point as it’s technically well-past EOL, but roof replacement is expensive and a PITA, so I’ve fixed the issue by stripped off as much rust as I could and then re-sealing the roof using Mineral Brush-On Underbody Seal.

Incase you’re wondering, yes, the same stuff that you can use on cars. It’s basically liquid tar, completely waterproof and ever so wonderful at sealing leaky roofs. I liberally applied a few cans over flashings, patches and the iron itself getting a nice thick seal.

Repair!

Repair!

The same stuff did wonders on the rusted shed roof flashing as well.

The same stuff did wonders on the rusted shed roof flashing as well.

Up next I need to complete a repaint of both sheds and the house roof. I’m probably going to do a small job in whatever colour I have lying around for the worst part of the roof and then go over the whole roof again at a later stage when we decide on a colour for the full repaint.


The other issue we had was that one of the window hinges had rusted out leaving us with a window that wouldn’t open/close properly.

So rusty :-/

I’m not expert, but I don’t think hinges are supposed to look like this….

This was a tricky one to fix – the hinge and the screws were so rusted out I couldn’t even remove them, in the end I removed the window simply by tearing the hinge apart when I pulled on it leaving a shower of rust and more disturbingly, cockroaches that had been living amongst the bubbled rust.

This left me with two parts of metal hinge stuck in the wall and on the window frame held in by screws that would no longer turn – or in some cases, even lacked heads entirely.

To get them out, I put a very small drill bit into the electric drill and drilled out the screw right down the middle of it. It’s pretty straightforwards once you get it going, but it was a bit tricky to get started – I ended up using the smallest bit I had to make a pilot hole/groove in the screw head, and then upsized the bit to drill in through the screw. Once done, the metal remains tend to just fall out and come out with a little prodding.

I’ve since replaced it with a shiny new hinge and stainless steel screws which should last a lot longer than their predecessors.

Shiny new

Shiny new hardware


Painting has been an “interesting” learning experience, I’ve found it the hardest skill to pickup since it’s just so time consuming and you have to take such extreme care to avoid dripping any paint on other surfaces.

One of my earliest painting jobs was doing the lower gate. This gate spends a lot of time in the shade and even in spring was feeling damp and waterlogged and generally wasn’t looking that sharp – especially the fact the bolt was a pile of rust barely holding together.

The rustic delight of unfinished timber.

I’m sure unfinished timber looks great when it’s first built, but the moss dirt and damp doesn’t lead to it aging well.

It's like new!

Much sharper!

Things like the gate take time and need care, but it’s nothing compared to the absolute frustration of painting window frames where a few mm to the wrong side or a stray bristle leads to paint being smeared across the glass.

I did the french doors initially as the paint had peeled and was starting to expose the timber to the elements, some of the putty had even fallen out and needed replacing.

Probably the most frustrating thing I've ever had to do.

Applying painter’s tape to this is one of the most frustrating things I’ve ever had to do :-/

Because I was painting around glass, I applied painter’s tape the whole thing before hand. It took hours, incredibly frustrating and I feel that the end result wasn’t particularly great.

I’ve since found that I can get a pretty tidy result using a sash/trim brush and taking extreme care not to bump the glass, but it is tricky and mistakes do happen. I’m figuring with enough practice I’ll get better at windows… and I have plenty of practice waiting for me with a full house paint job pending. Of course I could pay someone to do it, but at $15k+ for a re-paint, I’m pretty keen to see if I can tackle it myself….


The shed works haven’t proceeded much – I had the noble goal of completely repairing it over summer, but that time just varnished sorting out various other bits and pieces.

On the plus side, thanks to help from one of my colleagues, the shed has been dug out from it’s previously buried state and the rot and damage exposed – next step is to tear off the rotten weatherboards and doors and replace them with new ones, before repainting the whole shed.

Dug out shed

A small 1meter retaining wall would have been more than enough to protect the shed, but instead the earth has ended up piled around it causing it to rot and collapse.


I also had help from dad and toppled the mid-size trees that were in-between the shed and the path. Not only were they blocking out light, but they were also going to be a clear issue to shed and path integrity in the future as they got bigger.

Much tidier!

Much tidier! Just need to fix the shed itself now…

I’m still really keen to get this shed fixed so intend to make a start on measuring and sourcing the timber soon(ish) and maybe taking a few days off work to line up a block of time to really attack and fix it up.


A more pressing issue has been our pathways. We have two long 30-40meter concrete paths, a long ramped one (around 20-30 degree slope) up to the upper street and carpad and another zig-zag path with a mix of ramps and steps heading down to the lower street where the bus stop is.

Both paths are not in the best condition. The lower one requires a complete replacement, it’s probably around 80 years old and the non-reinforced concrete has cracked and shifted all over the place.

The upper one is more structurally intact, but has it’s own share of issues. The first most serious issue is that the steeper upmost end gets incredibly slippery in winter. It seems that although the concrete has been brush-finished whenever it rains, any grip it had just vanishes and it basically becomes a slide.

Jethro vs Autumn

Jethro vs Autumn

Naturally slipping to a broken/leg/face/life isn’t ideal and we’ve been looking at options to fix it. We could convert the steepest bit from a ramp to steps, but steps have their own safety issues and we aren’t keen the lose the ramp as it’s the best way for getting large/heavy items to/from the house.

So a couple months ago I put down some Resene Non-slip Deck & Path which is a tough non-slippery paint product that basically includes a whole heap of sand which turns the smooth concrete path into something more like fine sandpaper.

We weren’t too sure about how good it would be, so we put down a 0.5l strip to test it out on the worst most part of the path.

A/B Testing IRL

A/B Testing IRL

It doesn’t feel that different to brushed concrete in the dry, but in the wet the difference is night & day and you really do feel a bit more attached to the path. We’ll still need to invest in a decent handrail and fence, but this goes a long way towards an elegant fix.

I’ve since brought another 10l and painted the upper portion, essentially all the “good” concrete we have. I thought that it might be too dark but actually it looks very sharp and once we put a new fence up (maybe white picket?) it will look very clean and tidy.

Slick new path!

Old concrete, as good as new! :-)

The other ~30meters down to the house isn’t in such good shape, the surface is quite uneven in places and it’s missing chunks. We have a project to do to repair or replace the rest of it, once done the intention will be to paint the rest of the path in the same colour and it should look and feel great.


All this work requires a fair few tools, I’ve finally clean up the dining room where they had been accumulating and they’re now living properly in the shed.

Shed

Shed

One of the most interesting lessons I’ve had so far is that buying decent tools is often far cheaper than hiring tradies to do something for you – generally tools are cheap, even decent ones, but labour is incredibly expensive.

CHAIN SAW

Why yes, that is a hardwood lamppost that I’m chainsawing.

The same thing applies to parts, it’s generally cheaper to just buy a new replacement of something than it is to fix it – I’m used to this from the IT world, but didn’t expect it from IRL.

In our cases, we had a shower mixer that decided to start letting a constant small stream of water through rather than shutting off properly.

Jethro vs Shower

Jethro vs Shower

Taking it apart and even removing it from the wall entirely isn’t too tricky, but I found after removing it all that the issue wasn’t anything trivial like needing a new o-ring and had to call out the plumbers.

Plumbers took it out, look at and it and are all “yeah that needs a new part”, so I ended up paying for the part + the labour – I’d have been better off just buying the whole new part myself and fitting it rather than trying to fix it.


Never underestimate the amount of waste you produce moving into a new place. I filled a skip with 1/3 concrete rubble, 1/3 polystyrene and 1/3 misc waste and there’s still another skip worth of debris around the property, possibly more once I tear all the rotten timber out of the shed.

Polystyrene is my number one enemy right now, almost everything we had shipped to the house when we moved in came with some and it’s crumbly and completely non-recyclable for good measure >:-(.

Where did all this junk come from?

Where did all this junk come from?


Finally on the inside of the house things haven’t progressed much. Lisa has been working on the interior decor and accessories whilst I’ve done exciting things like overseeing the installation of insulation and fixing the loo in the laundry. :-/

Warming sheep fluff!

Warming sheep fluff!

I hate plumbing!

I hate plumbing!

I also had a whole bunch of fun with the locks – when we moved in I had the locksmith change the tumblers, but we’ve since found the locks were pretty worn out and the tail pieces inside started failing, so I had to buy whole new locks and fit them.

Turns out, whole new locks is way cheaper than getting the locksmith out to change the tumblers. If you’re moving into an older place, I’d recommend consider just getting new locks instead since the old ones probably aren’t much good either.

The only downside is that the sizing was slightly different, so I had to do some “creative woodwork” using a drill bit as a file (I didn’t have a file…. or the right size drill bit. A bit dodgy, but worked out OK).

It's not just the IT world where the lack of standards means a bit of hackery to make stuff function.

It’s not just the IT world where the lack of standards means a bit of hackery to make stuff function.

Tidy job at the end of the day!

Tidy job at the end of the day!


A lot of this work has been annoying in that it’s not directly visible as an improvement, but it’s all been important stuff that needed doing. I’m hoping to spend the next few months getting stuck into some of the bigger improvements like fixing the paths, sheds, etc which will be a lot more visible.

Until then, need to make more evenings to just sit back, relax and enjoy having our own place – feels like I’ve been just far too busy lately.

Beer time

Beer time

Installing Cloud Pipes

One of the essential upgrades for the house has been the installation of computer network data cabling throughout the house. Whilst some helpful individual went to the effort of installing phone jacks in almost every room, an analogue phone line in every room isn’t that useful to me in 2014, so I decided to get the place upgraded with something a little more modern.

A few people have asked me why I didn’t go entirely WiFi instead – granted it’s a valid question given that most devices now come with WiFi and no wired ethernet (curses Apple Macbooks), but I figured there’s still some good reasons to install cables through the house:

  1. WiFi still needs some copper cables to backhaul data and even if mesh networking evolved to be good enough to eliminate the backhaul link requirements, there’s no wireless power yet, so POE is damn handy.
  2. With ports in every room, I can always plug in more APs in any room to get better coverage. Could be very handy if new tech like WiGig takes off, which may require an access point in each room due to poor performance through walls.
  3. The current WiFi tech is acceptable for transferring current HD video content over the network, but it’s not going to handle ultra-high-def content like 4K footage very well.
  4. The Cat6 cabling I’ve installed should be capable of up to 10Gbit speeds. It’s going to take us a while to get 10Gbit with wireless.

Only time will tell if I was as foolish as those who installed coaxial cabling for their 10mbit networks before they got bitten by the uptake of Cat5, but I suspect it should be useful for another 10-20 years at least. After that, who knows….

Since I’m putting the cabling into existing clad rooms, I lack the convenience of a newly built or renovated property where I can simply run cables at my leisure and put the plasterboard up afterwards. On the plus side, unlike a modern house, mine has a number of gaps from items like old brick chimneys that have been removed and a number of walls that lack the conventional 2×4 horizontal studs, which offers some places where cables can be dropped from ceiling to floor uninterrupted.

With this in mind, I gathered my tools, geared up with confidence, and set off on my cabling adventure.

OPen wide

“Trust me, I know what I’m doing”

Only one problem – one quick look up into the attic quickly confirmed for me that “yes, I do certainly dislike heights” and “yes, I also really do dislike confined spaces that are dark and smell funny”.

To overcome these problems, I recruited the services of the future-father-in-law who has a lot of experience running TV antenna cabling, so is pretty comfortable moving around in an attic and drilling holes into walls. Thankfully he agreed to assist me (thanks Neville!!) with climbing up and around the attic which allowed me to move to the next step – getting the cables in.

It's high up here :-/

3.5 metre ceilings mean you need to get comfortable with working at the top of a ladder

I decided that I wanted 4x cables into the lounge, 4x into the back bedroom/office, and then 2x into the other 3 bedrooms. I pondered just putting 4x everywhere, but had a whole bunch of 2x plates and I figure the bedrooms aren’t likely to host a small server farm any time soon. Again, one of those things where I might be cursing myself in the future, or might not ever be an issue.

The small bedroom was the easiest, being in part of the original house, there was no studs from floor to roof, so we could simply drop the cables right down and cut a hole at the bottom for the ports. Easy!

The older walls never needed studs, since the walls are lined in about 10mm of solid sarking timber made from native hardwood Rimu, these timber planks hold the building together tight and eliminate the need for the more modern practice of horizontal studs in the walls. The upside of this sarking is that the place is solid and you can put weight baring screws into almost any part of the wall, and screw the faceplates for power and data directly into the wall without needing flushboxes. The downside is that the hole saw takes some effort to cut through this hardwood native timber and it also means that WiFi penetration betweens the rooms isn’t as great. Infact when I had the WiFi access point in a cupboard before it got properly installed, I struggled to maintain connections to some locations due to the thick walls.

Hello data!

If you look carefully, can see the thickness of the walls with the plasterboard + sarking.

The back rooms – bedroom, office and lounge were a bit more challenging. Due to structural blockages like support beams and horizontal studs in the younger office and bedroom renovation, it wasn’t simply a case of dropping the cable down from the roof to each room.Instead we ran the cables through the roof and then down all together in a single bunch thought the space that was once occupied by the brick chimney, to get the cables down from the roof to under the house. Once under, we were able to run them to the required rooms and pop the cables back up into the rooms by drilling a hole into the middle of each wall from under the house.

Cloud Pipes!

Cloud Pipes!

To do the master bedroom took some creativity, but we found that the hall cupboard that backs onto the bedroom was an easy to target location and dropped the cables down there, before doing some “creative re-construction” of the cupboard walls to get the cables down and through to the other side in the bedroom.

Even this coat cupboard needs to be GigE connected

Even this coat cupboard needs to be GigE connected

Running the cables was a three-step task. First we ran a single cable being fed out of the reel until we got it to the desired location. This is required to determine the length of the cabling needed, although if we were willing to be wasteful with cable and coil the excess in the roof, we could have made estimations on the generous side and skipped this step and just have run a draw wire from the immediate start.

We then removed the cable, pulling a draw wire through after it. In my case, we use some old cat5 cable as the draw wire since it’s nice and tough. Once the original cable is recovered, we cut the required number of lengths exactly the same, then create bundles of cable as needed.

We used electrical table to bind them together (since it doesn’t add any thickness to the bundles, unlike cable ties, which get stuck on holes) and made sure to stagger the cables so that it wasn’t a single large flat end trying to get through the holes.

Once the bundles are ready, it’s just a case of attaching it to the draw wire and pulling the draw wire through, pulling the new bundle behind it. Make sure you’ve drilled your holes to be big enough to fit the whole bundle!


The easiest installation was that of the roof-mounted WiFi access point (Ubiquiti Unifi UAP-AC). Since it just needed a single cable which needed to be run along the attic to the patch panel, we simply drilled a hole up into the attic and fed the cable up straight from the reel, no need to mess around with draw wires.

I suspect we could have done this for all the rooms in the house just as easily, so if you decide you want to invest in WiFi APs in every room rather than wired ethernet ports, you would have a lot easier time putting the APs up.

Leave plenty of length so you don't have to crimp a cable above your head

Drill hole, feed cable, doesn’t get much simpler than this.

Rather than a socket, the roof cable is terminated with an RJ45 connector which plugs directly into the back of the AP which then fits snugly on the roof hiding all cabling.

The end result looks quite tidy, I was worried about the impact on the character ceilings and part of me did feel bad putting the drill through it so I took care to keep the holes to the absolute minimum to ensure it could be patched without too much grief in future.

All done!

The blue-sun god we worship for internet access.

The blue square on the AP is visible in the dark, but doesn’t light up the area. It’s bright enough that I’d think carefully about putting it in a bedroom unless there’s a way to turn it off in software.


Whilst the roof mount AP had an RJ45 port due to space constraints and aesthetics, all the room cables have been terminated at proper RJ45 jacks.

Hardware

PDL Cover, Grid (sold together), Third Party RJ45 keystone and PDL RJ45 clip.

My house is primarily PDL 500/600 series faceplates, which means I ended up sourcing the same PDL products for the data faceplates. The faceplates aren’t too outrageous at about $6 each (2-port / 4-port), but PDL charge a whopping $13.80 for their RJ45 data inserts. Given that I installed 14 sockets, that would cost $193.20 for the ports, which is crazy… I could buy several entire patch panels for that.

Fortunately the RJ45 inserts themselves (the keystones) are made by a number of vendors, you just need the PDL keystone clip to join any third party keystone with the PDL faceplates.

Hence I sourced 14x of the PDL clips at $1.38 each ($19.32 total) and then sourced 3x 5-pack of keystones on TradeMe from a seller “digitalera” for $9 per pack ($27). This brought my total spend for the RJ45 data inserts to $46.32… much much cheaper!

Result

The finished product.

All these cables terminate back in a small cupboard in the hallway, into a 24-port patch panel. There’s a bit of space space left over on it for future expansion as it occurs.

Cabling!

All patched and all ready to go

The patch panel is installed in a wall-mount 9 RU 19″ comms cabinet. I went for a 9RU and 30cm deep model, since it offers plenty of space for PDUs, cabling and also can fit lots of models of switches and routers with room to clear.

Data & Power sorted!

Data & Power sorted!

Cable management with this setup has been a little tricky – usually I’d prefer to have a cable management bar for the patch panel and a cable management bar for each switch, an arrangement that is space expensive, but the easiest and tidiest.

Unfortunately I quickly found that putting the cable management bars in the roof-height cabinet limits visibility too much, since it blocks the ability to see the switch ports or patch panel labels since you can’t look at it face on, but rather look at it upwards from the top of the ladder.

The approach I’ve ended up with is therefore a little unconventional, with a cable management bar at the very top of the rack, and cabling going up into it from the patch panel and then back down to the switch.

The downside of this approach is that cables cross the patch panel to get to the switch (arghgh I know!), but the upside is that I can still see all the other switch ports and patch panel ports and its still quite readable. I’ll understand if I’m kicked out of the data centre cabling perfection club however.

There’s still 5RU spare for some shelves for devices like VDSL model or a dedicated router, but given that the Mikrotik CRS226-24G-2S+RM RouterOS based switch can do almost everything I need including almost 200mbits routing capability, there’s no plan to add much more in there.

Currently the power and server data runs down to the floor, but next time I have an electrician on-site doing work, I’ll get a mains socket installed up by the cabinet to save a cable run and potentially a very shallow rackmount UPS to run the cabinet.

Finished! For now...

Cabling and equipment installed!

The final step was making sure everything actually worked – for that I used a $5 cable tester I picked up off Trademe – has nothing on a fancy brand like Fluke that can measure the length of cable runs and tell you the type of cabling pin out, but for a casual home installation it was great!

Remote control

Testing the cabling jobs – the meter runs through each wire in order so you can detect incorrectly punched cables or incorrect arrangements of the wires at either end.


I had most of the tools needed on hand already, if you’re tempted to do similar, you’re going to need the following:

  1. A decent electric drill.
  2. A hole saw (goes into your drill, makes big holes in walls). You need this to make the opening for your wall plates with enough room to sit all the RJ45 modules into the wall.
  3. Regular drill bits if you’re going up through the ceiling into the roof for WiFi APs – just need something large enough for a Cat6 cable and no more.
  4. An auger drill bit if you want to drill holes suitable for running bundles of cables through solid wood beams. Having a bit big enough to fit all your cables in your bundle a bit of slack is good.
  5. A punch down tool, this is what you use to connect each wire in the patch panel and RJ45 wall modules. Its worth buying a reasonable quality one, I had a very cheap (~$5) unit which barely survived till the end of the build since you tend to put quite a bit of force on them. The cheap tool’s cutter was so bad I ended up using a separate wire cutter to get the job done, so don’t make my mistake and get something good.
  6. A good quality crimping tool – this will allow you to terminate RJ45 (needed if you want to terminate to the plug, rather than socket for roof-mount access points), but they also tend to include a cable stripper perfectly aligned to strip the outer jacket of the cat5/6 cable. Again, don’t scrimp on this tool, I have a particular solid model which has served me really well.
  7. Needle nose pliers or wire cutters – you need something to cut out the solid plastic core of the Cat6 cable. You can do it in the crimping tool, but often the wire cutter or pliers are just easier to use.

And of course materials:

  1. A reel of Cat6 Ethernet. Generally comes in 305m boxes.
  2. A roll of black electrical tape, you’ll want to use this to attach guide cables, and to bundle cables together without adding size to the cabling runs.
  3. Cable ties are useful once you get cables into position and want tight permanent bundling of cables.
  4. RJ45 plugs if you are terminating to a plug.
  5. RJ45 modules and related wall plate hardware.
  6. Pipe/Saddle Clips can be useful for holding up cables in an orderly fashion under the house (since they’re designed for pipes, big enough to fit cable bundles) and they’re great to avoid leaving cables running across the dirt.

Note that whilst there are newer standards like Cat 6a and Cat7 for 10 GigE copper, Cat6 is readily available in NZ and is rated to do 10GigE to a max of 35-50m runs, generally well within the max length of any run you’ll be doing in a suburban house.

Settling In

This blog has been a little quiet lately, mostly thanks to Lisa and I being busy adjusting to the joys of home ownership with our new house we moved into in mid-September!

I'm a trust worthy reputable resident of Wadestown now!

I’m a trust worthy reputable resident of Wadestown now!

It’s been pretty flat-out and a number of weeks have already passed us by very quickly – we had anticipated the increase in expenditure that comes with owning a properly, but the amount of time it consumes as well is quite incredible, and given that the property hasn’t had a whole lot of love for the past 5 years or so, there’s certainly a backlog of tasks that need doing.

There’s also the unexpected “joys” that come with ownership, like the burst waterpipe on our first day in the new house, or the one hob on the cooker that appears to like leaking gas when it’s used, or the front door lock that has broken after a few weeks of use. For the first time ever, I almost miss having a landlord to complain to – however the enjoyment of putting a power drill through your first wall without requiring permission cannot be understated either.


Amusingly despite becoming home owners, it’s actually been the outdoors that’s been occupying most of my time, with large masses of plant life that has crept over the sheds, the paths and into roof gutters. I cleared 8 wheelbarrows of soil and plant material off the upper path the other day and it’s barely made a dent.

Rediscovering the lower pathway slowly...

Rediscovering the lower pathway slowly…

So far I’ve been mostly concerned about the low level plants, I haven’t even begun to look at the wall of trees and ferns around us – a lot of them are great and we will keep them, but a few certainly need some pruning back to make them a bit tamer and let a bit more light into the property.

Ferns in the mist. Pretty kiwi as bru.

Ferns in the mist. Pretty kiwi as bru.

I’ve been discovering the awesome range of power tools that exist these days – seems tools have come a long way from the days of my fathers wired drill, I’ve now got drills, sanders and even a weedeater/line cutter which all share the same cordless battery pack!

Got 99 problems but wires ain't one.

Got 99 problems but wires ain’t one. Cordless freedom baby!

I’ve had to learn some new skills like how to use a saw or how to set a post in the ground. Of course I cheated a bit by using ready-to-pour fastcrete, but hey, I’m lazy Gen Y-er who wants the fastest easiest way to make something work. ;-)

Hole digging

Harder than it looks. Stupid solid clay ground :-(

I also have two sheds that I need to do up – the first is in pretty good shape and just needs some minor fixes and paint job. It’s even got power already wired up so you can plug in your tools and go :-)

The second shed is in a far worse state and pretty much needs complete stripping down and repairing including a whole new floor and getting rid of almost a meter high pile of detritus that has collected around the back of it over the past 100 years. Helpfully some trees also decided to then plant themselves and grow right next to it as well.

The older shed, pretty but somewhat unusable without some hard work.

The older shed and upper pathway after tidying up the over growth.


The house is thankfully in a better state than the garden and sheds, although there is certainly a lot of work needed in the form of overdue maintenance and improvements. The house was built in 1914 (100 years birthday this year!), but thankfully despite the age of the property, the hardest and most essential modernisation has been done for us already.

There’s been a complete replacement of electrical systems with modern cabling and both the structure and interior is in good shape with the original Totara piles having been replaced and whatever scrim wall linings that previous existed having been replaced with plasterboard.

Most of the interior decor is playing it safe with neutral coloured walls, carpet and curtains and the native timber exposed on the doors and skirting. However there are a few garish items remaining from an earlier era where style wasn’t as important, like the lovely maroon tiled fireplace or the cork flooring in the kitchen :-/

The Lounge: Where 2014 meets with 1970 head on.

The Lounge: Where 2014 meets with 1970 head on.


Generally the property is nice and everyone who comes over describes it as lovely – but of course nobody tells you if your baby is ugly, so it’s entirely possible everyone is questioning our tastes behind our backs… But give it time, we have a lot of plans for this place that are yet to be actioned!

Our primary task right now is dragging our 20th century house into the 21st century with a few modern requirements like data cabling, heating and decent lighting.

Oddly enough I’ve already started on the data side of things, getting Cat6 ethernet cable run through the house to all the living spaces and roof mounting a WiFi AP and installing a proper comms cabinet. Priorities!

The next major issue is heating, the house has an old wood fire and old unflued gas heater, both of which look pretty dubious. We’ve left them alone and have been using a few recently installed panel heaters, but we need to consider a more powerful whole-house solution like a modern gas fireplace to handle the cold Wellington winters.

Power drills! Holes in walls! This is what home ownership is all about.

Power drills! Holes in walls! This is what home ownership is all about.

In addition to heaters, we also need to fix up the shocking lack of insulation that is common with New Zealand properties. Whilst we have roof insulation already, the floor needs insulating and at some point there is going to be a very expensive retro-fit double glazing cost we need to investigate as well.


Aside from these immediate priorities, there’s the question of changes to the layout. The biggest annoyance for us right now is that the kitchen/dining space and the lounge are two separate rooms with a bedroom in-between, which doesn’t really suit modern open plan living so we are pondering the cost of knocking out a wall and re-arranging things to create a single open plan living area.

Additionally we have a really small bathroom yet we have a massive laundry that’s about twice the size just through the wall. Considering the the laundry has almost nothing but a single lonely washing machine in it, it’s a prime candidate for being annexed for a new role as a massive new bathroom.

The tiny wooden cabin bathroom.

The tiny “wooden cabin” bathroom. If it wasn’t for the skylight and our character 12 foot ceilings, it would be really dark and tiny in there. :-/

We are also thinking about how we can improve the outdoor area which is a bit weirdly organised with a large patio area detached from the house and the back deck being a tiny strip that can’t really fit much. We’re already pondering extending the deck out further, then along the full length of the house, so we can join up with the lower patio and make it a nore usable space.

World's tiniest deck.

World’s tiniest deck, not exactly that useful…

Of course all these improvements require a fair bit of capital, which is one thing we don’t have much of right now thanks to the home loan, so its going to take some careful budgeting and time to get to where we want to be. For now, we are just enjoying having the place and plotting…..


Aside from the garden and sorting out house improvements, the other major time sink has been unpacking. We didn’t exactly have heaps of stuff given that we just had limited bits stored at each other’s parent’s houses, so it’s pretty scary at how much has emerged and arrived at our new house. I think everyone was kind of glad to get our junk out of their houses at long last, although I’m sure my parents will miss the file server buzzing away 24×7.

It’s been a bit of a discovery of lots of stuff we didn’t realise we had, I have literally a small data center worth of tech gear including rackmount PDUs, routers, switches and other items.

I know what you're thinking "Oh how typical of Jethro, boobs on a box" - but this one ISN'T MINE, it came out of Lisa's parents house... :-/

I know what you’re thinking “Oh how typical of Jethro, boobs on a box” – but this one ISN’T MINE, it came out of Lisa’s parents house which kind of disturbs me deeply.

This is probably the biggest negative of home ownership for me – I hate owning stuff. And owning a house is a sure way to accumulate stuff very, very quickly.

Owning a house means you have space to just “store that in the cupboard for now”. Being a couple in a large 4 bedroom home means there’s a lot of space and little pressure to use it, so it’s very easy for us to end up with piles of junk that actually doesn’t serve a purpose and not feel forced to clean it out.

I came back from AU with two suitcases and I could probably have culled that down to as little as one suitcase given the chance. There’s a huge amount of tech gear I’m considering offloading and Lisa has a massive pile of childhood stuff to make some hard decisions about, because as hard as it is to get rid of things, I think both of us are keen to avoid ending up in the same hording situation like our parents.

Of course some stuff can’t be avoided. I’ve spent a small fortune at Bunnings recently obtaining tools and materials to do repairs and other DIY for the house, so there’s a lot of additions to the “stuff I have to own but hate having to own” pile.

We also needed to purchase all new furniture since we had essentially nothing after returning from Sydney. I don’t mind buying a few quality pieces, but sadly it seems impossible to buy a house load of furniture without also obtaining an entire shed worth of cardboard and polystyrene packaging that we need to dispose of. Sorry environment! :-(

Trapped by packaging.

Trapped by packaging.

We’ve gotten through most of the unpacking, but there’s still a lot of sorting and finding homes for things left to do.

I’m looking forwards to getting to the point where I can just enjoy the house and the space we have. It should be fantastic during summer especially for entertaining guests with its large backyard, patio and sunny afternoons and I’m really looking forwards to having a proper home office setup again for my geeking needs

Oh how I've missed a home office!

Got my home office! If only I had money for computer upgrades left :-(


So that’s an update on where we are at for now. It’s going to be a busy year I think with a lot of time spent doing up the place, and I’ll have plenty more blog posts to come on the various adventures along the way. I suspect many of them are going to be quite low-tech compared to the usual content of this blog, but maybe I’ll wake up and suddenly decide that home automation is an immediate vital task I need to complete. ;-)

If you want some more pictures of the house, there’s a copy of all the real estate agent listing photos on my Pinterest account taken by an actual competent photographer, the plan is to try and take pictures along the way as we progress with our improvements to the property to see the progress we’ve been making.