Tag Archives: jethro does mac

Various posts in relation to my experiences using MacOS instead of GNU/Linux for my work computer.

Thunderbolt and other Macbook hardware issues with Linux

Having semi-recently switched to a Macbook Pro Retina 15″ at work, I decided to give MacOS a go. It’s been interesting, it’s not too bad an operating system and whilst it is something I could use on an ongoing basis, I quickly longed for the happy embrace of GNU/Linux where I have a bit more power and control over the system.

Generally the Linux kernel supports most of the Macbook hardware out-of-the-box (As of 3.15 anyway), but with a couple exceptions:

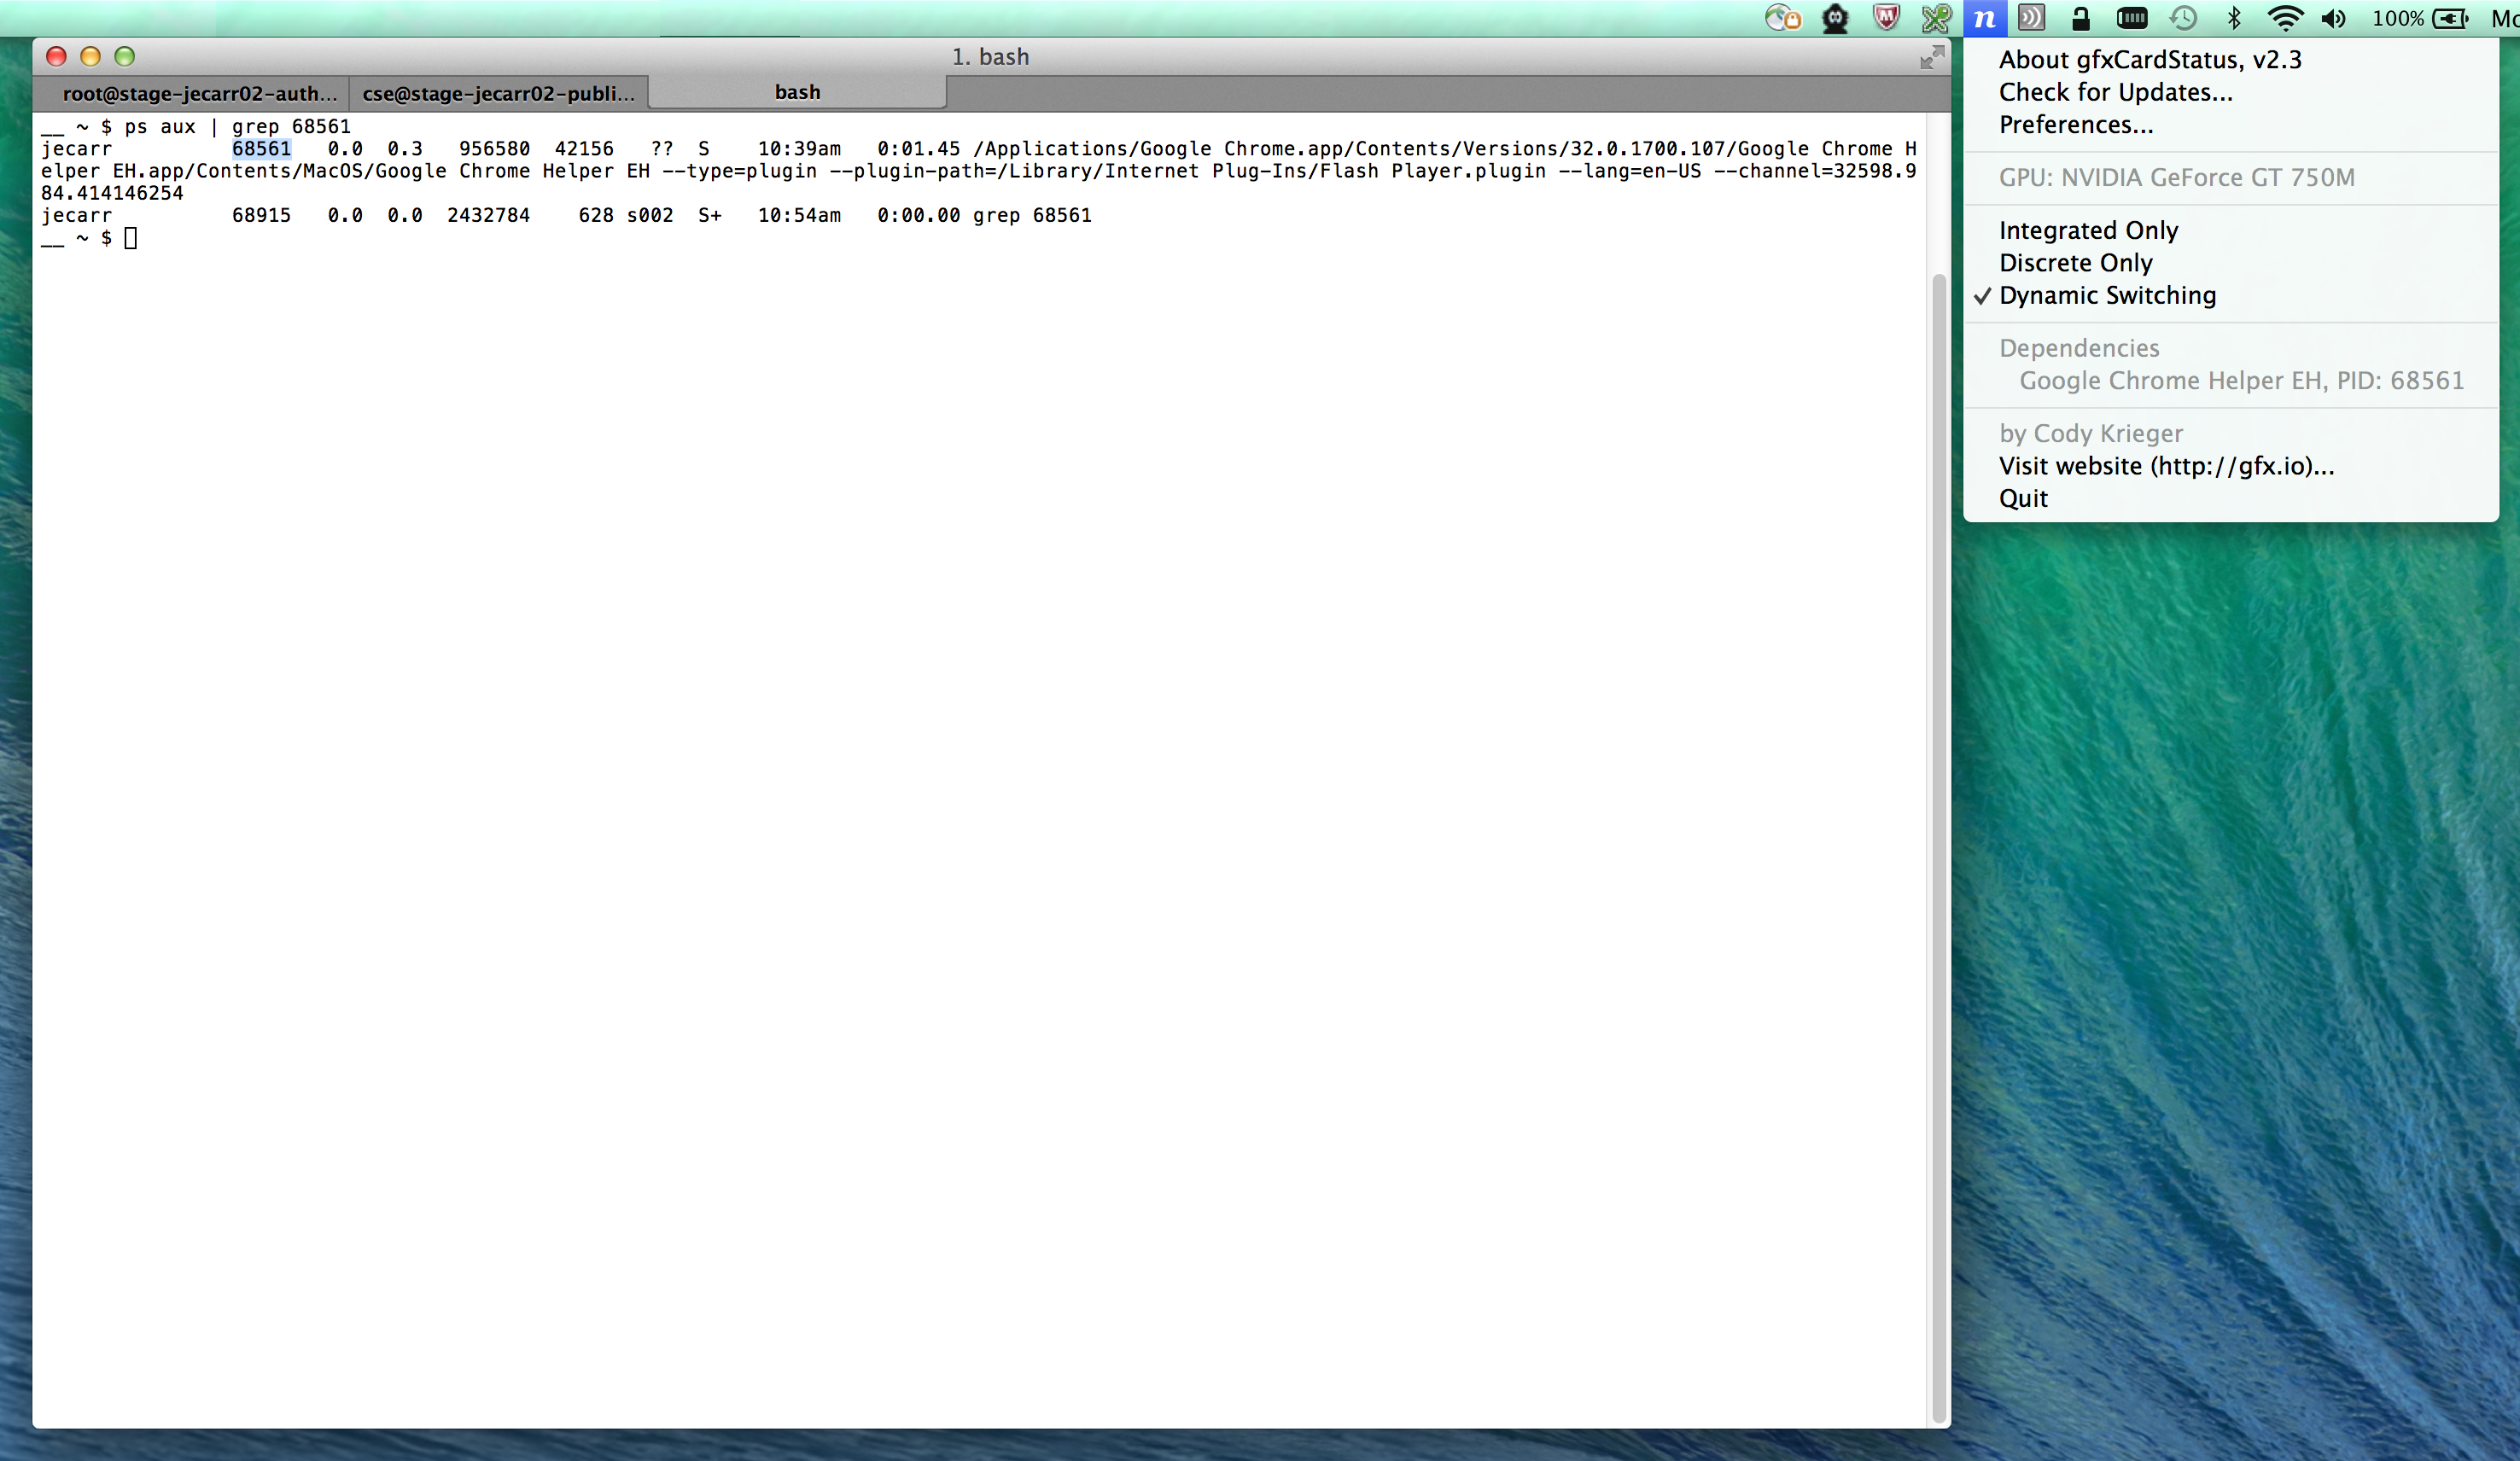
  • I believe support for the dual GPU mode switching is now fixed, however the model I’m using now is Intel only, so I can’t test this unfortunately.
  • The Apple Webcam does not yet have a driver. The older iSight driver doesn’t work, since the new gen of hardware is a PCIe connected device, not USB.
  • The WiFi requires a third party driver to be built for your kernel. You’ll want the latest Broadcom 802.11 STA driver in order for it to built with new kernel versions. Ubuntu users, get this version, or more recent.
  • If you’re having weird hangs where the Macbook just halts frequently waiting on on I/O, add “libata.force=noncq” kernel parameter. It seems that there is some bug with this SSD and some kernel versions that leads to weird I/O halts, which is fixed by this option.
  • Thunderbolt support is limited to only working on devices connected at boot up, no hotplug. Additionally, when using Thunderbolt, Suspend/Resume is disabled (although it works otherwise if there’s no Thunderbolt involved).

Of all these issues, the lack of Thunderbolt support was the one that was really frustrating me, since I need to use a Thunderbolt based Ethernet adaptor currently on a daily basis and I always rely on Suspend and Resume heavily.

Thankfully two kernel developers, Andreas Noever and Matthew J Garrett have been working on a series of kernel patches that introduce support for Thunderbolt hotplug and thus allow it to work on suspend and resume.

Sadly whilst this patch is awesome, it doesn't yet do wireless Thunderbolt for when the ethernet cable you want is too bloody short.

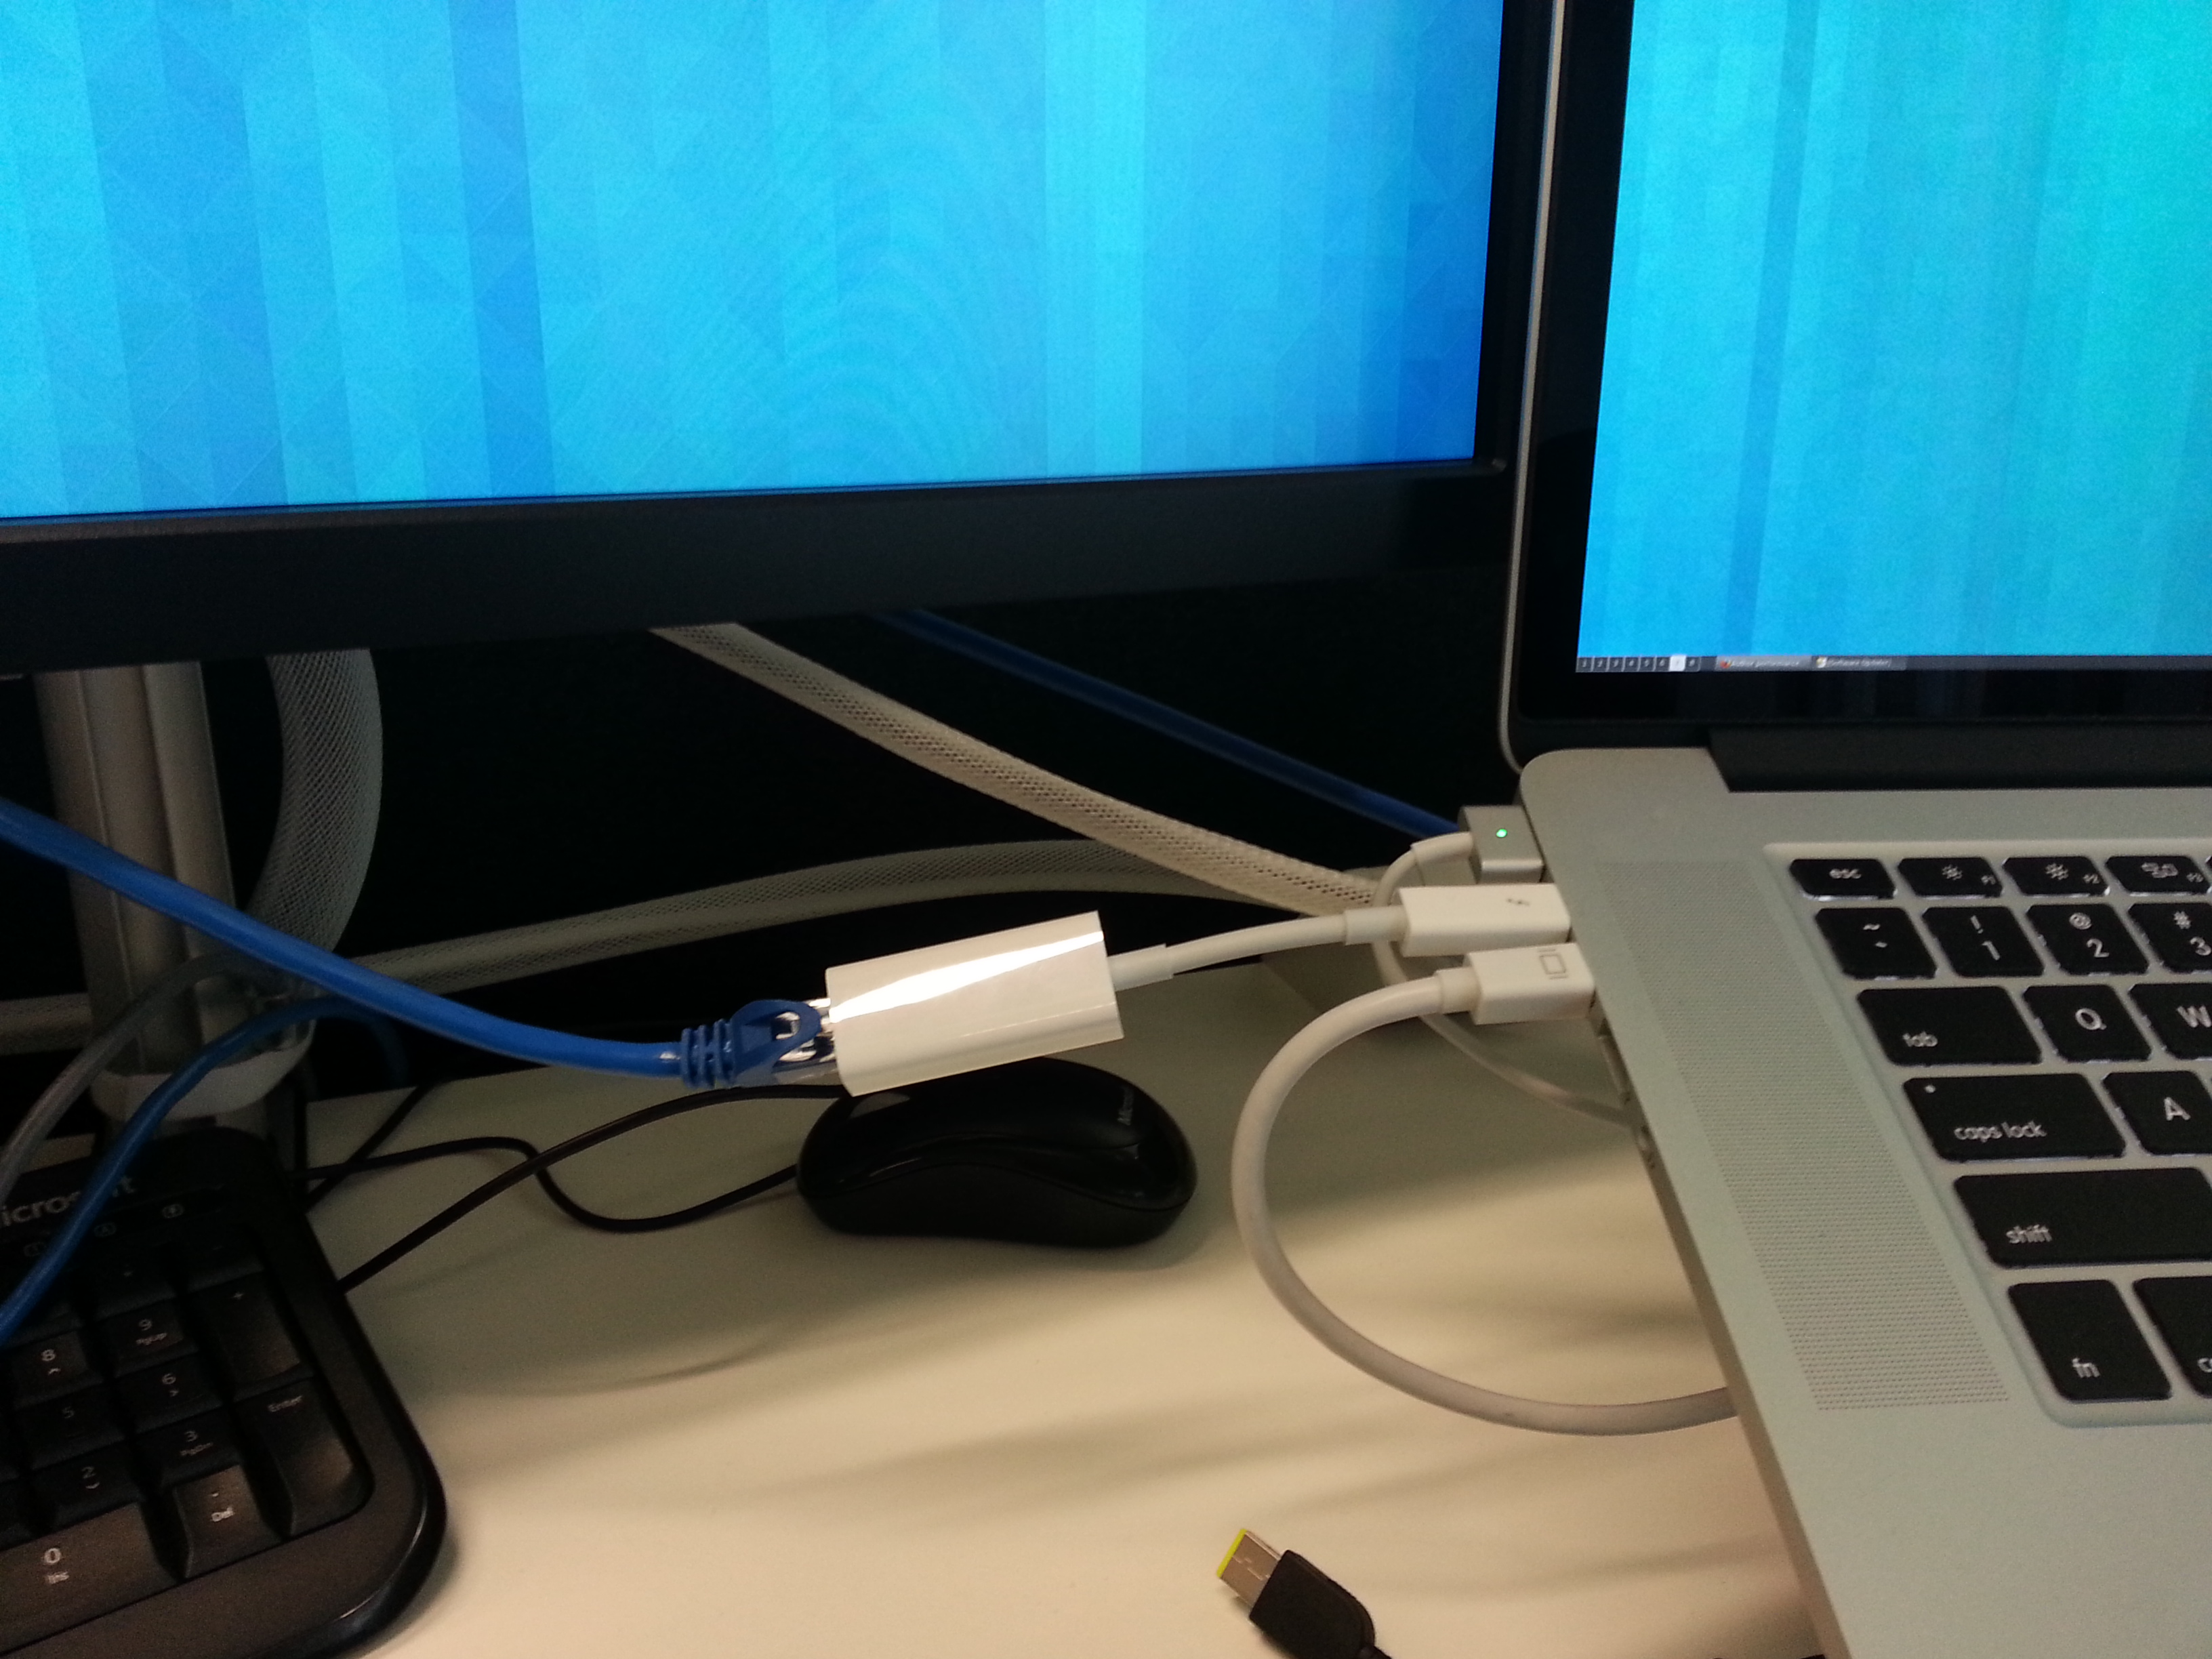
You too can now enjoy the shackles of a wired LAN connection like it’s 1990 all over again!

It doesn’t sound like it has been easy based on the posts on MJG’s blog which are well worth a read – essentially the Apple firmware does weird things with the Thunderbolt hardware when the OS doesn’t identify itself as Darwin (MacOS’s kernel) and likes to power stuff down after suspend/resume, so it’s taken some effort to debug and put in hardware-specific workarounds.
It will surely only be a matter of time before these awesome patches are merged, but if you need them right now and are happy to run rather beta kernel patches (who isn’t??) then the easiest way is to checkout their Git repo of 3.15 with all the patches applied. This repository should build cleanly via the usual means, and provide you with a new kernel module called “thunderbolt”.I’ve been testing it for a few days and it looks really good. I’ve had no kernel panics, freezes, devices failing to work or any issues with suspend/resume with these patches – the features that they claim to work, just work.  The only catches are:

  • If you boot the Macbook with the Thunderbolt device attached, it will be treated like a PCIe hotplug device… except that when you remove it, that Thunderbolt port won’t work again until the next restart. I recommend booting the Macbook with no devices attached, then hotplug once started to avoid this issue. I always remove before suspend and re-connect after resume as well (mostly because it’s a laptop and it’s easy to do so and avoid any issues).
  • The developers advise that Thunderbolt Displays don’t work at this time (however Mini DisplayPort connected screens work fine, even though they share the same socket).
  • The developers advise that chaining Thunderbolt devices is not yet supported. So stick to one device per port for now.

If you’re using Linux on a Macbook, I recommend grabbing the patched source and doing a build. Hopefully all these patches make their way into 3.16 or 3.17 and make this post irrelevant soon.

If you’re extra lazy and trust a random blogger’s binary packages, I’ve built deb packages for Ubuntu 13.10 (and should work just fine on 14.04 as well) for both the Thunderbolt enabled kernel as well as the Broadcom WiFi. You can download these packages here.

Jethro does Mac: Terminals

With a change in job, I recently shifted from my primary work computer being a Lenovo X1 Carbon running GNU/Linux to using an Apple Macbook Pro Retina 15″ running MacOS.

It’s not the first time that I’ve used MacOS as my primary workstation, but I’ve spent the vast majority of my IT life working in a purely GNU/Linux environment so it was interesting having to try and setup my usual working habits and flow with this new platform.

I’m going to do a few blog posts addressing my thoughts and issues with this platform and how I’ve found it compared to my GNU/Linux laptops. I’m going to look at both hardware and software and note down a few fixes and tricks that I’ve learnt along the way.


Part 4: Terminals and adventures with keybindings

I’ve already written about the physical issues with the Macbook keyboard, but there’s another issue with this input device – keybindings.

As mentioned previously, the Macbook lacks various useful keys, such as home and end, instead, you need to use a key combination such as Apple + Left/Right to achieve the same result. However for some inexplicable reason, Apple decided that the Terminal should have it’s own special behaviour, so it does not obey the same keybindings. In any other MacOS program, using these key combinations will achieve the desired results. But with Terminal, it results in random junk appearing in the terminal – or nothing at all.

For an engineer like myself this is the single most frustrating issue I’ve had with MacOS to date – having the Terminal essentially broken out of the box on their own hardware is quite frankly unacceptable and I suspect a reflection on how Apple cares far more about consumer users than power users.

Whilst Apple’s Terminal offers the ability to configure keybindings, it has two major problems that make it unusable:

  1. Whilst there is an entry for keys called “Home” and “End”, these entries seem to map to actual physical Home/End keys, but not the key combinations of Apple + Home/End, which appear as-is to the OS. So any configuration done for the Home/End won’t help.
  2. Instead we need to configure a key combination with a modifier of Apple key. But MacOS Terminal doesn’t allow the Apple key to be used as a modifier.
MacOS stock terminal keybinding configuration.

MacOS stock terminal keybinding configuration – no Apple key option here!

The result is, there’s no way to properly fix the MacOS Terminal and in my view, it’s essentially useless. Whilst if I was using an external keyboard with a physical home/end key it wouldn’t be too much of a problem since I can set a keybinding, there are times I do actually want to be able to use the laptop keyboard effectively!

I ended up fixing it by installing the popular iTerm2 third party terminal application- in many ways it’s similar to the stock terminal, but it offers various additional configuration options.

iTerm2 and MacOS Terminal alongside each other.

iTerm2 and MacOS Terminal alongside each other, configured to use same colour scheme and fonts.

For me the only thing that I really care about is the fact that it adds the ability to setup keybindings with the Apple + Home/End key options.

iTerm2

The killer feature – the ability to set key combinations with the Apple key!

Setting the above and then creating an ~/.input.rc file (as per these instructions) resolved the keybinding issues for me, and made iTerm2 consistent with all the MacOS applications.

"\e[1~": beginning-of-line
"\e[4~": end-of-line
"\e[5~": history-search-backward
"\e[6~": history-search-forward
"\e[3~": delete-char
"\e[2~": quoted-insert
"\e[5C": forward-word
"\e[5D": backward-word
"\e\e[C": forward-word
"\e\e[D": backward-word
set completion-ignore-case On

The key combinations work correct in the local shell, Vim and also via SSH connections to other systems. Perfect! I just wish I didn’t have to do this in the first place…


See other posts in this series via the jethro does mac tag as I explore using MacOS after years of GNU/Linux only.

Jethro does Mac: The Apple Input Devices

With a change in job, I recently shifted from my primary work computer being a Lenovo X1 Carbon running GNU/Linux to using an Apple Macbook Pro Retina 15″ running MacOS.

It’s not the first time that I’ve used MacOS as my primary workstation, but I’ve spent the vast majority of my IT life working in a purely GNU/Linux environment so it was interesting having to try and setup my usual working habits and flow with this new platform.

I’m going to do a few blog posts addressing my thoughts and issues with this platform and how I’ve found it compared to my GNU/Linux laptops. I’m going to look at both hardware and software and note down a few fixes and tricks that I’ve learnt along the way.


Part 3: The Apple Input Devices

I’ll freely admit that I’m a complete and total keyboard snob and I’ve been spoilt with quality desktop keyboards (Das Keyboard, IBM Model M) and the best possible laptop keyboard on the market – the classic IBM/Lenovo Thinkpad keyboard (pre-chiclet style).

Keeping this snobbery and bias in mind, I’m bitterly disappointed by the quality of the Apple keyboard. It’s a surprising slip-up by a company that prides itself on perfection and brilliant hardware design, I fear that the keyboard is just an unfortunate casualty of that design-focused mentality.

I have two main issues with this keyboard. Firstly, the shallowness and feeling of the keys, and secondly the layout and key selection.

The shallowness is the biggest issue with the keyboard. Laptops certainly aren’t known for their key travel distance, but there have been a few exceptions to the rule – IBM/Lenovo’s Thinkpad series is widely recognised as featuring one of the better keyboards in the market with decent sized keys, good layout and enough key depth to get a reasonable amount of travel when typing. (Side note: talking about the classic Thinkpad keyboards here… I’m undecided about their new chiclet style keyboards on recent models…)

On the Macbook, the key depth and travel distance is very short, there’s almost no movement when pressing keys and I lose the ability to effectively bounce between the different keys. I personally find that repeatedly doing the small motions needed to type on this keyboard for 4 hours or more causes me physical discomfort in my hands and I fear that if I were to use the Macbook keyboard as my primary computer, I would be looking at long term RSI problems.

Having said that, to be fair to Apple I probably couldn’t handle more than 6-8 hours a day on my Thinkpad keyboard – whilst it’s better than the Apple one, it’s still fundamentally a laptop keyboard with all the limitations it suffers. Realistically, for the amount of time I spend on a computer (12+ hours a day), I require an external keyboard whether it’s plugged into a Macbook, a Thinkpad or some other abomination of typing quality.

The other issue I have with Apple’s keyboard is that despite the large size of the laptop (mine is a 15.6″ unit), they’ve compromised the keyboard layout and removed various useful keys – the ones that I miss the most are home, end, insert, delete, page up and page down, all of which require the use of key combinations to be achieved on the Macbook.

The Thinkpad line has always done pretty well at including these keys, even if they have a VERY annoying habit of moving around their positions with different hardware generations, and their presence on the keyboard is very appreciated when doing terminal work – which for me, is a fast part of my day. It’s a shame that Apple couldn’t have used a bit more of the surface space on the laptop to add some of these keys in.

Overall, if I examine the Macbook keyboard as something I’m only going to use when out of the home/work office, then it’s an acceptable keyboard. I’ve certainly used far worse laptop keyboards and it sure beats tapping away on a tablet touchscreen or using something like the Microsoft Surface foldout keyboards.

And of course both the Thinkpad and the Macbook pale in comparison to a proper external keyboard – as long as I have a decent home/work office external keyboard it’s not too much of a deal breaker, but I’d certainly weigh in the keyboard as a negative if I was considering a machine for a role as a travelling consultant, where I could be spending weeks at a client site with unknown facilities and maybe needing to rely on the laptop itself.


Despite the insistence of some people that the keyboard is the only thing a computer needs, you’ll probably also want to use some kind of cursor moving thing if you want to effectively make use of the MacOS GUI.

The Macbook ships with a large touchpad centered in the middle of the laptop beneath the keyboard. This is a pretty conventional design, although Apple has certainly been pushing the limits on getting the largest possible sized touchpad on a laptop – a trend that other vendors appear to have been following in recent years.

Personally I hold a controversial opinion where I vastly prefer Trackpoint-style pointers on laptops over touchpads. I’m sure that a case could be made to accuse me of Thinkpad fanboyism, but I’ve used and enjoyed Trackpoints on Toshiba, HP and Lenovo computers in the past with great success.

The fundamental reason I prefer the Trackpoint, is that whilst it takes longer to get used to and feels weird at first, once it’s mastered, it’s possible to rapidly jump between typing and cursor moving with minimal effort.

Generally my fingers are resting on keys right next to the Trackpoint, or sometimes even I rest my finger on the Trackpoint itself whilst waiting, so it’s easy to jump between typing and cursoring. Plus on the Thinkpad design, my thumb rests just above the 3-button mouse, which is fantastically convenient.

http://xkcd.com/243/

http://xkcd.com/243/

Whilst the Macbook’s large touchpad is by far the best touchpad I’ve ever used, it still has the fundamental flaw of the layout forcing me to make a large movement to go between the keyboard and the touchpad each time.

This is technically a Macbook air, but the keyboard and touchpad is the same across the entire product line.

This is technically a Macbook air in the picture, but the keyboard and touchpad is the same across the entire product line…. this laptop was closer to my camera. :-)

It also has the issue of then sitting right in the way of my palm, so it took me a while to get used to not hitting the touchpad with my palm whilst typing. I’ve gotten better at this, although it still happens from time to time and does prevent me from resting my palm in my preferred natural position.

Admittedly I am nitpicking. To their credit, Apple has done a far better job of touchpads than most other vendors I’ve ever used. Generally laptop touchpads are too small (you can see how tiny the one on my Thinkpad is – I just disabled it entirely in favour of the Trackpoint) and even vendors who are busy cloning Apple’s design haven’t always gotten the same feel of sturdiness that Apple’s touchpad offers.

The gesture integration with MacOS is also excellent – I’ve found that I’m often using the three-finger swipe to switch between workspaces and the two-finger scrolling is very easy to use when doing web browsing, nicer and more natural feeling than using the cursor keys or a scroll wheel even.


Overall it’s a decent enough machine and beats most other laptop vendors in the market. I’d personally still go for the Thinkpad if all things other than keyboard were identical, simply due to how much I type and code, but the Macbook keyboard and touchpad is an acceptable second place for me and a good option for most general users.

See other posts in this series via the jethro does mac tag as I explore using MacOS after years of GNU/Linux only.

Jethro does Mac: GPU Woes

With a change in job, I recently shifted from my primary work computer being a Lenovo X1 Carbon running GNU/Linux to using an Apple Macbook Pro Retina 15″ running MacOS.

It’s not the first time that I’ve used MacOS as my primary workstation, but I’ve spent the vast majority of my IT life working in a purely GNU/Linux environment so it was interesting having to try and setup my usual working habits and flow with this new platform.

I’m going to do a few blog posts addressing my thoughts and issues with this platform and how I’ve found it compared to my GNU/Linux laptops. I’m going to look at both hardware and software and note down a few fixes and tricks that I’ve learnt along the way.


Part 2: Dual GPU Headaches

Whilst the Macbook line generally features Intel GPUs only, the flagship Macbook Pro 15″ model like mine features dual GPUs – the low power Intel GPU, as well as a high(er) performance Nvidia GPU for when graphical performance is required for certain business applications (*cough* Minecraft *cough*).

MacOS dynamically switches between the different GPUs as it deems necessary, which is a smart idea – except that MacOS seems to get led astray by malware such as Flash Player which launches in the background of some webpage somewhere and proceeds to force the GPU to run on Nvidia only, chewing up battery yet not even rendering anything.

To be fair to Apple, this is a fault with the crapiness of Flash Player and not MacOS. It certainly gives ammunition to Apple’s decision to ditch having Flash Player pre-installed on MacOS systems in 2010 to conserve battery life, the Nvidia GPU certainly shortens my laptop’s battery life by about 30mins when just sitting idle.

Annoyingly the only way I found out that my Mac wasn’t using the Intel GPU most of the time, was by installing a third party tool gfxCardStatus which shows the apps blocking low-power GPU selection and also allows forcing a particular GPU manually.

Not content with hogging CPU, Flash Player found itself wanting to hog GPU as well.

Not content with hogging CPU, Flash Player found itself wanting to hog GPU as well.

The other issue with the dual GPU design, is that it makes running GNU/Linux on these models of Macbook complex – it can be done, but you have to use MacOS to select one GPU or another before then booting into GNU/Linux and sticking with that selected GPU.

This may get better overtime, but it’s worth anyone who’s considering ditching MacOS to keep in mind.


See other posts in this series via the jethro does mac tag as I explore using MacOS after years of GNU/Linux only.

Jethro does Mac: Retina Display

With a change in job, I recently shifted from my primary work computer being a Lenovo X1 Carbon running GNU/Linux to using an Apple Macbook Pro Retina 15″ running MacOS.

It’s not the first time that I’ve used MacOS as my primary workstation, but I’ve spent the vast majority of my IT life working in a purely GNU/Linux environment so it was interesting having to try and setup my usual working habits and flow with this new platform.

I’m going to do a few blog posts addressing my thoughts and issues with this platform and how I’ve found it compared to my GNU/Linux laptops. I’m going to look at both hardware and software and note down a few fixes and tricks that I’ve learnt along the way.


Part 1: The Retina Display

Apple is known for their hardware quality – the Macbook Pro Retina 15″ I am using is a top-of-the-line machine with a whopping Core i7, 16GB of RAM and 512GB SDD, Nvidia GPU and the massive 2880×1800 pixel Retina LCD display. Whilst the hardware is nice, it’s something that can be found with other vendors – what really makes it interesting, is the massive high resolution display.

Shiny shiny

Shiner than a Thinkpad. But is it just a showoff?

Unfortunately for all the wonderfulness that Retina advertises, it’s given me more grief than happiness so far. My main issue, is how Apple handles this massive high resolution display.

Out of the box you get a scaled resolution that looks like any standard MacOS laptop, rather than the full native resolution of the display. Apple then does some weird black magic with their UI layer, where the actual display is rendered on a massive virtual 3360 x 2100 resolution virtual display and is then scaled down to the actual display size of 2880 x 1800 pixels.

The actual resolutions available to the end user aren’t real resolutions, but rather different modes that essentially look/feel like 1920×1200, 1680×1050, 1440×900 (the default for Retina), 1280×800 and 1024×640, but in the background MacOS is just scaling application windows to these sizes.

There’s some more details about the way the Retina display and MacOS work on the AnandTech review here.

If you come from a Windows or GNU/Linux world where the screen resolution is what it says on the box, it’s a really weird mindshift. You’ll quickly find this approach is common to the Apple ecosystem – so much stuff that I understand about computers is difficult to figure out with MacOS due to the way Apple hides everything and instead of using the technical terminology, hides it behind their own terminology designed to make it “easier” for normal users. And maybe it does… but for me, it’s more of a hindrance, rather than a help.

Apple's Settings window isn't that helpful at explaining the real resolutions underneath. Use

Apple’s Settings window isn’t that helpful at explaining the real resolutions underneath, in my case I had to get “screenresolution” from Brew in order to figure out what resolution this machine was actually displaying.

So which size and mode do I use? The stock screen resolution is OK for a laptop and maybe you’ll like it perfectly if you’re using Retina optimised applications (eg Aperture) where having a lower effective resolution, but high DPI for the content is useful.

Default scaled mode - effectively 1440x900

Default scaled mode – effectively 1440×900

However for me, where most of my use case is email, terminal and a browser, I wanted the ability to fit the most possible information onto the screen, so I ended up using the “More Space” resolution, which drives the display at a 1920×1200-like scaled resolution.

The "More Space" mode is handy for fitting decent amounts of console output.

The “More Space” mode is handy for fitting decent amounts of console output.

Whilst the Retina display is an excellent equal to a 24″ monitor (which have a resolution around 1920×1080, almost the same as the “More Space” mode), it doesn’t quite meet my dream hope which was that it would equal a 27″ monitor.

27″ monitors are the holy grail for me, since they have a resolution of 2560 x 1080, which is big enough to fit two large A4 sized windows on the screen at the same exact time.

Good, but not as good as a nice 27" panel.

It’s functional, but not as natural-feeling as doing the same on a 27″ monitor – still feels like trying to squeeze everything in.

It is possible to bypass Apple’s limitations on resolution get a higher resolution using third party tools, but I can only just read the 1920×1200 comfortably. I tried DisplayMenu (as suggested by Kai in the comments), but whilst the resulting resolution is amazing, I find reading text on it just a bit too small for prolonged periods.

The full 2880x1800 is lovely, but I might need glasses to read it...

The full 2880×1800 is lovely, but I might need glasses to read it…

The other issue with the Retina displays, is that due to the way Apple does the scaling, some applications just end up looking bad and fuzzy due to bitmap stretching and other nastiness – this impacted me with KeepassX, as well as some company-internal web applications.

But when you do get a properly Retina compatible application, things do look beautiful – Google Maps both in vector map and also satellite view look incredibly sharp and clear.

Vectorised graphics were made for Retina

Vectorised graphics were made for Retina

If I was choosing between a laptop with a high resolution display like this and one without, I’d be choosing the former all other factors being considered equal. But I’m not convinced that it’s worth splashing lots of cash on for my particular requirements of terminals and browsing – the Retina screen probably wouldn’t add much for me over a laptop that features a resolution like 1920×1200 native instead of downscaling.


See other posts in this series via the jethro does mac tag as I explore using MacOS after years of GNU/Linux only.