Tag Archives: hacks

Wellington Home Automation Hackers

I’m slowly setting up more and more Internet-of-Things stuff in my house and because of my interest in this space I’ve started a Wellington Home Automation Hackers meetup that will meet monthly! If you’re in Wellington and are interested in this sort of thing, please do join the group and come along!

I’m aiming to have 2 different presenters lined up every month to ensure a range of topics, including a mix of presentations suitable for less technical beginners as well as more technical gurus (and everything in-between).

I kicked off the first month by talking about my adventures so far with Home Assistant, using it to integrate with my air conditioning, house alarm and how I’m using it in conjunction with Apple Homekit. If you missed it but this sounds fun, check it out on YouTube below!

Easy Lockscreen MacOS

Whilst MacOS is a pretty polished experience, there’s some really simple things that are stupidly hard sometimes such as getting the keybindings to work right for real keyboards or in this case, getting the screen to be lockable without sleeping the computer.

No matter what configuration I set in power management, the only MacOS keyboard combination that does anything for me (Command + Option + Eject/Power/F12) will not only put up the lock screen, but also immediately sleeps the computer, much to the dismay of any background network connections or audio.

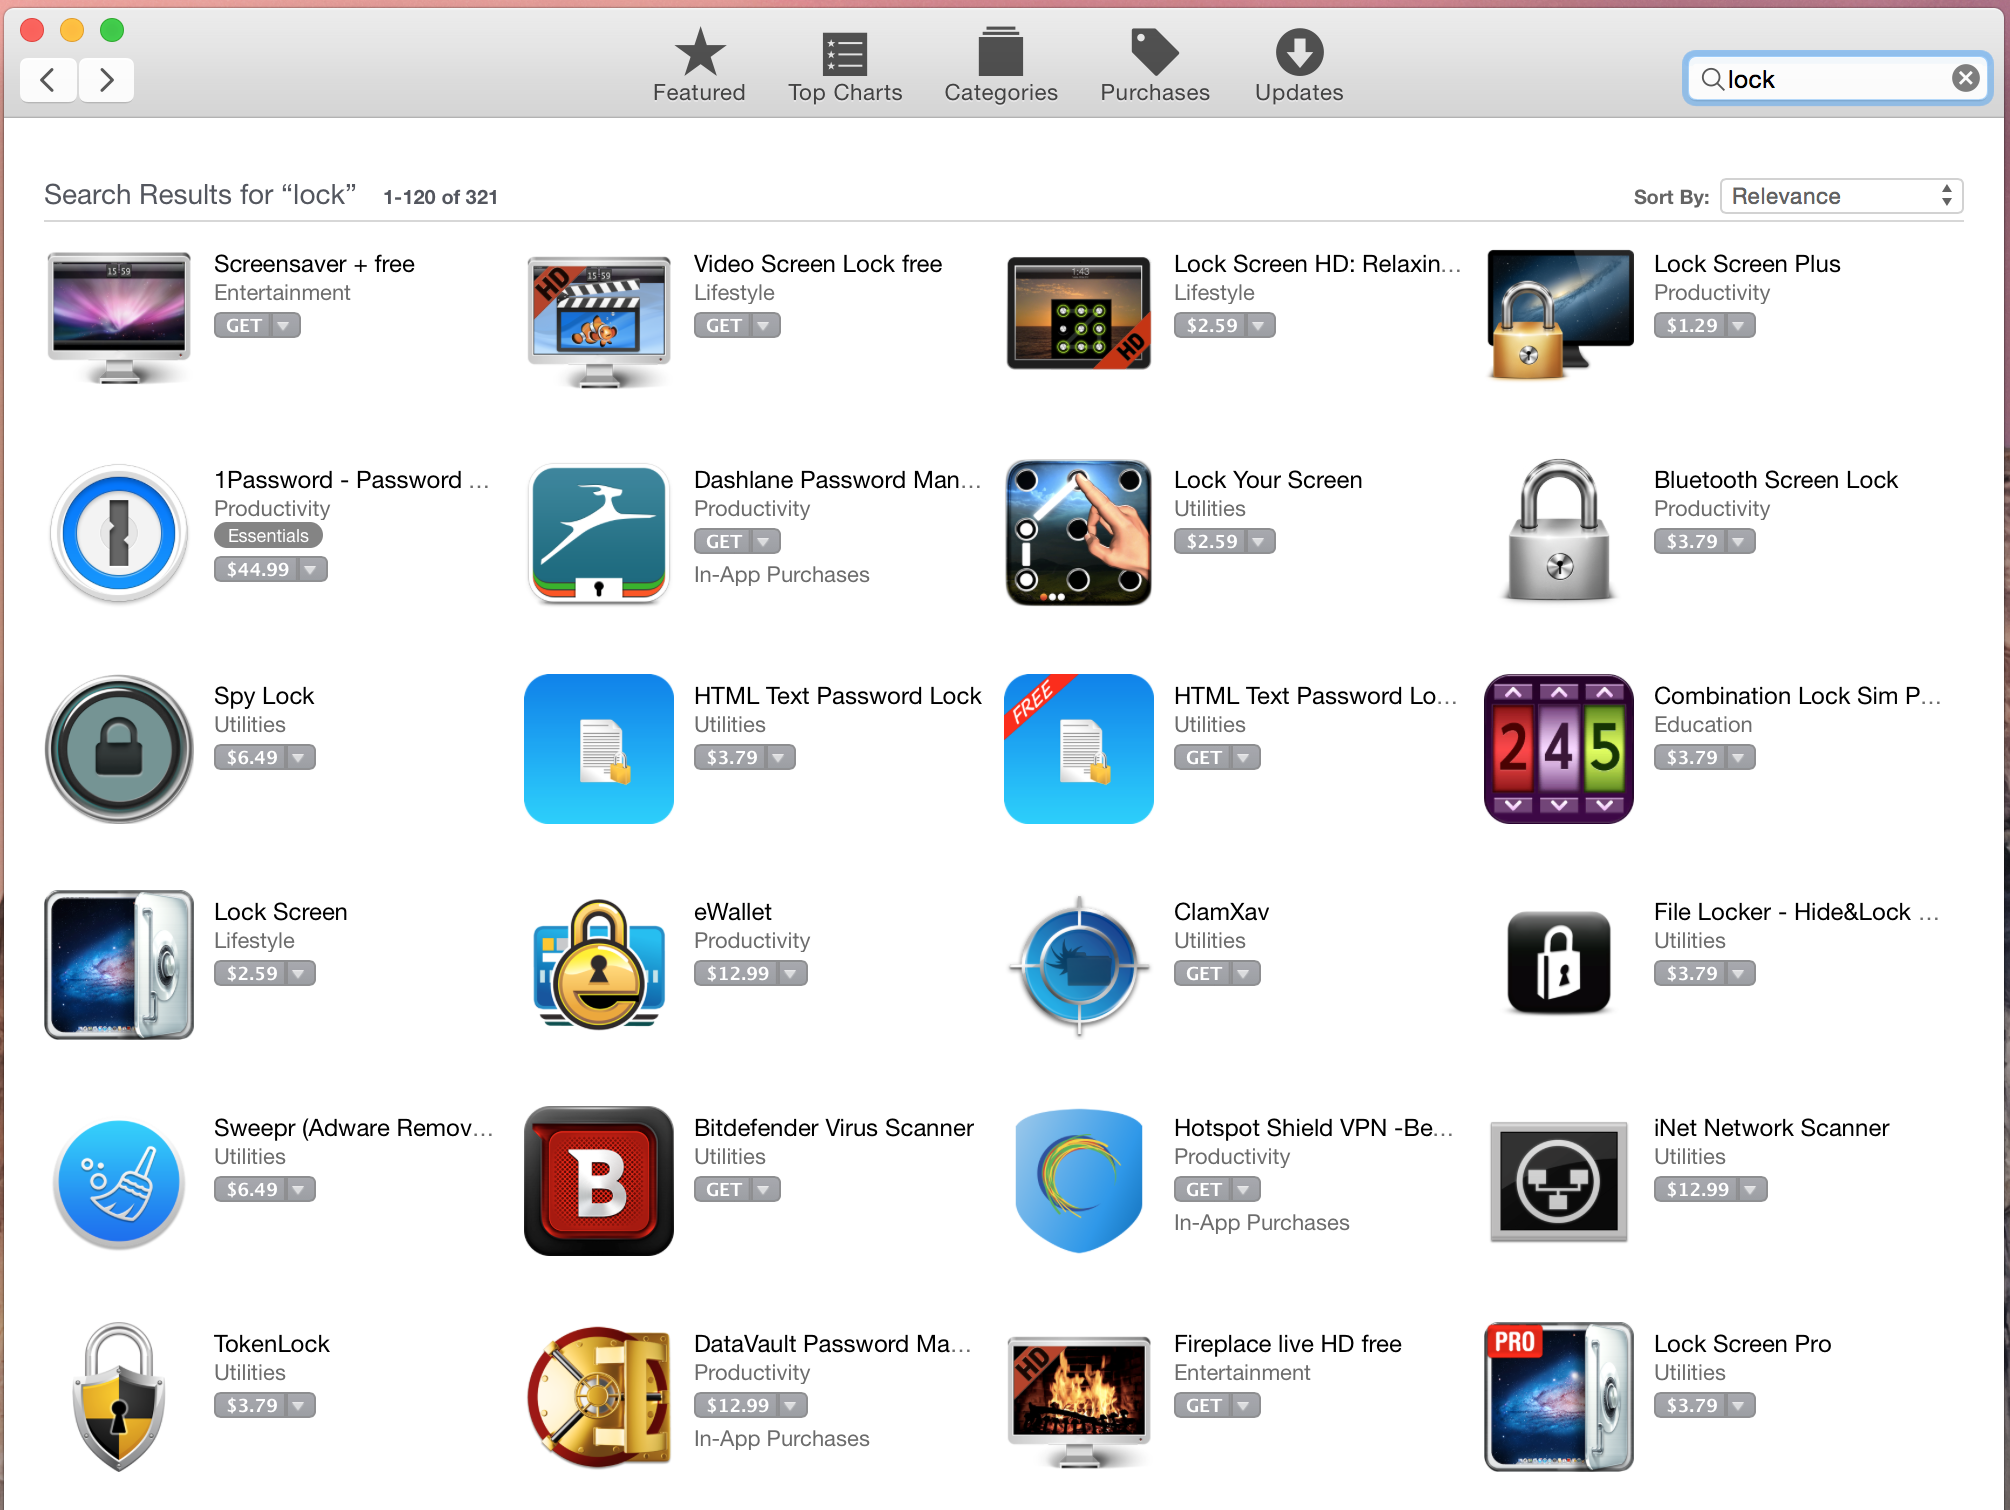
One of the issues with MacOS is that for any issue there are several dubious software vendors offering you an app that “fixes” the issue with quality ranging from some excellent utilities all the way to outright dodgy Android/Windows-style crapware addons.

None of these look particularly good. Who the hell wants Android-style swipe unlock on a Mac??

None of these look particularly good. Who the hell wants Android-style swipe unlock on a Mac??

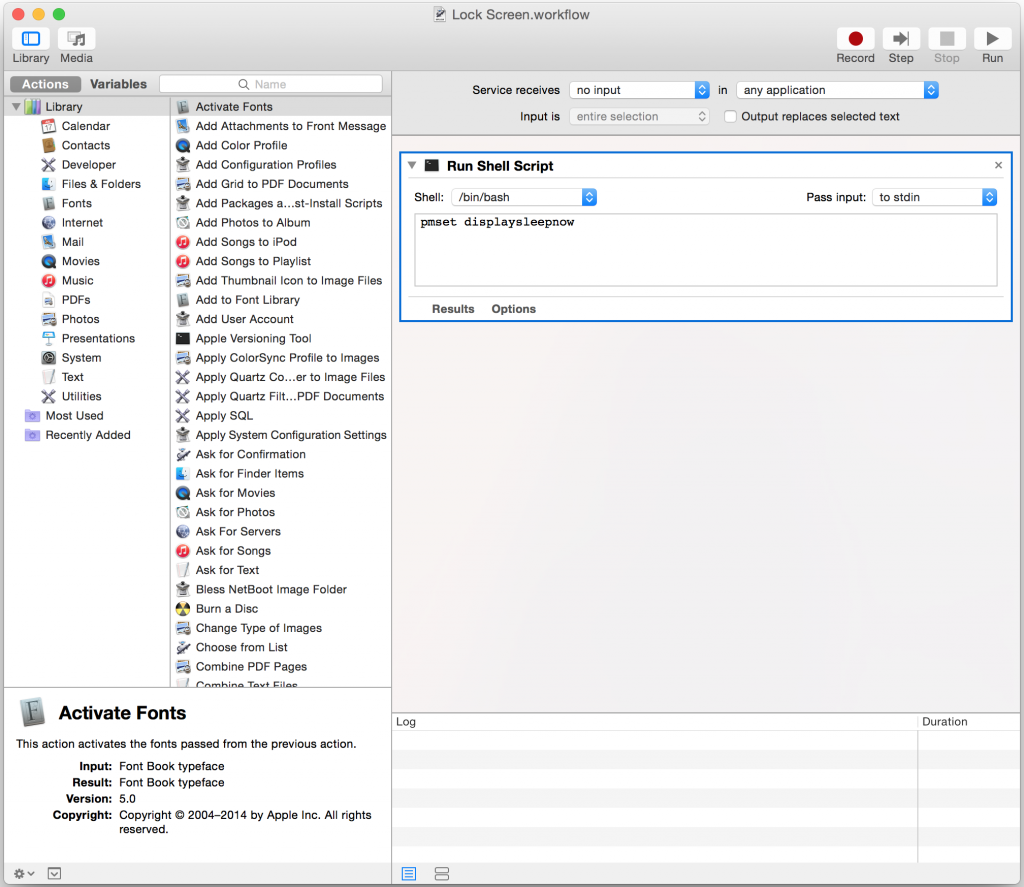
Naturally I’m not keen for some crappy third party app to do something as key as locking my workstation so went looking for the underlying way the screen gets locked. From my trawling I found that the following command executed as a normal user will trigger a sleep of the display, but not the whole machine:

pmset displaysleepnow

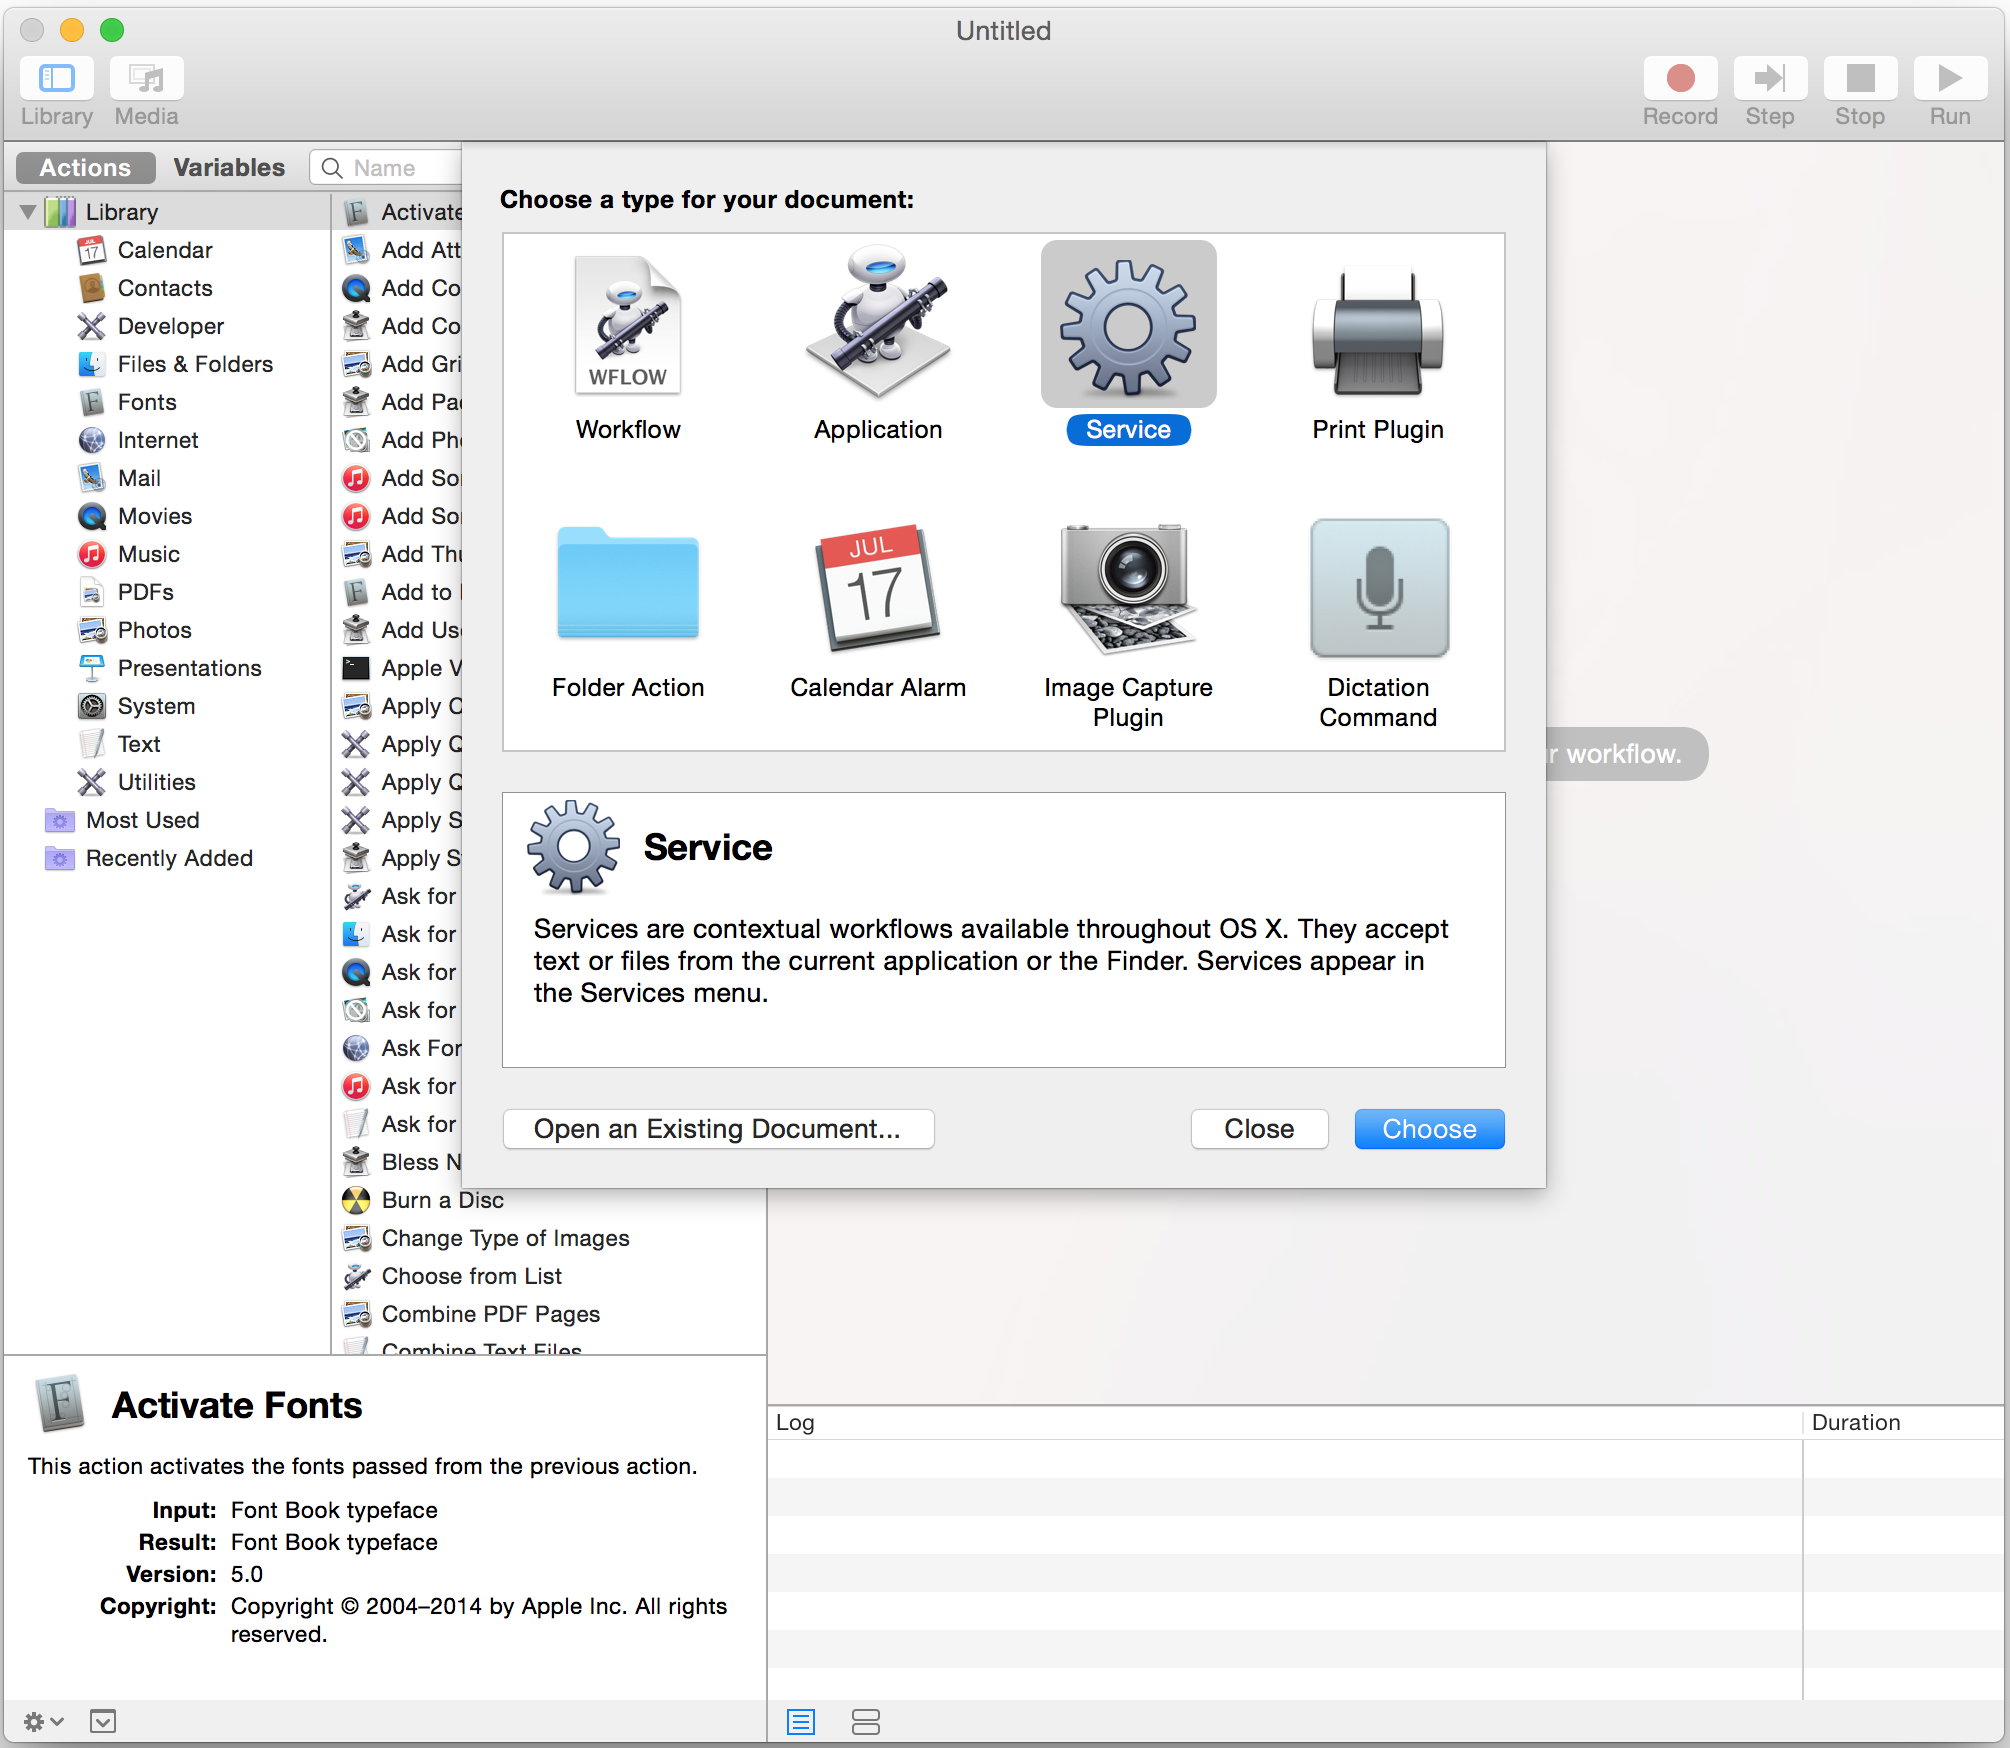
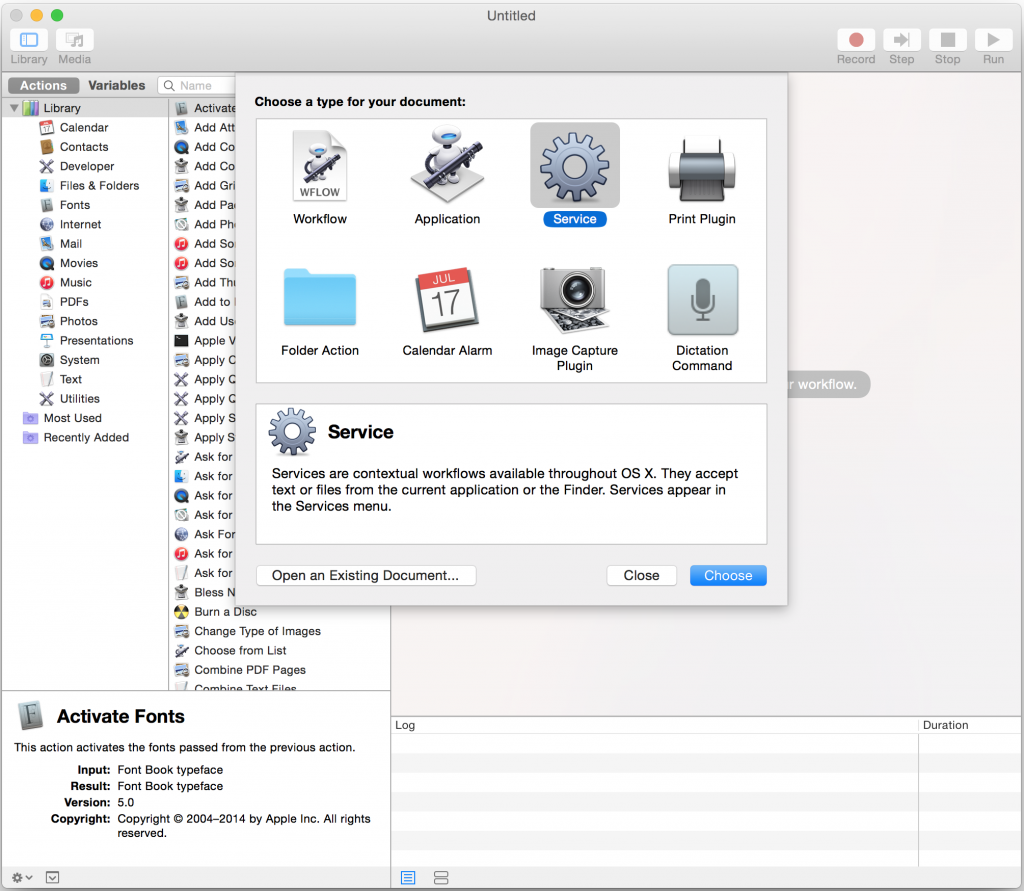
Turns out getting MacOS to execute some line of shell is disturbingly easy by using the Automator tool (Available in Applications -> Utilities) and creating a new Service.

Screen Shot 2015-05-26 at 23.47.59

Then add the Run Shell Script action from the Library of actions like below:

Screen Shot 2015-05-26 at 23.47.00

Save it with a logical name like “Lock Screen”. It gets saved into ~/Library/Services/ so in theory should be possible to easily copy it to other machines.

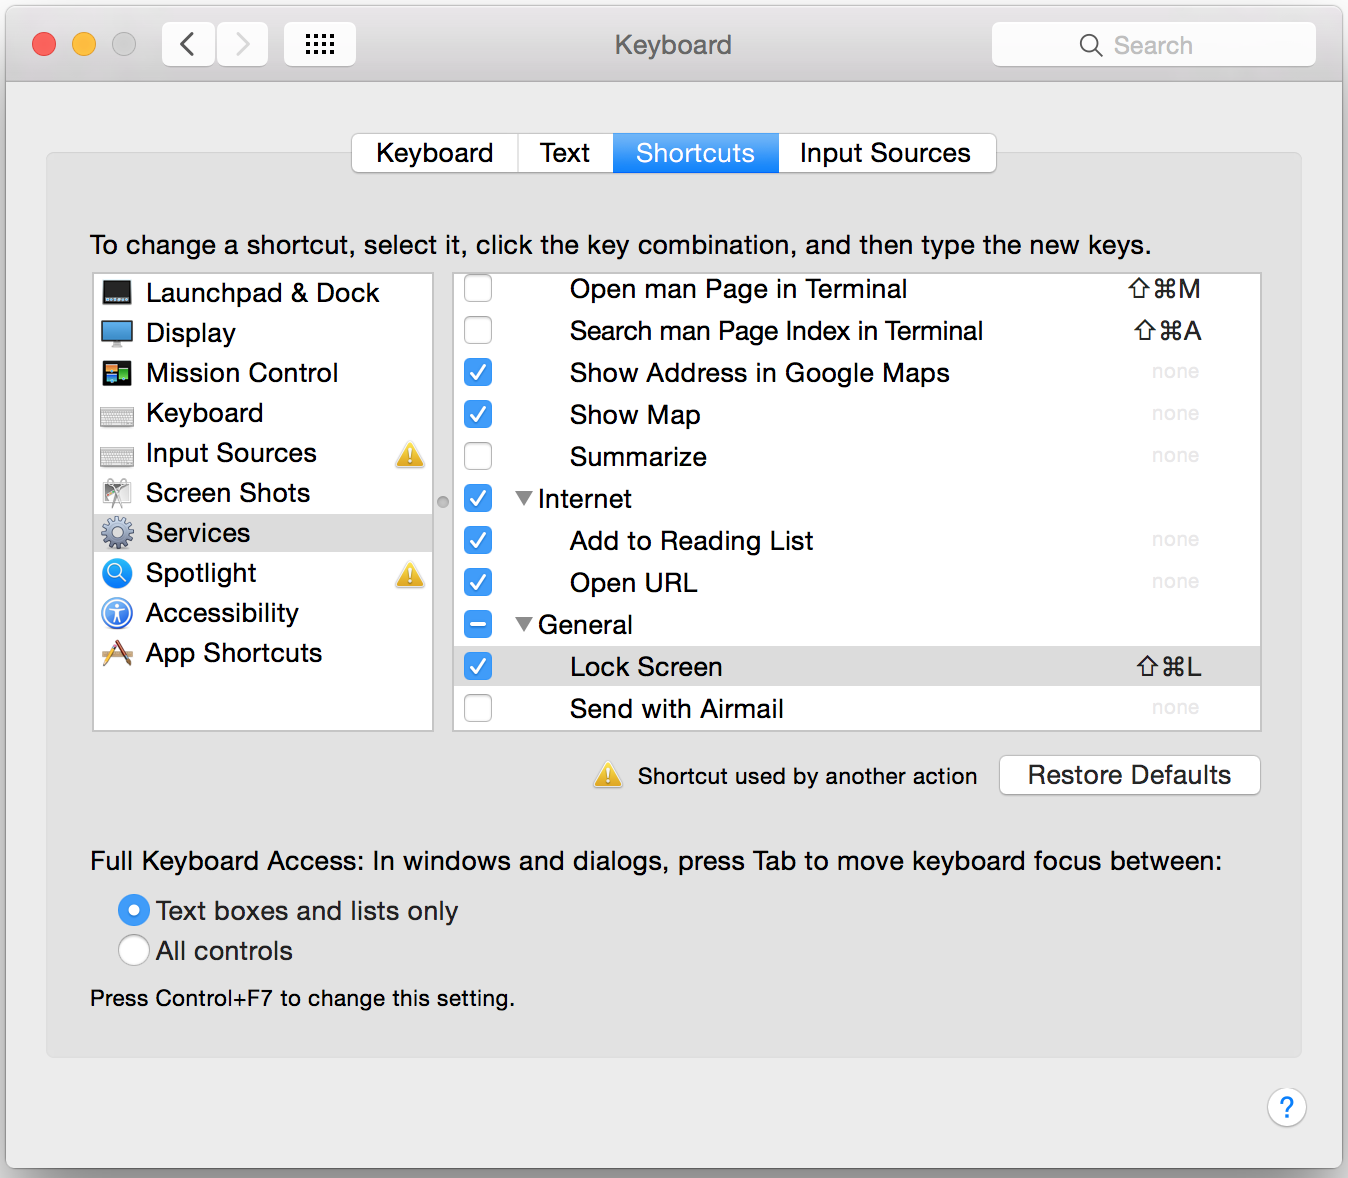
Once saved, your new service will become available to you in System Preferences -> Keyboard -> Shortcuts and will offer you the ability to set a keyboard shortcut.

Screen Shot 2015-05-26 at 23.50.37

And magic, it works. Command + Shift + L is a lot easier in my books than hot corners or clicking stupid menu items. Sadly you don’t have full flexibility of any key, but you should be able to get something that works for you.


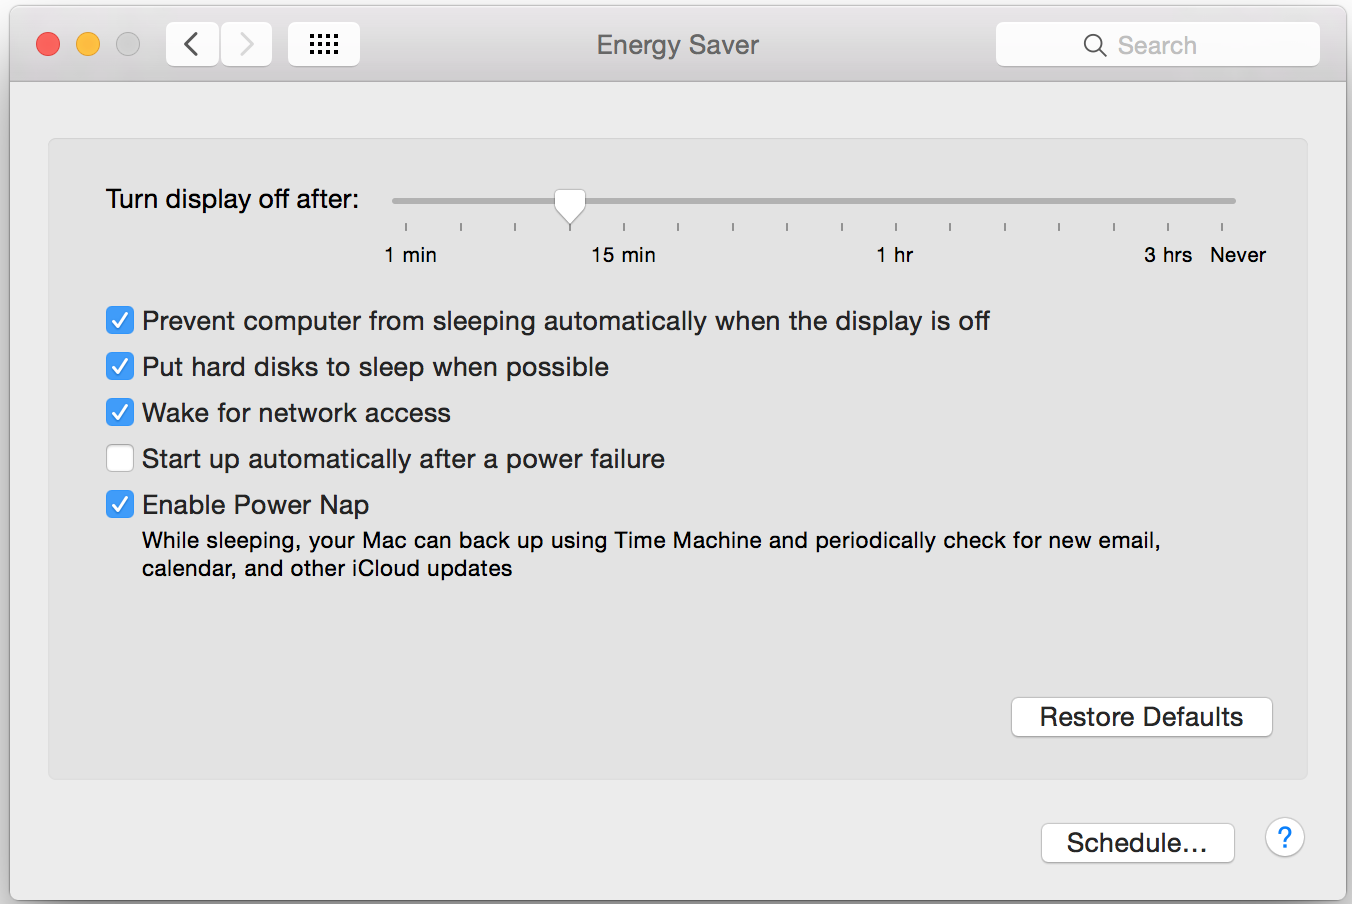
For reference, here are my other settings windows. First the power management (Energy Saver) settings. I select “Prevent computer from sleeping automatically” to avoid any surprises when sleeping.

Screen Shot 2015-05-27 at 00.14.29

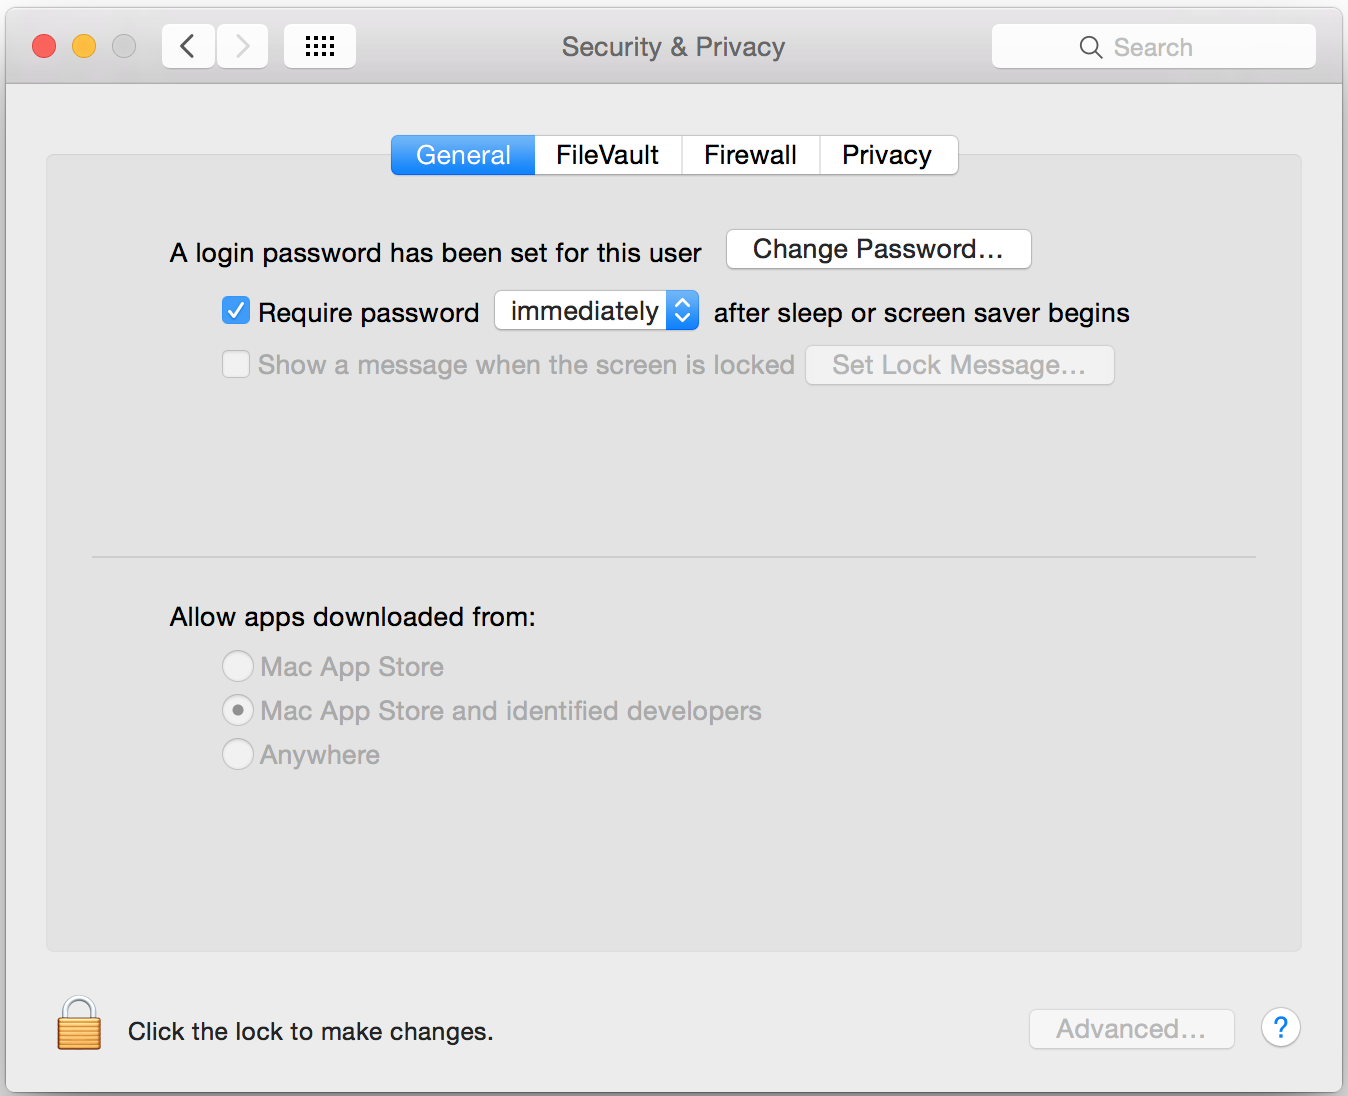
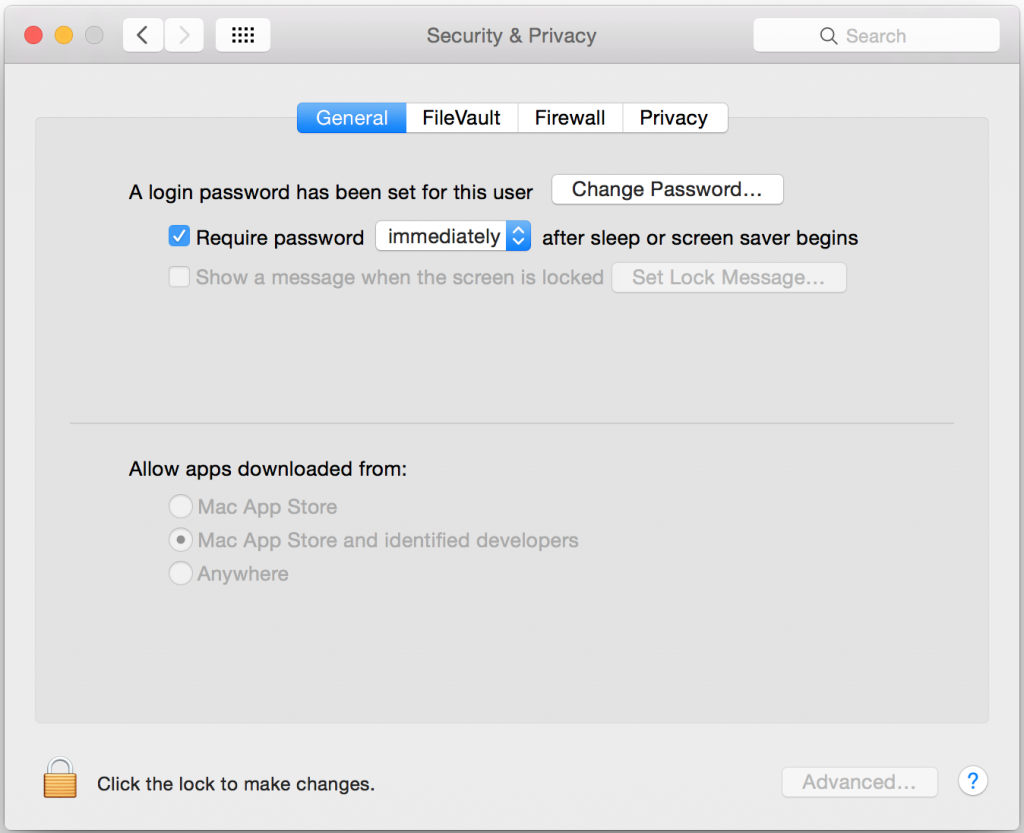
And secondly, your Security & Privacy settings should require a password after sleep/screen saver:

Screen Shot 2015-05-27 at 00.12.07


Tested on MacOS 10.10 Yosemite with pretty much a stock OS installation on an iMac 5k – I wouldn’t expect any variation by hardware, but YMMV (Your Mileage May Vary).

O-Ring Mod

As much as I love my Das Ultimate Silent keyboard, the one thing that it fails to do is live up to it’s “silent” label. Whilst it’s certainly massively quieter than something like the mighty IBM Model M, it still makes a fair bit of noise due to the keycaps bottoming out when typing, making a plastic clacking noise.

With a new more squished up office layout at work my colleagues have been begging threatening bribing cursing complaining requesting that I consider the “O-Ring Mod”, where you remove all the keycaps and install little rubber rings underneath each key to reduce their noise.

The result is quite effective, about a 50% sound reduction IMHO, with little negative impact on the typing experience – just a slightly shorter travel distance and a bit more bounce in the keyboard. There’s a great Youtube video on the difference it makes with various Cherry MX switch types – my Das Keyboard uses the brown switches, which are the second type demonstrated.

There’s a number of online stores happy to sell you the rings – although in my case, I just ordered the raw thing from Amazon than a keyboard shop. I also decided against spending the $10 for a keycap remover which was a good move –  a couple paperclips were effective enough.

OK keyboard, I know it's not quite the same, but it's time to put a rubber on it...

OK keyboard, I know it’s not quite the same, but it’s time to put a rubber on it…

Generally the replacement was easy, the biggest issue was the spreader/stabiliser bar keys, such as the Enter, Backspace, Shift and Space keys – these ones have a little metal bar which you need to stretch apart to unhook the key from and to hook it back on once the rubber ring is installed.

The tricky keys - don't just pull them off, unless you want to break the white plastic loops.

The tricky keys – don’t just pull them off, unless you want to break the white plastic loops. You can see the little rubber ring I’ve just added to the keycap.

Next up is working to improve my typing accuracy – I can already thrash out some insanely fast stuff, but my accuracy rate can vary a lot (partially due to bad spelling), but sitting down and forcing myself to slow slightly for more accuracy would be a good trade off.

I’m also pondering learning a different layout like Dvorak which could be a good excuse to learn a new typing style and get some performance advantages.

Process Monitor for Windows

From time to time I’m dragged into the murky world of Microsoft to debug a problem a customer is having, or to setup the occasional small business server.

My Windows skills are passable, but certainly nowhere near as good as my Linux capabilities – simple stuff like doing an strace on linux becomes a “ummmmm how?” on Windows.

Recently had an issue with an old Windows application refusing to launch on Windows Server 2008 due to a missing DLL file – found a very handy application published by Microsoft that works on XP SP2+ called “Process Monitor”.

It shows all calls being made by programs including what DLLs are being called and what registry values are being queried, along with the response from all these calls.

In my case, I was able to see what DLL file the problem was requesting and seeing that the OS was returning a NOT FOUND response – installed the require library, and fixed. :-)

Download from: http://technet.microsoft.com/en-us/sysinternals/bb896645


KVM/libvirt change CDROM

I was setting up some Windows virtual machines this evening on my Linux KVM/libvirt server, in order to experiment with how Windows handles IPv6 networks.

Installing windows was easy enough – standard virt-install commands, however post-reboot, Windows XP wants to access the CDROM again.

However the reboot causes the CDROM ISO to be unattached from the virtual CDROM drive – so it’s necessary to re-add it to continue installation

However the logical syntax based on virsh help, doesn’t work:

virsh # attach-disk devel-winxp1 /tmp/winxp.iso hdc
error: Failed to attach disk
error: this function is not supported by the connection driver: disk bus 'ide' cannot be hotplugged.

The correct syntax is:

virsh # attach-disk devel-winxp1 /tmp/winxp.iso hdc --type cdrom --mode readonly 
Disk attached successfully

Basically you need to tell libvirt that you’re attaching a *cdrom* and not an actual disk – I’m not sure why it doesn’t just figure that out, based on the fact the user is trying to obviously attach an ISO to a virtual optical drive device – maybe nobody has gotten around to implementing a nice autodetect method yet…