Surveillance State “at home” Edition

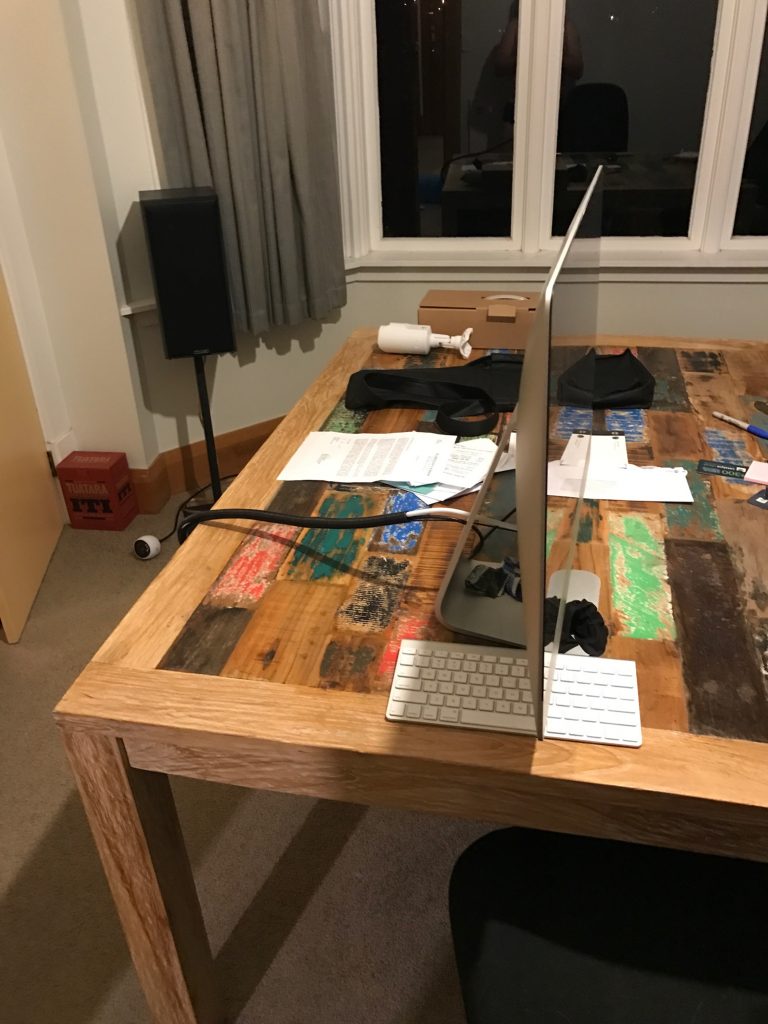
A number of months ago I purchased a series of Ubiquiti UniFi video surveillance cameras. These are standard IP ethernet cameras and uses a free (as-in-beer) server agent that runs happily on GNU/Linux to manage the recording and motion detection, which makes them a much more attractive offering than other proprietary systems that use their own specific NVRs.

Once I first got them I hooked them up in the house to test with the intention of installing properly on the outside of the house. This plan got delayed somewhat when we adopted two lovely kittens which immediately removed any incentive I had to actually install them properly since it was just too much fun watching the cats rather than keeping an eye out for axe murderers roaming the property.

I had originally ordered the 720p model, but during this time of kitten watching, Ubiquiti brought out a new 1080p “g3” model which provides better resolution as well as also offering a much nicer looking and easier to install form factor – so I now have a mix of both generations.

The following video shows some footage taken from the older 720p model:

During this test phase we also captured the November 2016 Wellington earthquake on the cameras using a mix of both generation of camera:

Finally with the New Year break, I got the time and motivation to get back up into the attic and install the cameras properly. This wasn’t a technically challenging task – mostly just a case of running cabling, but it’s a right PITA due to the difficulty of moving around in my attic thanks to heaps of water pipes, electrical wires, data wires and joists all hidden under a good foot or two of insulation.


On the plus side, the technical requirements for the cameras are pretty simple. Each camera is a Power-over-Ethernet (PoE) device, which means it gets both data and power via a single cable, which makes installation simple – no mains electrical wiring, just need to get a single cat6 cable to wherever you want the camera to sit. The camera then connects to the switch and of course the server running the included software.

I am aware of some vendors selling wireless cameras that use WiFi with a battery that needs to be recharged every so often. I can see the use and appeal for renters, but as a home owner, a hard wired system is going to be much easier and more reliable in the long term.

Ubiquiti sell the camera either with or without a PoE adaptor. Using the included PoE adaptor means you can connect them to essentially any existing switch, but if installing a number of cameras this can create a cable management nightmare. I’d strongly recommend a PoE switch if installing more than 5 cameras, even taking into account their higher cost.

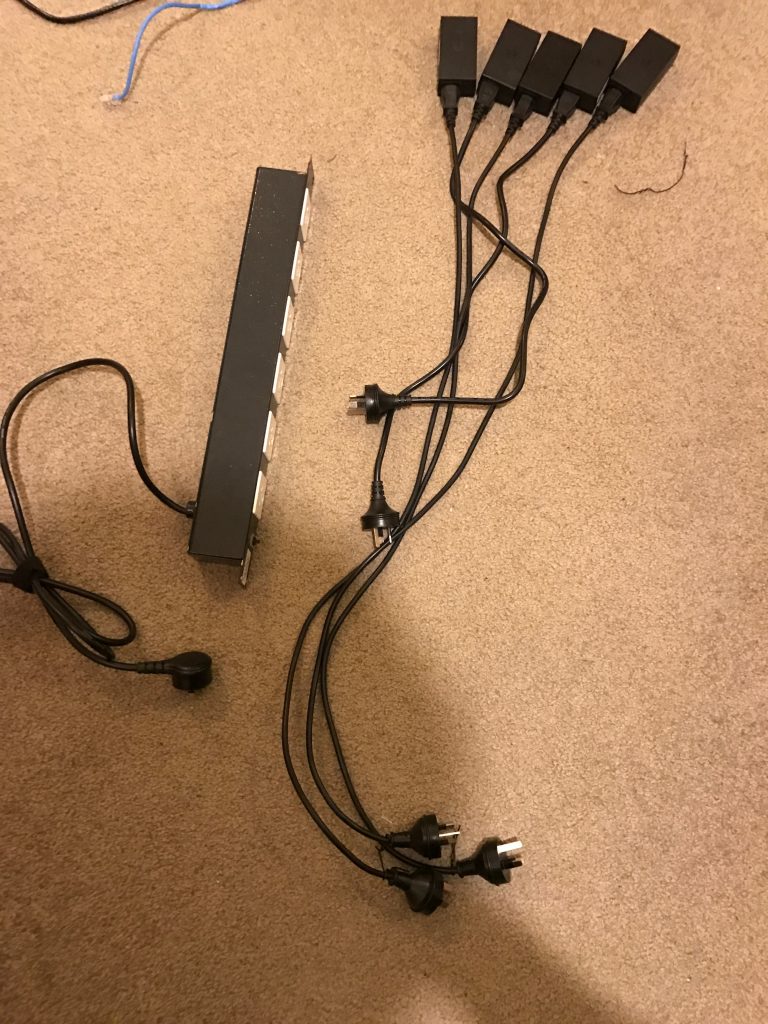
A PoE switch suddenly didn’t seem like such an expensive investment…

The easiest installation was the remote shed camera. Conveniently the shed has mains electrical wiring, but I needed to install a wireless AP to connect back to the house as running ethernet out there is just a bit too difficult.

I used Ubiquiti’s airGW-LR product which is a low cost access point that is designed to clip to their standard PoE supply. End result is a really tidy setup with a single power supply for both devices and with both devices mounted on a robust bracket for easy installation.

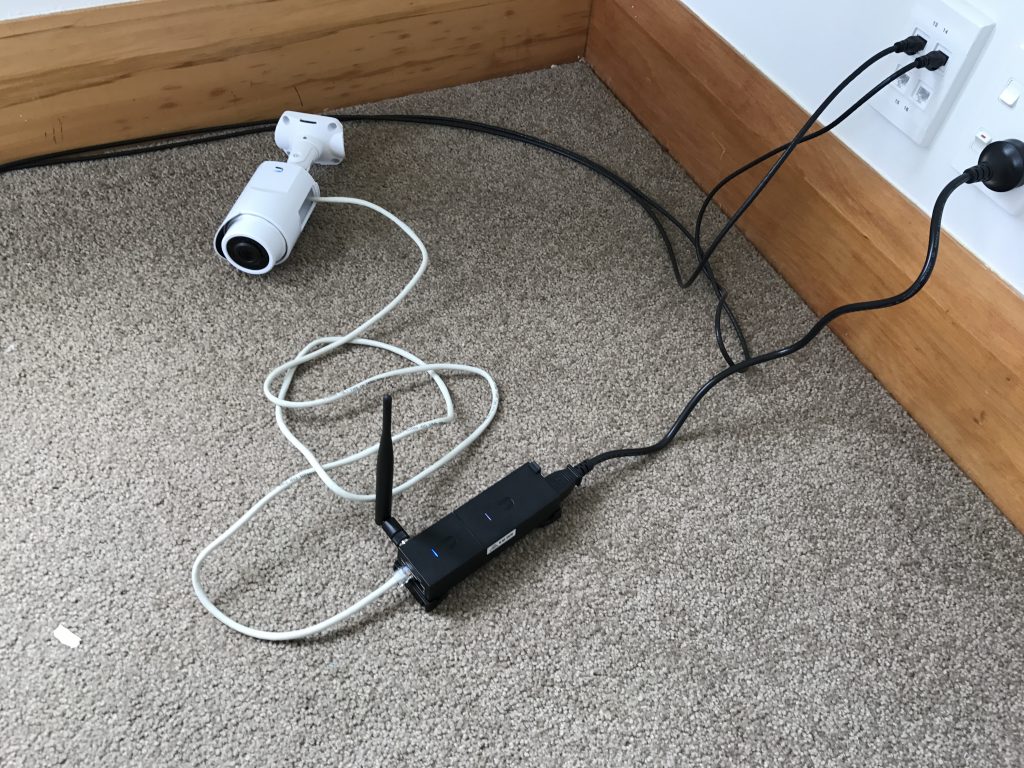
720p camera + airGW + PoE supply

The house cameras were a bit more work. It took me roughly a day to run cabling through the attic – my house isn’t easy to move in the roof or floor space so it takes longer than some others. Also tip – it’s much easier running cabling *before* the insulation is installed, so if you’re thinking of doing both, install the ethernet in advance.

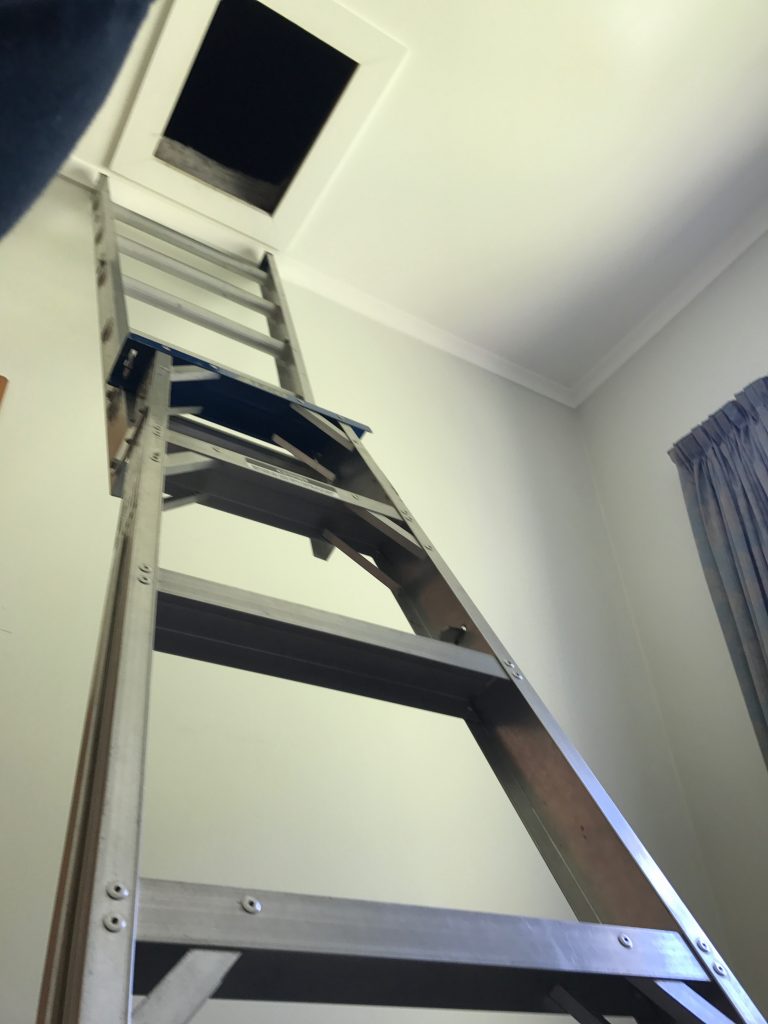
High ceilings and a small attic entrance is just the start of the hassles of running cabling.

The annoying moment when you drill into a stud and end up with a hole that needs filling again. (with solid hardwood walls and ceilings, stud finders don’t work well at my place)

Once the cable run had been completed, I crimped the outside ends with RJ45 connectors for the cameras and then proceeded to take apart the existing patch panel, which also required removing most of the gear in the comms cabinet to free up room to work.

Couple tips for anyone else doing this:

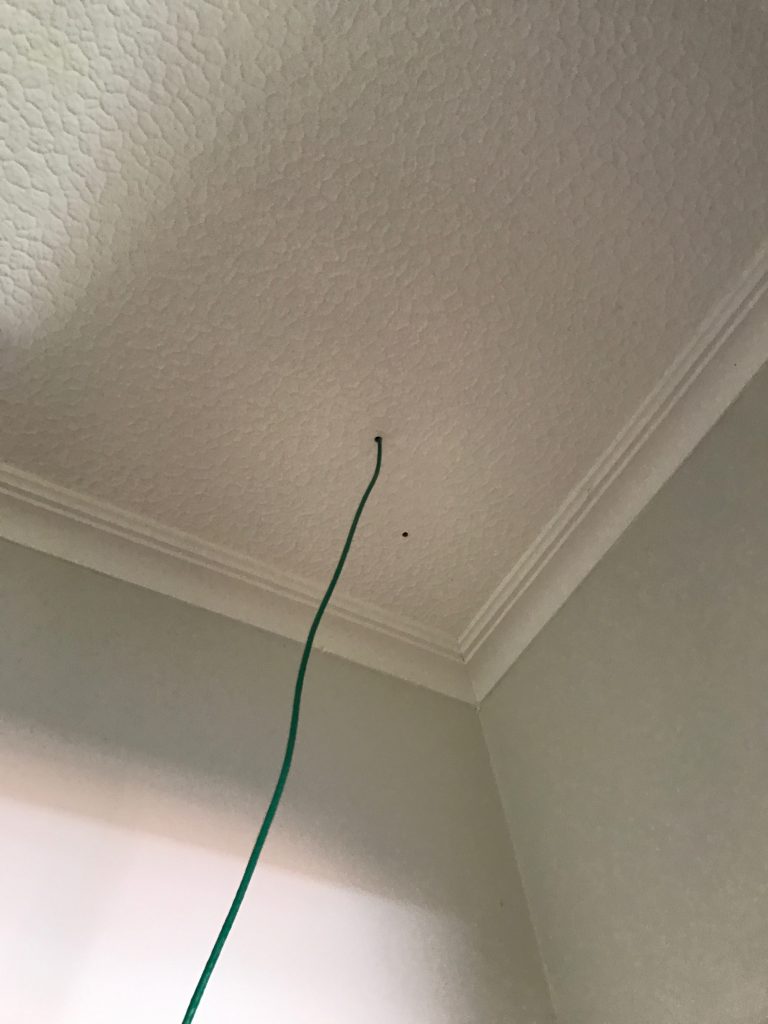
  • I left plenty of excess cable on my ethernet runs. This allowed me to crimp the camera end whilst standing comfortably on the ground, then when I installed the camera I just pushed up all the excess into attic. Ethernet cable is cheap compared to one’s time messing around up at the tops of ladders.
  • The same applies at the patch panel – make sure to leave enough slack to allow you to easily take the patch panel off and work on it in the future – you can see from the picture below I have a good length spare that comes out of the wall.
  • Remember to wire the RJ45 connectors and the patch panel to the same standard – I managed to do T568B at the camera end and T568A at the patch panel on my first attempt.
  • Test each cable as you complete the wiring. Because of this I caught the above issue on the first camera and it saved me a lot of pain in future. A cheap ethernet tester can be found online for ~$10 and is worth having in your tool kit.

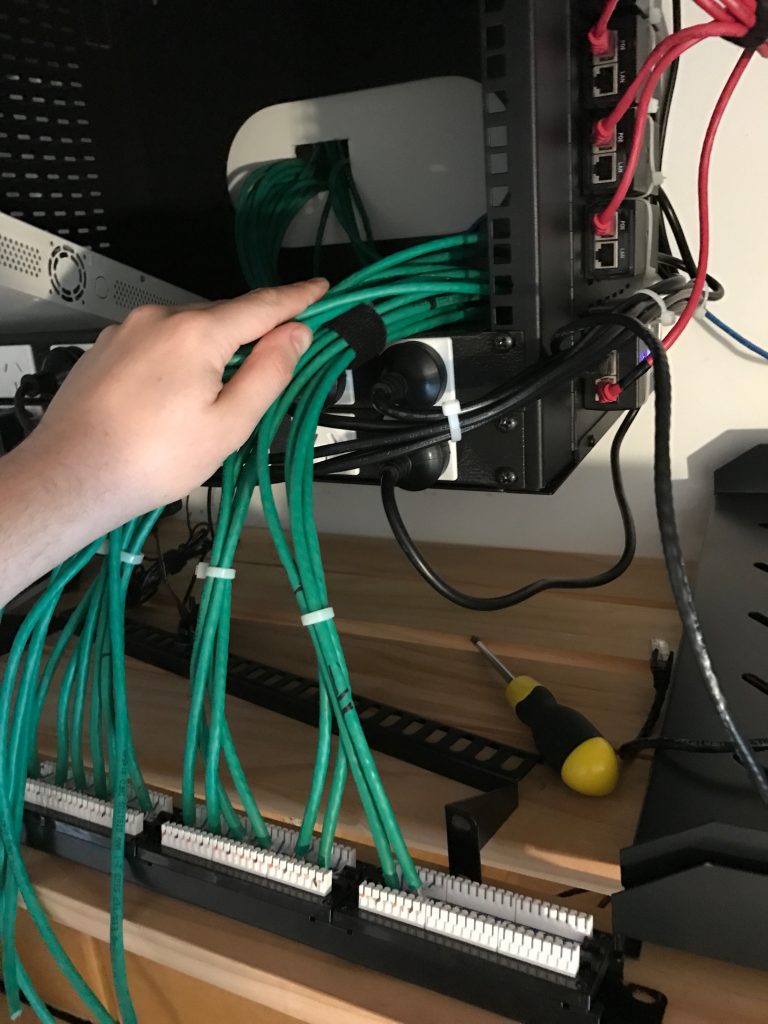
Down to only 4/24 ports free on the patch panel! I expect the last 4 will be consumed by WiGig/802.11ad in future, since it will require an AP per-room in order to get high performance, I might even need a second patch panel in future… good thing I brought the large wall mounted cabinet.


With the cabling done, I connected all the PoE adaptors. These are a bit of a PITA if you’re using a rack – you could get a small rackmount shelf with holes and cable tie down, but I went for cable tying them to the outside of the cabinet.

I also colour coded the output from the PoE adaptors. You need to be careful with passive PoE adaptors, you can potentially damage computers and network equipment if you connect them to the adaptor by mistake so I used the colour coding to make it very clear what cables are what.

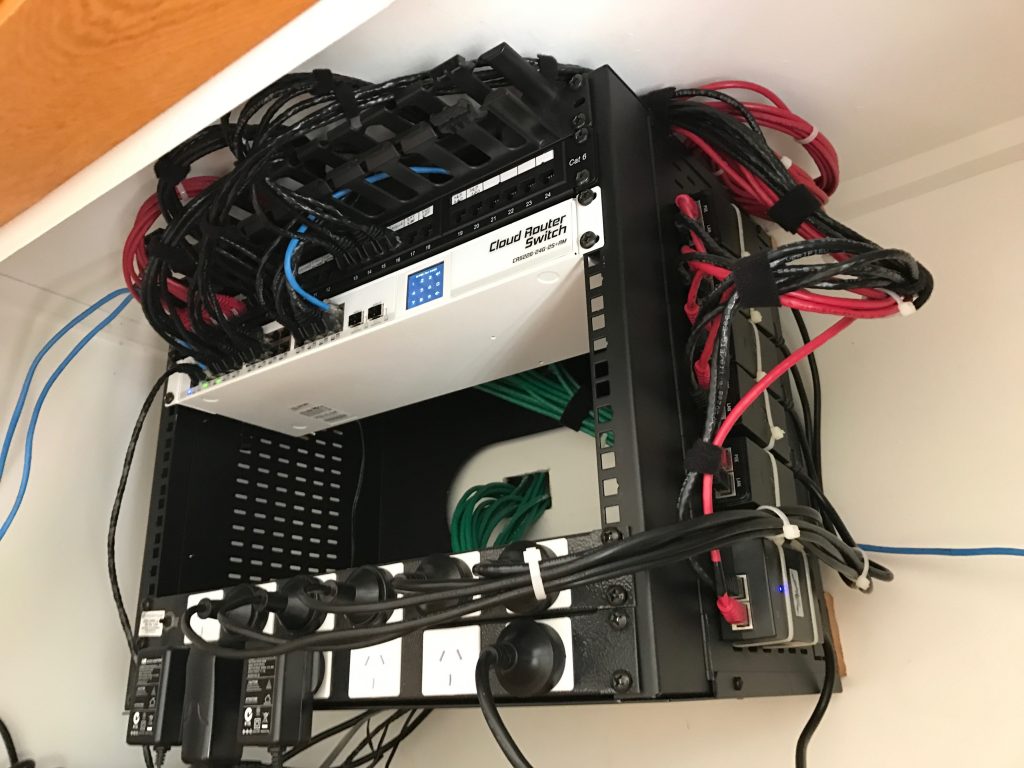
Finished cabling installation. About as tidy as I can get it in here without moving to using custom length patch cables…. but crimping 30+ patch cables by hand isn’t my idea of a good time.


Having completed the cabling and putting together the networking gear and PoE adaptors, I could finally install the cameras themselves. This isn’t particularly hard, basically just need to be able to screw something to the side of the house and then aim the camera in the right position.

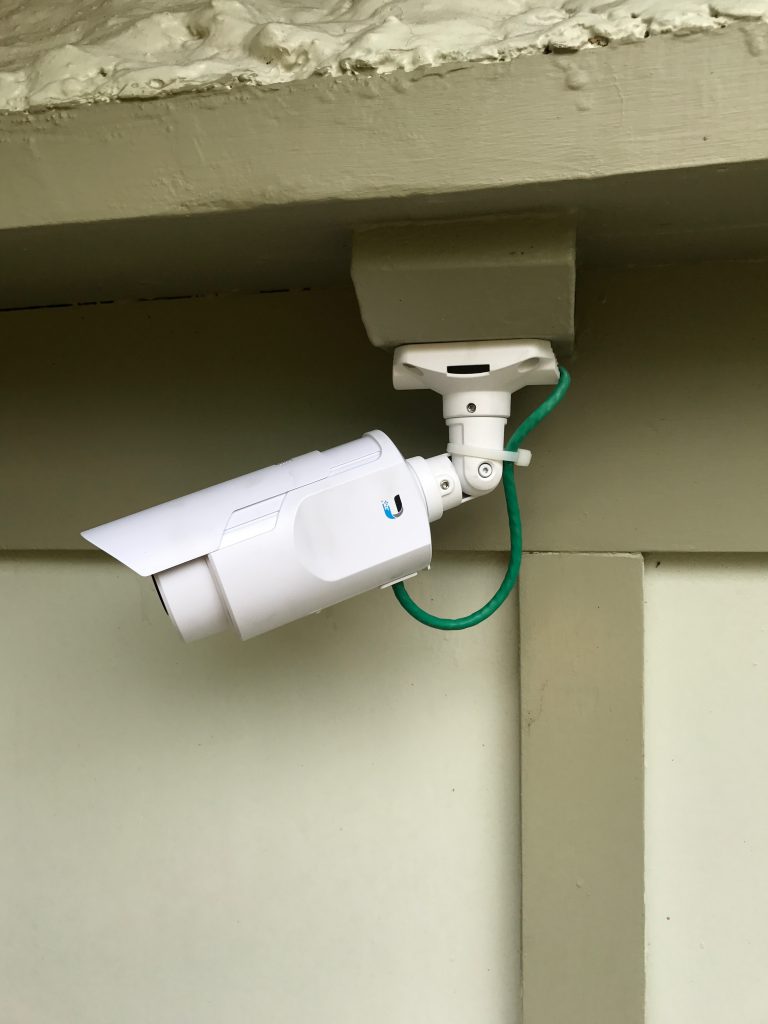
The older 720p model is the most annoying to install as it requires adjusting everything using an allen key, plus the cable must be exposed with a drip loop. It’s also more of an eyesore which is a mixed bag – you get better deterrence aspect, but it can look a bit ugly on the house.

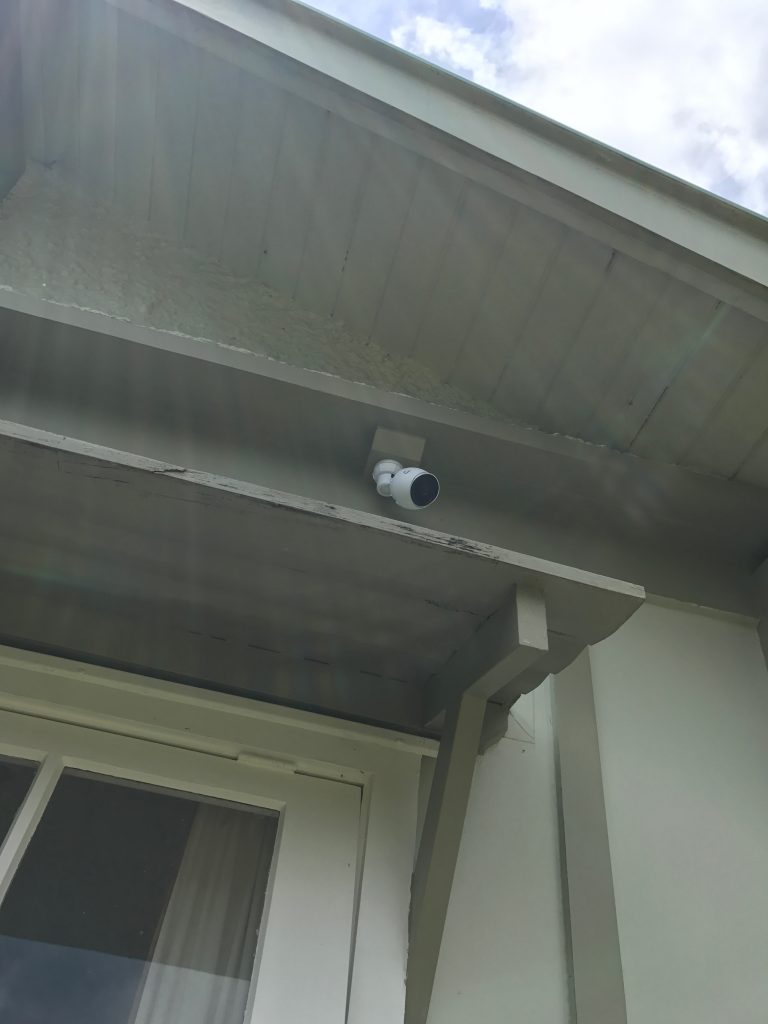
The newer model is more aesthetically pleasing, but it’s possible some people might not realise it’s a camera which could be a downside for deterrence.

That being said, they look OK when installed on the house – certainly no worse than the ugly alarm and sensor lights you get on many houses. I even ended up putting one inside to give me complete visibility of the hallway linking every room in the house and it’s not much more visible than a large alarm PIR sensor.

Some additional features worth noting:

  • All the cameras have built in IR, which means they provide decent footage, even at night time. The cameras switch an IR filter on/off automatically as required.
  • All the cameras have built in microphones. Whilst they capture a lot of background wind noise, they’re also quite good at picking up conversations even when outside – it’s a handy tool for gathering intel on any unwanted guests.


With all the hardware completed, onto the software. Ubiquiti supply their server software free-of-charge. It’s easy enough to download and install, but if you have Puppetised your home server (of course you have right?) I have a Puppet module here for you.


Generally I’ve found the software solution (including the iOS mobile app) to be pretty good, but there are two main issues to be aware of with it:

  1. First is that the motion detection is pretty dumb and works on percentage of image changed. This means windy areas with lots of greenery get lots of unwanted recordings made. It doesn’t causing technical issues, but it does make for a noisy set of recordings – don’t expect it to *only* record events of note, you’ll get all the burglars and axe murderers, but also every neighbourhood cat and the nearby trees on windy days. Oh and night time you get lots of footage of moths when they fly close to the camera with the IR night vision on.

  2. Second is that I found a software bug in the mobile apps where they did not validate SSL certs properly and got a very poor response from Ubiquiti. That being said one of their reps recently claimed they’ve hired more security staff to deal with their poor responsiveness, so let’s see what happens on this front.


One feature which is strangely absent, is the lack of support for automatically uploading recordings to a cloud storage service. It’s not possible for everyone, but if on a fast connection (eg VDSL, UFB) it’s worth uploading all recordings to something like Amazon S3 so that an attacker can’t subsequently break in and remove the recording hardware.

My approach was setting up lsyncd to listen to inotify events from Linux every time a video file is written to disk and then quickly copy that file up into Amazon S3 where it remains for a prolonged period.

If you can’t achieve this due to poor internet performance, your best bet is to put the video recording server in a difficult to find and/or access location, sufficient to prevent the casual intruder from finding it. If you have a proper monitored alarm system they shouldn’t be lingering long enough to find it.


Stability seems good. I’ve been running these cameras since April and have never had the server agent or the cameras crash or fail to record. I’m using a Mac Mini for the camera server but you can always buy an embedded black-box NVR solution from Ubiquiti themselves. If you’re on a budget, a second hand Mac Mini or Intel NUC might be better value for money – just make sure it’s 64bit, not an older gen 32bit device.


Posted in Uncategorized | Tagged , , , , , , , , | Leave a comment

AirPods

Being tethered to one’s device via a cable has long been an annoyance and with Apple finally releasing their AirPods product, I decided to take the risk of a first adopter of a Gen1 product and ordered a pair.

I seemed to be lucky and had mine arrive on 19th December – I suspect Apple allocated various amounts of stock per region and NZ didn’t have the same level of competition for the early shipments as the US did. Looks like the wait time is now around 6 weeks for new orders.

Fortunately AirPods do not damage my unstoppable sex appeal.

There’s been a heap of reviews online, but I wanted to write a bit about them myself, because frankly, they’re just brilliant and probably the best purchase I’ve made this year.

So why are they so good?

  • Extremely comfortable – I found them a lot lighter than I expected them to be and they stay in my ears properly without any discomfort or looseness. This is with the caveat that the old wired EarPods also fitted me well, I’m sure that this won’t be the case for everyone.
  • Having music automatically pause when you remove them is just awesome. It’s an example of the Apple of old making intuitive tech that you don’t need to think about controlling, because it just does what it should. Take AirPods out? Probably don’t want that track to keep playing…
  • The battery life and charging is pretty good. I’m getting the stated 4-5 hours life per charge and of course the carry case gives you another 24 hours or so of charge.
  • The freedom of not being attached by a cord is extremely liberating.  At one point I forgot I was tethered to my iMac and ended up going for a walk down to the other end of the house before it disconnected. I could easily see myself forgetting they’re in and getting into the shower one day by mistake.
  • The quality is “good enough”. Sure, you can get better audio through other products, but when it comes to earbuds, you’re going to compromise the quality in exchange for form factor and portability. For the sort of casual listening that I’m doing, it meets my expectations happily enough.
  • Easy switching between devices, something that traditional bluetooth products tended to do pretty badly.
  • Connectivity seems pretty strong. I’ve never had the audio dropout whilst listening, infact when I left them in and walked around the house, I had audio going through the walls. 

They’re not perfect – not that I was expecting them to be given it’s a first-gen product from Apple which generally always means a few teething issues:

  • Sometimes the AirPods simply aren’t discoverable by my iMac, and even when they are, the connection method can be hit and miss – sometimes I can just click on the volume icon and select them, other times I have to go into the Bluetooth menu and select from there. Personally I’ll blame MacOS/iMac for this, I’ve had other Bluetooth headaches with it in the past and I suspect it’s just not that well tested and implemented for anything more than the wireless keyboards/mice they ship with them. For example, other than the AirPods issues, my iMac often fails to see my iPhone or iPad when they’re in the near vicinity to do iOS handoff.
  • At one point a phone call decided to drop from the AirPods and revert to the on-phone speaker without any clear reason/cause.
  • I managed to end up with one AirPod unpairing itself from the phone, so I had mono audio until I re-selected AirPods again from the phone’s output menu.

The “dental floss” charging and storage case is pretty clever as well, although I find it a bit odd that Apple didn’t emboss it with the Apple logo like they normally do for all their other products.

That being said, these issues are not frequent and I expect them to be improved with software updates over time.

If I had any feature changes I’d like to see for Gen2, it would be for Apple to:

  1. Insert a touch sensor on the AirPods to allow changing of volume by swiping up/down on the AirPod. That being said, using the phone volume rocker or the keyboard to change volume isn’t a big issue. The AirPods also have a “double-tap” detection feature that can either launch Siri or Play/Pause music.
  2. Bring up the waterproofing to a level that allows their use in the shower. Whilst there are reports on the internet of AirPods surviving washing machine cycles already, I’d love a version that’s properly rated for water exposure that could truely go anywhere.


Are they worth the NZ $269? I think so – sure, I’d be happy if they could drop the price and include a pair with every iPhone sold, but I think it’s a remarkable effort of technology miniaturisation that’s resulted in a high quality product that produces a fantastic user experience. That generally doesn’t come cheap and I feel that given the cost of other brand name wireless audio products, AirPods are reasonably priced.

I’d maybe re-consider buying them if I was using a non-Apple ecosystem (which limits the nice peering features, although they should work with any Bluetooth device) or if I was only going to use it with MacOS rather than iOS devices. With less need for the nice peering and portability features, third party offerings become a bit more attractive.

Posted in Uncategorized | Tagged , , , , , , | Leave a comment

Macbook Pro 2016

Having recently changed jobs (Fairfax/Stuff -> Sailthru/Carnival), the timing worked out so that I managed to get one of the first new USB-C 2016 Macbook Pros. A few people keep asking me about the dongle situation, so figured I’d just blog about the machine.

Some key things to keep in mind:

  • I don’t need to attach much in the way of USB devices. Essentially I want my screen and input devices when docked at the office, but I have no SD cards and don’t generally swap anything with USB flash drives.
  • My main use case is pushing bits to/from the cloud. Eg web browser, terminals, some IDE usage. Probably the heaviest task I’d throw at it would be running something like IntelliJ or Xcode.
  • I value portability more than performance.

If Apple still made cinema displays, this would be a fully Apple H/W stack


Having used it for about 1 month now, it’s a brilliant unit. Probably the biggest things I love about it are:

  • The weight – at 1.37Kg, it’s essentially the same weight as the 13″ Macbook Air, but packs a lot more grunt. And having come from the 15″ Macbook Pro, it’s a huge size and weight reduction, yet still extremely usable.
  • USB-C. I know some people are going to hate the new connector, but this is the first laptop that literally only requires a single connector to dock – power, video data – one plug.
  • The larger touch pad is a nice addition. And even with my large man hands, I haven’t had any issues when typing, Apple seems to have figured out how to do palm detection properly.
  • It looks and feels amazing, loving the space gray finish. The last generation Macbooks were beautiful machines, but this bumps it up a notch.

The new 13″ is so slim and light, it fits perfectly into my iPad Pro 12″ sleeve. Don’t bother buying the sleeves intended for the older 13″ models, they’re way too big.

One thing to note is that the one I have is the entry level model. This brings a few differences over the other models:

  • This model is the only one to lack the new Touchbar. In my case, I use the physical ESC key a lot and don’t have a lot of use for the gimmick. I’d have preferred if Apple had made the Touchbar an optional additional for all models so any level machine could opt in/out.
  • As the entry level model, it features only 2x USB-C/Thunderbolt-3 ports. All Touchbar enabled models feature 4x. If you are like me and only want to dock, generally the 2x ports only issue isn’t a biggie since you’ll have one spare port, but it will be an issue if you want to drive multiple displays. If you intend to attach 2+ external displays, I’d recommend getting the model with 4x ports.
  • All the 13″ models feature Intel graphics. The larger 15″ model ships with dual Intel and AMD graphics that swap based on activity and power usage. Now this does mean the 13″ is slower at graphics, but I’m also hearing anecdotally that some users of the 15″ are having graphics stability issues with the new AMD drivers – I’ve had no stability issues of any kind with this new machine.
  • The 2.0Ghz i5 isn’t the fastest CPU. That being said, I only really notice it when doing things like compiles (brew, Xcode, etc) which my 4Ghz i7 at home would crunch through much faster. As compiling things isn’t a common requirement for my work, it’s not an issue for me.

It’s not without it’s problems of course – “donglegate” is an issue, but the extend of the issue depends on your requirements.

On the plus side, the one adaptor you won’t have to buy is headphones – all models still include the 3.5mm headphone jack. One caveat however, they are now purely analogue audio, the built in toslink port has been abandoned.

Whilst there are a huge pile of dongles available, I’d say the essential two dongles you must have are:

  • The USB-C to USB adaptor. If you ever need to connect USB devices when away from desk, you’ll want this one in your bag.
  • The USB-C Digital A/V adaptor. Unless you are getting a native USB-C screen, this is the only official Apple adaptor that supports a digital display. This specific adaptor provides 1x USB2, 1x HDMI and 1x USB-C for charging.

I have some concerns about the digital A/V adaptor. Firstly I’m not sure about is whether it can drive a 4K panel, eg if it’s HDMI 2.0 or not. I’m driving a 25″ Dell U2515H at 2560×1440 at 60Hz happily, but haven’t got anything higher resolution to check with.

It also feels like it’s not going to tolerate a whole lot of flexing and unflexing so I’ll be a bit wary about it’s longevity if travelling with it to connect to things all over the place.

The USB-C Digital AV adaptor. At my desk I have USB and HDMI feeding into the LCD (which has it’s own USB hub) and power coming from the Apple-supplied USB-C charger.

Updating and rebooting for a *dongle update*? The future is bleak.

Oh and if you want a DisplayPort version – there isn’t an official one. And this is where things get a little crazy.

For years all of Apple’s laptops have shipped with combined Thunderbolt 1/2 and Mini-Display ports. These ports take either device, but are technically different protocols that share a single physical socket. The new Macbook Pro doesn’t have any of these sockets. And there’s no USB-C to Mini Display port adaptor sold by Apple.

Apple does sell the “Thunderbolt 3 (USB-C) to Thunderbolt 2 Adaptor” but this is distinctly different to the port on the older laptops, in that it only supports Thunderbolt 2 devices – there is no support for Mini DisplayPort, even though the socket looks the same.

So this adaptor is useless for you, unless you legitimately have Thunderbolt 2 devices you wish to continue using – but these tend to be a minority of the Apple user base whom purchased things like disk arrays or the Apple Cinema Display (which is Thunderbolt, not Mini DisplayPort).

If you want to connect directly to a DisplayPort screen, there are third party cables available which will do so – just remember they will consume a whole USB-C port and not provide data and power. So adding 2x screens using these sorts of adaptors to the entry level Macbook isn’t possible since you’ll have no data ports and no power left! The 4x port machines make it more feasible to attach multiple displays and use the remaining ports for other use cases.

The other option is one of the various third party USB-C/Thunderbolt-3 docks. I’d recommend caution here however, there are a number on the market that doesn’t work properly with MacOS (made for Windows boxes) and a lot of crap “first to market” type offerings that aren’t really any good.


My recommendation is that if you buy one of these machines, you should ideally make the investment in a new native USB-C 4K or 5K panel when you purchase this machine. Apple recommend two different LG models which look pretty good:

There is no such thing as the Apple Cinema Display any more, but these would be their logical equivalent now. These screens connect via USB-C, power your laptop (so no need to spend more on a charger, you can use the one that ships with the laptop as your carry around one) and features a 3x USB-C hub in the back of the screen.

If you’re wanting to do multiple displays, note that there are some limits:

  • 13″ Macbook Pros can drive a single 5K panel or 2x 4K panels.
  • 15″ Macbook Pros can drive two 5K panels or 4x 4K panels.

Plus remember if buying the entry level 13″, having two screens would mean no spare ports at all on the unit – so it would be vital to make sure the screens can power the machine and provide additional ports.

Also be aware that just because the GPU can drive this many panels, doesn’t mean it can drive them particularly well – don’t expect any 4K gaming for example. My high spec iMac 5k struggles at times to drive it’s one panel using an AMD Radeon card, so I’m dubious about the Intel chipset in the new Macbooks being able to drive 2x 4K panels.


So recommendations:

If you need maximum portability, I’d still recommend going for the Macbook 13″ Pro over the Macbook 12″ Retina. It’s slightly heaver (1.37kg vs 0.92kg) and slightly more expensive (NZ $2499 vs $2199), but the performance is far better and the portability is almost the same. The other big plus, is that the USB-C in the Macbook Pro is also a Thunderbolt-3 port, which gives you much better future proofing.

If you need a solid work horse for a DevOps engineer, the base Macbook Pro 13″ model is fine. It’s a good size for carrying around for oncall and 16GB of RAM with a Core i5 2.0Ghz is perfectly adequate for local terminals, IDEs and browsers. Anything needing more grunt can get pushed to the cloud.

No matter what model you buy, bump it to 16GB RAM. 8GB isn’t going to cut it long term and since you can’t expand later, you’ll get better lifespan by going to max RAM now. I’d rate this more worthwhile than buying a better CPU (don’t really need it for most workloads) or more SSD (can never get enough SSD anyway, so just overflow into iCloud).

If you some how can’t live with only 16GB of RAM and need 32GB you’re kind of stuck. But this is a problem across most portable lines from competitors currently, 32GB RAM is too power hungry with the current gen CPUs and memory. If you need that much memory locally you’ll have to look at the iMac 5k (pretty nice) or the Mac Pro series (bit dated/overly expensive) to get it on a Mac.


So is it a good machine? I think so. I feel the main problem is that the machine is ahead of the rest of the market, which means lots of adaptors and pain until things catch up and everything is USB-C. Apple themselves aren’t even ready for this machine, their current flagship iPhone still ships with an older USB 3 connector rather than a USB-C one, which leads to an amusing situation where the current gen iPhone and current gen Macbook Pro can’t be connected without first purchasing a dongle.

Posted in Uncategorized | Tagged , , , , , | 2 Comments

Quake 2016-11-14

We had a pretty large quake last night – everyone OK here, but a bit of a shock. The cats weren’t too happy either and after fleeing the house at high speed they spent most of the night hiding outside unwilling to come back in.

Still getting considerable number of aftershocks, some of them quite strong. Minimal damage thankfully. Really happy we bolted the TV to the wall a while back with a really solid bracket.

We were dangerously close to having the iMac fly off the desk however, I think the only thing that saved it was that it was trying to go in the opposite direction of the power cord. Surprised that the speakers stayed upright since they aren’t bolted to the floor, but they did OK.

A very expensive accident narrowly averted

A very expensive accident narrowly averted

Posted in Uncategorized | 1 Comment

DevOpsDays NZ 2016

I recently spoke at the inaugural DevOpsDays NZ in Wellington. The team whom put together the conference did an amazing job and it’s one of the few conferences that I’ve really enjoyed recently. If they put together a subsequent conference next year, I recommend attending if possible.

I presented about our DevOps practises and tooling at Fairfax Media / stuff.co.nz which you can find at the recording below:


Whilst the vast majority of the content of the conference was really good, the following were clear standouts to me that I recommend watching:

You can find these (and other) presentations from the conference on this Youtube page.

Tagged , , , , , | Leave a comment

Puppet Training

I recently ran a training session for our development team at Fairfax introducing them to the fundamentals of Puppet.

To assist with this training, I’ve developed a bunch of scripts and learning modules which I’ve now open sourced at https://github.com/jethrocarr/puppet-training

Using these modules you can:

  • Provision a pre-configured Puppet master + Puppet client to use for exercises.
  • Learn the basics of an r10k/git workflow for Puppet modules.
  • Create a module and get used to Puppet resources like package, file and service.
  • Learn the basics of ordering and dependencies.
  • Use Hiera to set params.

It’s not as complete a course as I’d like. I did about half a day using these modules and another half the day adhoc. Ideally I’d like to finish off writing modules at some point, but it takes a reasonably long period to write anything like this and there’s only so many hours in a week :-)

Putting up here as they might be of interest to people. PRs are always welcome as well.

Tagged , , , , , | Leave a comment

Building a mail server with Puppet

A few months back I rebuilt my personal server infrastructure and fully Puppetised everything, even the mail server. Because I keep having people ask me how to setup a mail server, I’ve gone and adjusted my Puppet modules to make them suitable for a wider audience and open sourced them.

Hence announcing – https://github.com/jethrocarr/puppet-mail

This module has been designed for hobbyists or small organisation mail server operators whom want an easy solution to build and manage a mail server that doesn’t try to be too complex. If you’re running an ISP with 30,000 mailboxes, this probably isn’t the module for you. But 5 users? Yourself only? Keep on reading!

Mail servers can be difficult to configure, particularly when figuring out the linking between MTA (eg Postfix) and LDA (eg Dovecot) and authentication (SASL? Cyrus? Wut?), plus there’s the added headaches of dealing with spam and making sure your configuration is properly locked down to prevent open relays.

By using this Puppet module, you’ll end up with a mail server that:

  • Uses Postfix as the MTA.
  • Uses Dovecot for providing IMAP.
  • Enforces SSL/TLS and generates a legitimate cert automatically with LetsEncrypt.
  • Filters spam using SpamAssassin.
  • Provides Sieve for server-side email filtering rules.
  • Simple authentication against PAM for easy management of users.
  • Supports virtual email aliases and multiple domains.
  • Supports CentOS (7) and Ubuntu (16.04).

To get started with this module, you’ll need a functional Puppet setup. If you’re new to Puppet, I recommend reading Setting up and using Pupistry for a master-less Puppet setup.

Then it’s just a case of adding the following to r10k to include all the modules and dependencies:

mod 'puppetlabs/stdlib'

# EPEL & Jethro Repo modules only required for CentOS/RHEL systems
mod 'stahnma/epel'
mod 'jethrocarr/repo_jethro'

# Note that the letsencrypt module needs to be the upstream Github version,
# the version on PuppetForge is too old.
mod 'letsencrypt',
  :git    => 'https://github.com/danzilio/puppet-letsencrypt.git',
  :branch => 'master'

# This postfix module is a fork of thias/puppet-postfix with some fixes
# to make it more suitable for the needs of this module. Longer-term,
# expect to merge it into this one and drop unnecessary functionality.
mod 'postfix',
  :git    => 'https://github.com/jethrocarr/puppet-postfix.git',
  :branch => 'master'

And the following your Puppet manifests (eg site.pp):

class { '::mail': }

And in Hiera, define the specific configuration for your server:

mail::server_hostname: 'setme.example.com'
mail::server_label: 'My awesome mail server'
mail::enable_antispam: true
mail::enable_graylisting: false
mail::virtual_domains:
 - example.com
mail::virtual_addresses:
  'nickname@example.com': 'user'
  'user@example.com': 'user'

That’s all the Puppet config done! Before you apply it to the server, you also need to make sure both your forward and reverse DNS is correct in order to be able to get the SSL/TLS cert and also to ensure major email providers will accept your messages.

$ host mail.example.com
mail.example.com has address 10.0.0.1

$ host 10.0.0.1
1.0.0.10.in-addr.arpa domain name pointer mail.example.com.

For each domain being served, you need to setup MX records and also a TXT record for SPF:

$ host -t MX example.com
example.com mail is handled by 10 mail.example.com.

$ host -t TXT example.com
example.com descriptive text "v=spf1 mx -all"

Note that SPF used to have it’s own DNS type, but that was replaced in favour of just using TXT.

The example above tells other mail servers that whatever system is mentioned in the MX record is a legitmate mail server for that domain. For details about what SPF records and what their values mean, please refer to the OpenSPF website.

Finally, you should read the section on firewalling in the README, there are a number of ports that you’ll probably want to restrict to trusted IP ranges to prevent attackers trying to force their way into your system with password guess attempts.

Hopefully this ends up being useful to some people. I’ve replaced my own internal-only module for my mail server with this one, so I’ll continue to dogfood it to make sure it’s solid.

That being said, this module is new and deals with a complex configuration so I’m sure there will be some issues people run into – please raise any problems you have on the Github issues page and I’ll do my best to assist where possible.

Tagged , , , , , , , , | 2 Comments

Fairfax’s Cloud Journey at Auckland AWS Summit 2016

I recently presented at the 2016 AWS Summit Auckland about Fairfax’s cloud journey as part of the business stream “Key Steps for Setting up your AWS Journey for Success” alongside two excellent Amazon engineers. It’s a bit different from my usual talks, in that this one was specifically focused on a business audience, rather than a technical one.

My segment was just part of a talk full of excellent content from Amazon themselves, so you can checkout the full presentation here and all the other recorded presentations at the AWS Summit Auckland on-demand site.

Tagged , , , , , , | Leave a comment

DNC NZ submission

The DNC has proposed a new policy for .nz WHOIS data which unfortunately does not in my view address the current issues with lack of privacy of the .nz namespace. The following is my submission on the matter.

Dear DNC,

I have strong concerns with the proposed policy changes to .nz WHOIS information and am writing to request you reconsider your stance on publication of WHOIS information.

#1: Refuting requirement of public information for IT and business related contact

My background is working in IT and I manage around 600 domains for a large NZ organisation. This would imply that WHOIS data would be useful, as per your public good statement, however I don’t find this to be correct.

My use cases tend to be one of the following:

1. A requirement to get a malicious (phishing, malware, etc) site taken down.

2. Contacting a domain owner to request a purchase of their domain.

3. A legal issue (eg copyright infringement, trademarks, defamation).

4. Determining if my employer actually owns the domain marketing is trying to use today. :-)

Of the above:

1. In this case, I would generally contact the service provider of the hosting anyway since the owners of such domains tend to be unreliable or unsure how to even fix the issue. Service providers tend to have a higher level of maturity of pulling such content quickly. The service provider details can be determined via IP-address lookup and finding the hosting provider from there, rather than relying on the technical contact information which often is just the same as the registrant and doesn’t reflect the actual company hosting the site. All the registrant information is not required to complete this requirement, although email is always good for a courtesy heads up.

2. Email is satisfactory for this. Address & phone is not required.

3. Given any legal issue is handled by a solicitor, a legal request could be filed with DNC to release the private ownership information in the event that the email address of the domain owner was non responsive.

4. Accurate owner name is more than enough.

#2: Internet Abuse

I publish a non-interesting and non-controversial personal blog. I don’t belong to any minorities ethnic groups. I’m born in NZ. I’m well off. I’m male. The point being that I don’t generally attract any kind of abuse or harassment that is sadly delivered to some members of the online community.

However even I end up receiving abuse relating to my online presence on occasion in the form of anonymous abusive emails. This doesn’t phase me personally, but if I was in one of the many online minorities that can (and still do) suffer real-word physical abuses, I might not be so blasé knowing that it doesn’t take much to suddenly turn up at my home and throw abuse in person.

It’s also extremely easy for an online debate to result in a real world incident. It isn’t hard to trace a person’s social media comments to their blog/website and from there, their real world address. Nobody likes angry morons abusing them at 2am outside their house with a tire iron about their Twitter post.

#3. Cold-blooded targeting

I’ve discussed my needs as an IT professional for WHOIS data, the issue of internet abuse. Finally I wish to point out the issue of exposing one’s address publicly when we consider what a smart, malicious player can do with the information.

* With a target’s date of birth (thanks Facebook!) and their address (thanks DNC policy!) you’re in the position to fake someone’s identity for a number of NZ organisations including insurance and medical whom use these two (weak) forms of validation.

* Tweet a picture of your coffee at Mojo this morning? Excellent, your house is probably unoccupied for 8 hours, I need a new TV.

* Posting blogs about your amazing international trip? Should be a couple good weeks to take advantage of this – need a couch to go with that TV.

* Mentioned you have a young daughter? Time to wait for them at your address after school events and intercept there. Its not hard to be “Uncle Bob from the UK to take you for candy” when you have address, names, habits thanks to the combined forces of real world location and social media disclosure.

Not exposing information that doesn’t need to be public is a text-book infosec best practise to prevent social engineering type attacks. We (try to be) cautious around what we tell outsiders because lots of small bits of information becomes very powerful very quickly. Yet we’re happy for people to slap their real world home address on the internet for anyone to take advantage of because no harm could come of this?

To sum up, I request the DNC please reconsider this proposed policy and:

1. Restrict the publication of physical address and phone numbers for all private nz domains. This information has little real use and offer avenues for very disturbing and intrusive abuse and targeting. At least email abuse can be deleted from the comfort of your couch.

2. Retain the requirement for a name and contact email address to be public.However permit the publicly displayed named to be a pseudonym to preserve privacy for users whom consider themselves at risk, with the owner’s real/legal name to be held by DNC for legal contact situations.

I have no concerns if DNC was to keep business-owned domain information public. Ltd companies director contact details are already publicly available via the companies registry, and most business-owned domains simply list their place of business and their reception phone number which doesn’t expose any particular person. My concern is the lack of privacy for New Zealanders rather than businesses.

Thank you for reading. I am happy for this submission to be public.

regards.

Jethro

Tagged , , , , , , | Leave a comment

Faking a Time Capsule with a GNU/Linux server

Apple MacOS’s Time Machine feature is a great backup solution for general desktop use, but has some annoying limitations such as only working with either locally attached storage devices or with Apple’s Time Capsule devices.

Whilst the Time Capsules aren’t bad devices, they offer a whole bunch of stuff I already have and don’t need – WiFi access point, ethernet router, and network attached storage and they’re not exactly cheap either. They also don’t help anyone wanting to backup to an off-site cloud server/VPS via a VPN.

So instead of a Time Capsule, I’m using a project called netatalk to allow a GNU/Linux server to provide an AFP file share to MacOS which acts as a Time Machine suitable target.

There’s an annoyance with Time Machine where it only officially works with AFP shares specially flagged as “Time Machine” shares. So whilst Apple has embraced SMB2 as the file sharing protocol of future use, you can’t use SMB2 for Time Machine backups (Well technically you can by enabling unsupported volumes in MacOS, but then you lack the ability to restore from backup via the MacOS recovery tools).

To make life easy, I’ve written a Puppet module that install netatalk and configures a Debian GNI/Linux server to act as a Time Capsule for all local users.

After installing the Puppet module (r10k or puppet module tools), you can simply define the directory and how much space to report to each client:

class { 'timemachine':
  location     => '/mnt/backup/timemachine',
  volsizelimit => '1000000', # 1TB per user backing up
}

To setup each MacOS machine, you will need to first connect to the share using Finder. You can do this with Finder -> Go -> Connect to Server and then entering afp://SERVERNAME and authenticating with your PAM credentials for the server.

After connecting, the share should now appear under Time Machine preferences. If you experience any issues connecting, check the /var/log/afpd.log file for debug information on the server – common issues include not having created the directories for the shares or having incorrect permissions on them.

Tagged , , , , , , , | Leave a comment