Tag Archives: open source

All posts relating to Open Source software, mostly but not exclusively UNIX focused.

Experiments with Local LLMS for agentic coding

I don’t often do a heap of hands on stuff these days as a manager, hence the lack of tech blog posts in the past… 5+ years, but I’ve been digging into LLMs a bunch lately, especially in the area of agentic code (“vibe coding”) to see what the state of the technology is.

I’d describe myself as an AI realist, I can see the massive capabilities of the technology and use it daily, but I also don’t fully buy the hype that we’ll have thought leaders vibe coding entire applications without understanding the technology anytime soon. A capable understanding of what the heck it’s doing and what to instruct it to do is a key requirement IMHO. That said, I like to regularly challenge my assumptions around technology and nothing beats that than getting hands on with it.

I’ve used cloud based frontier models like GPT-4.1, Claude, etc. These have been surprisingly good when doing greenfield development, especially in well understood domains like web SaaS development coupled with clear requirements in prompts.

One challenge I can see is the rate of token consumption, especially once the current VC-fueled loss leader era runs dry and we’re actually paying for the GPU time consumed. So wanted to run some tests with local LLMs and see what’s possible there with the technology available today.

To be clear, I didn’t expect local to beat big cloud, but I was interested to see exactly how far behind the local options are in terms of hardware+model capabilities.

The Setup

I picked a simple example – an old Lambda I wrote back in 2017 and have basically not maintained since as it’s feature complete and AWS let me keep on using the node14 runtime. (The day Amazon introduces extended support pricing for older Lambda runtimes will be a tough day for me 😅).

This is ideal for a test of refactoring legacy code:

  • Old JS standards and library choices
  • Old v2 AWS SDK
  • Last built on Node 14
  • Using early pre-release version of the Serverless framework.
  • Simple “one file” app that shouldn’t tax any models with too much complexity.

For the test I enrolled my Windows gaming machine for the task. Unfortunately the AMD RX580 8GB GPU it had, whilst great for my basic gaming needs, is pretty unloved by the AI development community and wasn’t going to cut it (side note: this GPU is abandoned in ROCM but you can get it to run with llama.cpp using Vulkan, so it’s not incapable, just not the prime choice in an ecosystem that is extremely NVIDA centric. The vRAM size is also pretty small vs the sizes needed these days).
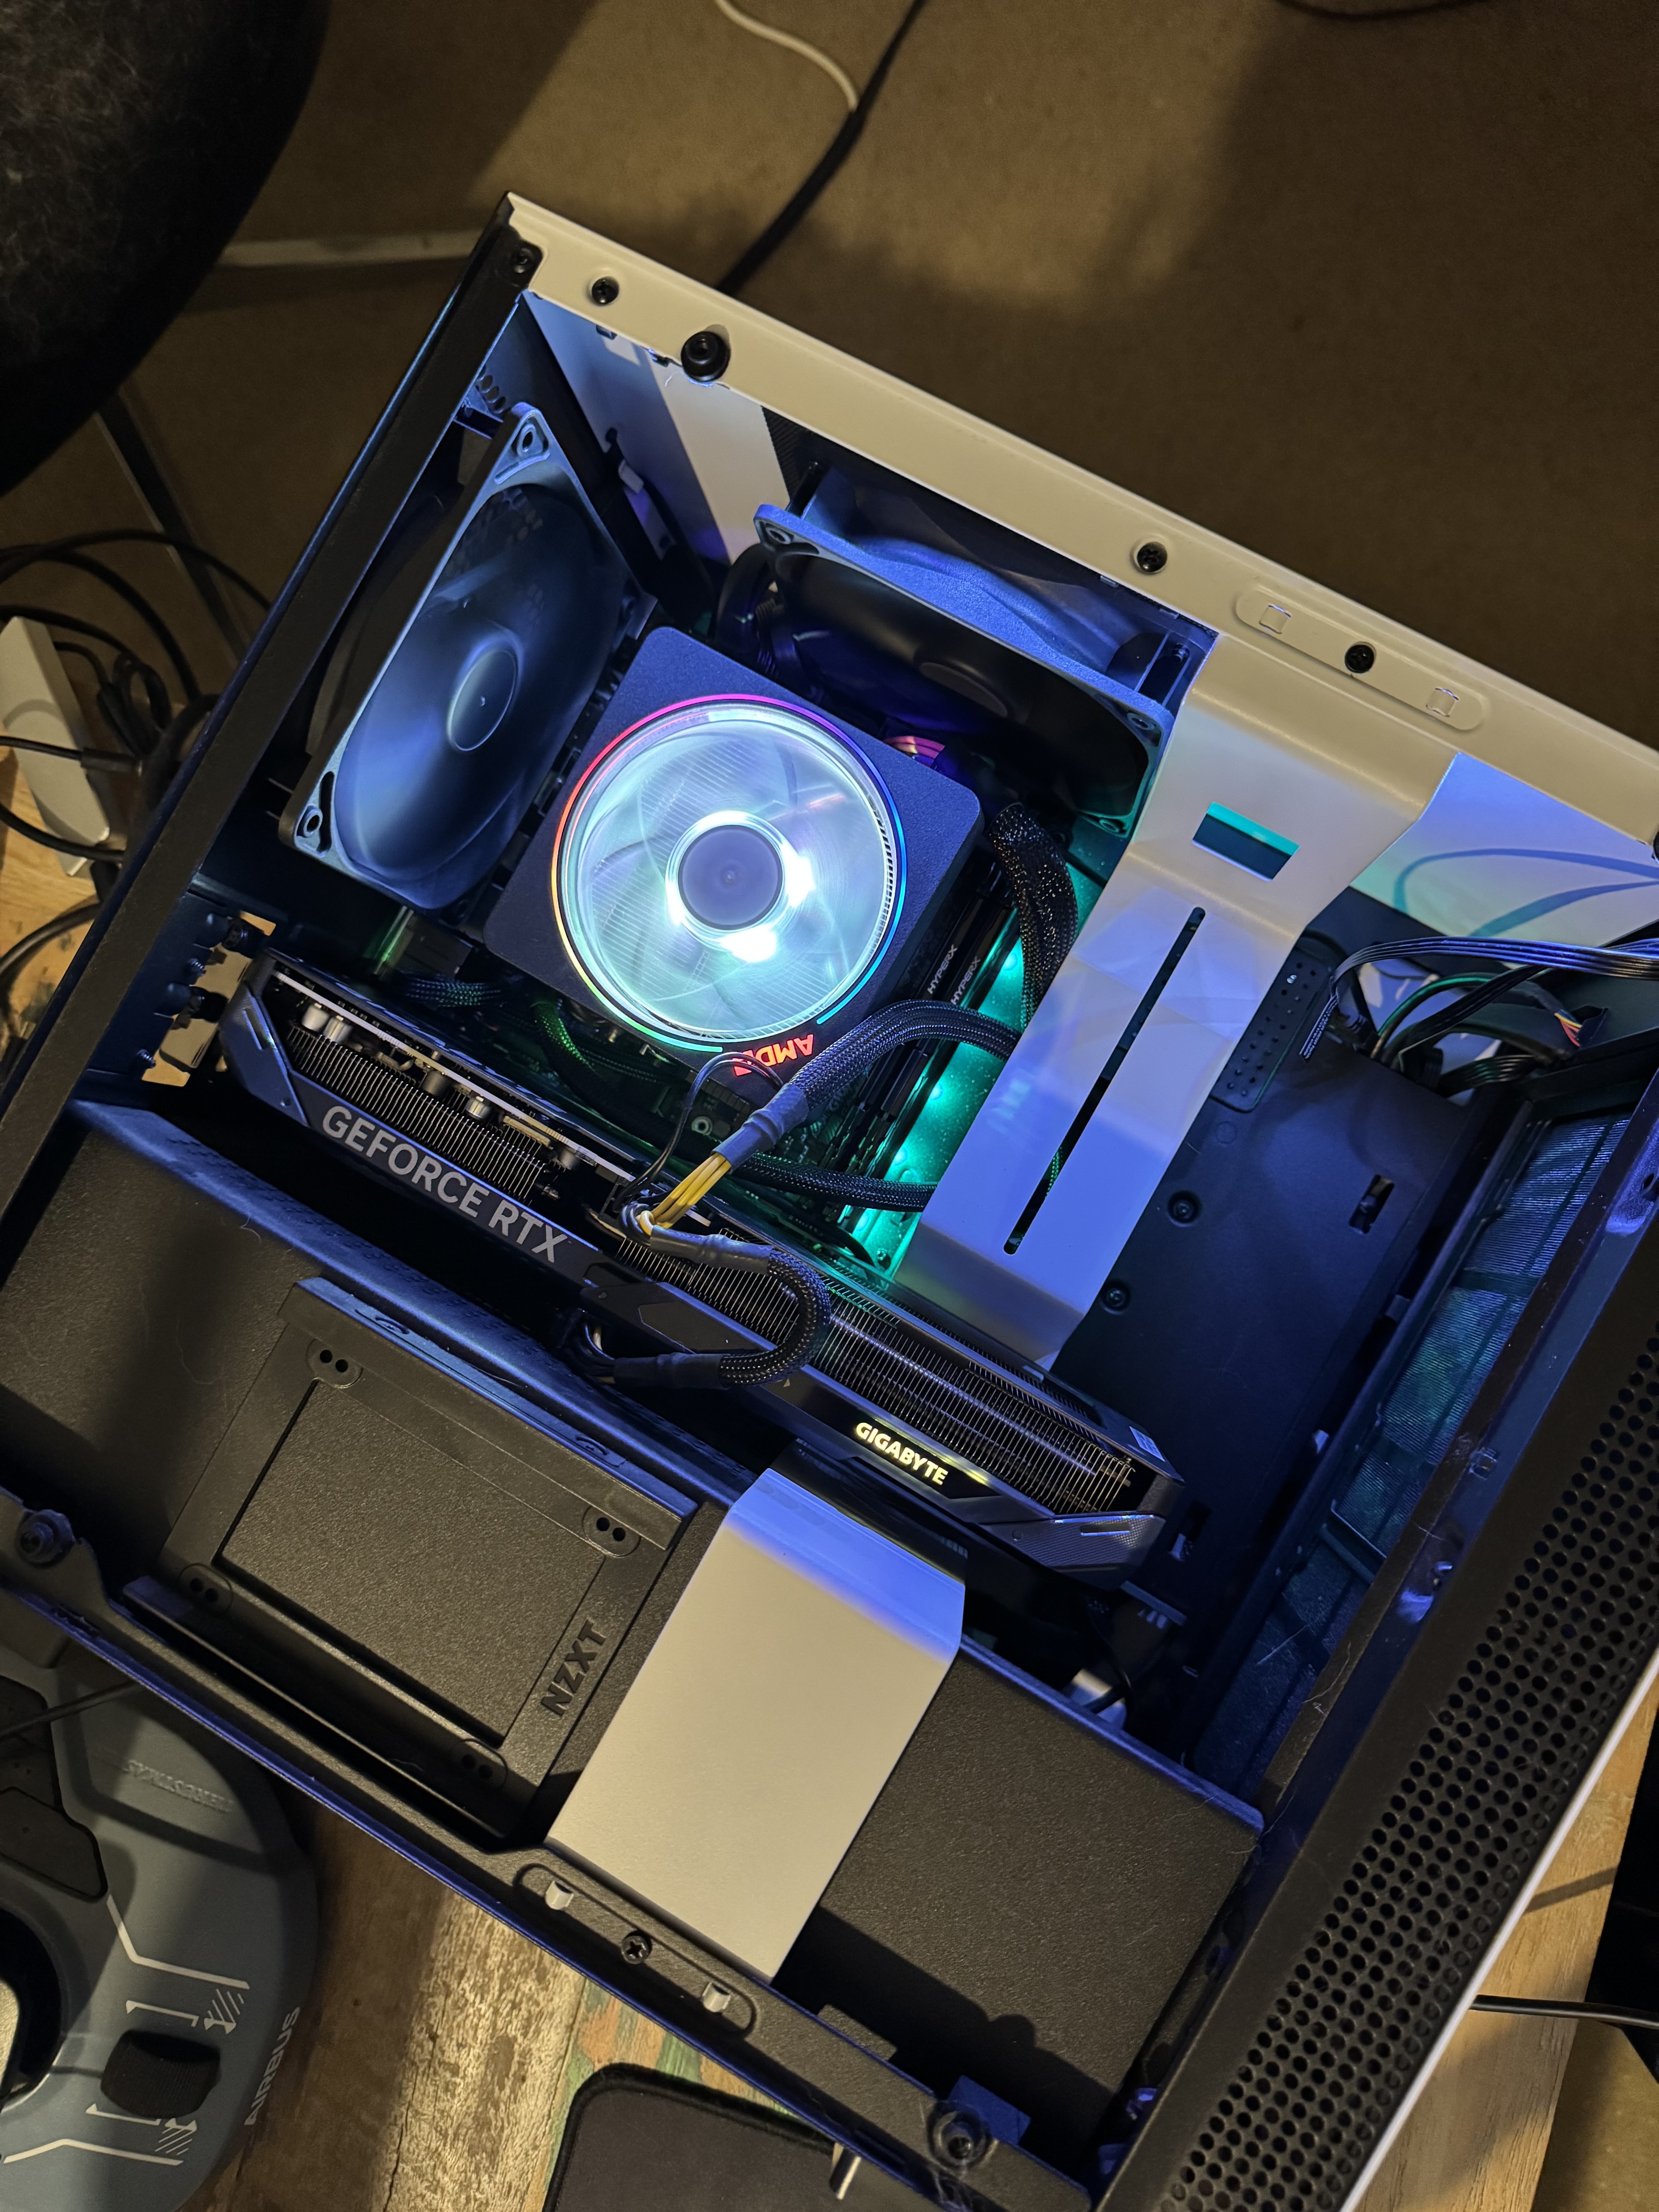
Big fan of these small mini ITX tower builds – enough room to fit an entire GPU without being a massive tower.

Given the GPU issues, I upgraded it to an 5060ti, which is the most cost effective option I could get ($1000 NZD / ~$590 USD) that could run models reasonably well without breaking the bank. To get more vRAM, I’d end up needing a 5090 which comes in a whopping $5000 NZD / ~$3000 USD which is a bit more than I’d like to spend on this experiment.

End result is a machine with:

  • Windows 11 Home edition
  • AMD Ryzen 7 3700X
  • 32GB DDR4
  • NVIDIA RTX 5060 Ti 16GB

For software, I ran Ollama directly on the host OS and exposed the connection to my Macbook where I was running development tooling and using vscode as the editor.

One challenge is that vscode’s Copilot extension on paper offers support for Local LLM models as well as the cloud models, but Microsoft intentionally blocks them if you’re getting your Copilot account via a business plan of any kind because F you I guess. I worked around this with a tweak to one line of code and built the extension locally, but ended up needing to abandon it and use the Continue.dev extension due to issues with Ollama + CoPilot extension not working together correctly to handle tools with the model, which I was able to work around mostly with Continue.dev’s more flexible options.

Test 1: qwen3-coder:30b

See the PR at https://github.com/jethrocarr/lambda-ping/pull/9 for the full notes, prompts and challenges.

This model is a bit above what my hardware could handle. The model itself is 19GB, but with the larger context windows for agentic workloads, I was consuming almost 26GB of memory which forced it to blend both CPU+RAM, and GPU to operate the model which impacted processing performance considerably.

Because of this, the generation was super slow, it took me a couple hours to complete the project with waiting time for the various prompt runs. Unworkable as a normal workflow. To run this workload, really need 32GB vRAM like an expensive RTX 5090 with 32GB, an (also expensive) Mac Studio with unified memory, or maybe the new framework desktop with it’s AMD AI Max 395+ chip and unified memory.

This model generated valid code, but it wasn’t particularly amazing work. It introduced a bug where only HTTPS requests would work (breaking HTTP) and required a prompt to fix, which it did with making a conditional to handle HTTP vs HTTPs. It also didn’t adopt AWS SDK v3 until specifically instructed to do so.

Test 2: qwen2.5-code:14b

See the PR at https://github.com/jethrocarr/lambda-ping/pull/10 for the full notes, prompts and challenges.

A smaller 9GB model that in theory fits entirely within my GPU, but with the context size, actually took around 19GB forcing again a blend of CPU+RAM and GPU for the task. That said, it was considerably faster with 78% of the workload running inside the GPU and not materially worse than the previous test for this specific coding scenario.

This model also generated valid code although it too had a bug, this time with not tracing duration of the request so was non functional on it’s first iteration. When prompted, it was able to correct.

Test 3: qwen2.5-coder:7b

See the PR at https://github.com/jethrocarr/lambda-ping/pull/11 for the full notes, prompts and challenges.

A smaller model yet again, this one fits entirely within the GPU even with the large context and runs super fast thanks to this. Unfortunately the model is just too simplistic and was unable to build a functional application.

I would describe it as capable of writing “code shaped text”. It technically writes valid Javascript but it just hallucinates up different libraries and mashes library names together. It’s also too simplistic to run properly agentically, so it ended up with me copying it’s output into the editor for each file it generated.

Test 4: Cloud LLM using Copilot and GPT-41.

See the PR at https://github.com/jethrocarr/lambda-ping/pull/12 for the full notes, prompts and challenges.

I was originally intending to use Copilot with a few different models so started with the lesser premium GPT-4.1 and… it just hit it right out of the gate immediately, no point even looking at the others. It essentially took a single prompt to refactor the JS into modern standards, moved to AWS-SDK v3 without prompting and the only other prompts were to clean up some old deps it no longer needed and adjust the node runtime for Lambda.

I did follow up with a stretch goal of trying to move it from Serverless to AWS SAM and it struggled a bit more here. I guess LLMs are a bit like many developers and struggle with devops/infrastructure tasks, so maybe devops has a bit more job security for a while… Essentially it got about 70% of the way there but had some mistakes with IAM policies and wrote files into some weird paths that needed moving around.

Learnings

  • Hardware and affordability is a big challenge to do serious agentic work locally. The hardware exists, but maybe not at a price most are willing to pay, specially when there’s a heap of cloud offerings right now at suspiciously cheap prices. Whether this can be sustained and what it ends up costing is yet TBD, there’s a lot of speculation about what the true operating costs are and pricing models/plans seem to change every 6 months as companies figure out what works.
  • Ultimately if the value is there for the customer, the price being charged by cloud could scale somewhat infinitely. $200/mo for Cursor for a hobbyist is a lot, for a professional development shop, it’s chump change vs labour costs. If AI can make a developer 2x more effective and costs $2,000 /mo? Still a bargain vs labour costs for a business.
  • Local LLMs are a hedge against the above, if a cloud vendor gets too greedy, at certain levels it becomes more cost effectively to lease or buy raw GPU power to run your own models. Of course there’s the issue of NVIDA having a defacto monopoly on AI capable GPU hardware these past few years, but AMD seems to be catching up and bringing out great new products like Strix Halo, enabling products like the Framework Desktop with an AMD AI MAX 395+ with up to 128GB of RAM. It might not have the fastest GPU cores ever, but it sure has a heap of unified memory to give those GPU cores a seriously massive pool of RAM. And of course Apple’s M-series architecture delivers similar capabilities, at a price premium.
  • Time solves the above, the local LLMs feel like where ChatGPT was a few years ago. And computer hardware goes through periods where the technology is extremely expensive before trickling down to the consumer, given a few more years, it’s fesible that we could see GPT-4.1 performance capabilities from affordable commodity hardware.
  • When factoring in memory size, it’s not just the size of the model, it the model + all the context size. Can easily double the effective working memory required making the hardware needed even more expensive.
  • All the models struggled with the more infra/devopsy type workload of needing to update a legacy deployment framework. I think this hints at a bit of the technology limitations right now, this specific scenario won’t have much reference material online to have trained on and requires somewhat specific understanding of the tool and AWS ecosystem. As a former devops and Linux nerd this gives me the warm and fuzzies about job security… until next year’s release of AI lifts the bar again and can just talk directly to AWS or something.
  • Windows is surprisingly… less trash than it used to be. Some key bits:
    • WSL 2 (Linux on Windows) works, and most importantly for this topic, has GPU passthrough support so you can run CUDA workloads on a Linux environment using the NVIDA hardware on the host itself. This is a massive win for anyone doing any kind of AI experimentation but not wanting to dual boot their gaming box or just not comfortable setting up Linux as a lab OS.
    • Windows includes OpenSSH server now. Yeah I was surprised to. In true windows fashion it’s a bit clunky but you can now SSH into powershell once it’s setup. I haven’t yet been able to get SSH keys to work so it’s password auth only right now.
    • Docker on Windows uses the WSL subsystem so again, has GPU access.
    • WinGet gives windows a half usable package manager.
    • If you enable SVM virtualization and your Windows install just immediately bluescreens at boot, make sure mini dump is enabled and you can capture some kernel dumps and open it up to review. In my case, there was a legacy driver that crashed when running under hyper v that I was able to isolate and delete. Reading online, a lot of folks seem to resort to doing a windows reinstall to fix issues with being unable to enable SVM.
    • WSL is a little funky with grabbing a lot of RAM for itself, for someone like myself running a mix of workloads in containers and a on the host OS, I may need to startup/shutdown when changing mode (eg AI lab vs Gaming) as WSL doesn’t dynamically claw back RAM that well so you end up with a Linux VM holding onto 10GB of RAM for 1GB of idle workloads.

Rabbit Hole: Hardware

I haven’t really kept up with hardware in a major way in the past few years, so it was interesting researching ways to run local LLM workloads. ChatGPT is actually very good with an encyclopaedic knowledge of CPUs and chipset PCIe lane setups, and there is a heap of real world reports on Reddit of different hardware setups. Few things I learnt:

  • My AM4 motherboard has a 16x PCIe slot, but it’s a PCIe 3.0 slot. The NVIDIA RTX 5060 Ti is a PCIe 5.0 card but only 8x. This is fine on PCIe 5.0 where the bus is fast but when running at 3.0 speed, it can bottleneck for AI as the effective bandwidth is 8GB/s vs what could be 32 GB/s. It doesn’t impact gaming which doesn’t get close to this much bandwidth, and it doesn’t impact a single model running entirely in GPU, but it does impact any models spilling to CPU+RAM like in my case when doing agentic workloads with large contexts.
  • Consumer AMD and Intel CPUs don’t actually have heaps of PCIe lanes available. For example, AM5 offers 28 lanes which sounds like a heap, until you realise 16x goes directly to the GPU, 4x to the NVMe slot, 4x to the chipset and 4x general purpose (additional NVMe or expansion 4x slot).
  • This means you’re not going to see consumer motherboards with multiple 16x slots, so sorry , you can’t just build one AM5 box and put in 4x 5060s. Or if a board offers it, it might be getting shared, eg the 16x GPU runs as 2x 8x slots, or you have slots hanging off the chipset and bottlenecked at 4x back to CPU.
  • .. unless you go for server hardware, ie Threadripper, Epyc or Xeon which does have serious amounts of lanes. You can get some good deals on used hardware here, but there’s a spanner in the works with the “good priced” deals having older generations of PCIe 3.0 which limits bandwidth.
  • PCIe 3.0,4.0,5.0 – the difference is essentially 2x performance in bandwidth per generation. So it is a pretty big deal for these bandwidth heavy workloads for AI. It’s not such an issue for a single GPU if the workload fits entirely in vRAM but if using multiple GPUs the bandwidth for moving data between them can become a bottleneck.
  • As a side note of a side note, this is why most consumer NVMe NASes kinda suck performance wise – they’re not using chips capable of providing that many high performance PCIe lanes. They have other wins, like size, power, noise and reliability, but performance is a problem.
    • To get actual max performance on NVMe you will need to use the 16x slot with bifurcation to pack in the M2 NVMe cards , but that then only leaves the PCIe 4x slot for networking.
    • And you’ll need to upgrade networking, as 10Gbits is basically nothing vs the speed of NVMe drives when a single drive is doing ~56Gbits. In theory a PCIe 5.0 4x slot can do 128Gbits but I’ve not seen any QSFP+ cards that are PCIe 5.0 and 4x, most seem to be PCIe 3.0 8x cards, it might take a few more years for this hardware to catch up, the server market seems happy enough with 8x cards which is driving this kind of networking gear.
    • So the most cost effective top-performance NVMe NAS right now, might be something like an “X99” motherboard with used Xeons and a heap of PCIe 3.0 lanes capable of supporting both NVME storage and networking cards. Or, Apple M4-series hardware using Thunderbolt attached NVMe and Thunderbolt/USB4 networking to the Mac workstations needing access to the storage.
    • Whilst I was digging in this subject I basically came to the conclusion that high performance NVMe NASes aren’t worth it right now for consumers. You need power hungry or expensive hardware to run the drives and then you get bottlenecked on network and need to spend a bunch on server grade networking gear. Might as well just get Thunderbolt/USB4 NVMe enclosures and directly connect them to your Mac workstation. Even a Macbook Air with it’s 2x ports can support 1x external screen+power delivery, and 1x NVMe drive concurrently which would meet any editing or other high I/O workflow that you’d conceivable want to run on such a machine.

Rabbit Hole: Other Reading

MongoDB document depth headache

We ran into a weird problem recently where we were unable to sync a replica set running MongoDB 3.4 when adding new members to the replica set.

The sync would begin, but at some point during the sync it would always fail with:

[replication-0] collection clone for 'database.collection' failed due to Overflow:
While cloning collection 'database.collection' there was an error
'While querying collection 'database.collection' there was an error 
'BSONObj exceeded maximum nested object depth: 200''

(For extra annoyance the sync would continue with syncing all the other databases and collections on the replica set, before then only realising it had actually failed earlier at the very end of the sync and then restarting the sync from the beginning again).


The error means that one or more documents has a max depth over 200. This could be a chain of objects, or a chain of arrays in a document – a mistake that isn’t too tricky to cause with a buggy loop or ORM.

But how is it possible that this document could be in the database in the first case? Surely it should have been refused at time of insert? Well the nested document limit size and enforcement has changed at various times in past versions and a long-lived database such as ours from early MongoDB 2.x days may have had these bad documents inserted before the max depth limit was enforced and only now when we try to use the document do the limits become a problem.

In our case the document was old, but didn’t have any issues syncing back on Mongo 3.0 but now failed with Mongo 3.4.

Finding the document is tricky – the replication process helpfully does not log the document ID, so you can’t go and purge it from the collection to resolve the issue.

With input from my skilled colleagues with better Mongo skills than I, we figured out three queries that allowed us to identify the bad documents.

1. This query finds any documents that have a long chain of nested objects inside them.

db.collection.find({ $where: function() { return tojsononeline(this).indexOf("} } } } } } } } }") != -1 } })

2. This query finds any documents that have a long chain of nested arrays. This was the specific issue in our case and this query successfully identified all the bad documents.

db.collection.find({ $where: function() { return tojsononeline(this).indexOf("] ] ] ] ] ] ]") != -1 } })

3. And if you get really stuck, you can find any bad document (for whatever reason) by reading the document and then re-writing it back out to another collection. This ensures the document gets all the limits applied at write time and will identify their ID, regardless of the specific reason for them being refused.

db.collection.find({}).forEach(function(d) { print(d["_id"]); db.new_collection.insert(d) });

Note that all of these queries tend to be performance impacting since you’re asking your database to read every single document. And the last one, copying collections, could take considerable time and space to complete.

I recommend restoring the replica set to a test system and performing the operation there where you know it’s not going to impact production if you have any data of notable size.

Once you find your bad document, you can display it with:

db.collection.find({ _id: ObjectId("54492129902178d6f600004f") });

And delete it entirely (assuming nothing important in it!) with:

db.collection.deleteOne({ _id: ObjectId("54492129902178d6f600004f") });

DevOpsDays NZ 2016

I recently spoke at the inaugural DevOpsDays NZ in Wellington. The team whom put together the conference did an amazing job and it’s one of the few conferences that I’ve really enjoyed recently. If they put together a subsequent conference next year, I recommend attending if possible.

I presented about our DevOps practises and tooling at Fairfax Media / stuff.co.nz which you can find at the recording below:


Whilst the vast majority of the content of the conference was really good, the following were clear standouts to me that I recommend watching:

You can find these (and other) presentations from the conference on this Youtube page.

Puppet Training

I recently ran a training session for our development team at Fairfax introducing them to the fundamentals of Puppet.

To assist with this training, I’ve developed a bunch of scripts and learning modules which I’ve now open sourced at https://github.com/jethrocarr/puppet-training

Using these modules you can:

  • Provision a pre-configured Puppet master + Puppet client to use for exercises.
  • Learn the basics of an r10k/git workflow for Puppet modules.
  • Create a module and get used to Puppet resources like package, file and service.
  • Learn the basics of ordering and dependencies.
  • Use Hiera to set params.

It’s not as complete a course as I’d like. I did about half a day using these modules and another half the day adhoc. Ideally I’d like to finish off writing modules at some point, but it takes a reasonably long period to write anything like this and there’s only so many hours in a week :-)

Putting up here as they might be of interest to people. PRs are always welcome as well.

Building a mail server with Puppet

A few months back I rebuilt my personal server infrastructure and fully Puppetised everything, even the mail server. Because I keep having people ask me how to setup a mail server, I’ve gone and adjusted my Puppet modules to make them suitable for a wider audience and open sourced them.

Hence announcing – https://github.com/jethrocarr/puppet-mail

This module has been designed for hobbyists or small organisation mail server operators whom want an easy solution to build and manage a mail server that doesn’t try to be too complex. If you’re running an ISP with 30,000 mailboxes, this probably isn’t the module for you. But 5 users? Yourself only? Keep on reading!

Mail servers can be difficult to configure, particularly when figuring out the linking between MTA (eg Postfix) and LDA (eg Dovecot) and authentication (SASL? Cyrus? Wut?), plus there’s the added headaches of dealing with spam and making sure your configuration is properly locked down to prevent open relays.

By using this Puppet module, you’ll end up with a mail server that:

  • Uses Postfix as the MTA.
  • Uses Dovecot for providing IMAP.
  • Enforces SSL/TLS and generates a legitimate cert automatically with LetsEncrypt.
  • Filters spam using SpamAssassin.
  • Provides Sieve for server-side email filtering rules.
  • Simple authentication against PAM for easy management of users.
  • Supports virtual email aliases and multiple domains.
  • Supports CentOS (7) and Ubuntu (16.04).

To get started with this module, you’ll need a functional Puppet setup. If you’re new to Puppet, I recommend reading Setting up and using Pupistry for a master-less Puppet setup.

Then it’s just a case of adding the following to r10k to include all the modules and dependencies:

mod 'puppetlabs/stdlib'

# EPEL & Jethro Repo modules only required for CentOS/RHEL systems
mod 'stahnma/epel'
mod 'jethrocarr/repo_jethro'

# Note that the letsencrypt module needs to be the upstream Github version,
# the version on PuppetForge is too old.
mod 'letsencrypt',
  :git    => 'https://github.com/danzilio/puppet-letsencrypt.git',
  :branch => 'master'

# This postfix module is a fork of thias/puppet-postfix with some fixes
# to make it more suitable for the needs of this module. Longer-term,
# expect to merge it into this one and drop unnecessary functionality.
mod 'postfix',
  :git    => 'https://github.com/jethrocarr/puppet-postfix.git',
  :branch => 'master'

And the following your Puppet manifests (eg site.pp):

class { '::mail': }

And in Hiera, define the specific configuration for your server:

mail::server_hostname: 'setme.example.com'
mail::server_label: 'My awesome mail server'
mail::enable_antispam: true
mail::enable_graylisting: false
mail::virtual_domains:
 - example.com
mail::virtual_addresses:
  'nickname@example.com': 'user'
  'user@example.com': 'user'

That’s all the Puppet config done! Before you apply it to the server, you also need to make sure both your forward and reverse DNS is correct in order to be able to get the SSL/TLS cert and also to ensure major email providers will accept your messages.

$ host mail.example.com
mail.example.com has address 10.0.0.1

$ host 10.0.0.1
1.0.0.10.in-addr.arpa domain name pointer mail.example.com.

For each domain being served, you need to setup MX records and also a TXT record for SPF:

$ host -t MX example.com
example.com mail is handled by 10 mail.example.com.

$ host -t TXT example.com
example.com descriptive text "v=spf1 mx -all"

Note that SPF used to have it’s own DNS type, but that was replaced in favour of just using TXT.

The example above tells other mail servers that whatever system is mentioned in the MX record is a legitmate mail server for that domain. For details about what SPF records and what their values mean, please refer to the OpenSPF website.

Finally, you should read the section on firewalling in the README, there are a number of ports that you’ll probably want to restrict to trusted IP ranges to prevent attackers trying to force their way into your system with password guess attempts.

Hopefully this ends up being useful to some people. I’ve replaced my own internal-only module for my mail server with this one, so I’ll continue to dogfood it to make sure it’s solid.

That being said, this module is new and deals with a complex configuration so I’m sure there will be some issues people run into – please raise any problems you have on the Github issues page and I’ll do my best to assist where possible.

Faking a Time Capsule with a GNU/Linux server

Apple MacOS’s Time Machine feature is a great backup solution for general desktop use, but has some annoying limitations such as only working with either locally attached storage devices or with Apple’s Time Capsule devices.

Whilst the Time Capsules aren’t bad devices, they offer a whole bunch of stuff I already have and don’t need – WiFi access point, ethernet router, and network attached storage and they’re not exactly cheap either. They also don’t help anyone wanting to backup to an off-site cloud server/VPS via a VPN.

So instead of a Time Capsule, I’m using a project called netatalk to allow a GNU/Linux server to provide an AFP file share to MacOS which acts as a Time Machine suitable target.

There’s an annoyance with Time Machine where it only officially works with AFP shares specially flagged as “Time Machine” shares. So whilst Apple has embraced SMB2 as the file sharing protocol of future use, you can’t use SMB2 for Time Machine backups (Well technically you can by enabling unsupported volumes in MacOS, but then you lack the ability to restore from backup via the MacOS recovery tools).

To make life easy, I’ve written a Puppet module that install netatalk and configures a Debian GNI/Linux server to act as a Time Capsule for all local users.

After installing the Puppet module (r10k or puppet module tools), you can simply define the directory and how much space to report to each client:

class { 'timemachine':
  location     => '/mnt/backup/timemachine',
  volsizelimit => '1000000', # 1TB per user backing up
}

To setup each MacOS machine, you will need to first connect to the share using Finder. You can do this with Finder -> Go -> Connect to Server and then entering afp://SERVERNAME and authenticating with your PAM credentials for the server.

After connecting, the share should now appear under Time Machine preferences. If you experience any issues connecting, check the /var/log/afpd.log file for debug information on the server – common issues include not having created the directories for the shares or having incorrect permissions on them.

Easy IKEv2 VPN for mobile devices (inc iOS)

I recently obtained an iPhone and needed to connect it to my VPN. However my existing VPN server was an OpenVPN installation which works lovely on traditional desktop operating systems and Android, but the iOS client is a bit more questionable having last been updated in September 2014 (pre iOS 9).

I decided to look into what the “proper” VPN option would be for iOS in order to get something that should be supported by the OS as smoothly as possible. Last time I looked this was full of wonderful horrors like PPTP (not actually encrypted!!) and L2TP/IPSec (configuration hell), so I had always avoided like the plague.

However as of iOS 9+, Apple has implemented support for IKEv2 VPNs which offers an interesting new option. What particularly made this option attractive for me, is that I can support every device I have with the one VPN standard:

  • IKEv2 is built into iOS 9 and MacOS El Capitan.
  • IKEv2 is built into Windows 10.
  • Works on Android with a third party client (hopeful for native integration soonish?).
  • Naturally works on GNU/Linux.

Whilst I love OpenVPN, being able to use the stock OS features instead of a third party client is always nice, particularly on mobile where power management and background tasks behaviour can be interesting.

IKEv2 on mobile also has some other nice features, such as MOBIKE, which makes it very seamless when switching between different networks (like the cellular to WiFi dance we do constantly with phones/tablets). This is something that OpenVPN can’t do – whilst it’s generally fast and reliable at establishing a connection, a change in the network means issuing a reconnect, it doesn’t just move the current connection across.


Given that I run GNU/Linux servers, I went for one of the popular IPSec solutions available on most distributions – StrongSwan.

Unfortunately whilst it’s technical capabilities are excellent, it’s documentation isn’t great. Best way to describe it is that every option is documented, but what options and why you’d want to use them? Not so much. The “left” vs “right” style documentation is also a right pain to work with, it’s not a configuration format that reads nicely and clearly.

Trying to find clear instructions and working examples of configurations for doing IKEv2 with iOS devices was also difficult and there’s some real traps for young players such as generating SHA1 certs instead of SHA2 when using the tools with defaults.

The other fun is that I also wanted my iOS device setup properly to:

  1. Use certificate based authentication, rather than PSK.
  2. Only connect to the VPN when outside of my house.
  3. Remain connected to the VPN even when moving between networks, etc.

I found the best way to make it work, was to use Apple Configurator to generate a .mobileconfig file for my iOS devices that includes all my VPN settings and certificates in an easy-to-import package, but also (critically) allows me to define options that are not selectable to end users, such as on-demand VPN establishment.


After a few nights of messing around and cursing the fact that all the major OS vendors haven’t just implemented OpenVPN, I managed to get a working connection. To avoid others the same pain, I considered writing a guide – but it’s actually a really complex setup, so instead I decided to write a Puppet module (clone from github / or install from puppetforge) which does the following heavy lifting for you:

  • Installs StrongSwan (on a Debian/derived GNU/Linux system).
  • Configures StrongSwan for IKEv2 roadwarrior style VPNs.
  • Generates all the CA, cert and key files for the VPN server.
  • Generates each client’s certs for you.
  • Generates a .mobileconfig file for iOS devices so you can have a single import of all the configuration, certs and ondemand rules and don’t have to have a Mac to use Apple Configurator.

This means you can save yourself all the heavy lifting and setup a VPN with as little as the following Puppet code:

class { 'roadwarrior':
   manage_firewall_v4 => true,
   manage_firewall_v6 => true,
   vpn_name           => 'vpn.example.com',
   vpn_range_v4       => '10.10.10.0/24',
   vpn_route_v4       => '192.168.0.0/16',
 }

roadwarrior::client { 'myiphone':
  ondemand_connect       => true,
  ondemand_ssid_excludes => ['wifihouse'],
}

roadwarrior::client { 'android': }

The above example sets up a routed VPN using 10.10.10.0/24 as the VPN client range and routes the 192.168.0.0/16 network behind the VPN server back through. (Note that I haven’t added masquerading options yet, so your gateway has to know to route the vpn_range back to the VPN server).

It then defines two clients – “myiphone” and “android”. And in the .mobileconfig file generated for the “myiphone” client, it will specifically generate rules that cause the VPN to maintain a constant connection, except when connected to a WiFi network called “wifihouse”.

The certs and .mobileconfig files are helpfully placed in  /etc/ipsec.d/dist/ for your rsync’ing pleasure including a few different formats to help load onto fussy devices.


Hopefully this module is useful to some of you. If you’re new to Puppet but want to take advantage of it, you could always check out my introduction to Puppet with Pupistry guide.

If you’re not sure of my Puppet modules or prefer other config management systems (or *gasp* none at all!) the Puppet module should be fairly readable and easy enough to translate into your own commands to run.

There a few things I still want to do – I haven’t yet done IPv6 configuration (which I’ll fix since I run a dual-stack network everywhere) and I intend to add a masquerade firewall feature for those struggling with routing properly between their VPN and LAN.

I’ve been using this configuration for a few weeks on a couple iOS 9.3.1 devices and it’s been working beautifully, especially with the ondemand configuration which I haven’t been able to do on any other devices (like Android or MacOS) yet unfortunately. The power consumption overhead seems minimal, but of course your mileage may vary.

It would be good to test with Windows 10 and as many other devices as possible. I don’t intend for this module to support non-roadwarrior type configs (eg site-to-site linking) to keep things simple, but happy to merge any PRs that make it easier to connect more mobile devices or branch routers back to a main VPN host. Also happy to merge PRs for more GNU/Linux distribution support- currently only support Debian/Ubuntu, but it shouldn’t be hard to add others.

If you’re on Android, this VPN will work for you, but you may find the OpenVPN client better and more flexible since the Android client doesn’t have the same level of on demand functionality that iOS has built in. You may also find OpenVPN a better option if you’re regularly using restrictive networks that only allow “HTTPS” out, since it can be run on TCP/443, whereas StrongSwan IKEv2 runs on UDP port 500 or 4500.

Upcycling 32-bit Mac Minis

The first generation Intel Apple Mac Mini (Macmini1,1) has a special place as the best bang-for-buck system that I’ve ever purchased.

Purchased for around $1k NZD in 2006, it did a stint as a much more sleep-friendly server back after I started my first job and was living at my parents house. It then went on to become my primary desktop for a couple of years in conjunction with my laptop. And finally it transitioned into a media centre and spent a number of years driving the TV and handling long running downloads. It even survived getting sent over to Sydney and running non-stop in the hot blazing hell inside my apartment there.

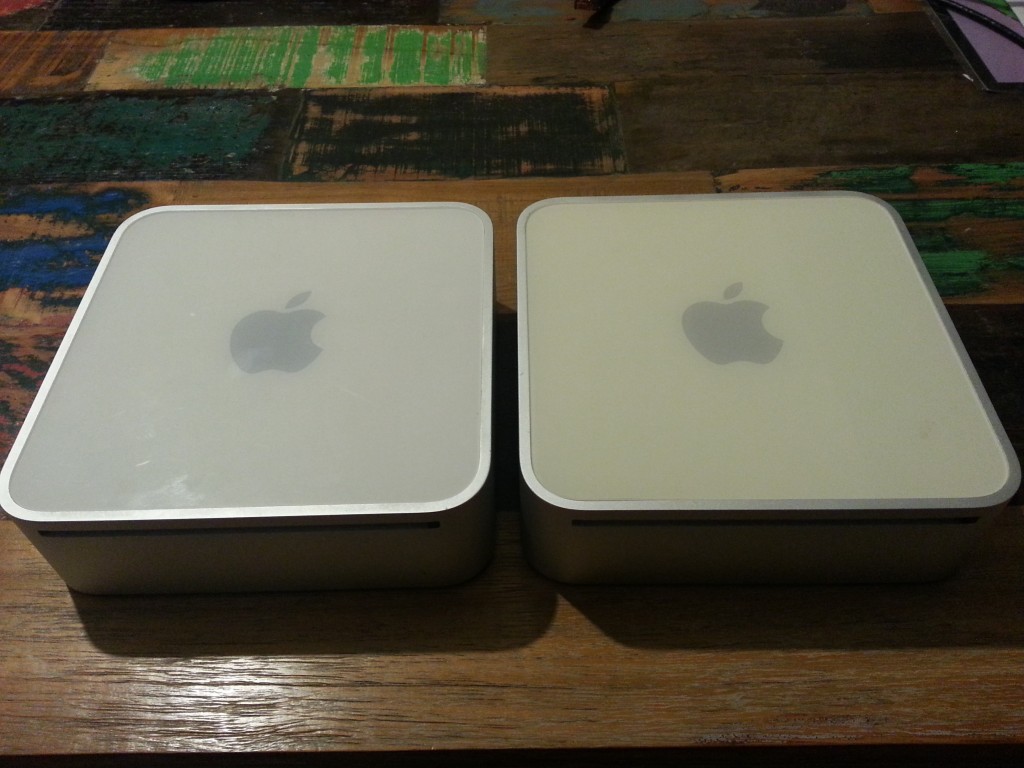
My long term relationship on the left and a more recent stray obtained second hand.

My long term relationship on the left and a more recent stray I obtained. Clearly mine takes after it’s owner and hasn’t seen the sun much.

Having now reached it’s 10th birthday, it’s started to show it’s age. Whilst it handles 720p content without an issue, it’s now hit and miss whether 1080p H264 content will work without unacceptable jitter.

It’s previously undergone a few upgrades. I bumped it from the original 512MB RAM to 2GB (the max) years ago and it’s had it’s 60GB hard drive replaced with a more modern 500GB model. But neither of these will help much with the video decoding performance.


Given we had recently obtained something that the people at Samsung consider a “Smart” TV, I decided to replace the Mac Mini with the Plex client running natively on the TV and recycle the Mac Mini into a new role as a small server to potentially replace a much more power hungry AMD Phenom II system that performs somewhat basic storage and network tasks.

Unfortunately this isn’t as simple as it sounds. The first gen Intel Mac Minis arrived on the scene just a bit too soon for 64-bit CPUs and so are packing the original Intel Core Solo or Intel Core Duo (1 or 2 cores respectively) which aren’t clocked particularly high and are only 32bit capable.

Whilst GNU/Linux *can* run on this, supported versions of MacOS X certainly can’t. The last MacOS version supported on these devices is Mac OS X 10.6.8 “Snow Leopard” 32-bit and the majority of app developers for MacOS have decided to set their minimum supported platform at 64-bit MacOS X 10.7.5 “Lion” so they can drop the old 32-bit stuff – this includes the popular Chrome browser which now only provides 64-built builds. Basically OS X Snow Leopard is the Win XP of the MacOS world.

Even running 32-bit GNU/Linux can be an exercise in frustration. Some distributions now only ship 64-bit builds and proprietary software vendors don’t always bother releasing 32-bit builds of their apps limiting what you can run on them.


On the plus side, this earlier generation of Apple machines was before Apple decided to start soldering everything together which means not only can you replace the RAM, storage, drives, WiFi card, you can also replace the CPU itself since it’s socketed!

I found a great writeup of the process at iFixit which covers the process of replacing the CPU with a newer model.

Essentially you can replace the CPUs in the Macmini1,1 (2006) or Macmini2,1 (2007) models with any chip compatible with Intel Socket M, the highest spec model available being the Intel Core 2 Duo 2.33 Ghz T7600.

At ~$60NZD for the T7600, it was a bit more than I wanted to spend for a decade old CPU. However moving down slightly to the T7400, the second hand price drops to around ~$20NZD per CPU with international shipping included. And at 2.177Ghz it’s no slouch, especially when compared to the original 1.5Ghz single core CPU.

It took a while to get here, I used this seller after the first seller never delivered the item and refunded me when asked about it. One of my CPUs also arrived with a bent pin, so there was some rather cold sweat moments straightening the tiny pin with a screw driver. But I guess this is what you get for buying decade old CPUs from a mysterious internet trader.

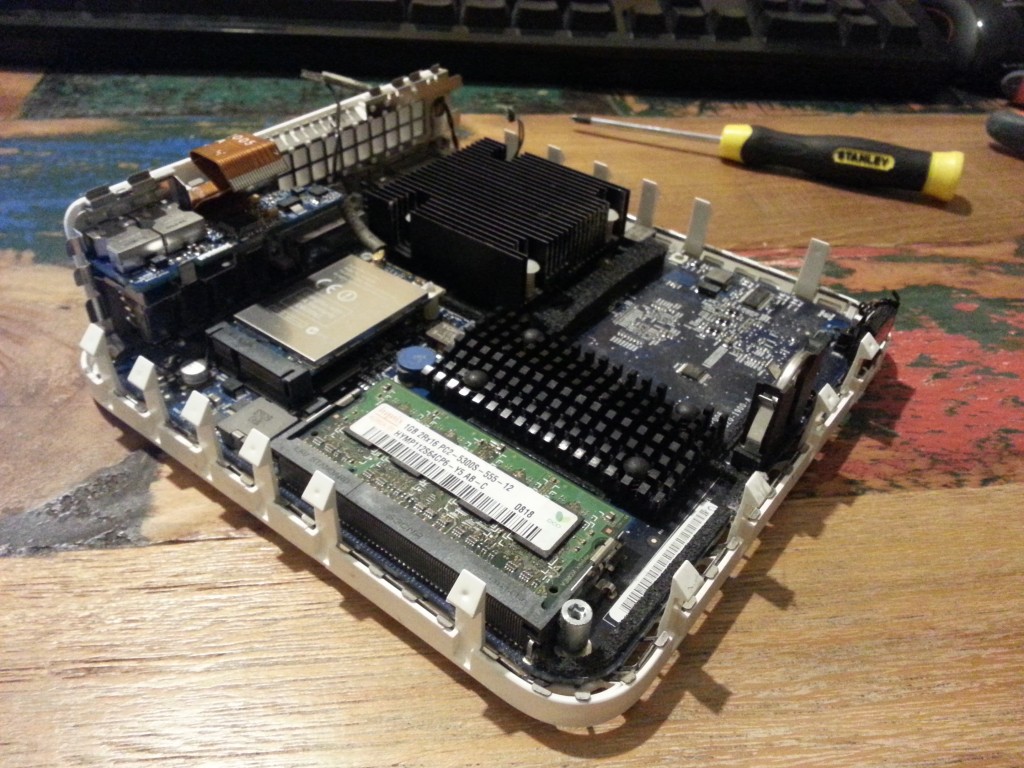
I'm naked!

I was surprised at the lack of dust inside the unit given it’s long life, even the fan duct was remarkably dust-free.

The replacement is a bit of a pain, you have to strip the Mac Mini right down and take the motherboard out, but it’s not the hardest upgrade I’ve ever had to do – dealing with cheap $100 cut-your-hand-open PC cases were much nastier than the well designed internals of the Mac. The only real tricky bit is the addition and removal of the heatsink which worked best with a second person helping remove the plastic pegs.

I did it using a regular putty knife, needle-nose pliers, phillips & flat head screw drivers and one Torx screw driver to deal with a single T10 screw that differs from the rest of the ones in the unit.

Moment of truth...

Recommend testing this things *before* putting the main case back together, they’re a pain to open back up if it doesn’t work first run.

The end result is an upgrade from a 1.5 Ghz single core 32bit CPU to 2.17 Ghz dual core 64bit CPU – whilst it won’t hold much to a modern i7, it will certainly be able to crunch video and server tasks quite happily.


The next problem was getting an OS on there.

This CPU upgrade opens up new options for MacOS fans, if you hack the installer a bit you can get MacOS X 10.7.5 “Lion” on there which gives you a 64-bit OS that can still run much of the current software that’s available. You can’t go past Lion however, since the support for the Intel GMA 950 GPU was dropped in later versions of MacOS.

Given I want them to run as servers, GNU/Linux is the only logical choice. The only issue was booting it… it seems they don’t support booting from USB flash drives.

These Mac Minis really did fall into a generational gap. Modern enough to have EFI and no legacy ports, yet old enough to be 32-bit and lack support for booting from USB. I wasn’t even sure if I would even be able to boot 64-bit Linux with a 32-bit EFI…


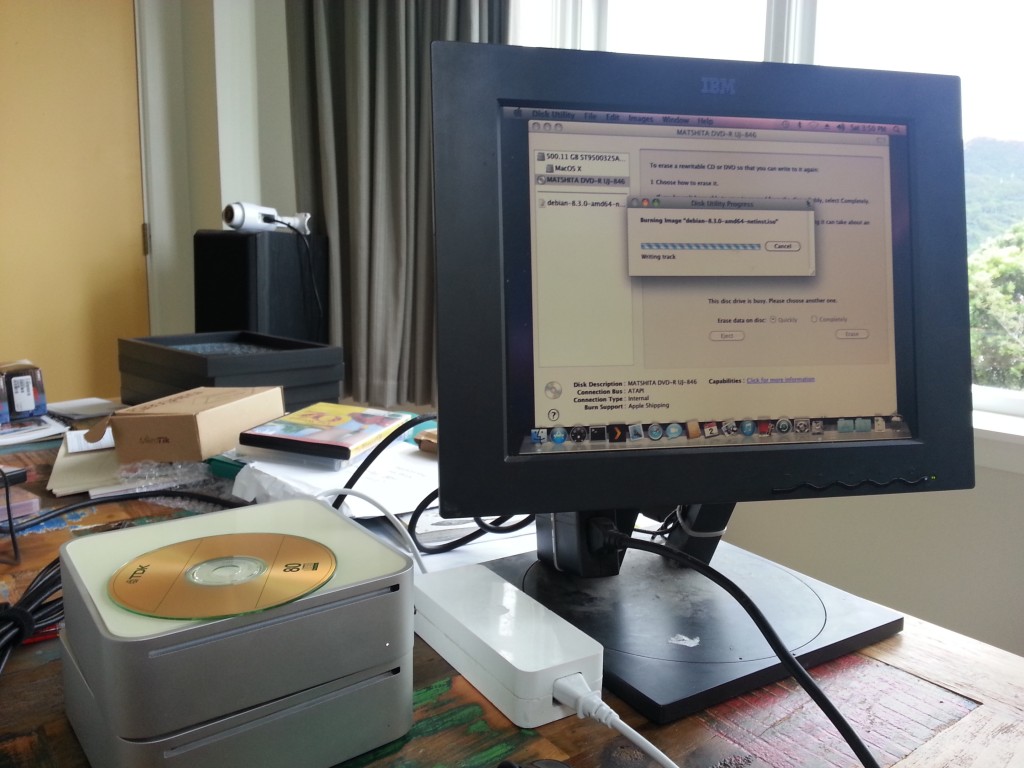
Given it doesn’t boot from USB and I didn’t have any firewire devices lying around to try booting from, I fell back to the joys of optical media. This was harder than it sounds given I don’t have any media and barely any working drives, but my colleague thankfully dug up a couple old CD-R for me.

They're basically floppy disks...

“Daddy are those shiny things floppy disks?”

I also quickly remembered why we all moved on from optical media. My first burn appeared to succeed but crashed trying to load the bootloader. And then refused to eject. Actually, it’s still refusing to eject, so there’s a Debian 8 installer that might just be stuck in there until it’s dying days… The other unit’s optical drive didn’t even work at all, so I couldn’t even do the pain of swapping around hardware to get a working combination.


Having exhausted the optional of a old-school CD-based GNU/Linux install, I started digging into ways to boot from another partition on the machine’s hard drive and found a project called rEFInd.

This awesome software is an alternative boot manager for EFI. It differs from a boot loader slightly, in a traditional BIOS -> Boot Loader -> OS world, rEFInd is equivalent to a custom BIOS offering better boot functionality than the OEM vendor.

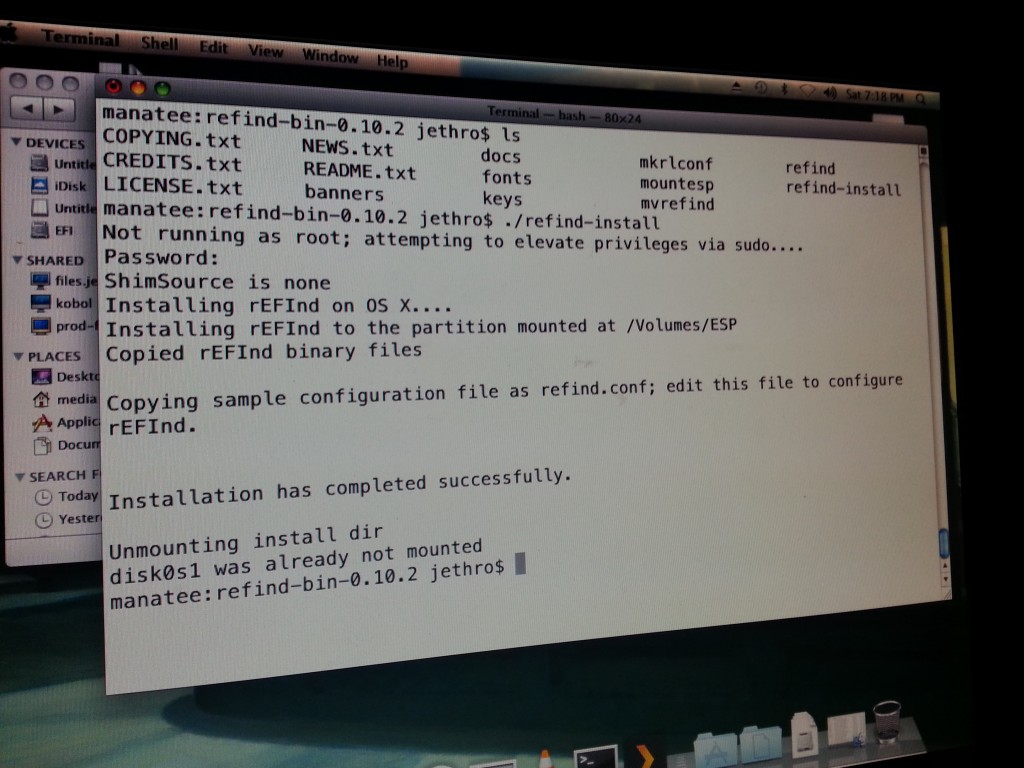
It works by installing itself into a small FAT partition that lives on the hard disk – it’s probably the easiest low-level tool I’ve ever installed – download, unzip, and run the installer from either MacOS or Linux.

./unsuckefi

Disturbingly easy from the existing OS X installation

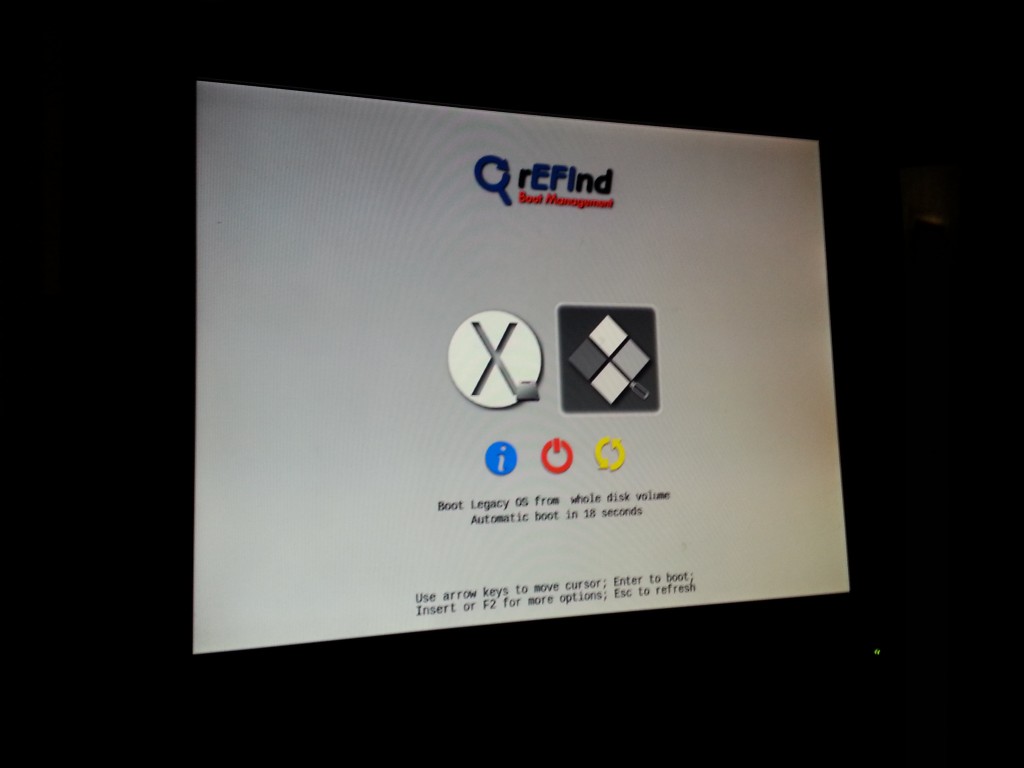
Once installed, rEFInd kicks in at boot and offers the ability to boot from USB flash drives, in addition to the hard drive itself!

Legacy

The USB flash installer has been detected as “Legacy OS from whole disk volume”.

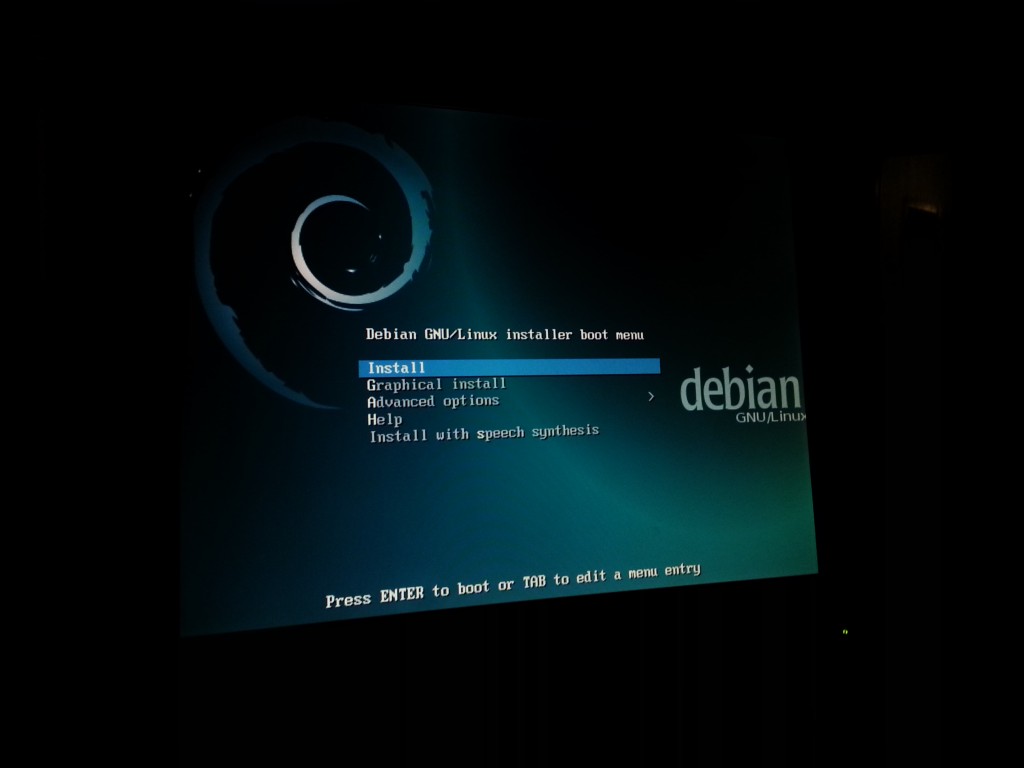
Yusss!

Yusss, Debian installer booted from USB via rEFInd!

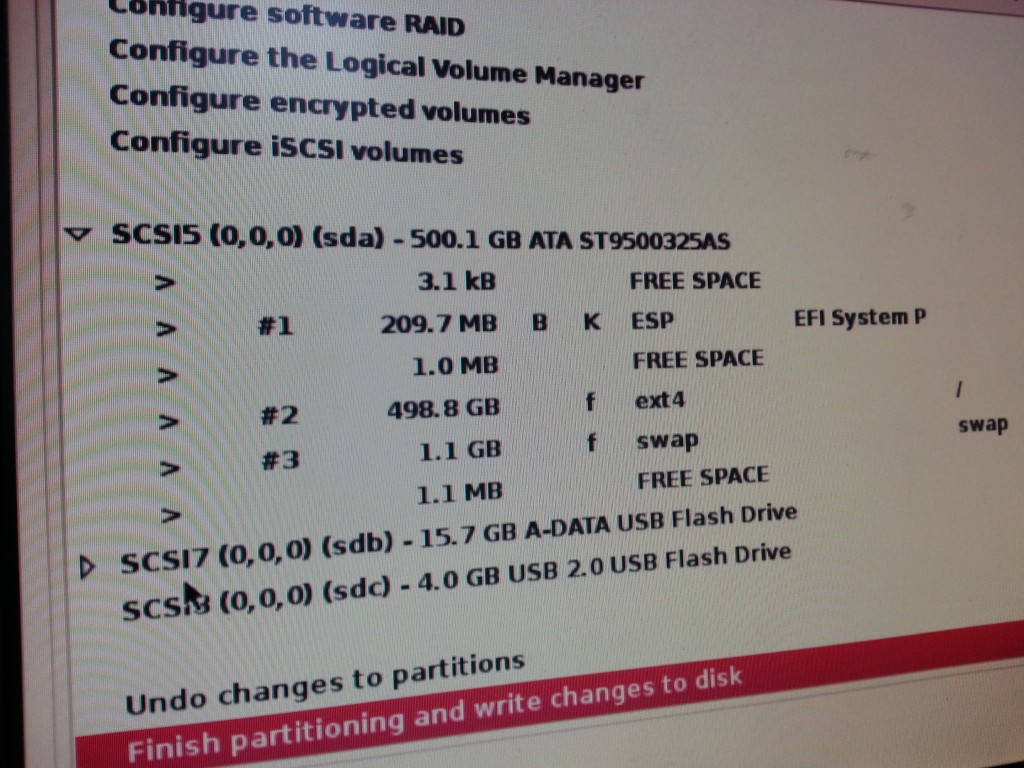
A typical Debian installation followed, only thing I was careful about was not to delete the 209.7MB FAT filesystem used by EFI – I figured I didn’t want to find out what deleting that would mean on a box that was hard enough to boot as it is…

This is an ugly partition table

The small < 1MB free space between the partitions here irks me so much, I blame MacOS for aligning the partitions weirdly.

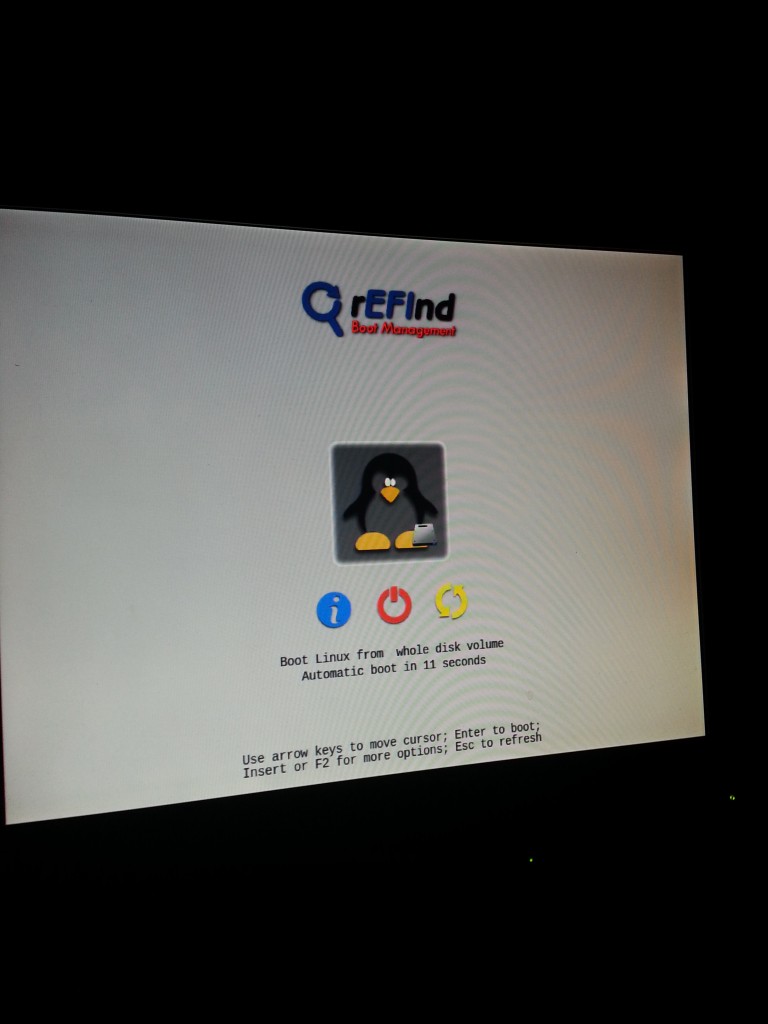
Once installed. rEFInd detected Linux as the OS installed on the hard drive and booted into GRUB and from there the usual Linux boot process works fine.

Launch the penguins!

Launch the penguins!

This spec sheet violates the manafacturer's warranty!

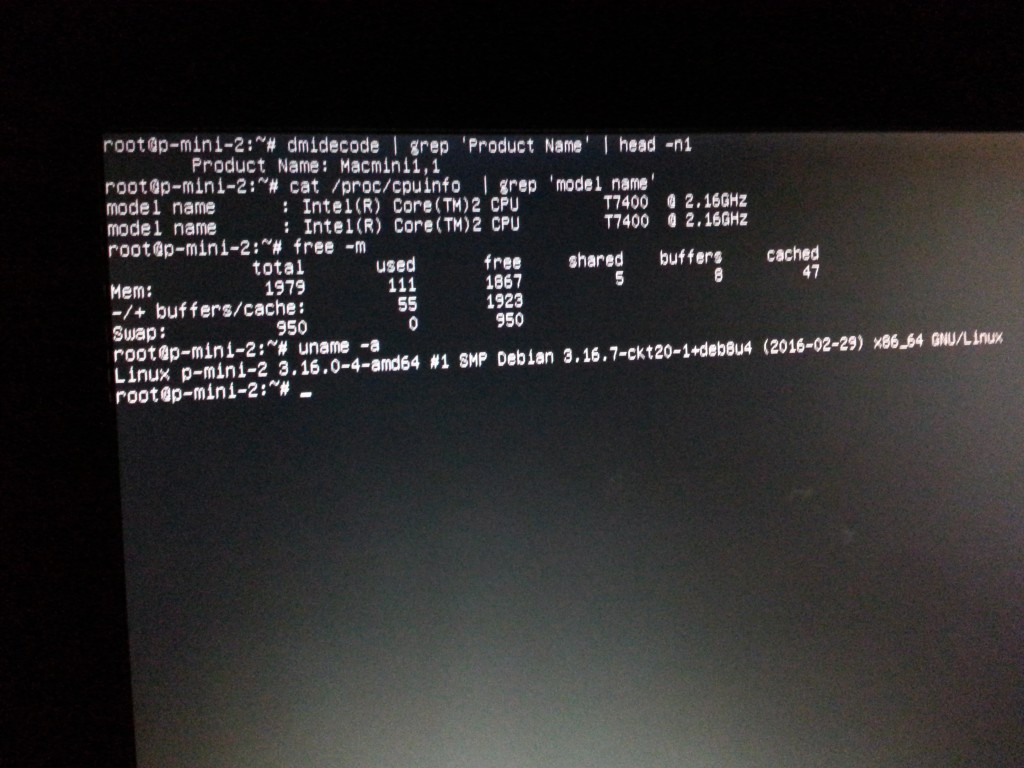
Final result -2GB RAM, 64bit CPU, delicious delicious GNU/Linux x86_64

I can confirm that both 32bit and 64bit Debian works nicely on this box (I installed 32-bit first by mistake) – so even without doing the CPU upgrade, if you want to get a bit more life out of these early unsupported Mac Minis, they’d happily run a 32-bit Debian desktop so you can enjoy wonders like a properly patched browser and operating system.

Not all other distributions will work – Ubuntu for example don’t include EFI support on their 32-bit installer which will probably cause some headaches. You should be OK with any of the major 64-bit distributions since they tend to always support EFI.


The final joy I ran into is that when I set up the Mac Mini as a headless box, it didn’t boot… it just turned on and never appeared on the network.

Seems that the Mac Minis (even the later unibody generation) have some genius firmware that disables the GPU hardware if no screen is attached, which then messes up most operating systems on it.

The easy fix, is to hack together a fake VGA load by connecting a 100Ω resister between pins 2 and 7 of a DVI-to-VGA adaptor (such as the one that ships with the Mac Mini).

I need to make a tidier/better version of this, but it works!

I need to make a tidier/better version of this, but it works!

No idea what engineer thought this was a good feature, but thankfully it’s an easy and cheap fix, especially since I have a box littered with these now-useless adaptors.


The end result is that I now have 2x 64-bit first gen Mac Minis running Debian GNU/Linux for a cost of around $20NZD and some time dismantling/reassembling them.

I’d recommend these small Mac Minis for server purposes, but the NZ second hand prices are still a bit too expensive for their age to buy specifically for this… Once they start going below $100 they’d make reasonable alternatives to something like the Intel NUC or Raspberry Pi for small serving tasks.

The older units aren’t necessarily problem free either. Whilst the build quality is excellent, after 10 years things don’t always work right. Both of my optical drives no longer function properly and one of the Mac Minis has a faulty RAM slot, limiting it to 1GB instead of the usual 2GB.

And of course at 10 years whom knows how much longer they’ll run for – but it’s been a good run so far, so here’s to another 10 years (hopefully)! The real limiting factor is going to be the 1GB/2GB RAM long term.

How much swap should I use on my VM?

Lately a couple people have asked me about how much swap space is “right” for their servers – especially in the context of running low spec machines like AWS t2.nano/t2.micro or Digital Ocean boxes with low allocations like 1GB or 512MB RAM.

The old fashioned advice was always “your swap space should be double your RAM” but this doesn’t actually make a lot of sense any more. Really swap should be considered a tool of last resort – a hack even – to squeeze a bit more performance out of systems and should be used sparingly where it makes sense.

I tend to look after two different types of systems:

  1. Small systems running a specific dedicated service (eg microservices). These systems might do nothing more than run Nginx/Apache or something like PHP-FPM or Unicorn with a few workers. They typically have 512MB-1GB of RAM.
  2. Big heavy servers running heavy weight applications, typically Java. These systems will be configured with large memory allocations (eg 16GB) and be configured to allocate a specific amount of memory to the application (eg 10GB Java Heap) and to keep the rest free for disk cache and background apps.

The latter doesn’t need swap. There’s no time I would ever want my massive apps getting pushed into swap for a couple reasons:

  • Performance of these systems is critical. We’ve paid good money to allocate them specific amounts of memory which is essentially guaranteed – we know how much the heap needs, how much disk cache we need and how much to allocate to the background apps.
  • If something does go wrong and starts consuming too much RAM, rather than having performance degrade as the server tries to swap, I want it to die – and die fast. If Puppet has decided it wants 7 GB of RAM, I want the OOM to step in and slaughter it. If I have swap, I risk everything on the server being slowed down as it moves tasks into the horribly slow (even on SSD) swap space.
  • If you’re paying for 16GB of RAM, why do you want to try and get an extra 512MB out of some swap space? It’s false economy.

For this reason, our big boxes are all swapless. But what about the former example, the small microservice type boxes, or your small personal VPS type systems?

Like many things in IT, “it depends”.

If you’re running stateless clusters, provided that the peak usage fits within the memory allocation, you don’t need swap. In this scenario, your workload is sized appropriately and if anything goes wrong due to an unexpected issue, the machine will either kill the errant process or die and get removed from the pool entirely.

I run a lot of web app workers this way – for example a 1GB t2.micro can happily run 4 Ruby Unicorn workers averaging around 128MB each, plus have space for Puppet, monitoring and delayed jobs. If something goes astray, the process gets killed and the usual automated recovery processes handle things.

However you may need some swap if you’re running stateful systems (pets) where it’s better for them to go slow than to die entirely, or if you’re running a system where the peak usage won’t fit within the memory allocation due to tight budget constraints.

For an example of tight budget constraints – I run this blog on a small machine with only 512MB RAM. With an allocation this small, there’s just not enough memory to run applications like Apache and also be able to handle the needs of background daemons and Puppet runs which can use several hundred MB just by themselves.

The approach I took was to create a small swap volume and size the worker counts in Apache so that the max workers at average size would just fit within the real memory allocation. However any background or system tasks, would have to fight over the swap space.

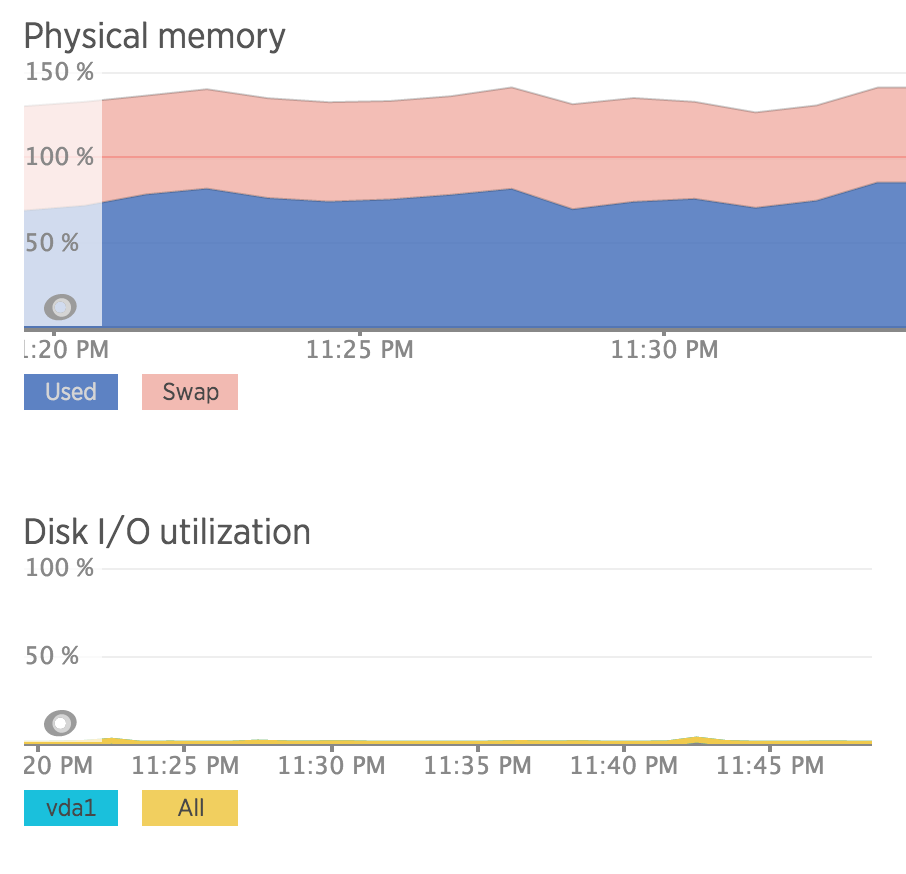
Screen Shot 2016-03-03 at 23.52.58

What you can see from the above is that I’m consuming quite a bit of swap – but my disk I/O is basically nothing. That’s because most of what’s in swap on this machine isn’t needed regularly and the active workload, i.e. the apps actually using/freeing RAM constantly, fit within the available amount of real memory.

In this case, using swap allows me to get better value for money, than using the next size up machine – I’m paying just enough to run Apache and squeezing in the management tools and background jobs onto the otherwise underutilized SSD storage. This means I can spend $5 to run this blog, vs $10. Excellent!

In respects to sizing, I’m running with a 1GB swap on a 512MB RAM server which is compliant with the traditional “twice your RAM” approach to sizing. That being said, I wouldn’t extend past this, even if the system had more RAM (eg 2GB) you should only ever use swap as a hack to squeeze a bit more out of a system. Basically don’t assume swap will scale linearly as memory scales.

Given I’m running on various cloud/VPS environments, I don’t have a traditional swap partition – instead I create an image file on the root filesystem and format it as swap space – I use a third party Puppet module (https://forge.puppetlabs.com/petems/swap_file) to do this:

swap_file::files { 'default':
  ensure            => present,
  swapfile         => '/tmp/swapfile',
  swapfilesize  => '1000 MB’
}

The performance impact of using a swap file ontop of a filesystem is almost nothing and this dramatically simplifies management and allocation of swap space. Just make sure you’re not using tmpfs for that /tmp path or you’ll find that memory benefit isn’t as good as it seems.

/tmp mounted as tmpfs on CentOS

After a recent reboot of my CentOS servers, I’ve inherited an issue where the server comes up running with /tmp mounted using tmpfs. tmpfs is a memory-based volatile filesystem and has some uses for people, but others like myself may have servers with very little free RAM and plenty of disk and prefer the traditional mounted FS volume.

Screen Shot 2016-02-17 at 23.06.28

As a service it should be possible to disable this as per the above comment… except that it already is – the following shows the service disabled on both my server and also by default by the OS vendor:

Screen Shot 2016-02-17 at 22.50.23

The fact I can’t disable it, appears to be a bug. The RPM changelog references 1298109 and implies it’s fixed, but the ticket seems to still be open, so more work may be required… it looks like any service defining “PrivateTmp=true” triggers it (such as ntp, httpd and others).

Whilst the developers figure out how to fix this properly, the only sure way I found to resolve the issue is to mask the tmp.mount unit with:

systemctl mask tmp.mount

Here’s something to chuck into your Puppet manifests that does the trick for you:

exec { 'fix_tmpfs_systemd':
 path => ['/bin', '/usr/bin'],
 command => 'systemctl mask tmp.mount',
 unless => 'ls -l /etc/systemd/system/tmp.mount 2>&1 | grep -q "/dev/null"'
}

This properly survives reboots and is supposed to survive systemd upgrades.