Tag Archives: geek

Anything IT related (which is most things I say) :-)

Experiments with Local LLMS for agentic coding

I don’t often do a heap of hands on stuff these days as a manager, hence the lack of tech blog posts in the past… 5+ years, but I’ve been digging into LLMs a bunch lately, especially in the area of agentic code (“vibe coding”) to see what the state of the technology is.

I’d describe myself as an AI realist, I can see the massive capabilities of the technology and use it daily, but I also don’t fully buy the hype that we’ll have thought leaders vibe coding entire applications without understanding the technology anytime soon. A capable understanding of what the heck it’s doing and what to instruct it to do is a key requirement IMHO. That said, I like to regularly challenge my assumptions around technology and nothing beats that than getting hands on with it.

I’ve used cloud based frontier models like GPT-4.1, Claude, etc. These have been surprisingly good when doing greenfield development, especially in well understood domains like web SaaS development coupled with clear requirements in prompts.

One challenge I can see is the rate of token consumption, especially once the current VC-fueled loss leader era runs dry and we’re actually paying for the GPU time consumed. So wanted to run some tests with local LLMs and see what’s possible there with the technology available today.

To be clear, I didn’t expect local to beat big cloud, but I was interested to see exactly how far behind the local options are in terms of hardware+model capabilities.

The Setup

I picked a simple example – an old Lambda I wrote back in 2017 and have basically not maintained since as it’s feature complete and AWS let me keep on using the node14 runtime. (The day Amazon introduces extended support pricing for older Lambda runtimes will be a tough day for me 😅).

This is ideal for a test of refactoring legacy code:

  • Old JS standards and library choices
  • Old v2 AWS SDK
  • Last built on Node 14
  • Using early pre-release version of the Serverless framework.
  • Simple “one file” app that shouldn’t tax any models with too much complexity.

For the test I enrolled my Windows gaming machine for the task. Unfortunately the AMD RX580 8GB GPU it had, whilst great for my basic gaming needs, is pretty unloved by the AI development community and wasn’t going to cut it (side note: this GPU is abandoned in ROCM but you can get it to run with llama.cpp using Vulkan, so it’s not incapable, just not the prime choice in an ecosystem that is extremely NVIDA centric. The vRAM size is also pretty small vs the sizes needed these days).
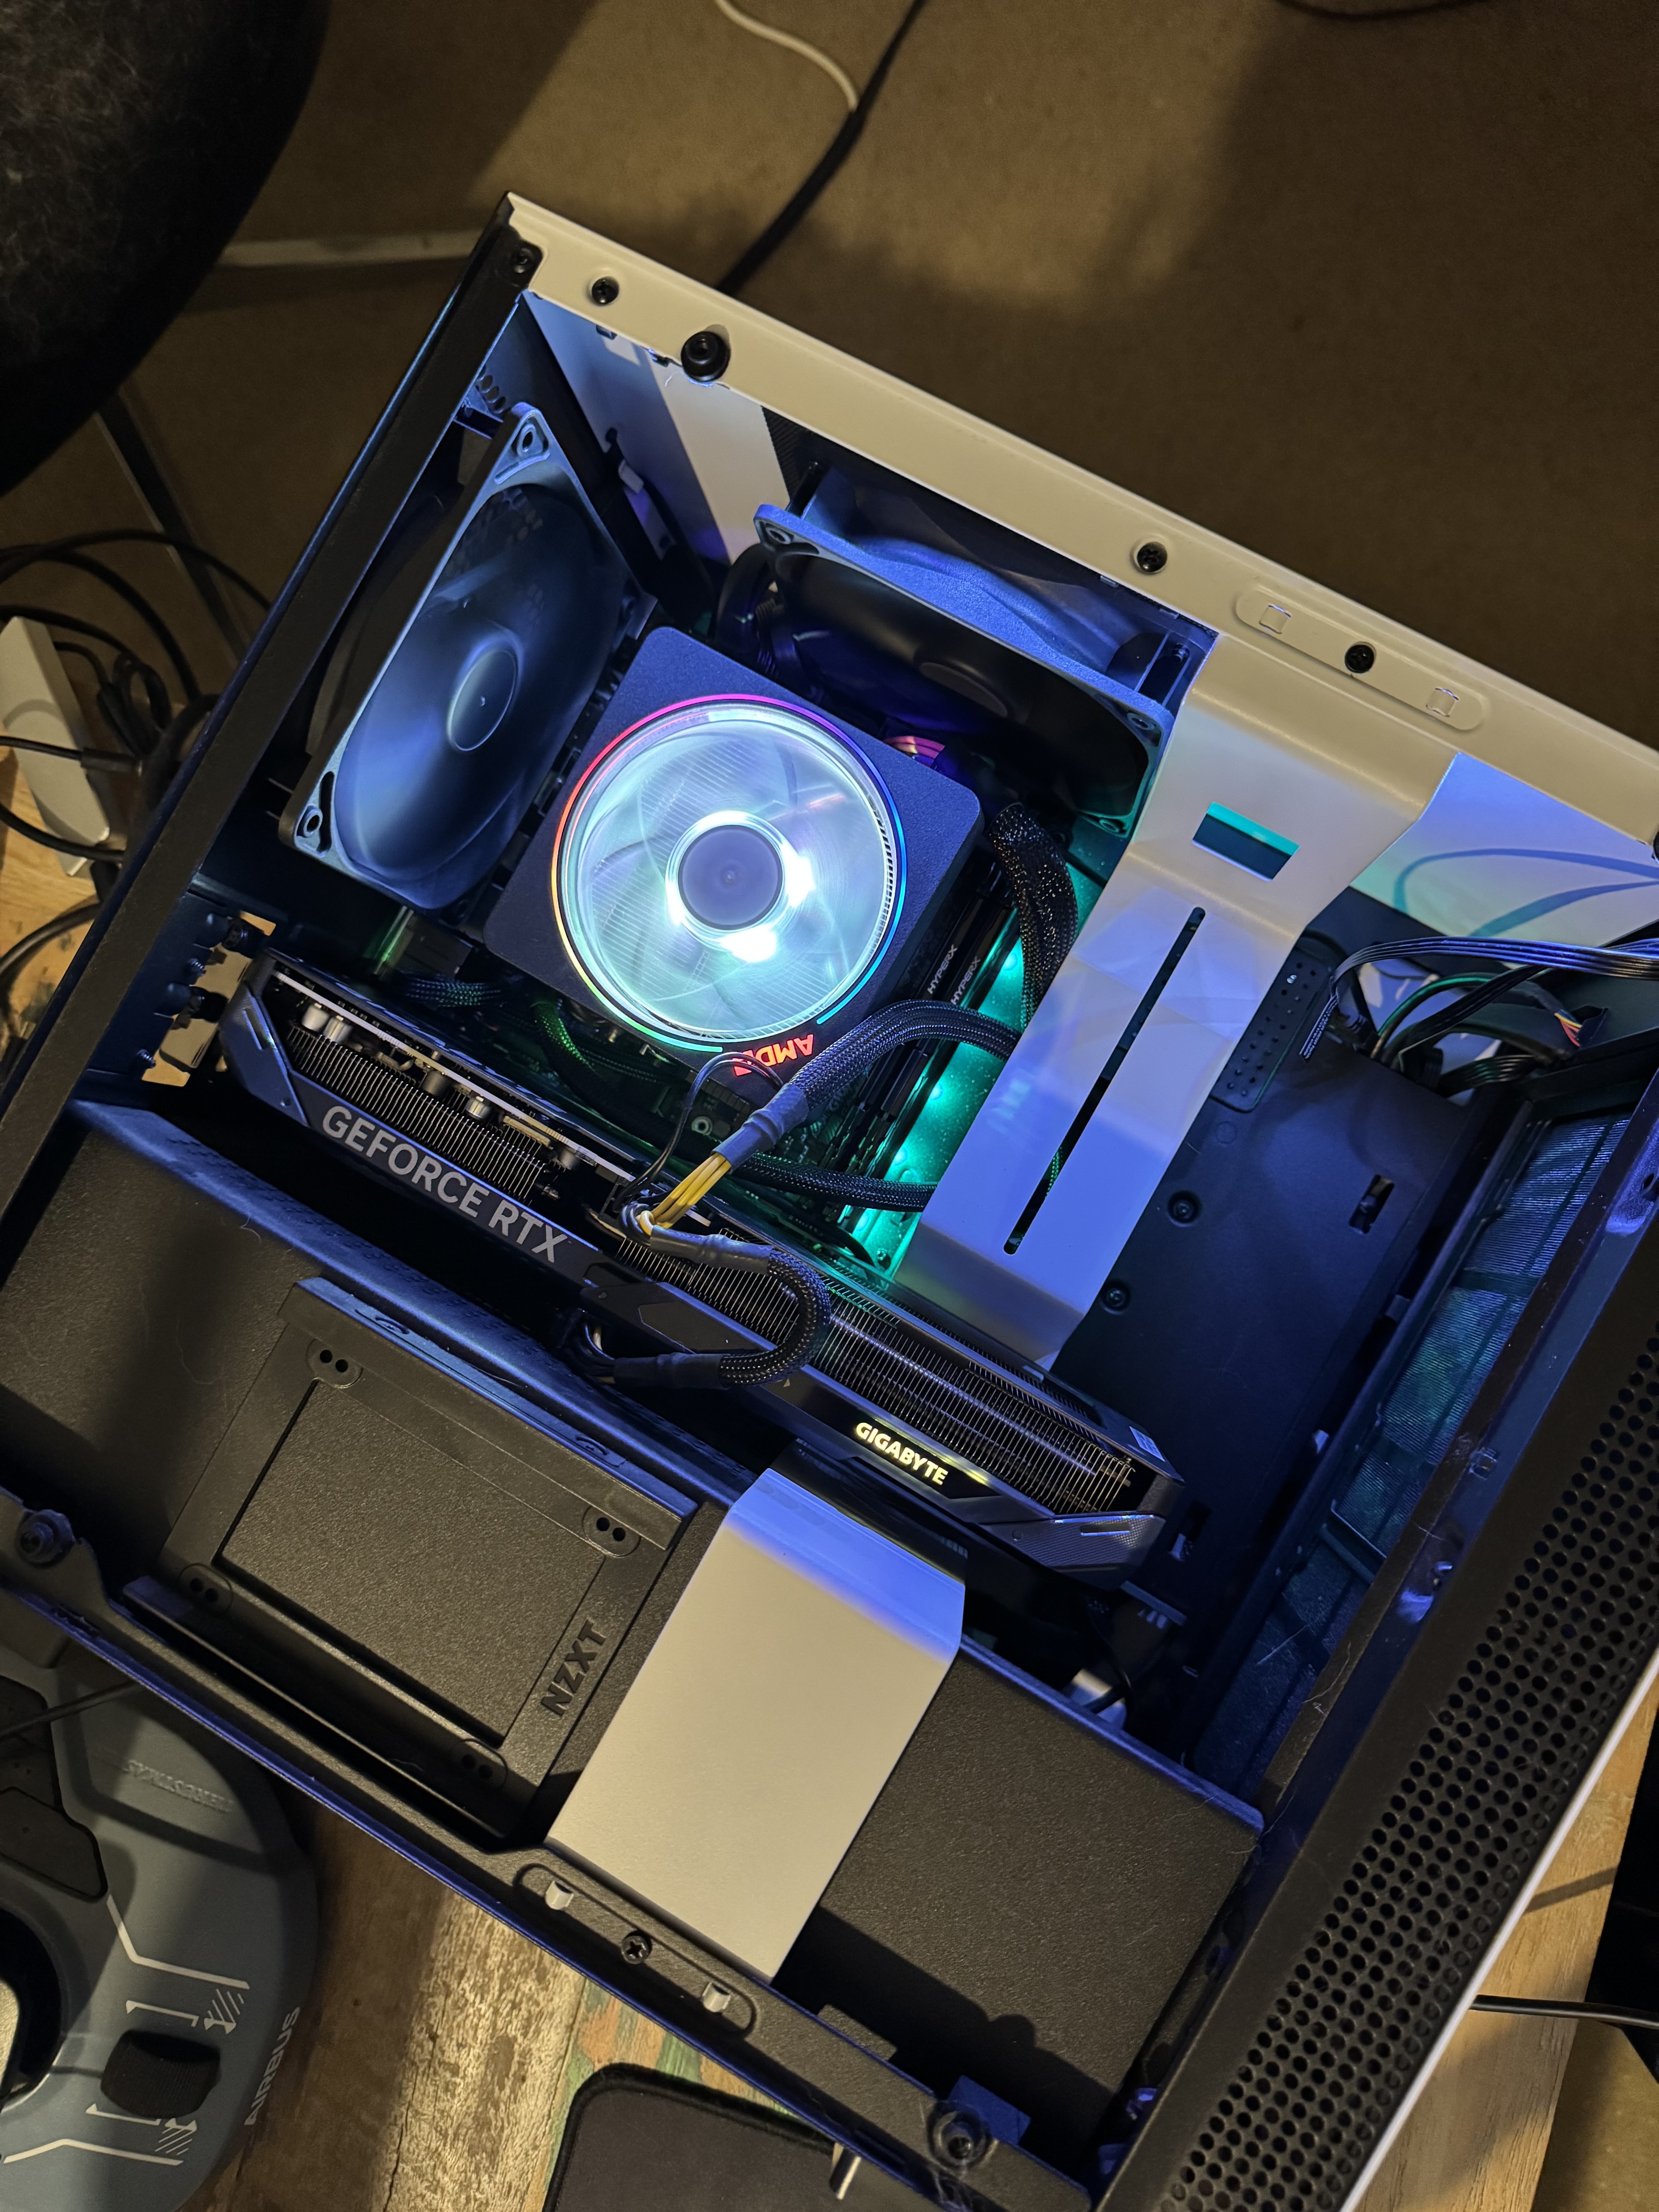
Big fan of these small mini ITX tower builds – enough room to fit an entire GPU without being a massive tower.

Given the GPU issues, I upgraded it to an 5060ti, which is the most cost effective option I could get ($1000 NZD / ~$590 USD) that could run models reasonably well without breaking the bank. To get more vRAM, I’d end up needing a 5090 which comes in a whopping $5000 NZD / ~$3000 USD which is a bit more than I’d like to spend on this experiment.

End result is a machine with:

  • Windows 11 Home edition
  • AMD Ryzen 7 3700X
  • 32GB DDR4
  • NVIDIA RTX 5060 Ti 16GB

For software, I ran Ollama directly on the host OS and exposed the connection to my Macbook where I was running development tooling and using vscode as the editor.

One challenge is that vscode’s Copilot extension on paper offers support for Local LLM models as well as the cloud models, but Microsoft intentionally blocks them if you’re getting your Copilot account via a business plan of any kind because F you I guess. I worked around this with a tweak to one line of code and built the extension locally, but ended up needing to abandon it and use the Continue.dev extension due to issues with Ollama + CoPilot extension not working together correctly to handle tools with the model, which I was able to work around mostly with Continue.dev’s more flexible options.

Test 1: qwen3-coder:30b

See the PR at https://github.com/jethrocarr/lambda-ping/pull/9 for the full notes, prompts and challenges.

This model is a bit above what my hardware could handle. The model itself is 19GB, but with the larger context windows for agentic workloads, I was consuming almost 26GB of memory which forced it to blend both CPU+RAM, and GPU to operate the model which impacted processing performance considerably.

Because of this, the generation was super slow, it took me a couple hours to complete the project with waiting time for the various prompt runs. Unworkable as a normal workflow. To run this workload, really need 32GB vRAM like an expensive RTX 5090 with 32GB, an (also expensive) Mac Studio with unified memory, or maybe the new framework desktop with it’s AMD AI Max 395+ chip and unified memory.

This model generated valid code, but it wasn’t particularly amazing work. It introduced a bug where only HTTPS requests would work (breaking HTTP) and required a prompt to fix, which it did with making a conditional to handle HTTP vs HTTPs. It also didn’t adopt AWS SDK v3 until specifically instructed to do so.

Test 2: qwen2.5-code:14b

See the PR at https://github.com/jethrocarr/lambda-ping/pull/10 for the full notes, prompts and challenges.

A smaller 9GB model that in theory fits entirely within my GPU, but with the context size, actually took around 19GB forcing again a blend of CPU+RAM and GPU for the task. That said, it was considerably faster with 78% of the workload running inside the GPU and not materially worse than the previous test for this specific coding scenario.

This model also generated valid code although it too had a bug, this time with not tracing duration of the request so was non functional on it’s first iteration. When prompted, it was able to correct.

Test 3: qwen2.5-coder:7b

See the PR at https://github.com/jethrocarr/lambda-ping/pull/11 for the full notes, prompts and challenges.

A smaller model yet again, this one fits entirely within the GPU even with the large context and runs super fast thanks to this. Unfortunately the model is just too simplistic and was unable to build a functional application.

I would describe it as capable of writing “code shaped text”. It technically writes valid Javascript but it just hallucinates up different libraries and mashes library names together. It’s also too simplistic to run properly agentically, so it ended up with me copying it’s output into the editor for each file it generated.

Test 4: Cloud LLM using Copilot and GPT-41.

See the PR at https://github.com/jethrocarr/lambda-ping/pull/12 for the full notes, prompts and challenges.

I was originally intending to use Copilot with a few different models so started with the lesser premium GPT-4.1 and… it just hit it right out of the gate immediately, no point even looking at the others. It essentially took a single prompt to refactor the JS into modern standards, moved to AWS-SDK v3 without prompting and the only other prompts were to clean up some old deps it no longer needed and adjust the node runtime for Lambda.

I did follow up with a stretch goal of trying to move it from Serverless to AWS SAM and it struggled a bit more here. I guess LLMs are a bit like many developers and struggle with devops/infrastructure tasks, so maybe devops has a bit more job security for a while… Essentially it got about 70% of the way there but had some mistakes with IAM policies and wrote files into some weird paths that needed moving around.

Learnings

  • Hardware and affordability is a big challenge to do serious agentic work locally. The hardware exists, but maybe not at a price most are willing to pay, specially when there’s a heap of cloud offerings right now at suspiciously cheap prices. Whether this can be sustained and what it ends up costing is yet TBD, there’s a lot of speculation about what the true operating costs are and pricing models/plans seem to change every 6 months as companies figure out what works.
  • Ultimately if the value is there for the customer, the price being charged by cloud could scale somewhat infinitely. $200/mo for Cursor for a hobbyist is a lot, for a professional development shop, it’s chump change vs labour costs. If AI can make a developer 2x more effective and costs $2,000 /mo? Still a bargain vs labour costs for a business.
  • Local LLMs are a hedge against the above, if a cloud vendor gets too greedy, at certain levels it becomes more cost effectively to lease or buy raw GPU power to run your own models. Of course there’s the issue of NVIDA having a defacto monopoly on AI capable GPU hardware these past few years, but AMD seems to be catching up and bringing out great new products like Strix Halo, enabling products like the Framework Desktop with an AMD AI MAX 395+ with up to 128GB of RAM. It might not have the fastest GPU cores ever, but it sure has a heap of unified memory to give those GPU cores a seriously massive pool of RAM. And of course Apple’s M-series architecture delivers similar capabilities, at a price premium.
  • Time solves the above, the local LLMs feel like where ChatGPT was a few years ago. And computer hardware goes through periods where the technology is extremely expensive before trickling down to the consumer, given a few more years, it’s fesible that we could see GPT-4.1 performance capabilities from affordable commodity hardware.
  • When factoring in memory size, it’s not just the size of the model, it the model + all the context size. Can easily double the effective working memory required making the hardware needed even more expensive.
  • All the models struggled with the more infra/devopsy type workload of needing to update a legacy deployment framework. I think this hints at a bit of the technology limitations right now, this specific scenario won’t have much reference material online to have trained on and requires somewhat specific understanding of the tool and AWS ecosystem. As a former devops and Linux nerd this gives me the warm and fuzzies about job security… until next year’s release of AI lifts the bar again and can just talk directly to AWS or something.
  • Windows is surprisingly… less trash than it used to be. Some key bits:
    • WSL 2 (Linux on Windows) works, and most importantly for this topic, has GPU passthrough support so you can run CUDA workloads on a Linux environment using the NVIDA hardware on the host itself. This is a massive win for anyone doing any kind of AI experimentation but not wanting to dual boot their gaming box or just not comfortable setting up Linux as a lab OS.
    • Windows includes OpenSSH server now. Yeah I was surprised to. In true windows fashion it’s a bit clunky but you can now SSH into powershell once it’s setup. I haven’t yet been able to get SSH keys to work so it’s password auth only right now.
    • Docker on Windows uses the WSL subsystem so again, has GPU access.
    • WinGet gives windows a half usable package manager.
    • If you enable SVM virtualization and your Windows install just immediately bluescreens at boot, make sure mini dump is enabled and you can capture some kernel dumps and open it up to review. In my case, there was a legacy driver that crashed when running under hyper v that I was able to isolate and delete. Reading online, a lot of folks seem to resort to doing a windows reinstall to fix issues with being unable to enable SVM.
    • WSL is a little funky with grabbing a lot of RAM for itself, for someone like myself running a mix of workloads in containers and a on the host OS, I may need to startup/shutdown when changing mode (eg AI lab vs Gaming) as WSL doesn’t dynamically claw back RAM that well so you end up with a Linux VM holding onto 10GB of RAM for 1GB of idle workloads.

Rabbit Hole: Hardware

I haven’t really kept up with hardware in a major way in the past few years, so it was interesting researching ways to run local LLM workloads. ChatGPT is actually very good with an encyclopaedic knowledge of CPUs and chipset PCIe lane setups, and there is a heap of real world reports on Reddit of different hardware setups. Few things I learnt:

  • My AM4 motherboard has a 16x PCIe slot, but it’s a PCIe 3.0 slot. The NVIDIA RTX 5060 Ti is a PCIe 5.0 card but only 8x. This is fine on PCIe 5.0 where the bus is fast but when running at 3.0 speed, it can bottleneck for AI as the effective bandwidth is 8GB/s vs what could be 32 GB/s. It doesn’t impact gaming which doesn’t get close to this much bandwidth, and it doesn’t impact a single model running entirely in GPU, but it does impact any models spilling to CPU+RAM like in my case when doing agentic workloads with large contexts.
  • Consumer AMD and Intel CPUs don’t actually have heaps of PCIe lanes available. For example, AM5 offers 28 lanes which sounds like a heap, until you realise 16x goes directly to the GPU, 4x to the NVMe slot, 4x to the chipset and 4x general purpose (additional NVMe or expansion 4x slot).
  • This means you’re not going to see consumer motherboards with multiple 16x slots, so sorry , you can’t just build one AM5 box and put in 4x 5060s. Or if a board offers it, it might be getting shared, eg the 16x GPU runs as 2x 8x slots, or you have slots hanging off the chipset and bottlenecked at 4x back to CPU.
  • .. unless you go for server hardware, ie Threadripper, Epyc or Xeon which does have serious amounts of lanes. You can get some good deals on used hardware here, but there’s a spanner in the works with the “good priced” deals having older generations of PCIe 3.0 which limits bandwidth.
  • PCIe 3.0,4.0,5.0 – the difference is essentially 2x performance in bandwidth per generation. So it is a pretty big deal for these bandwidth heavy workloads for AI. It’s not such an issue for a single GPU if the workload fits entirely in vRAM but if using multiple GPUs the bandwidth for moving data between them can become a bottleneck.
  • As a side note of a side note, this is why most consumer NVMe NASes kinda suck performance wise – they’re not using chips capable of providing that many high performance PCIe lanes. They have other wins, like size, power, noise and reliability, but performance is a problem.
    • To get actual max performance on NVMe you will need to use the 16x slot with bifurcation to pack in the M2 NVMe cards , but that then only leaves the PCIe 4x slot for networking.
    • And you’ll need to upgrade networking, as 10Gbits is basically nothing vs the speed of NVMe drives when a single drive is doing ~56Gbits. In theory a PCIe 5.0 4x slot can do 128Gbits but I’ve not seen any QSFP+ cards that are PCIe 5.0 and 4x, most seem to be PCIe 3.0 8x cards, it might take a few more years for this hardware to catch up, the server market seems happy enough with 8x cards which is driving this kind of networking gear.
    • So the most cost effective top-performance NVMe NAS right now, might be something like an “X99” motherboard with used Xeons and a heap of PCIe 3.0 lanes capable of supporting both NVME storage and networking cards. Or, Apple M4-series hardware using Thunderbolt attached NVMe and Thunderbolt/USB4 networking to the Mac workstations needing access to the storage.
    • Whilst I was digging in this subject I basically came to the conclusion that high performance NVMe NASes aren’t worth it right now for consumers. You need power hungry or expensive hardware to run the drives and then you get bottlenecked on network and need to spend a bunch on server grade networking gear. Might as well just get Thunderbolt/USB4 NVMe enclosures and directly connect them to your Mac workstation. Even a Macbook Air with it’s 2x ports can support 1x external screen+power delivery, and 1x NVMe drive concurrently which would meet any editing or other high I/O workflow that you’d conceivable want to run on such a machine.

Rabbit Hole: Other Reading

Firebase FCM upstream with Swift on iOS

I’ve been learning a bit of Swift lately in order to write an iOS app for my alarm system. I’m not very good at it yet, but figured I’d write some notes to help anyone else playing with the murky world of Firebase Cloud Messaging/FCM and iOS.

One of the key parts of the design is that I wanted the alarm app and the alarm server to communicate directly with each other without needing public facing endpoints, rather than the conventional design when the app interacts via an HTTP API.

The intention of this design is that it means I can dump all the alarm software onto a small embedded computer and as long as that computer has outbound internet access, it just works™️. No headaches about discovering the endpoint of the service and much more simplified security as there’s no public-facing web server.

Given I need to deliver push notifications to the app, I implemented Google Firebase Cloud Messaging (FCM) – formerly GCM – for push delivery to both iOS and Android apps.

Whilst FCM is commonly used for pushing to devices, it also supports pushing messages back upstream to the server from the device. In order to do this, the server must be implemented as an XMPP server and the FCM SDK be embedded into the app.

The server was reasonably straight forwards, I’ve written a small Java daemon that uses a reference XMPP client implementation and wraps some additional logic to work with HowAlarming.

The client side was a bit more tricky. Google has some docs covering how to implement upstream messaging in the iOS app, but I had a few issues to solve that weren’t clearly detailed there.


Handling failure of FCM upstream message delivery

Firstly, it’s important to have some logic in place to handle/report back if a message can not be sent upstream – otherwise you have no way to tell if it’s worked. To do this in swift, I added a notification observer for .MessagingSendError which is thrown by the FCM SDK if it’s unable to send upstream.

class AppDelegate: UIResponder, UIApplicationDelegate, MessagingDelegate {

 func application(_ application: UIApplication, didFinishLaunchingWithOptions launchOptions: [UIApplicationLaunchOptionsKey: Any]?) -> Bool {
   ...
   // Trigger if we fail to send a message upstream for any reason.
   NotificationCenter.default.addObserver(self, selector: #selector(onMessagingUpstreamFailure(_:)), name: .MessagingSendError, object: nil)
   ...
 }

 @objc
 func onMessagingUpstreamFailure(_ notification: Notification) {
   // FCM tends not to give us any kind of useful message here, but
   // at least we now know it failed for when we start debugging it.
   print("A failure occurred when attempting to send a message upstream via FCM")
 }
}

Unfortunately I’m yet to see a useful error code back from FCM in response to any failures to send message upstream – seem to just get back a 501 error to anything that has gone wrong which isn’t overly helpful… especially since in web programming land, any 5xx series error implies it’s the remote server’s fault rather than the client’s.


Getting the GCM Sender ID

In order to send messages upstream, you need the GCM Sender ID. This is available in the GoogleService-Info.plist file that is included in the app build, but I couldn’t figure out a way to extract this easily from the FCM SDK. There probably is a better/nice way of doing this, but the following hack works:

// Here we are extracting out the GCM SENDER ID from the Google
// plist file. There used to be an easy way to get this with GCM, but
// it's non-obvious with FCM so here's a hacky approach instead.
if let path = Bundle.main.path(forResource: "GoogleService-Info", ofType: "plist") {
  let dictRoot = NSDictionary(contentsOfFile: path)
  if let dict = dictRoot {
    if let gcmSenderId = dict["GCM_SENDER_ID"] as? String {
       self.gcmSenderId = gcmSenderId // make available on AppDelegate to whole app
    }
  }
}

And yes, although we’re all about FCM now, this part hasn’t been rebranded from the old GCM product, so enjoy having yet another acronym in your app.


Ensuring the FCM direct channel is established

Finally the biggest cause I had for upstream message delivery failing, is that I was often trying to send an upstream message before FCM had finished establishing the direct channel.

This happens for you automatically by the SDK whenever the app is loaded into foreground, provided that you have shouldEstablishDirectChannel set to true. This can take up to several seconds after application launch for it to actually complete – which means if you try to send upstream too early, the connection isn’t ready, and your send fails with an obscure 501 error.

The best solution I found was to use an observer to listen to .MessagingConnectionStateChanged which is triggered whenever the FCM direct channel connects or disconnects. By listening to this notification, you know when FCM is ready and capable of delivering upstream messages.

An additional bonus of this observer, is that when it indicates the FCM direct channel is established, by that time the FCM token for the device is available to your app to use if needed.

So my approach is to:

  1. Setup FCM with shouldEstablishDirectChannel set to true (otherwise you won’t be going upstream at all!).
  2. Setup an observer on .MessagingConnectionStateChanged
  3. When triggered, use Messaging.messaging().isDirectChannelEstablished to see if we have a connection ready for us to use.
  4. If so, pull the FCM token (device token) and the GCM Sender ID and retain in AppDelegate for other parts of the app to use at any point.
  5. Dispatch the message to upstream with whatever you want in messageData.

My implementation looks a bit like this:

class AppDelegate: UIResponder, UIApplicationDelegate, MessagingDelegate {

 func application(_ application: UIApplication, didFinishLaunchingWithOptions launchOptions: [UIApplicationLaunchOptionsKey: Any]?) -> Bool {
  ...
  // Configure FCM and other Firebase APIs with a single call.
  FirebaseApp.configure()

  // Setup FCM messaging
  Messaging.messaging().delegate = self
  Messaging.messaging().shouldEstablishDirectChannel = true

  // Trigger when FCM establishes it's direct connection. We want to know this to avoid race conditions where we
  // try to post upstream messages before the direct connection is ready... which kind of sucks.
  NotificationCenter.default.addObserver(self, selector: #selector(onMessagingDirectChannelStateChanged(_:)), name: .MessagingConnectionStateChanged, object: nil)
  ...
 }

 @objc
 func onMessagingDirectChannelStateChanged(_ notification: Notification) {
  // This is our own function listen for the direct connection to be established.
  print("Is FCM Direct Channel Established: \(Messaging.messaging().isDirectChannelEstablished)")

  if (Messaging.messaging().isDirectChannelEstablished) {
   // Set the FCM token. Given that a direct channel has been established, it kind of implies that this
   // must be available to us..
   if self.registrationToken == nil {
    if let fcmToken = Messaging.messaging().fcmToken {
     self.registrationToken = fcmToken
     print("Firebase registration token: \(fcmToken)")
    }
   }

   // Here we are extracting out the GCM SENDER ID from the Google PList file. There used to be an easy way
   // to get this with GCM, but it's non-obvious with FCM so we're just going to read the plist file.
   if let path = Bundle.main.path(forResource: "GoogleService-Info", ofType: "plist") {
    let dictRoot = NSDictionary(contentsOfFile: path)
     if let dict = dictRoot {
      if let gcmSenderId = dict["GCM_SENDER_ID"] as? String {
       self.gcmSenderID = gcmSenderId
     }
    }
   }

  // Send an upstream message
  let messageId = ProcessInfo().globallyUniqueString
  let messageData: [String: String] = [
   "registration_token": self.registrationToken!, // In my use case, I want to know which device sent us the message
   "marco": "polo"
  ]
  let messageTo: String = self.gcmSenderID! + "@gcm.googleapis.com"
  let ttl: Int64 = 0 // Seconds. 0 means "do immediately or throw away"

  print("Sending message to FCM server: \(messageTo)")

  Messaging.messaging().sendMessage(messageData, to: messageTo, withMessageID: messageId, timeToLive: ttl)
  }
 }

 ...
}

For a full FCM downstream and upstream implementation example, you can take a look at the HowAlarming iOS app source code on Github and if you need a server reference, take a look at the HowAlarming GCM server in Java.


Learnings

It’s been an interesting exercise – I wouldn’t particularly recommend this architecture for anyone building real world apps, the main headaches I ran into were:

  1. FCM SDK just seems a bit buggy. I had a lot of trouble with the GCM SDK and the move to FCM did improve stuff a bit, but there’s still a number of issues that occur from time to time. For example: occasionally a FCM Direct Channel isn’t established for no clear reason until the app is terminated and restarted.
  2. Needing to do things like making sure FCM Direct Channel is ready before sending upstream messages should probably be handled transparently by the SDK rather than by the app developer.
  3. I have still yet to get background code execution on notifications working properly. I get the push notification without a problem, but seem to be unable to trigger my app to execute code even with content-available == 1 . Maybe a bug in my code, or FCM might be complicating the mix in some way, vs using pure APNS. Probably my code.
  4. It’s tricky using FCM messages alone to populate the app data, occasionally have issues such as messages arriving out of order, not arriving at all, or occasionally ending up with duplicates. This requires the app code to process, sort and re-populate the table view controller which isn’t a lot of fun. I suspect it would be a lot easier to simply re-populate the view controller on load from an HTTP endpoint and simply use FCM messages to trigger refreshes of the data if the user taps on a notification.

So my view for other projects in future would be to use FCM purely for server->app message delivery (ie: “tell the user there’s a reason to open the app”) and then rely entirely on a classic app client and HTTP API model for all further interactions back to the server.

MacOS High Sierra unable to free disk space

I recently ran out of disk space on my iMac. After migrating a considerable amount of undesirable data to either the file server or /dev/null, I found that despite my efforts, the amount of free disk space had not increased.

I was worried it was an issue with the new APFS file system introduced to all SSD-using Macs as of High Sierra, but in this case it turns out the issue is that Time Machine retains local snapshots on disk, in addition to the full backup history that is retained on the network time machine device.

Apple state that they automatically remove local snapshots when disk space is low, but their definition of low is apparently only 5GB of free space remaining – not really much free working space in 2017 when you might want scratch space of 22GB for 1 hour of 4k 30FPS footage.

On older MacOS releases, it was possible to disable the local snapshot feature entirely, this doesn’t seem to be the case with High Sierra – but it does appear to be possible to force an immediate purge of local snapshots with the following command:

sudo tmutil thinLocalSnapshots / 10000000000 4

For example;

Back into the time vortex with you, filthy snapshots!

Note that this snapshot usage is not visible as a distinct item in the Disk Utility or Storage Management application.

In my case, all the snapshots appeared to be within the last 24 hours, so if I hadn’t urgently needed the disk space, I suspect the local snapshots would have flushed themselves after a 24 hour period restoring considerable disk space.

The fact this isn’t an opt-in user-accessible feature is a shame. It adds convenience for a user of not having to get physical access to the backup drive or time capsule-like-thingy in order to restore data, but any users of systems with SSD-only storage are likely to be a bit precious about how every GB is used and there’s almost no transparency about how much space is being consumed. Especially annoying when you urgently need more space and are stuck wondering why nothing is freeing up room…

Surveillance State “at home” Edition

A number of months ago I purchased a series of Ubiquiti UniFi video surveillance cameras. These are standard IP ethernet cameras and uses a free (as-in-beer) server agent that runs happily on GNU/Linux to manage the recording and motion detection, which makes them a much more attractive offering than other proprietary systems that use their own specific NVRs.

Once I first got them I hooked them up in the house to test with the intention of installing properly on the outside of the house. This plan got delayed somewhat when we adopted two lovely kittens which immediately removed any incentive I had to actually install them properly since it was just too much fun watching the cats rather than keeping an eye out for axe murderers roaming the property.

I had originally ordered the 720p model, but during this time of kitten watching, Ubiquiti brought out a new 1080p “g3” model which provides better resolution as well as also offering a much nicer looking and easier to install form factor – so I now have a mix of both generations.

The following video shows some footage taken from the older 720p model:

During this test phase we also captured the November 2016 Wellington earthquake on the cameras using a mix of both generation of camera:

Finally with the New Year break, I got the time and motivation to get back up into the attic and install the cameras properly. This wasn’t a technically challenging task – mostly just a case of running cabling, but it’s a right PITA due to the difficulty of moving around in my attic thanks to heaps of water pipes, electrical wires, data wires and joists all hidden under a good foot or two of insulation.


On the plus side, the technical requirements for the cameras are pretty simple. Each camera is a Power-over-Ethernet (PoE) device, which means it gets both data and power via a single cable, which makes installation simple – no mains electrical wiring, just need to get a single cat6 cable to wherever you want the camera to sit. The camera then connects to the switch and of course the server running the included software.

I am aware of some vendors selling wireless cameras that use WiFi with a battery that needs to be recharged every so often. I can see the use and appeal for renters, but as a home owner, a hard wired system is going to be much easier and more reliable in the long term.

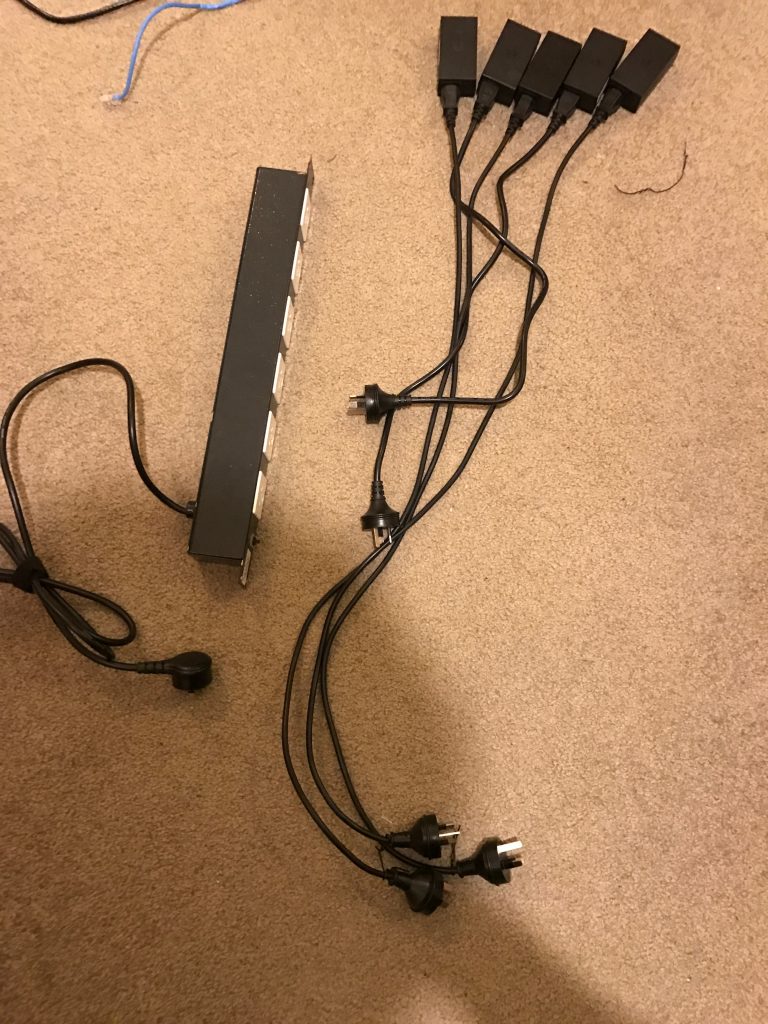
Ubiquiti sell the camera either with or without a PoE adaptor. Using the included PoE adaptor means you can connect them to essentially any existing switch, but if installing a number of cameras this can create a cable management nightmare. I’d strongly recommend a PoE switch if installing more than 5 cameras, even taking into account their higher cost.

A PoE switch suddenly didn’t seem like such an expensive investment…

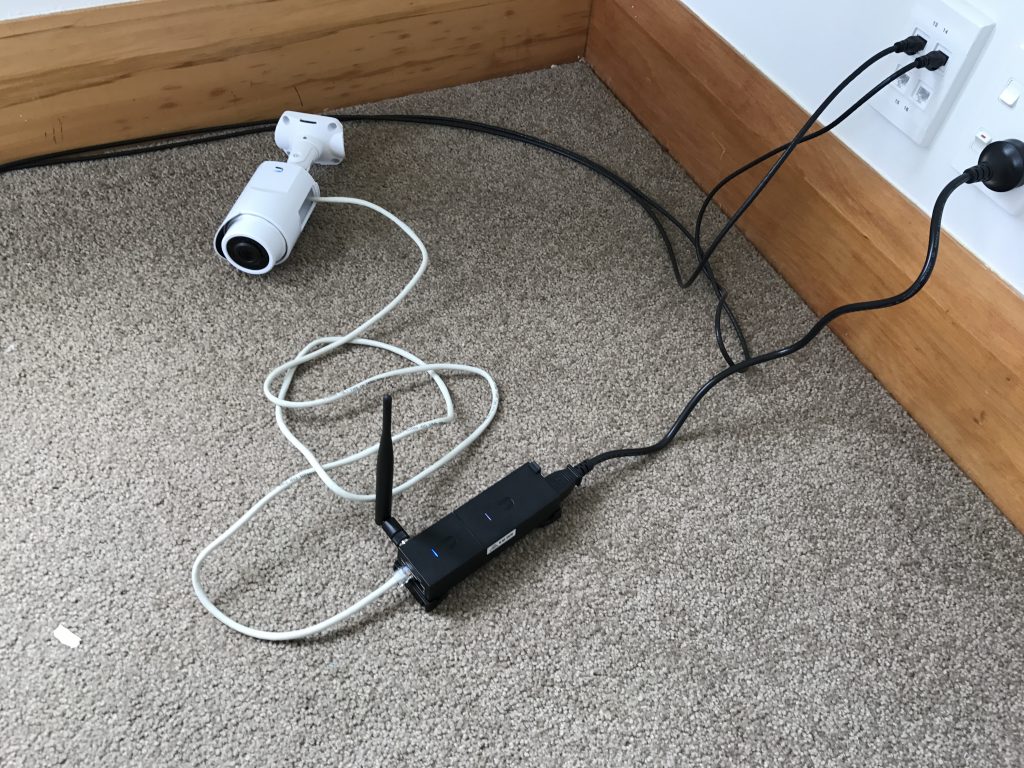
The easiest installation was the remote shed camera. Conveniently the shed has mains electrical wiring, but I needed to install a wireless AP to connect back to the house as running ethernet out there is just a bit too difficult.

I used Ubiquiti’s airGW-LR product which is a low cost access point that is designed to clip to their standard PoE supply. End result is a really tidy setup with a single power supply for both devices and with both devices mounted on a robust bracket for easy installation.

720p camera + airGW + PoE supply

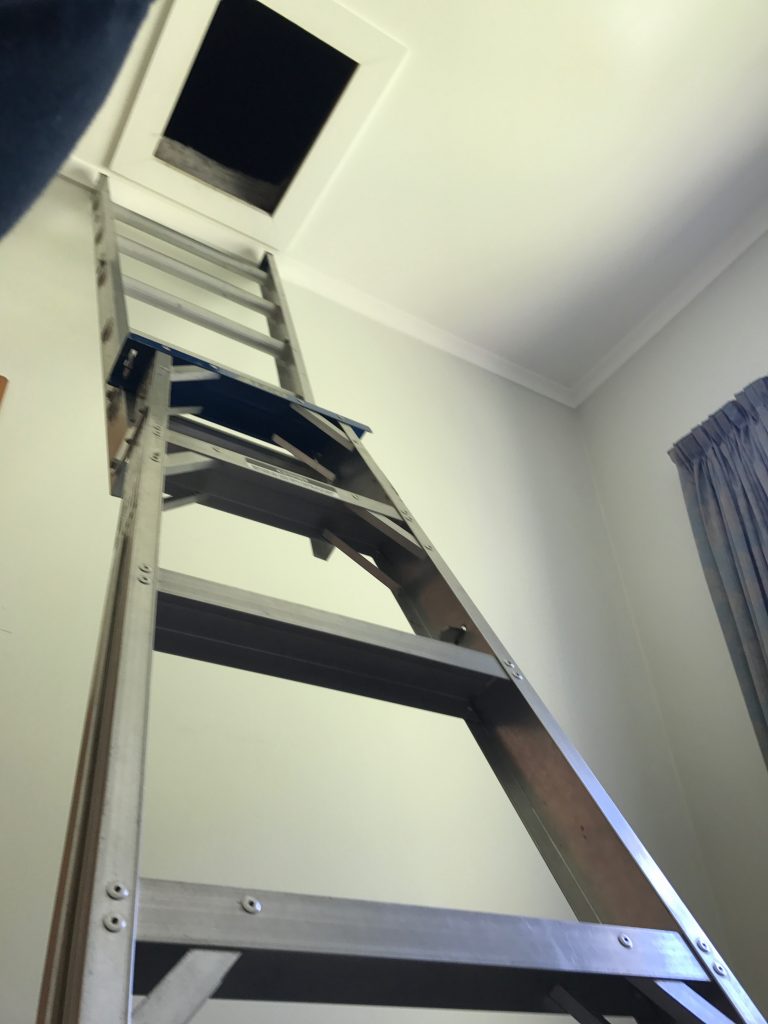
The house cameras were a bit more work. It took me roughly a day to run cabling through the attic – my house isn’t easy to move in the roof or floor space so it takes longer than some others. Also tip – it’s much easier running cabling *before* the insulation is installed, so if you’re thinking of doing both, install the ethernet in advance.

High ceilings and a small attic entrance is just the start of the hassles of running cabling.

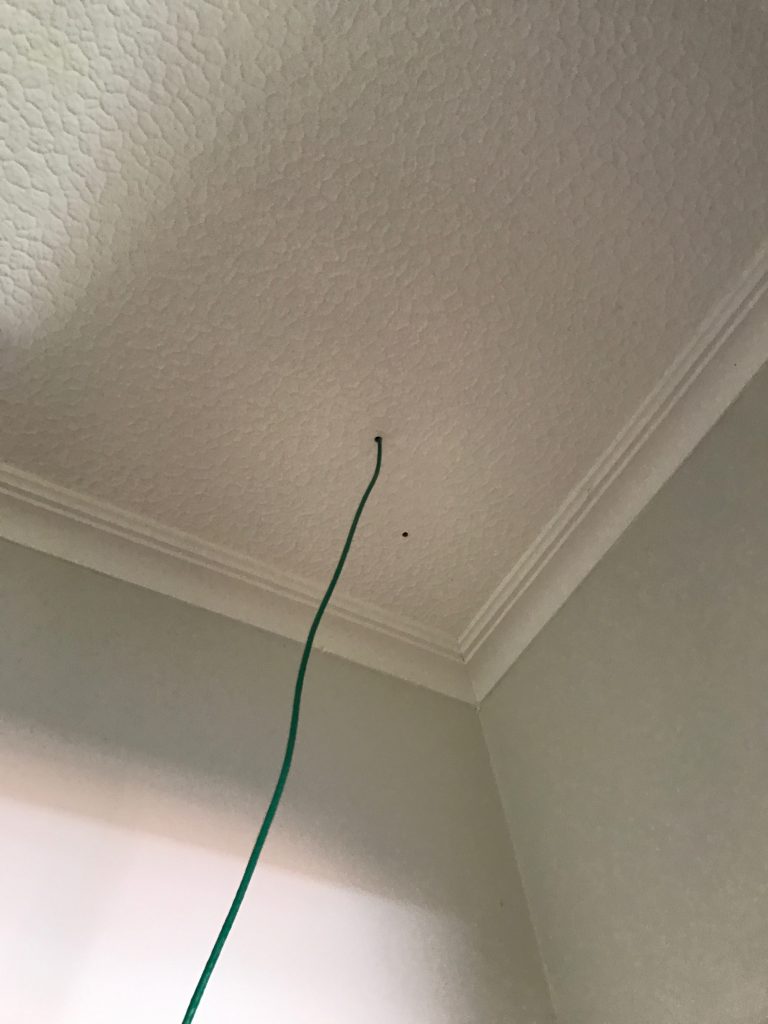
The annoying moment when you drill into a stud and end up with a hole that needs filling again. (with solid hardwood walls and ceilings, stud finders don’t work well at my place)

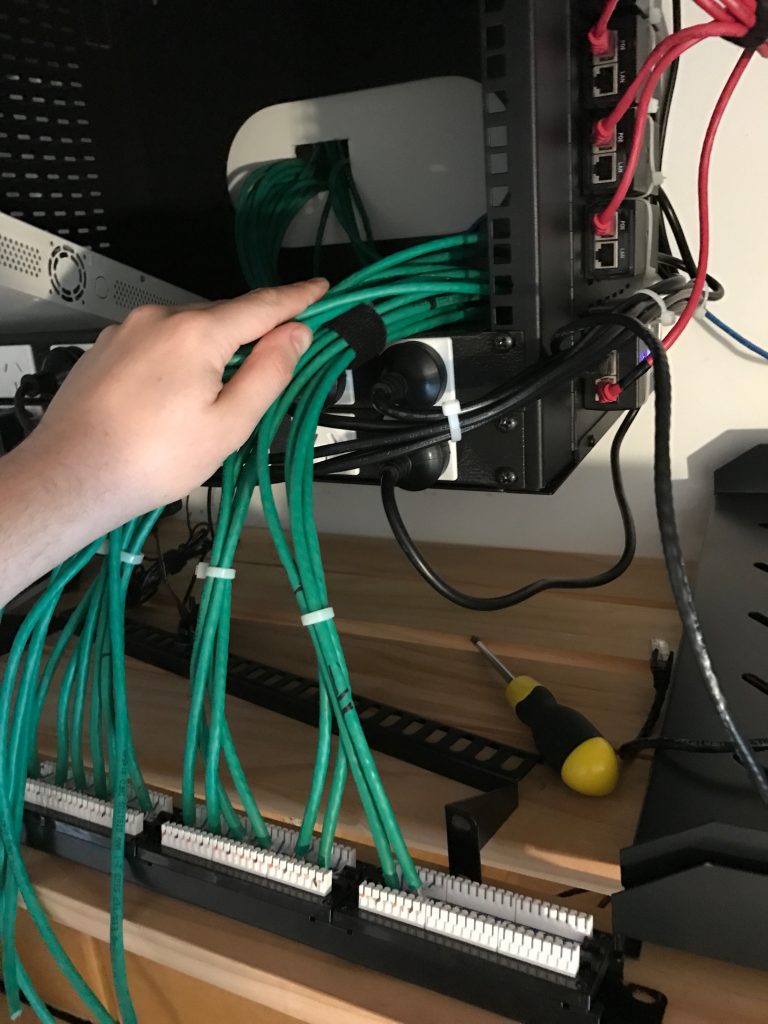
Once the cable run had been completed, I crimped the outside ends with RJ45 connectors for the cameras and then proceeded to take apart the existing patch panel, which also required removing most of the gear in the comms cabinet to free up room to work.

Couple tips for anyone else doing this:

  • I left plenty of excess cable on my ethernet runs. This allowed me to crimp the camera end whilst standing comfortably on the ground, then when I installed the camera I just pushed up all the excess into attic. Ethernet cable is cheap compared to one’s time messing around up at the tops of ladders.
  • The same applies at the patch panel – make sure to leave enough slack to allow you to easily take the patch panel off and work on it in the future – you can see from the picture below I have a good length spare that comes out of the wall.
  • Remember to wire the RJ45 connectors and the patch panel to the same standard – I managed to do T568B at the camera end and T568A at the patch panel on my first attempt.
  • Test each cable as you complete the wiring. Because of this I caught the above issue on the first camera and it saved me a lot of pain in future. A cheap ethernet tester can be found online for ~$10 and is worth having in your tool kit.

Down to only 4/24 ports free on the patch panel! I expect the last 4 will be consumed by WiGig/802.11ad in future, since it will require an AP per-room in order to get high performance, I might even need a second patch panel in future… good thing I brought the large wall mounted cabinet.


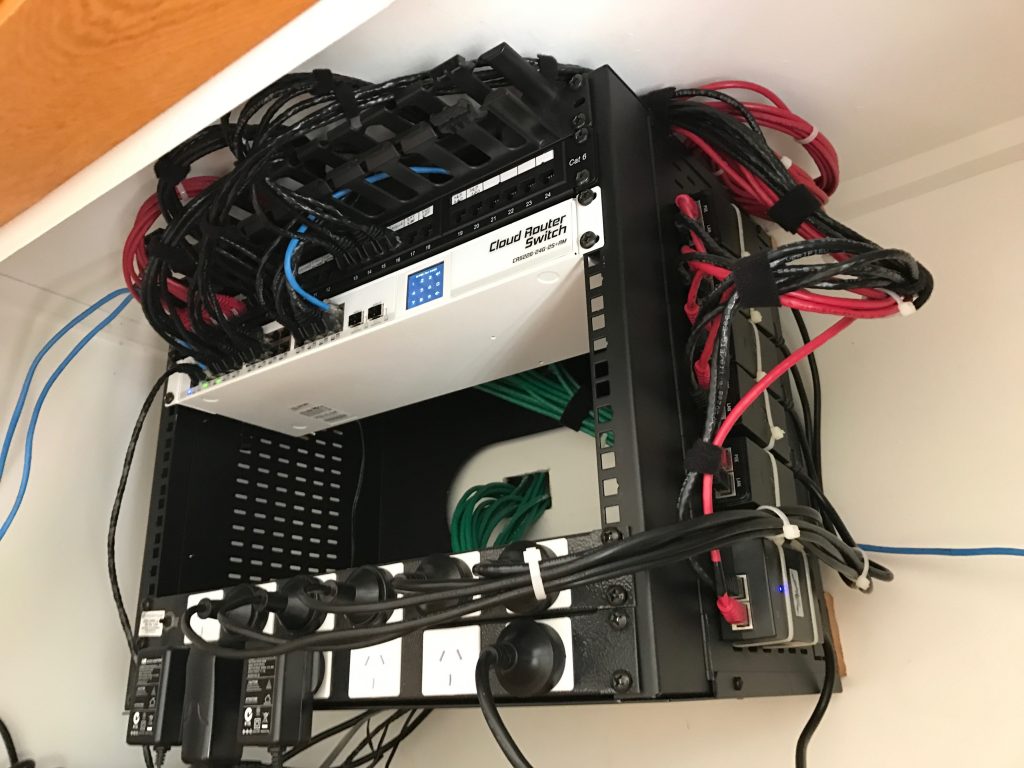
With the cabling done, I connected all the PoE adaptors. These are a bit of a PITA if you’re using a rack – you could get a small rackmount shelf with holes and cable tie down, but I went for cable tying them to the outside of the cabinet.

I also colour coded the output from the PoE adaptors. You need to be careful with passive PoE adaptors, you can potentially damage computers and network equipment if you connect them to the adaptor by mistake so I used the colour coding to make it very clear what cables are what.

Finished cabling installation. About as tidy as I can get it in here without moving to using custom length patch cables…. but crimping 30+ patch cables by hand isn’t my idea of a good time.


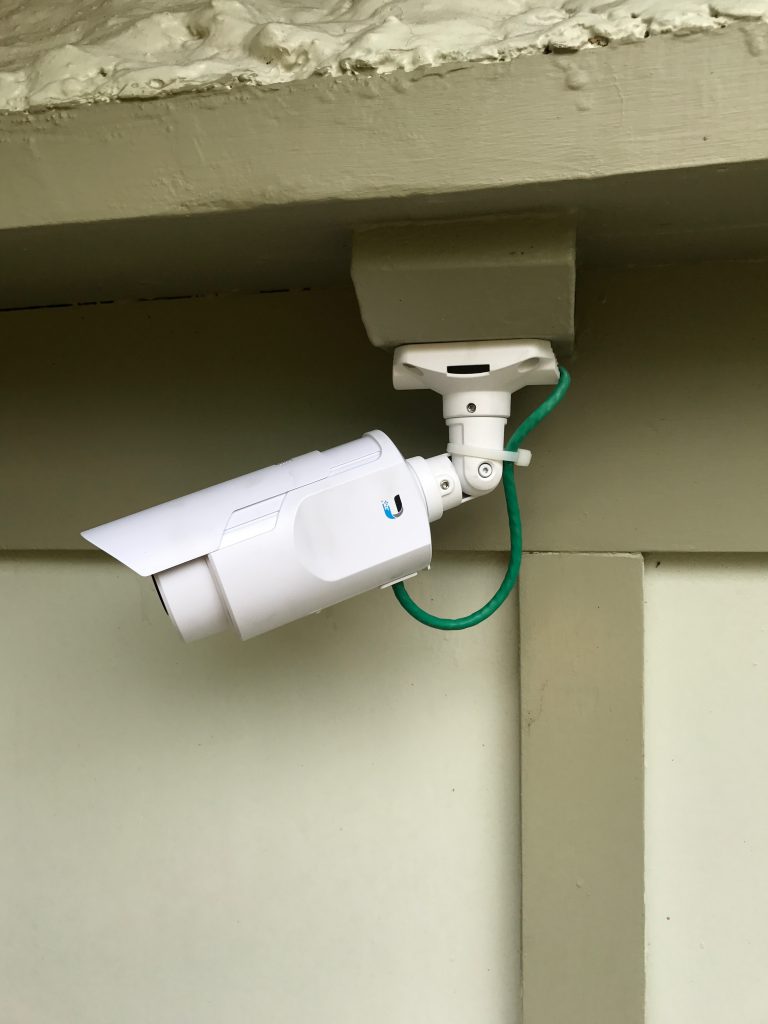
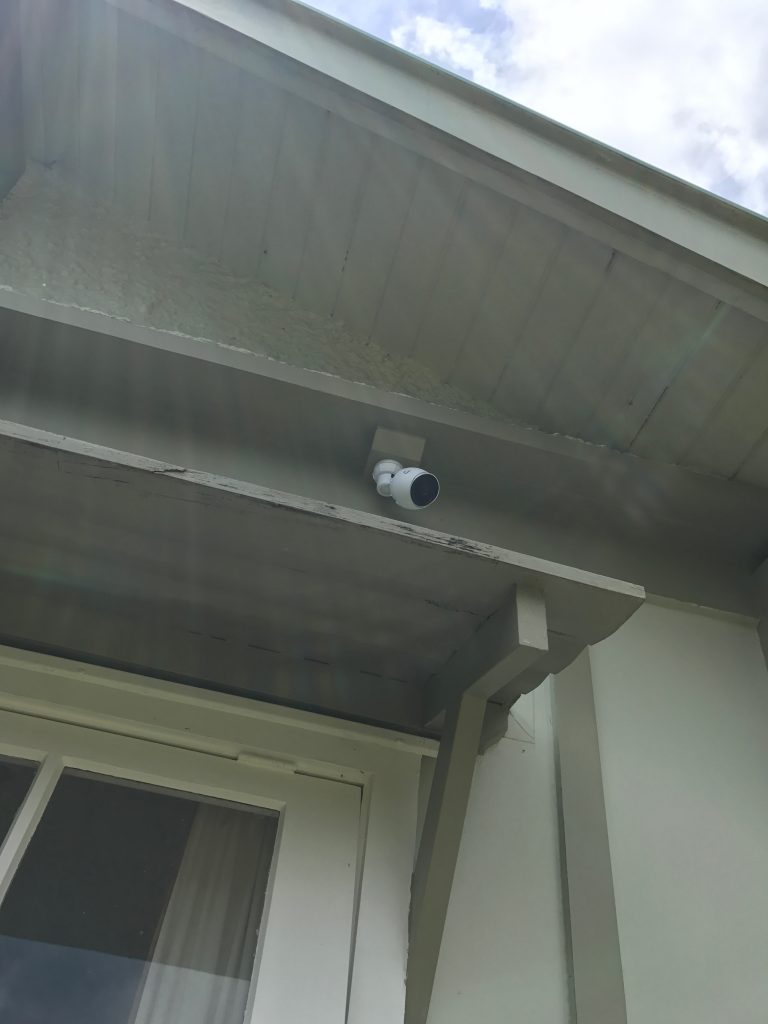
Having completed the cabling and putting together the networking gear and PoE adaptors, I could finally install the cameras themselves. This isn’t particularly hard, basically just need to be able to screw something to the side of the house and then aim the camera in the right position.

The older 720p model is the most annoying to install as it requires adjusting everything using an allen key, plus the cable must be exposed with a drip loop. It’s also more of an eyesore which is a mixed bag – you get better deterrence aspect, but it can look a bit ugly on the house.

The newer model is more aesthetically pleasing, but it’s possible some people might not realise it’s a camera which could be a downside for deterrence.

That being said, they look OK when installed on the house – certainly no worse than the ugly alarm and sensor lights you get on many houses. I even ended up putting one inside to give me complete visibility of the hallway linking every room in the house and it’s not much more visible than a large alarm PIR sensor.

Some additional features worth noting:

  • All the cameras have built in IR, which means they provide decent footage, even at night time. The cameras switch an IR filter on/off automatically as required.
  • All the cameras have built in microphones. Whilst they capture a lot of background wind noise, they’re also quite good at picking up conversations even when outside – it’s a handy tool for gathering intel on any unwanted guests.


With all the hardware completed, onto the software. Ubiquiti supply their server software free-of-charge. It’s easy enough to download and install, but if you have Puppetised your home server (of course you have right?) I have a Puppet module here for you.


Generally I’ve found the software solution (including the iOS mobile app) to be pretty good, but there are two main issues to be aware of with it:

  1. First is that the motion detection is pretty dumb and works on percentage of image changed. This means windy areas with lots of greenery get lots of unwanted recordings made. It doesn’t causing technical issues, but it does make for a noisy set of recordings – don’t expect it to *only* record events of note, you’ll get all the burglars and axe murderers, but also every neighbourhood cat and the nearby trees on windy days. Oh and night time you get lots of footage of moths when they fly close to the camera with the IR night vision on.

  2. Second is that I found a software bug in the mobile apps where they did not validate SSL certs properly and got a very poor response from Ubiquiti. That being said one of their reps recently claimed they’ve hired more security staff to deal with their poor responsiveness, so let’s see what happens on this front.


One feature which is strangely absent, is the lack of support for automatically uploading recordings to a cloud storage service. It’s not possible for everyone, but if on a fast connection (eg VDSL, UFB) it’s worth uploading all recordings to something like Amazon S3 so that an attacker can’t subsequently break in and remove the recording hardware.

My approach was setting up lsyncd to listen to inotify events from Linux every time a video file is written to disk and then quickly copy that file up into Amazon S3 where it remains for a prolonged period.

If you can’t achieve this due to poor internet performance, your best bet is to put the video recording server in a difficult to find and/or access location, sufficient to prevent the casual intruder from finding it. If you have a proper monitored alarm system they shouldn’t be lingering long enough to find it.


Stability seems good. I’ve been running these cameras since April and have never had the server agent or the cameras crash or fail to record. I’m using a Mac Mini for the camera server but you can always buy an embedded black-box NVR solution from Ubiquiti themselves. If you’re on a budget, a second hand Mac Mini or Intel NUC might be better value for money – just make sure it’s 64bit, not an older gen 32bit device.


AirPods

Being tethered to one’s device via a cable has long been an annoyance and with Apple finally releasing their AirPods product, I decided to take the risk of a first adopter of a Gen1 product and ordered a pair.

I seemed to be lucky and had mine arrive on 19th December – I suspect Apple allocated various amounts of stock per region and NZ didn’t have the same level of competition for the early shipments as the US did. Looks like the wait time is now around 6 weeks for new orders.

Fortunately AirPods do not damage my unstoppable sex appeal.

There’s been a heap of reviews online, but I wanted to write a bit about them myself, because frankly, they’re just brilliant and probably the best purchase I’ve made this year.

So why are they so good?

  • Extremely comfortable – I found them a lot lighter than I expected them to be and they stay in my ears properly without any discomfort or looseness. This is with the caveat that the old wired EarPods also fitted me well, I’m sure that this won’t be the case for everyone.
  • Having music automatically pause when you remove them is just awesome. It’s an example of the Apple of old making intuitive tech that you don’t need to think about controlling, because it just does what it should. Take AirPods out? Probably don’t want that track to keep playing…
  • The battery life and charging is pretty good. I’m getting the stated 4-5 hours life per charge and of course the carry case gives you another 24 hours or so of charge.
  • The freedom of not being attached by a cord is extremely liberating.  At one point I forgot I was tethered to my iMac and ended up going for a walk down to the other end of the house before it disconnected. I could easily see myself forgetting they’re in and getting into the shower one day by mistake.
  • The quality is “good enough”. Sure, you can get better audio through other products, but when it comes to earbuds, you’re going to compromise the quality in exchange for form factor and portability. For the sort of casual listening that I’m doing, it meets my expectations happily enough.
  • Easy switching between devices, something that traditional bluetooth products tended to do pretty badly.
  • Connectivity seems pretty strong. I’ve never had the audio dropout whilst listening, infact when I left them in and walked around the house, I had audio going through the walls. 

They’re not perfect – not that I was expecting them to be given it’s a first-gen product from Apple which generally always means a few teething issues:

  • Sometimes the AirPods simply aren’t discoverable by my iMac, and even when they are, the connection method can be hit and miss – sometimes I can just click on the volume icon and select them, other times I have to go into the Bluetooth menu and select from there. Personally I’ll blame MacOS/iMac for this, I’ve had other Bluetooth headaches with it in the past and I suspect it’s just not that well tested and implemented for anything more than the wireless keyboards/mice they ship with them. For example, other than the AirPods issues, my iMac often fails to see my iPhone or iPad when they’re in the near vicinity to do iOS handoff.
  • At one point a phone call decided to drop from the AirPods and revert to the on-phone speaker without any clear reason/cause.
  • I managed to end up with one AirPod unpairing itself from the phone, so I had mono audio until I re-selected AirPods again from the phone’s output menu.

The “dental floss” charging and storage case is pretty clever as well, although I find it a bit odd that Apple didn’t emboss it with the Apple logo like they normally do for all their other products.

That being said, these issues are not frequent and I expect them to be improved with software updates over time.

If I had any feature changes I’d like to see for Gen2, it would be for Apple to:

  1. Insert a touch sensor on the AirPods to allow changing of volume by swiping up/down on the AirPod. That being said, using the phone volume rocker or the keyboard to change volume isn’t a big issue. The AirPods also have a “double-tap” detection feature that can either launch Siri or Play/Pause music.
  2. Bring up the waterproofing to a level that allows their use in the shower. Whilst there are reports on the internet of AirPods surviving washing machine cycles already, I’d love a version that’s properly rated for water exposure that could truely go anywhere.


Are they worth the NZ $269? I think so – sure, I’d be happy if they could drop the price and include a pair with every iPhone sold, but I think it’s a remarkable effort of technology miniaturisation that’s resulted in a high quality product that produces a fantastic user experience. That generally doesn’t come cheap and I feel that given the cost of other brand name wireless audio products, AirPods are reasonably priced.

I’d maybe re-consider buying them if I was using a non-Apple ecosystem (which limits the nice peering features, although they should work with any Bluetooth device) or if I was only going to use it with MacOS rather than iOS devices. With less need for the nice peering and portability features, third party offerings become a bit more attractive.

DevOpsDays NZ 2016

I recently spoke at the inaugural DevOpsDays NZ in Wellington. The team whom put together the conference did an amazing job and it’s one of the few conferences that I’ve really enjoyed recently. If they put together a subsequent conference next year, I recommend attending if possible.

I presented about our DevOps practises and tooling at Fairfax Media / stuff.co.nz which you can find at the recording below:


Whilst the vast majority of the content of the conference was really good, the following were clear standouts to me that I recommend watching:

You can find these (and other) presentations from the conference on this Youtube page.

Puppet Training

I recently ran a training session for our development team at Fairfax introducing them to the fundamentals of Puppet.

To assist with this training, I’ve developed a bunch of scripts and learning modules which I’ve now open sourced at https://github.com/jethrocarr/puppet-training

Using these modules you can:

  • Provision a pre-configured Puppet master + Puppet client to use for exercises.
  • Learn the basics of an r10k/git workflow for Puppet modules.
  • Create a module and get used to Puppet resources like package, file and service.
  • Learn the basics of ordering and dependencies.
  • Use Hiera to set params.

It’s not as complete a course as I’d like. I did about half a day using these modules and another half the day adhoc. Ideally I’d like to finish off writing modules at some point, but it takes a reasonably long period to write anything like this and there’s only so many hours in a week :-)

Putting up here as they might be of interest to people. PRs are always welcome as well.

Building a mail server with Puppet

A few months back I rebuilt my personal server infrastructure and fully Puppetised everything, even the mail server. Because I keep having people ask me how to setup a mail server, I’ve gone and adjusted my Puppet modules to make them suitable for a wider audience and open sourced them.

Hence announcing – https://github.com/jethrocarr/puppet-mail

This module has been designed for hobbyists or small organisation mail server operators whom want an easy solution to build and manage a mail server that doesn’t try to be too complex. If you’re running an ISP with 30,000 mailboxes, this probably isn’t the module for you. But 5 users? Yourself only? Keep on reading!

Mail servers can be difficult to configure, particularly when figuring out the linking between MTA (eg Postfix) and LDA (eg Dovecot) and authentication (SASL? Cyrus? Wut?), plus there’s the added headaches of dealing with spam and making sure your configuration is properly locked down to prevent open relays.

By using this Puppet module, you’ll end up with a mail server that:

  • Uses Postfix as the MTA.
  • Uses Dovecot for providing IMAP.
  • Enforces SSL/TLS and generates a legitimate cert automatically with LetsEncrypt.
  • Filters spam using SpamAssassin.
  • Provides Sieve for server-side email filtering rules.
  • Simple authentication against PAM for easy management of users.
  • Supports virtual email aliases and multiple domains.
  • Supports CentOS (7) and Ubuntu (16.04).

To get started with this module, you’ll need a functional Puppet setup. If you’re new to Puppet, I recommend reading Setting up and using Pupistry for a master-less Puppet setup.

Then it’s just a case of adding the following to r10k to include all the modules and dependencies:

mod 'puppetlabs/stdlib'

# EPEL & Jethro Repo modules only required for CentOS/RHEL systems
mod 'stahnma/epel'
mod 'jethrocarr/repo_jethro'

# Note that the letsencrypt module needs to be the upstream Github version,
# the version on PuppetForge is too old.
mod 'letsencrypt',
  :git    => 'https://github.com/danzilio/puppet-letsencrypt.git',
  :branch => 'master'

# This postfix module is a fork of thias/puppet-postfix with some fixes
# to make it more suitable for the needs of this module. Longer-term,
# expect to merge it into this one and drop unnecessary functionality.
mod 'postfix',
  :git    => 'https://github.com/jethrocarr/puppet-postfix.git',
  :branch => 'master'

And the following your Puppet manifests (eg site.pp):

class { '::mail': }

And in Hiera, define the specific configuration for your server:

mail::server_hostname: 'setme.example.com'
mail::server_label: 'My awesome mail server'
mail::enable_antispam: true
mail::enable_graylisting: false
mail::virtual_domains:
 - example.com
mail::virtual_addresses:
  'nickname@example.com': 'user'
  'user@example.com': 'user'

That’s all the Puppet config done! Before you apply it to the server, you also need to make sure both your forward and reverse DNS is correct in order to be able to get the SSL/TLS cert and also to ensure major email providers will accept your messages.

$ host mail.example.com
mail.example.com has address 10.0.0.1

$ host 10.0.0.1
1.0.0.10.in-addr.arpa domain name pointer mail.example.com.

For each domain being served, you need to setup MX records and also a TXT record for SPF:

$ host -t MX example.com
example.com mail is handled by 10 mail.example.com.

$ host -t TXT example.com
example.com descriptive text "v=spf1 mx -all"

Note that SPF used to have it’s own DNS type, but that was replaced in favour of just using TXT.

The example above tells other mail servers that whatever system is mentioned in the MX record is a legitmate mail server for that domain. For details about what SPF records and what their values mean, please refer to the OpenSPF website.

Finally, you should read the section on firewalling in the README, there are a number of ports that you’ll probably want to restrict to trusted IP ranges to prevent attackers trying to force their way into your system with password guess attempts.

Hopefully this ends up being useful to some people. I’ve replaced my own internal-only module for my mail server with this one, so I’ll continue to dogfood it to make sure it’s solid.

That being said, this module is new and deals with a complex configuration so I’m sure there will be some issues people run into – please raise any problems you have on the Github issues page and I’ll do my best to assist where possible.

Fairfax’s Cloud Journey at Auckland AWS Summit 2016

I recently presented at the 2016 AWS Summit Auckland about Fairfax’s cloud journey as part of the business stream “Key Steps for Setting up your AWS Journey for Success” alongside two excellent Amazon engineers. It’s a bit different from my usual talks, in that this one was specifically focused on a business audience, rather than a technical one.

My segment was just part of a talk full of excellent content from Amazon themselves, so you can checkout the full presentation here and all the other recorded presentations at the AWS Summit Auckland on-demand site.

DNC NZ submission

The DNC has proposed a new policy for .nz WHOIS data which unfortunately does not in my view address the current issues with lack of privacy of the .nz namespace. The following is my submission on the matter.

Dear DNC,

I have strong concerns with the proposed policy changes to .nz WHOIS information and am writing to request you reconsider your stance on publication of WHOIS information.

#1: Refuting requirement of public information for IT and business related contact

My background is working in IT and I manage around 600 domains for a large NZ organisation. This would imply that WHOIS data would be useful, as per your public good statement, however I don’t find this to be correct.

My use cases tend to be one of the following:

1. A requirement to get a malicious (phishing, malware, etc) site taken down.

2. Contacting a domain owner to request a purchase of their domain.

3. A legal issue (eg copyright infringement, trademarks, defamation).

4. Determining if my employer actually owns the domain marketing is trying to use today. :-)

Of the above:

1. In this case, I would generally contact the service provider of the hosting anyway since the owners of such domains tend to be unreliable or unsure how to even fix the issue. Service providers tend to have a higher level of maturity of pulling such content quickly. The service provider details can be determined via IP-address lookup and finding the hosting provider from there, rather than relying on the technical contact information which often is just the same as the registrant and doesn’t reflect the actual company hosting the site. All the registrant information is not required to complete this requirement, although email is always good for a courtesy heads up.

2. Email is satisfactory for this. Address & phone is not required.

3. Given any legal issue is handled by a solicitor, a legal request could be filed with DNC to release the private ownership information in the event that the email address of the domain owner was non responsive.

4. Accurate owner name is more than enough.

#2: Internet Abuse

I publish a non-interesting and non-controversial personal blog. I don’t belong to any minorities ethnic groups. I’m born in NZ. I’m well off. I’m male. The point being that I don’t generally attract any kind of abuse or harassment that is sadly delivered to some members of the online community.

However even I end up receiving abuse relating to my online presence on occasion in the form of anonymous abusive emails. This doesn’t phase me personally, but if I was in one of the many online minorities that can (and still do) suffer real-word physical abuses, I might not be so blasé knowing that it doesn’t take much to suddenly turn up at my home and throw abuse in person.

It’s also extremely easy for an online debate to result in a real world incident. It isn’t hard to trace a person’s social media comments to their blog/website and from there, their real world address. Nobody likes angry morons abusing them at 2am outside their house with a tire iron about their Twitter post.

#3. Cold-blooded targeting

I’ve discussed my needs as an IT professional for WHOIS data, the issue of internet abuse. Finally I wish to point out the issue of exposing one’s address publicly when we consider what a smart, malicious player can do with the information.

* With a target’s date of birth (thanks Facebook!) and their address (thanks DNC policy!) you’re in the position to fake someone’s identity for a number of NZ organisations including insurance and medical whom use these two (weak) forms of validation.

* Tweet a picture of your coffee at Mojo this morning? Excellent, your house is probably unoccupied for 8 hours, I need a new TV.

* Posting blogs about your amazing international trip? Should be a couple good weeks to take advantage of this – need a couch to go with that TV.

* Mentioned you have a young daughter? Time to wait for them at your address after school events and intercept there. Its not hard to be “Uncle Bob from the UK to take you for candy” when you have address, names, habits thanks to the combined forces of real world location and social media disclosure.

Not exposing information that doesn’t need to be public is a text-book infosec best practise to prevent social engineering type attacks. We (try to be) cautious around what we tell outsiders because lots of small bits of information becomes very powerful very quickly. Yet we’re happy for people to slap their real world home address on the internet for anyone to take advantage of because no harm could come of this?

To sum up, I request the DNC please reconsider this proposed policy and:

1. Restrict the publication of physical address and phone numbers for all private nz domains. This information has little real use and offer avenues for very disturbing and intrusive abuse and targeting. At least email abuse can be deleted from the comfort of your couch.

2. Retain the requirement for a name and contact email address to be public.However permit the publicly displayed named to be a pseudonym to preserve privacy for users whom consider themselves at risk, with the owner’s real/legal name to be held by DNC for legal contact situations.

I have no concerns if DNC was to keep business-owned domain information public. Ltd companies director contact details are already publicly available via the companies registry, and most business-owned domains simply list their place of business and their reception phone number which doesn’t expose any particular person. My concern is the lack of privacy for New Zealanders rather than businesses.

Thank you for reading. I am happy for this submission to be public.

regards.

Jethro